
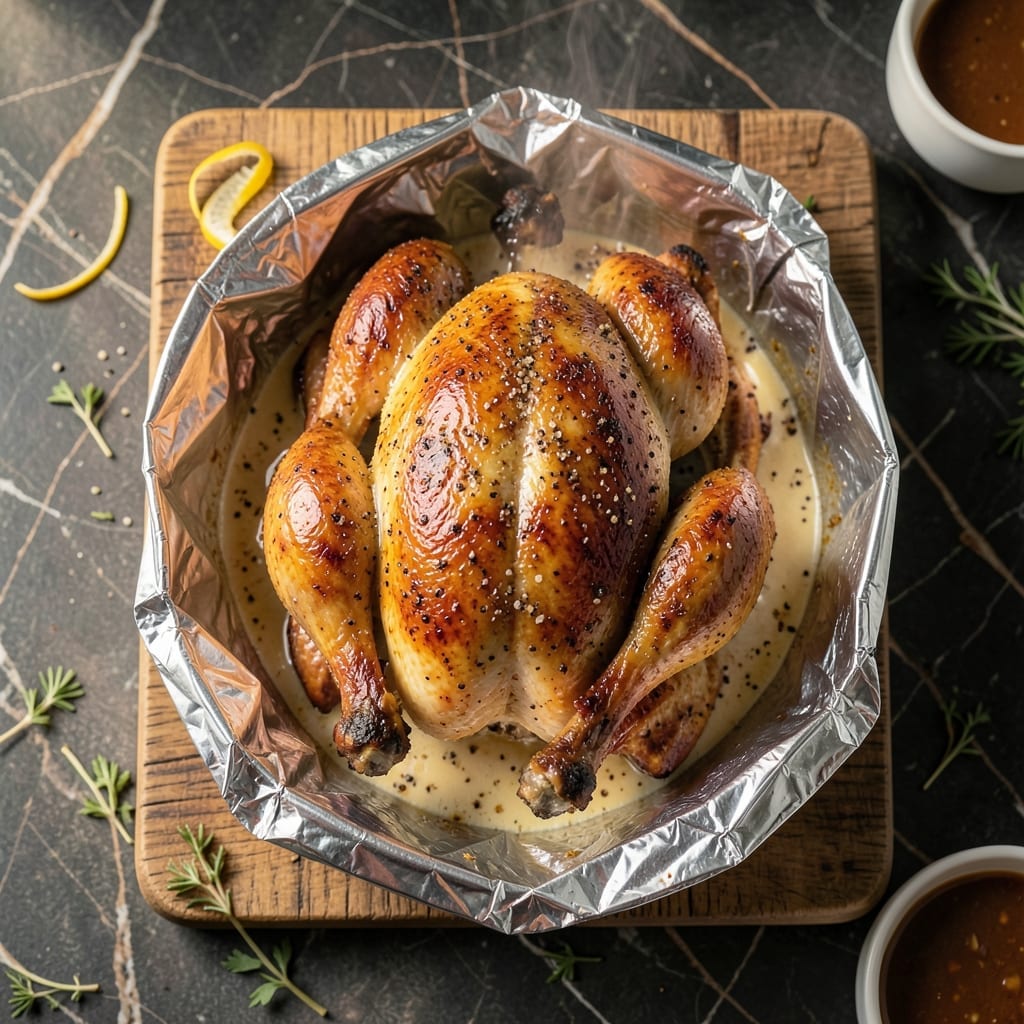
This oven-baked method delivers tender, flavorful chicken with minimal cleanup. The secret lies in cooking the bird in a sealed bag, which traps steam to keep the meat juicy while allowing the skin to crisp.
No special equipment is needed—just a roasting bag, basic seasonings, and your oven. The technique works for whole chickens or pieces, making it versatile for any meal.
By the time it’s done, you’ll have perfectly cooked chicken with golden skin and moist meat, all without the mess of traditional roasting.
This approach guarantees consistent results every time, with less active effort than other methods.
Ingredients for Chicken in the Bag
A whole chicken, basic seasonings, and one oven bag create this effortless, mess-free dish.
| Ingredient | Amount | Notes |
|---|---|---|
| Whole Chicken 🍗 | 1 whole | 3-4 lb, giblets removed |
| Oven Roasting Bag 🛍️ | 1 bag | Large size, food-safe |
| Unsalted Butter 🧈 | ½ cup | Melted for rubbing |
| Kosher Salt 🧂 | 1 ½ tbsp | Diamond Crystal preferred |
| Black Pepper 🌶️ | 1 tsp | Freshly ground |
| Garlic Powder 🧄 | 1 tsp | Not garlic salt |
| Onion Powder 🧅 | 1 tsp | Fresh ground preferred |
| Dried Thyme 🌿 | 1 tsp | Crushed between fingers |
| Dried Rosemary 🍃 | 1 tsp | Crushed between fingers |
| Paprika 🌶️ | 1 tsp | Sweet or smoked variety |
| Lemon 🍋 | 1 whole | Sliced for cavity |
| Fresh Parsley 🌿 | ¼ cup | Chopped for garnish |
| All-Purpose Flour 🌾 | 2 tbsp | For bag dusting |
| Chicken Broth 🍲 | ¼ cup | Low-sodium preferred |
The chicken quality is paramount. Opt for a fresh, air-chilled bird (3-4 pounds) from Whole Foods or a trusted butcher for superior texture and flavor. The skin should be pale with no dark spots, and the meat should have a slight bounce when pressed. Avoid pre-brined birds as they can become overly salty. The oven bag—Reynolds brand is widely available—must be food-safe and large enough to accommodate the chicken with room for steam circulation.
Substitutions are straightforward for this method. Dried herbs at one-third the amount can replace fresh if necessary. No roasting bag? Heavy-duty aluminum foil (double thickness) works in a pinch, though the steam seal won’t be as effective. For extra flavor, add fresh herb sprigs (thyme, rosemary) to the cavity alongside the lemon. The butter can be swapped for olive oil, though the flavor profile will be slightly different.
Store the raw chicken in its original packaging on the bottom shelf of the refrigerator—use within 2 days for optimal freshness. The seasoning blend can be pre-mixed and kept in an airtight container for up to 6 months. Leftover cooked chicken stays moist for 4-5 days refrigerated or freezes beautifully for 3 months.
Why You’ll Love This Recipe
- No-Mess Magic: I just season the chicken, drop it in the bag, and let the oven do the work—no scrubbing pans afterward.
- Buttery Perfection: The unsalted butter melts into the skin, giving it that golden, crispy finish I crave.
- Feeds Everyone: One whole chicken means I’ve got dinner for the family plus leftovers for sandwiches tomorrow.
- Budget Winner: Honestly, a whole chicken and a few pantry staples stretch further than any takeout I’ve tried.
Step-by-Step Instructions for Chicken in the Bag
This method ensures perfectly juicy meat with minimal cleanup and maximum flavor.
Step 1: Prepare and Season the Whole Chicken
Pat the whole chicken dry inside and out with paper towels to ensure the seasoning adheres properly. In a small bowl, combine the 1.5 tbsp kosher salt, 1 tsp black pepper, 1 tsp garlic powder, 1 tsp onion powder, 1 tsp dried thyme, 1 tsp dried rosemary, and 1 tsp paprika.
Rub this seasoning blend generously over the entire surface of the chicken, including inside the cavity. Place the sliced lemon inside the cavity for added aroma and moisture during cooking.
Step 2: Prepare the Oven Roasting Bag
Shake the 2 tbsp all-purpose flour inside the oven roasting bag to coat it evenly. This prevents the bag from sticking to the chicken and helps thicken the juices. Place the bag in a roasting pan or baking dish.
Add the 0.25 cup chicken broth to the bag—this creates steam that keeps the chicken moist throughout the cooking process. The flour and broth combination will form a light sauce as the chicken cooks.
Step 3: Add Chicken and Butter to the Bag
Place the seasoned whole chicken inside the prepared oven roasting bag. Pour the 0.5 cup unsalted butter over the chicken, ensuring it coats the surface evenly. This butter will baste the chicken as it cooks, enhancing both flavor and moisture.
Seal the bag according to the package instructions, typically by gathering the open end and securing it with the provided tie. Make sure the seal is tight to trap the steam inside.
Step 4: Bake Until Golden and Juicy
Preheat your oven to 350°F. Cut a few small slits in the top of the bag to allow excess steam to escape, which prevents the bag from bursting. Bake the chicken for 1 hour and 15 minutes to 1 hour and 30 minutes, or until the internal temperature reaches 165°F in the thickest part of the thigh.
The chicken is done when the juices run clear and the skin is golden brown. The bag will inflate during cooking, which is normal—this indicates the steam is working to cook the chicken evenly.
Step 5: Rest and Garnish Before Serving
Carefully remove the chicken from the oven and transfer it to a cutting board. Open the bag away from your face to avoid the hot steam. Let the chicken rest for 10 minutes before carving to allow the juices to redistribute.
Garnish the carved chicken with the 0.25 cup fresh parsley before serving. The parsley adds a pop of color and freshness to the finished dish. Serve with the pan juices spooned over the top for extra flavor.
Pro Tips For Making Chicken In The Bag
- Preheat the Bag: Toss the oven bag in with the oven preheating—it softens the plastic and prevents bursting when you add the hot chicken.
- Butter Under Skin: Work a few pats of unsalted butter under the chicken skin before bagging—it bastes the meat from the inside out as it roasts.
- Vent the Bag: Poke 4-6 small holes in the top of the bag before sealing; it lets steam escape so the skin doesn’t turn rubbery.
- Rest in Bag: Let the chicken rest in the opened bag for 10 minutes after roasting—it keeps the juices locked in while it finishes cooking.
Troubleshooting Great chicken in the bag
Bag Bursting Issues
If your oven bag bursts during cooking, it’s usually because you didn’t create enough vents. I always make 4-6 small slits in the top with kitchen shears. Also, avoid overfilling—leave at least 2 inches of space at the top.
Chicken Not Cooking Evenly
Uneven cooking often happens with larger birds. For chickens over 4 lbs, I extend the cooking time by 15-20 minutes and rotate the pan halfway through. Check the temperature in multiple spots, especially near the thickest parts of the thighs.
Dry Meat Problems
Dry chicken usually means insufficient liquid. I always add the full ¼ cup chicken broth and make sure the bag is properly sealed. If you’re using a larger bird, increase the broth to ½ cup for better steam circulation. 💡
Pale Skin
For golden-brown skin, make sure your oven is fully preheated to 350°F before inserting the chicken. I also brush the skin with extra melted butter after removing it from the bag for a final crisp under the broiler for 2-3 minutes.
Sticking to Bag
The flour coating is essential to prevent sticking. I use 2 tbsp all-purpose flour and shake it thoroughly to coat all surfaces. If you notice sticking during cooking, gently shake the bag to release the chicken from the sides.
Weak Flavor
Don’t skip the cavity seasoning. I always add the lemon slices plus an extra ½ tsp salt and ½ tsp garlic powder inside the cavity. This ensures the meat stays flavorful from the inside out.
Nutrition Facts
Frequently Asked Questions
What size oven bag should I use?
Use a large roasting bag for a 3-4 lb chicken. The bag should have enough room for steam circulation.
Can I use chicken pieces instead of a whole bird?
Yes! Reduce cooking time to 45-60 minutes for pieces. Ensure they’re in a single layer for even cooking.
Why does the bag puff up during cooking?
This is normal! The bag traps steam, creating pressure that puffs it up. Small slits prevent bursting.
How do I know when it’s done?
Use a meat thermometer. The internal temp should reach 165°F in the thickest part.

- 6 Egg Cake Recipe with Oil: Light as Air With Buttery Moisture - October 4, 2026
- 4 Bean Casserole Recipe: One-Pan Heartiness With Smoky Paprika Depth - October 4, 2026
- 3-Ingredient Keto Mug Cake Recipe: Microwave Magic in 2 Minutes - October 4, 2026