
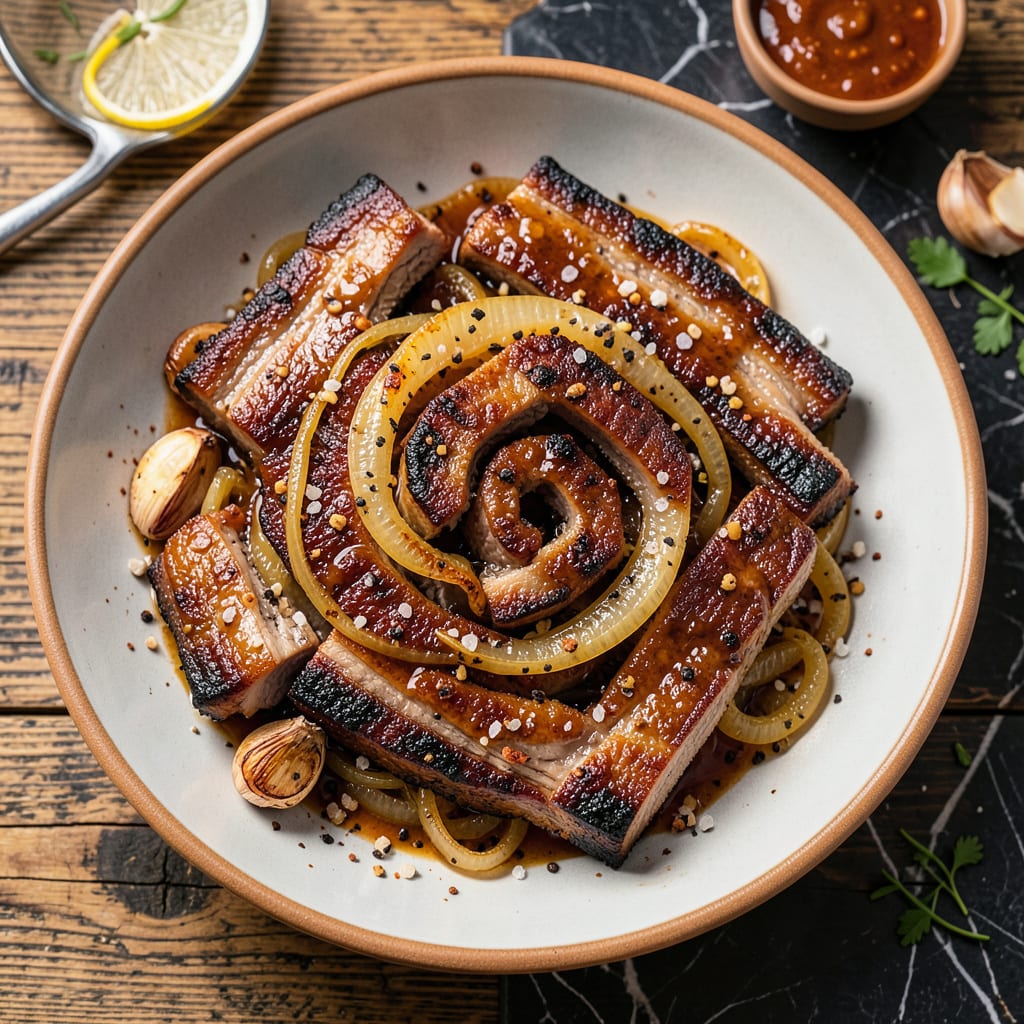
Achieving fall-off-the-bone tender country style spare ribs at home is simpler than you think—no smoker required. This method delivers restaurant-quality results using just your oven and a few key techniques I’ve perfected over years of testing. The secret lies in a slow braise at 300°F, allowing the connective tissue to break down gradually while keeping the meat impossibly juicy.
What sets this recipe apart is the balance of simplicity and precision. A dry rub with brown sugar and smoked paprika creates a flavorful crust, while the braising liquid—just apple cider vinegar, broth, and aromatics—infuses the ribs with depth. By the time they emerge from the oven, the meat will pull apart effortlessly, yet maintain its rich, meaty texture. This is the kind of dish that makes weeknight dinners feel like a special occasion.
Ingredients for Country Style Spare Ribs
These ribs need just 12 ingredients—most are already in your pantry. The magic happens in the oven, not the smoker.
| Ingredient | Amount | Notes |
|---|---|---|
| Country Style Spare Ribs 🥩 | 4 lb | Bone-in, evenly trimmed |
| Light Brown Sugar 🍚 | ¼ cup | Packed for dry rub |
| Smoked Paprika 🌶️ | 1 tbsp | Sweet or hot variety |
| Garlic Powder 🧄 | 1 tbsp | Not garlic salt |
| Onion Powder 🧅 | 1 tbsp | Freshly opened for potency |
| Kosher Salt 🧂 | 1 tbsp | Diamond Crystal preferred |
| Ground Black Pepper 🌶️ | 1 tsp | Freshly cracked for best flavor |
| Apple Cider Vinegar 🍏 | ½ cup | Unfiltered for depth |
| Low-Sodium Chicken Broth 🥫 | 2 cups | Or substitute vegetable broth |
| Yellow Onion 🧅 | 1 whole | Medium, roughly chopped |
| Garlic Cloves 🧄 | 4 cloves | Smashed, not minced |
| Bay Leaves 🌿 | 2 whole | Dried, for braising liquid |
| Olive Oil 🫒 | 2 tbsp | For searing ribs |
The ribs are everything here. Bone-in country style gives you that perfect meat-to-fat ratio—avoid boneless, which dries out. I grab mine from Costco (consistent quality, great price) or ask the butcher to cut them into even 2-3 inch pieces. Look for ribs with good marbling (those white streaks of fat) and avoid anything with dark spots. The brown sugar in the rub? Domino Light is my go-to—it caramelizes beautifully without burning (worth the extra 50 cents).
No smoked paprika? Regular paprika plus a pinch of cayenne gets you 80% there. Out of apple cider vinegar? White wine vinegar or even lemon juice in a pinch (though the flavor shifts slightly). The broth can be beef instead of chicken—just reduce the salt in the rub. If you’re making this for a crowd, double the braising liquid but keep the vinegar amount the same (too much makes the meat sour).
Ribs taste even better the next day—store in their braising liquid for up to 4 days. Freeze cooked ribs (without liquid) for 3 months in vacuum-sealed bags. The dry rub keeps in a jar for 6 months if you make extra. Pro tip: save that leftover braising liquid—it’s liquid gold for sauces or soups.
Why You’ll Love This Recipe
- I’ll be real: this is my go-to when we’ve got company or I need to meal prep for the week. One batch stretches for sandwiches, tacos, or even tossed into fried rice—no waste, all flavor.
- Dump-and-Bake Simple: Between us, this might be the easiest rib recipe I’ve ever made. Just toss the ribs with brown sugar and those smoky spices (no marinating, no fancy steps), then let the oven do the work—no babysitting required.
- That Sweet-Smoky Crust: The light brown sugar caramelizes with the smoked paprika to create this sticky, slightly crispy glaze that’s just ridiculously good. I’ve caught my husband sneaking bites straight from the pan—more than once.
- Feeds a Hungry Table: I’ll be real: this is my go-to when we’ve got company or I need to meal prep for the week. One batch stretches for sandwiches, tacos, or even tossed into fried rice—no waste, all flavor.
Step-by-Step Instructions for Country Style Spare Ribs
Three hours is all it takes to transform these ribs into fork-tender perfection.
Step 1: Create and Apply the Dry Rub
In a small bowl, combine the 0.25 cup light brown sugar, 1 tbsp smoked paprika, 1 tbsp garlic powder, 1 tbsp onion powder, 1 tbsp kosher salt, and 1 tsp ground black pepper. I like to use my fingers to break up any clumps in the brown sugar—this ensures even distribution.
Pat the 4 lb country style spare ribs completely dry with paper towels. This step is crucial for getting that perfect crust. Apply the rub generously to all sides of the ribs, pressing it into the meat so it adheres well. Let the seasoned ribs sit at room temperature for 30 minutes while you preheat your oven to 300°F.
Step 2: Sear the Ribs for Deep Flavor
Heat the 2 tbsp olive oil in a large Dutch oven over medium-high heat until shimmering. Working in batches if needed, add the ribs and sear for 3-4 minutes per side until you achieve a deep golden-brown crust. Don’t move them around too much—let them develop that beautiful caramelization.
You’ll know they’re ready to flip when they release easily from the pan. Transfer the seared ribs to a plate and set aside. The fond (those browned bits) left in the pot will add incredible depth to your braising liquid.
Step 3: Build the Braising Liquid
In the same Dutch oven, add the roughly chopped yellow onion, smashed garlic cloves, and bay leaves. Cook over medium heat for 2-3 minutes until the onions start to soften and become translucent. You’re not looking for color here—just to wake up those aromatics.
Pour in the 0.5 cup apple cider vinegar and scrape up all those delicious browned bits from the bottom of the pot. Let it simmer for 1 minute to cook off the raw vinegar edge, then add the 2 cups low-sodium chicken broth. Bring this mixture to a gentle simmer.
Step 4: Braise to Fall-Off-the-Bone Tenderness
Return the seared ribs to the Dutch oven, arranging them in a single layer if possible. The liquid should come about halfway up the ribs—this is the sweet spot for braising. Cover with a tight-fitting lid and transfer to your preheated 300°F oven.
Braise for 2.5 to 3 hours, turning the ribs halfway through the cooking time. You’ll know they’re done when the meat pulls away from the bone easily and a fork slides in with no resistance. The ribs should be incredibly tender but still hold their shape when lifted.
Step 5: Reduce the Sauce and Serve
Carefully transfer the ribs to a serving platter and tent with foil to keep warm. Place the Dutch oven on the stovetop over medium-high heat and simmer the braising liquid for 5-7 minutes until it reduces by about half and thickens slightly.
Spoon this rich, flavorful sauce over the ribs before serving. The sauce should be glossy and coat the back of a spoon. I like to serve these with the reduced sauce and some of the softened onions and garlic from the braising liquid—they’re packed with flavor after hours of cooking together.
Common Mistakes When Making This Recipe
Overcrowding the Pan
When searing the ribs, resist the urge to cram them all in at once. I learned this the hard way—overcrowding causes steam instead of that beautiful crust. Use batches if needed, giving each piece 2 inches of space in the Dutch oven. Trust me, the extra 5 minutes is worth it for that perfect caramelization. 🔥
Skipping the Room-Temp Rest
Don’t rush straight from fridge to oven. Letting the seasoned ribs sit at room temperature for 30 minutes ensures even cooking. Cold meat contracts when it hits heat, leading to tough spots. I set a timer—it’s the difference between good ribs and fall-off-the-bone perfection.
Using the Wrong Liquid
The braising liquid isn’t just filler—it’s flavor insurance. Stick with the apple cider vinegar and low-sodium broth combo. I’ve tried wine and beer substitutions, but they often overpower the meat. The vinegar’s acidity tenderizes while the broth keeps things balanced.
Peeking Too Often
Every time you lift that lid, you lose 25°F of heat and add 10 minutes to cooking time. I check only once halfway through to turn the ribs. If you’re tempted to peek, set a phone timer for 90 minutes—that’s your first check-in point.
Rushing the Reduction
That braising liquid needs time to transform into sauce. Cranking the heat too high burns the fond and makes it bitter. I reduce on medium-high for 5-7 minutes, stirring constantly. You’ll know it’s ready when it coats the back of a spoon like thin syrup.
Neglecting the Rest
Even after cooking, the ribs need 10 minutes under foil to redistribute juices. Slicing immediately sends all that moisture onto your cutting board. I use this time to warm sides or set the table—it’s the secret to juicy, not dry, meat. ✨
Nutrition Facts
Frequently Asked Questions
Can I use a slow cooker instead of the oven?
Yes, but with adjustments. Cook on low for 6-7 hours or high for 4-5 hours after searing. The texture will be slightly different—more uniform tenderness but less caramelization. Add 30 minutes extra if your slow cooker runs cool.
Why did my ribs turn out dry?
Most likely from overcooking or insufficient liquid. Check doneness at 2.5 hours—they should pull apart easily but not shred completely. Ensure braising liquid covers at least half the ribs during cooking. A tight lid prevents moisture loss.
What sides pair best with these ribs?
Classic pairings include creamy coleslaw, buttery cornbread, or roasted sweet potatoes. For lighter options, try a crisp apple salad or grilled asparagus. The vinegar in the braising liquid makes starchy sides like mashed potatoes especially complementary.
Can I make this recipe ahead of time?
Cooked ribs keep beautifully in their braising liquid for up to 4 days refrigerated. Reheat gently in a 300°F oven for 20-30 minutes covered. The flavors deepen overnight—many say they taste even better the next day.

- 6 Egg Cake Recipe with Oil: Light as Air With Buttery Moisture - October 4, 2026
- 4 Bean Casserole Recipe: One-Pan Heartiness With Smoky Paprika Depth - October 4, 2026
- 3-Ingredient Keto Mug Cake Recipe: Microwave Magic in 2 Minutes - October 4, 2026