
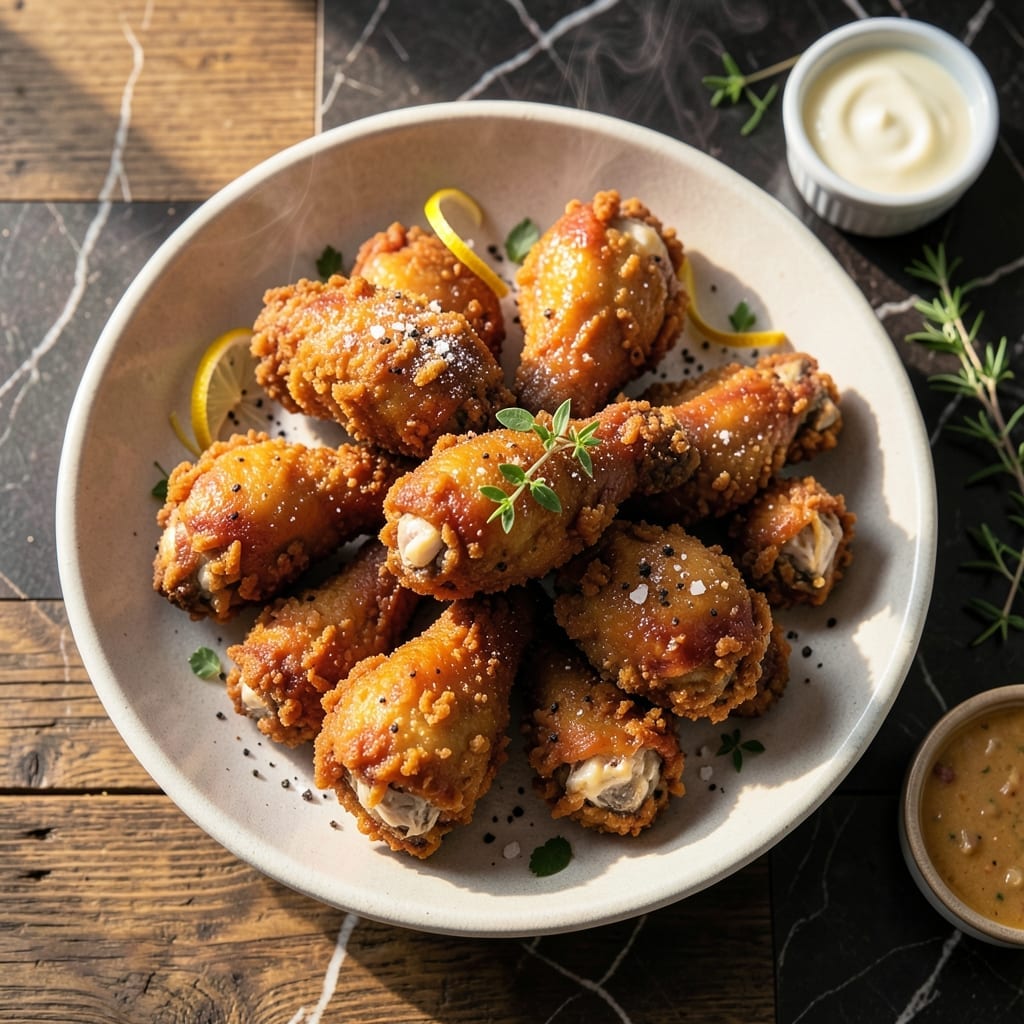
This recipe delivers the crispy, golden-brown fried chicken that’s become a legend. The buttermilk marinade ensures every piece stays tender and juicy inside while forming a perfect crust.
I’ve refined this method over years of testing to guarantee consistent results. The secret lies in the seasoned flour coating and precise frying temperature for that signature crunch.
Each bite offers a satisfying contrast of textures, with flavor that lingers. The buttermilk does double duty, tenderizing the meat and helping the coating adhere properly.
Serve hot for the best experience. This technique works for both bone-in pieces and tenders, making it versatile for any meal.
Ingredients for English’s Fried Chicken
Pantry staples and a quick grocery run. Nothing exotic—just quality ingredients for legendary results.
| Ingredient | Amount | Notes |
|---|---|---|
| Chicken Pieces 🍗 | 3 ½ lb | Bone-in, skin-on thighs and drumsticks |
| Buttermilk 🥛 | 2 cups | Full-fat for best results |
| All-Purpose Flour 🌾 | 2 ½ cups | Divided for dredging and coating |
| Cornstarch 🌽 | ½ cup | For extra crispiness |
| Kosher Salt 🧂 | 2 tbsp | Diamond Crystal preferred |
| Black Pepper 🌶️ | 1 tbsp | Freshly ground for best flavor |
| Garlic Powder 🧄 | 1 tbsp | Not garlic salt |
| Onion Powder 🧅 | 1 tbsp | Freshly ground preferred |
| Paprika 🌶️ | 1 tbsp | Sweet or smoked variety |
| Cayenne Pepper 🔥 | ½ tsp | Adjust for heat preference |
| Vegetable Oil 🫒 | 4 cups | For frying, high smoke point |
| Large Eggs 🥚 | 2 whole | For egg wash binding |
| Baking Powder 🧂 | 1 tsp | For extra crispiness in coating |
The chicken is critical here. Bone-in, skin-on thighs and drumsticks deliver the juiciest results with maximum flavor. Costco and Whole Foods consistently carry high-quality birds. The buttermilk must be full-fat—reduced-fat versions won’t tenderize as effectively. For the flour, King Arthur all-purpose is my go-to for reliability. Always check the expiration date on your leavening agents like baking powder.
No buttermilk? Whole milk with 1 tbsp vinegar per cup works in a pinch. For the oil, peanut oil is traditional if you can find it, but vegetable or canola work too. Swap hot paprika for sweet if you prefer a spicier kick. The egg wash can be replaced with aquafaba (3 tbsp per egg) for a vegan-friendly version. Cornstarch is non-negotiable for that signature crunch.
Marinate the chicken in buttermilk for up to 24 hours for best results. Store dry ingredients in airtight containers at room temperature for up to 6 months. Leftover fried chicken keeps in the fridge for 3-4 days—reheat in the oven to maintain crispiness.
Why You’ll Love This Recipe
- One Bowl Wonder: I just toss chicken in buttermilk, then coat it in flour and cornstarch—no fancy steps.
- Crave-Worthy Crunch: That cornstarch in the coating gives it a shatteringly crisp shell with juicy meat inside.
- Weeknight Hero: Honestly, it’s my go-to for busy Tuesdays when I need dinner fast.
- Budget Stretcher: A bag of chicken pieces and pantry staples feed my family for two meals easy.
Step-by-Step Instructions for English’s Fried Chicken
Here’s the method. Straightforward, tested, works every time.
Step 1: Marinate the Chicken in Buttermilk
Place the 3.5 lb chicken pieces in a large bowl and pour over the 2 cups buttermilk. Ensure all pieces are fully submerged by pressing them down gently. This buttermilk soak tenderizes the meat and helps the coating adhere properly.
Cover the bowl with plastic wrap and refrigerate for at least 4 hours, or ideally overnight. The longer the chicken marinates, the more flavorful and tender it becomes. Don’t skip this step—it’s essential for achieving juicy, crispy results.
Step 2: Prepare the Seasoned Flour Coating
In a large bowl, whisk together the 2.5 cups all-purpose flour, 0.5 cup cornstarch, 2 tbsp kosher salt, 1 tbsp black pepper, 1 tbsp garlic powder, 1 tbsp onion powder, 1 tbsp paprika, 0.5 tsp cayenne pepper, and 1 tsp baking powder.
The cornstarch and baking powder are key to achieving that extra crispiness. Mix thoroughly to ensure the spices are evenly distributed throughout the flour. This blend will create a well-seasoned, ultra-crispy crust that clings perfectly to the chicken.
Step 3: Coat the Chicken for Frying
Remove the chicken pieces from the buttermilk, letting any excess drip off. Dredge each piece in the seasoned flour mixture, pressing firmly to ensure a thick, even coating. Place the coated chicken on a wire rack set over a baking sheet to allow any excess flour to fall away.
In a separate bowl, beat the 2 whole large eggs lightly. Dip each floured chicken piece into the egg wash, then dredge again in the seasoned flour. This double-dredging technique creates a thicker, crunchier crust. Let the coated chicken rest for 10-15 minutes to help the coating set.
Step 4: Fry to Golden Perfection
In a deep, heavy-bottomed pot or Dutch oven, heat the 4 cups vegetable oil to 350°F. Use a deep-fry thermometer to monitor the temperature, as maintaining consistent heat is crucial for even cooking and crispy results.
Working in batches to avoid overcrowding, carefully lower the chicken pieces into the hot oil. Fry for 12-15 minutes, turning occasionally, until the chicken is golden brown and the internal temperature reaches 165°F. The coating should be deep amber and crispy when done.
Transfer the fried chicken to a wire rack or paper towels to drain excess oil. Keep the finished pieces warm in a 200°F oven while you fry the remaining batches. Serve hot for the crispiest experience.
Pro Tips For Making English’S Fried Chicken
- Soak Overnight: Let the chicken pieces bathe in buttermilk for at least 8 hours—I learned this the hard way after my first dry batch. The longer soak guarantees tender, juicy meat every time.
- Double-Dredge Properly: After the buttermilk dip, coat the chicken in flour, then back in buttermilk, then flour again. This extra step creates that shatteringly crisp crust English’s is known for.
- Skip Cold Oil: Make sure your oil is screaming hot (350°F) before adding the chicken. After burning three batches, I finally figured out that lukewarm oil just makes greasy, sad chicken.
- Rest Before Serving: Give the fried chicken a solid 5-10 minutes on a rack after frying. My grandmother swore by this, and she was right: it keeps the crust crisp instead of soggy.
Common Mistakes When Making This Recipe
Skipping the Marinade
Don’t rush the buttermilk soak. I’ve seen people skip it to save time, but the 4-hour minimum is non-negotiable for tender meat. The acid in buttermilk breaks down proteins, keeping the chicken juicy inside that crispy crust. 💡
Overcrowding the Fryer
Frying too many pieces at once drops the oil temperature, leading to greasy, soggy chicken. I fry in batches with at least 2 inches of space between pieces. A deep-fry thermometer helps maintain that critical 350°F.
Inconsistent Coating Thickness
Press the flour mixture firmly onto each piece during dredging. A light dusting won’t create that signature crunch. The double-dredge method with egg wash ensures an even, thick coating that holds up to frying.
Wrong Oil Temperature
Oil that’s too hot burns the outside before the chicken cooks through. Too cool, and you’ll get oily, dense breading. I test the oil with a wooden chopstick—bubbles should form immediately when inserted at 350°F.
Not Letting Chicken Rest
The 10-15 minute rest after dredging helps the coating adhere. Skipping this step often causes the breading to slide off during frying. I set a timer to avoid forgetting this crucial pause. ⏰
Ignoring Internal Temperature
Color isn’t enough—always check with a meat thermometer. Dark meat should reach 165°F internally. I pull pieces at 160°F and let carryover cooking finish the job while resting.
Nutrition Facts
Frequently Asked Questions
How long should I marinate the chicken?
Marinate for at least 4 hours, but overnight is best. This ensures tender, flavorful meat.
Can I use a different oil for frying?
Yes, peanut or canola oil work well. Maintain 350°F for crispy results.
Why does my coating fall off during frying?
Letting the coated chicken rest for 10-15 minutes helps the coating adhere. Press firmly when dredging.
How do I keep the chicken crispy after frying?
Drain on a wire rack, not paper towels. Keep warm in a 200°F oven.

- 6 Egg Cake Recipe with Oil: Light as Air With Buttery Moisture - October 4, 2026
- 4 Bean Casserole Recipe: One-Pan Heartiness With Smoky Paprika Depth - October 4, 2026
- 3-Ingredient Keto Mug Cake Recipe: Microwave Magic in 2 Minutes - October 4, 2026