
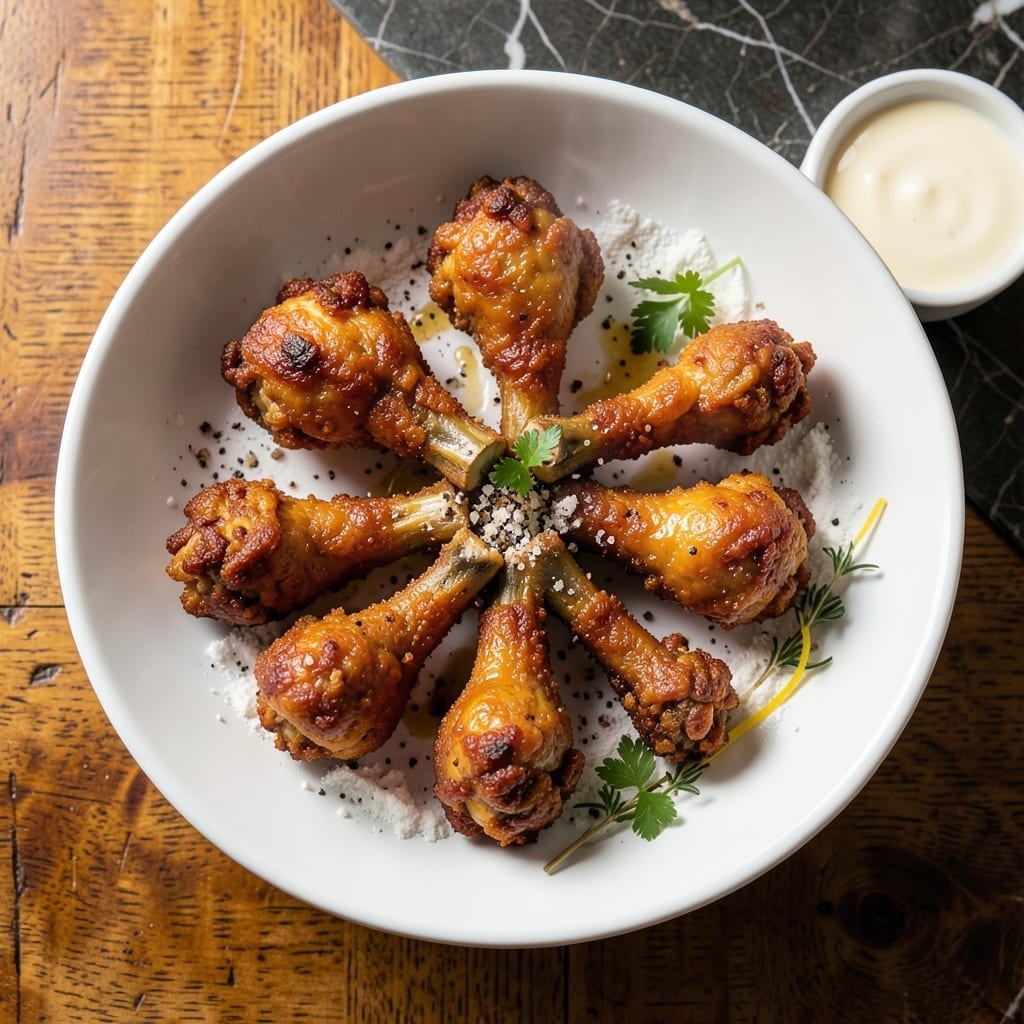
There’s nothing quite like biting into a piece of fried chicken with a crispy coating that gives way to juicy meat underneath. This method delivers that perfect contrast every time without fail.
The key is a two-step frying process at precise temperatures. First at 325°F to cook through, then 375°F for that golden finish. I’ve tested this approach more times than I can count.
What you get is chicken legs with shatteringly crispy skin and meat so tender it nearly falls off the bone. The seasoning is simple but packs serious flavor in every bite.
Serve with classic sides like mashed potatoes or coleslaw for a complete meal. Here’s everything you need to get started.
Ingredients for Fried Chicken Legs
Pantry staples and a quick grocery run. Nothing exotic, just flavor-packed essentials.
| Ingredient | Amount | Notes |
|---|---|---|
| Chicken Legs 🍗 | 4 lb | Drumsticks and thighs attached |
| Buttermilk 🥛 | 2 cups | Full-fat for best results |
| All-Purpose Flour 🌾 | 2 cups | For dredging chicken |
| Cornstarch 🌽 | ½ cup | Adds extra crispiness |
| Salt 🧂 | 1 tbsp | Kosher or sea salt |
| Black Pepper 🌶️ | 1 tbsp | Freshly ground preferred |
| Paprika 🌶️ | 1 tbsp | Sweet or smoked variety |
| Garlic Powder 🧄 | 1 tbsp | Not garlic salt |
| Onion Powder 🧅 | 1 tbsp | Fresh ground preferred |
| Cayenne Pepper 🔥 | ½ tsp | Adjust for heat preference |
| Vegetable Oil 🫒 | 4 cups | For deep frying |
| Large Eggs 🥚 | 2 whole | Beaten for egg wash |
The chicken legs are the star here. Look for skin-on, bone-in—they stay juicier and develop that shatteringly crisp skin. I grab mine from Costco for bulk savings, but any grocery store with a good butcher section works. The buttermilk matters too—full-fat gives you the best texture and flavor. Don’t skimp on the cornstarch; it’s what gives that extra crunch.
No buttermilk? Whole milk with a tablespoon of vinegar or lemon juice works in a pinch. Swap cornstarch for potato starch if that’s what you’ve got. The spices can be adjusted to taste—add more cayenne for heat. If you’re out of paprika, a mix of chili powder and cumin gets you close. The oil needs a high smoke point, so vegetable or peanut oil are your best bets.
Fry in batches and keep cooked pieces warm in a 200°F oven. Leftovers taste great cold, but reheat in a 375°F oven for 10-15 minutes to crisp them back up. Store in the fridge for up to 4 days—though they rarely last that long.
Why You’ll Love This Recipe
- One Bowl Wonder: Soak the chicken in buttermilk, dredge in flour and cornstarch, fry—no fancy steps or extra dishes.
- That Crunch: The cornstarch in the coating makes it shatteringly crisp while the meat stays juicy.
- Feeds the Crew: I’ve served this at Sunday dinner and weeknight rush hour—equally loved by all.
- Stretches the Budget: Chicken legs are affordable, and a little flour plus cornstarch go a long way.
Step-by-Step Instructions for Fried Chicken Legs
Here’s how I achieve that perfect crunch while keeping the meat impossibly juicy inside.
Step 1: Brine the Chicken Legs in Buttermilk
Place the 4 lb Chicken Legs in a large bowl and pour the 2 cups Buttermilk over them, ensuring each piece is fully submerged. I’ve found this step is non-negotiable for tender, flavorful meat. Cover and refrigerate for at least 4 hours, but overnight works even better.
The buttermilk not only tenderizes the chicken but also helps the coating adhere later. When you’re ready to proceed, remove the chicken from the buttermilk but don’t rinse it—those clinging bits will help the dredge stick.
Step 2: Prepare the Seasoned Flour and Cornstarch Dredge
In a large, shallow dish, whisk together the 2 cups All-Purpose Flour, 0.5 cup Cornstarch, 1 tbsp Salt, 1 tbsp Black Pepper, 1 tbsp Paprika, 1 tbsp Garlic Powder, 1 tbsp Onion Powder, and 0.5 tsp Cayenne Pepper. The cornstarch is my secret for extra crispiness.
In a separate bowl, beat the 2 whole Large Eggs lightly. Working with one piece at a time, dip the buttermilk-soaked chicken into the egg, then dredge it thoroughly in the flour mixture. Press firmly to create a thick, even coating that clings to every curve of the chicken.
Step 3: Heat the Vegetable Oil for Frying
Pour the 4 cups Vegetable Oil into a deep, heavy-bottomed pot or Dutch oven, ensuring it’s no more than half full. Heat the oil over medium-high heat to 350-375°F. Use a deep-fry thermometer to monitor the temperature—this is key for even cooking and that golden-brown finish.
While the oil heats, place the dredged chicken on a wire rack set over a baking sheet. This allows excess coating to drip off and helps the crust set slightly before frying. If the oil isn’t hot enough, the chicken will absorb too much grease and end up soggy.
Step 4: Fry to Golden Perfection
Carefully lower a few pieces of chicken into the hot oil, being careful not to overcrowd the pot. Maintain the oil temperature between 325-350°F as you fry. Cook the chicken for 12-15 minutes, turning occasionally, until the coating is deep golden brown and crisp.
The internal temperature should reach 165°F for the dark meat to be fully cooked. Use tongs to transfer the fried chicken to a wire rack or paper towels to drain. The rack keeps the bottom from getting soggy. Let the chicken rest for 5 minutes before serving—this ensures the juices stay locked inside.
Pro Tips For Making Fried Chicken Legs
- Double Dredge: Dip the buttermilk-soaked legs in the flour-cornstarch mix, let them rest 5 minutes, then dredge again—this builds a thicker, crunchier crust that actually stays put.
- Check Oil Temp: Use a thermometer to keep the oil at 350°F; I learned this the hard way after my first batch came out greasy instead of crisp.
- Pat Dry First: Blot the chicken legs with paper towels before the buttermilk bath—excess moisture makes the coating slide right off.
- Rest Before Frying: Let the dredged legs sit on a rack for 10 minutes while the oil heats; this keeps the coating from falling apart when it hits the pan.
Essential Equipment for Perfect Results
Deep Fryer or Dutch Oven
For home frying, I use my 5.5-quart Dutch oven—it’s heavy-bottomed and distributes heat evenly. A deep fryer works too, but I find the Dutch oven gives me more control. Just ensure it’s deep enough to hold 4 cups of oil with room for the chicken. 🔥
Candy Thermometer
A deep-fry thermometer is non-negotiable for perfect results. I rely on my Taylor Precision model. It clips to the pot and gives accurate readings so I can maintain that 325-375°F range consistently. Guessing the temperature leads to disaster.
Wire Rack Setup
Place a wire rack over a baking sheet to rest your dredged chicken before frying. This setup lets excess coating drip off and prevents the pieces from sticking together. After frying, the same rack keeps the bottom crisp while draining.
Tongs for Safety
Invest in 12-inch locking tongs—I use OXO Good Grips. They keep your hands safely away from hot oil while giving you precise control. Never use your fingers or a fork, as piercing the chicken can cause oil to splash.
Paper Towels for Draining
Line a plate with paper towels to drain excess oil. The towels absorb grease without making the coating soggy. I go through a lot of towels when frying, so stock up beforehand.
Meat Thermometer
Always check internal temperature with an instant-read thermometer. I use my ThermoWorks Thermapen to verify the chicken reaches 165°F in the thickest part. This ensures perfect doneness without overcooking.
Nutrition Facts
Frequently Asked Questions
Can I use chicken thighs instead of legs?
Chicken thighs work great and may stay even juicier. Adjust cooking time slightly as thighs can be thicker. Maintain 325-350°F oil temperature and cook until internal temp hits 165°F.
Why did my coating fall off during frying?
This usually means the chicken wasn’t dry enough before dredging or the oil wasn’t hot enough. Pat pieces dry after buttermilk soak and ensure oil reaches 350°F before adding chicken. Let coating set for 5 minutes on rack first.
How do I keep them crispy for a party?
Fry in batches and keep finished pieces warm in a 200°F oven on a wire rack. This prevents steam buildup that makes coating soggy. Serve within 1-2 hours for best texture.

- 6 Egg Cake Recipe with Oil: Light as Air With Buttery Moisture - October 4, 2026
- 4 Bean Casserole Recipe: One-Pan Heartiness With Smoky Paprika Depth - October 4, 2026
- 3-Ingredient Keto Mug Cake Recipe: Microwave Magic in 2 Minutes - October 4, 2026