
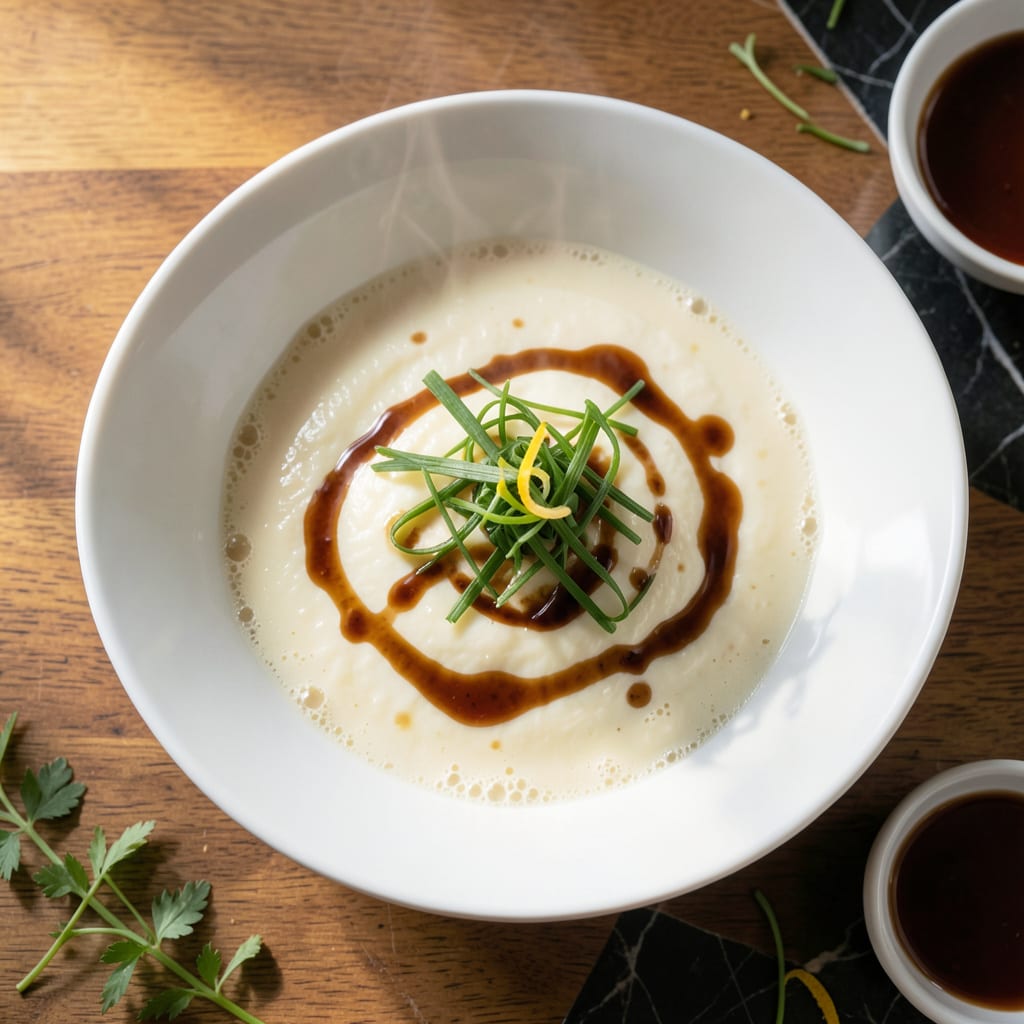
This Hong Kong classic transforms simple eggs into a silk-smooth custard with delicate scallion aroma. The technique requires patience and precision, rewarding you with a dish that’s both comforting and elegant.
Steaming at the right temperature creates that signature velvety texture, while a drizzle of soy sauce and a sprinkle of scallions elevate the flavor. It’s a test of timing and heat control that any home cook can master.
Ingredients for Hong Kong Steamed Egg
Transform simple eggs into elegant custard with these traditional Hong Kong ingredients.
| Ingredient | Amount | Notes |
|---|---|---|
| Large Eggs 🥚 | 6 whole | Room temperature for smooth texture |
| Chicken Stock 🍲 | 2 cups | Low-sodium preferred for control |
| Scallions 🧅 | 4 whole | Thinly sliced, whites separated from greens |
| Light Soy Sauce 🫒 | 1 tbsp | For drizzling, plus extra to serve |
| Neutral Oil 💧 | 1 tsp | Vegetable or canola oil for greasing |
| Sea Salt 🧂 | ½ tsp | Fine grain for even distribution |
| Ground White Pepper 🌶️ | ¼ tsp | Traditional for subtle heat |
| Sesame Oil 🫒 | ½ tsp | Toasted variety for finishing |
| Shaoxing Wine 🍶 | 1 tbsp | Optional but traditional for depth |
| Water 💧 | 1 cup | For steaming, as needed |
The eggs are the foundation—room temperature is non-negotiable for that signature silk-smooth texture. Use large eggs for consistency. Chicken stock should be low-sodium so you control the seasoning; homemade is ideal but store-bought works if it’s high quality. Scallions must be fresh; the whites go into the custard, the greens are for garnish. Look for firm, vibrant stalks at Asian markets for the best flavor.
No Shaoxing wine? Dry sherry is a perfect substitute. For a non-alcoholic option, add an extra half teaspoon of sugar to mimic the depth. The soy sauce should be light variety—dark soy will overpower and discolor. If you only have dark, dilute it with water. Vegetable stock can replace chicken stock, but reduce salt accordingly. Freshly ground white pepper is traditional, but black pepper works if that’s what you’ve got.
Steamed eggs are best served immediately but can be held in the steamer for up to 15 minutes without losing texture. Leftovers keep in the fridge for 2 days—reheat gently in the steamer. The custard will firm up as it cools, so don’t overcook initially. Always cover with a lid to prevent water droplets from marring the surface.
Why You’ll Love This Recipe
- Under 10 Minutes: I crack the eggs, whisk with stock, and steam—no fancy moves, just silky results every time.
- Umami Bomb: That first bite with soy-drizzled scallions? Honestly, I make extra just to sneak spoonfuls while it’s hot.
- Breakfast or Dinner: We eat it with rice for dinner, then cold leftovers straight from the fridge the next morning.
- Pantry Staples: Five ingredients I always have, and it still tastes like a restaurant dish.
Step-by-Step Instructions for Hong Kong Steamed Egg
Master the technique for achieving that signature silky texture every single time.
Step 1: Prepare the Egg Mixture with Precision
Crack all 6 whole Large Eggs into a large bowl and whisk until the yolks and whites are fully combined but not overly aerated. The mixture should be uniform in color with no streaks.
Gradually pour in the 2 cups Chicken Stock while continuing to whisk gently. I use low-sodium stock here to maintain precise control over the seasoning. The liquid should fully incorporate without creating bubbles, resulting in a smooth, pale yellow custard base.
Step 2: Season and Infuse with Aromatics
Add the 0.5 tsp Sea Salt, 0.25 tsp Ground White Pepper, 1 tbsp Shaoxing Wine, and the white portions of the 4 whole Scallions (finely minced) to the egg mixture. Whisk gently to distribute the seasonings evenly throughout the custard.
The Shaoxing wine adds a subtle depth that’s traditional in Hong Kong-style preparations. Be careful not to overmix after adding the wine, as this can create air pockets that affect the final texture. The mixture should look like a thin pancake batter at this stage.
Step 3: Strain and Prepare for Steaming
Pour the egg mixture through a fine-mesh sieve into a heatproof dish that fits inside your steamer. This straining step removes any lumps and ensures that ultimate silk-smooth texture. I prefer using a shallow ceramic or glass dish for even cooking.
Lightly grease the dish with the 1 tsp Neutral Oil before adding the mixture to prevent sticking. Gently tap the dish on the counter to remove any large air bubbles, then cover with a piece of parchment paper to prevent water droplets from falling onto the custard during steaming.
Step 4: Steam to Silky Perfection
Bring the 1 cup Water to a boil in your steamer or a large pot with a steaming rack. Reduce the heat to maintain a gentle, steady simmer. Place the dish containing the egg mixture in the steamer, ensuring the water doesn’t touch the dish.
Cover and steam for 15-20 minutes until the custard is just set. You’re looking for a texture that’s firm but still slightly jiggly in the center, like flan. Avoid overcooking, as this will result in a grainy texture rather than the desired silky finish.
Step 5: Finish and Serve with Elegance
Remove the dish from the steamer and let it rest for 2 minutes. This brief rest allows the custard to fully set and makes it easier to portion. Drizzle with the 1 tbsp Light Soy Sauce and finish with the 0.5 tsp Sesame Oil.
Garnish with the green portions of the scallions, thinly sliced. Serve immediately while still warm, with additional light soy sauce on the side for those who prefer a saltier profile. The custard should have a velvety texture that coats the spoon beautifully.
Pro Tips For Making Hong Kong Steamed Egg
- Strain the Eggs: After beating the eggs, strain them through a fine-mesh sieve into the chicken stock. This removes any chalcaza or thick bits, guaranteeing that silky smooth texture Hong Kong steamed eggs are famous for.
- Warm the Stock: I learned this the hard way—always use room temperature or slightly warm chicken stock, not cold. Adding eggs to cold stock creates temperature shock, which can make the mixture separate or turn lumpy.
- Steam on Low: Keep the heat low and steady once the mixture is in the steamer. High heat cooks the eggs too fast, leading to a rubbery or uneven custard.
- Drizzle Last: Skip mixing the oil into the egg mixture. Instead, heat the neutral oil until just shimmering, then drizzle it over the finished steamed eggs right before serving—this adds a fragrant, glossy finish without weighing down the custard.
Essential Equipment for Perfect Results
Steamer Selection
Invest in a bamboo steamer for authentic results—I use a 10-inch two-tier from EcoNest that fits perfectly over my wok. Bamboo absorbs excess moisture, preventing water droplets from ruining your custard’s surface. For a budget option, a stainless steel steamer insert works too.
Heatproof Dishes
A shallow ceramic or glass dish with a 6-8 cup capacity ensures even cooking. I prefer Pyrex for its heat resistance and transparency. Avoid metal dishes as they can react with the egg mixture. The dish should fit comfortably inside your steamer with 1-inch clearance on all sides.
Fine-Mesh Sieve
Straining the egg mixture is non-negotiable for that silk-smooth texture. Use a fine-mesh sieve—I recommend OXO’s 7.5-inch model. This removes any lumps and aerates the mixture just enough. Press gently with a spatula to extract all the liquid.
Parchment Paper
Cover your dish with parchment paper to protect the custard from water droplets. Cut a piece slightly larger than your dish and poke a few small holes for steam to escape. I use unbleached parchment from If You Care for its non-stick properties and eco-friendliness. 💡
Thermometer
Maintain precise water temperature between 180-190°F for the most consistent results. A candy thermometer clipped to the side of your pot helps monitor this. I use Taylor’s digital probe thermometer for its accuracy and quick response time.
Serving Tools
Serve with a large spoon to scoop the delicate custard. I love my bamboo rice paddle for portioning. Have small bowls ready for individual servings, and keep light soy sauce on hand for drizzling at the table. The right tools make serving this elegant dish effortless.
Nutrition Facts
Frequently Asked Questions
Why strain the egg mixture?
Straining removes lumps and air bubbles for that signature silk-smooth texture. It ensures a uniform custard without any graininess.
Can I use water instead of stock?
Yes, but the flavor will be milder. Use 1 cup water + 1 cup stock for better depth. Stock adds richness that water can’t replicate.
How do I prevent water droplets on the custard?
Cover the dish with parchment paper poked with small holes. This shields the surface while allowing steam to circulate.
What if my custard turns out lumpy?
Overmixing or high heat causes this. Whisk gently and maintain 180-190°F water temperature. Straining the mixture helps too.

- 6 Egg Cake Recipe with Oil: Light as Air With Buttery Moisture - October 4, 2026
- 4 Bean Casserole Recipe: One-Pan Heartiness With Smoky Paprika Depth - October 4, 2026
- 3-Ingredient Keto Mug Cake Recipe: Microwave Magic in 2 Minutes - October 4, 2026