
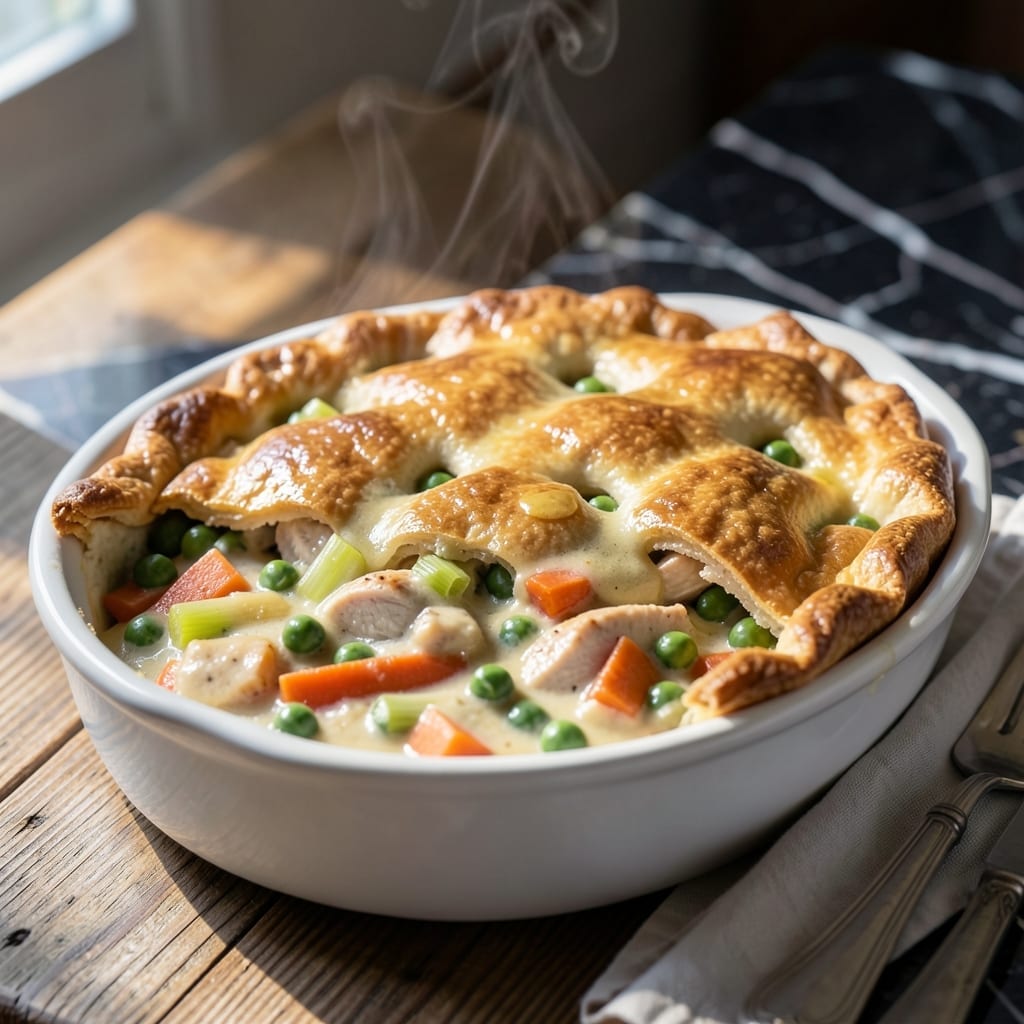
This Ninja Foodi recipe transforms classic chicken pot pie into a one-pot wonder without sacrificing comfort. The pressure cooker tenderizes the chicken and vegetables in minutes, while the air crisp lid delivers a golden crust.
I developed this method to capture all the cozy flavors of traditional pot pie with far less effort. The filling comes together quickly under pressure, then gets topped with store-bought pie crust for that familiar flaky finish.
The result is a hearty, creamy filling packed with chicken, carrots, peas and celery, all encased in a buttery crust. It’s the same satisfying meal you love, just made faster and with less cleanup.
Perfect for weeknight dinners when you want comfort food without the fuss.
Ingredients for Ninja Foodi Chicken Pot Pie
Everything for that creamy, comforting pot pie in one pressure cooker
| Ingredient | Amount | Notes |
|---|---|---|
| Boneless, Skinless Chicken Breasts 🍗 | 1 ½ lb | Cut into 1-inch cubes |
| Carrots 🥕 | 2 whole | Peeled and diced |
| Celery Stalks 🌿 | 2 whole | Diced, leaves removed |
| Frozen Green Peas 🌱 | 1 cup | No need to thaw |
| Yellow Onion 🧅 | 1 whole | Medium, finely diced |
| Garlic Cloves 🧄 | 3 cloves | Minced for depth |
| Unsalted Butter 🧈 | ½ cup | Divided for cooking and roux |
| All-Purpose Flour 🌾 | ½ cup | For thickening the filling |
| Chicken Broth 🍲 | 1 ½ cups | Low-sodium preferred |
| Heavy Cream 🥛 | ½ cup | Full-fat for creaminess |
| Pie Crust 🥧 | 1 package | Store-bought, thawed if frozen |
| Dried Thyme 🌿 | 1 tsp | For earthy warmth |
| Dried Rosemary 🌿 | 1 tsp | Crushed to release flavor |
| Kosher Salt 🧂 | 1 tsp | Adjust to taste |
| Black Pepper 🌶️ | ½ tsp | Freshly ground preferred |
The chicken is the foundation here. Boneless, skinless breasts work perfectly, but thighs stay juicier if you’re okay with a slightly richer filling. I grab mine from Costco for bulk savings, but any grocery store’s butcher section will do. For the pie crust, Pillsbury is my go-to—reliable flakiness without the fuss. Just make sure it’s fully thawed before topping the filling.
No fresh thyme or rosemary? Dried works at one-third the amount—just crush it between your fingers to wake up the flavor. Out of heavy cream? Whole milk mixed with a splash of melted butter gets you close. If you’ve got leftover veggies, throw them in (potatoes or green beans work great). The peas can be swapped for corn or diced green beans if that’s what’s in the freezer.
Leftovers reheat like a dream—3-4 days in the fridge, 3 months frozen. Store the crust separately if freezing to keep it crisp. I always make extra filling for easy lunches the next day (it’s even better after the flavors meld).
Why You’ll Love This Recipe
- One Pot Wonder: I toss in the chicken, carrots, celery, and peas, and the Ninja Foodi does all the work—no extra pots or pans.
- That Crustless Magic: The vegetables soak up the juices from the chicken and herbs, creating a rich, savory filling without the fuss of a crust.
- Weeknight Rescue: Honestly, it’s my secret for getting a hearty meal on the table fast, even on the busiest nights.
- Leftovers for Days: This dish tastes even better the next day, and it reheats beautifully for lunch or dinner.
Step-by-Step Instructions for Ninja Foodi Chicken Pot Pie
Here’s how to create this comforting dish with perfect texture and rich flavor every time.
Step 1: Sauté the Vegetables and Chicken
Set your Ninja Foodi to the sauté function on medium-high heat. Add 2 tablespoons of the unsalted butter and let it melt. Toss in the diced yellow onion, peeled and diced carrots, and diced celery stalks, cooking for 3-4 minutes until the vegetables begin to soften.
Add the minced garlic cloves and cook for 30 seconds until fragrant. Stir in the 1.5 lb boneless, skinless chicken breasts cut into 1-inch cubes, seasoning with 1 tsp kosher salt, 1 tsp dried thyme, 1 tsp dried rosemary, and 0.5 tsp black pepper. Sauté for 5-6 minutes until the chicken is no longer pink.
Step 2: Pressure Cook the Filling
Once the chicken is cooked through, add the 1 cup frozen green peas and 1.5 cups chicken broth. Stir to combine, scraping up any browned bits from the bottom of the pot. Secure the pressure cooker lid and set the valve to seal.
Cook on high pressure for 5 minutes. When the cooking cycle is complete, allow the pressure to release naturally for 5 minutes, then quick-release any remaining pressure. The chicken should be tender and the vegetables fork-tender.
Step 3: Create the Creamy Sauce
Remove the lid and set the Ninja Foodi back to sauté on medium heat. In a small bowl, melt the remaining unsalted butter and whisk in the 0.5 cup all-purpose flour to create a smooth paste. Stir this mixture into the pot and cook for 1-2 minutes to thicken the filling.
Gradually pour in the 0.5 cup heavy cream, stirring constantly until the sauce is smooth and has thickened enough to coat the back of a spoon. The filling should be rich and creamy, with the vegetables and chicken evenly distributed.
Step 4: Assemble and Bake the Pot Pie
Unroll the pie crust and place it over the filling, tucking the edges down gently. Use a sharp knife to cut a few small slits in the center of the crust to allow steam to escape. This ensures the crust bakes evenly without becoming soggy.
Close the air fryer lid and bake at 375°F for 12-15 minutes until the crust is golden brown and flaky. Let it rest for 5 minutes before serving to allow the filling to set. Each serving should have a crisp, buttery crust with a creamy, flavorful filling underneath.
Pro Tips For Making Ninja Foodi Chicken Pot Pie
- Dice the Chicken Small: Cut the boneless chicken breasts into 1-inch pieces—this guarantees they cook through in the Foodi without turning rubbery before the veggies soften. I learned this the hard way after pulling out dry, overcooked chunks.
- Sauté the Veggies First: Toss the carrots, celery, and onion in the pot with a little oil for 3-4 minutes before pressure cooking. It builds a flavor base that frozen peas alone can’t match.
- Skip the Thaw: Add the frozen green peas straight from the bag during the last 2 minutes of pressure cooking. Thawing first makes them mushy, and nobody wants a soggy pot pie.
- Thicken After Pressure: After releasing the pressure, switch to sauté mode and stir in a cornstarch slurry (1 tbsp cornstarch + 1 tbsp water). This tightens the filling into that classic pot pie consistency—no watery mess.
Creative Variations of This Recipe
Creamy Turkey Variation
Swap the 1.5 lb boneless, skinless chicken breasts for ground turkey to create a leaner version. Brown 1.5 lbs ground turkey in the Ninja Foodi first, then proceed with the recipe. The texture remains hearty while cutting some fat. A great way to use leftover Thanksgiving turkey too!
Vegetarian Delight
For a meat-free take, replace the chicken with 2 cups chickpeas and add 8 oz mushrooms for extra umami. Sauté the mushrooms with the vegetables, then add chickpeas with the peas. The filling stays just as satisfying and creamy.
Spicy Southwest Twist
Add 1 diced jalapeño and 1 tbsp taco seasoning with the vegetables. Replace peas with 1 cup corn kernels and top with a cheddar cheese blend crust. This gives your pot pie a zesty, Tex-Mex flair that’s perfect for taco night fans. 🌶️
Seafood Lovers’ Version
Use 1.5 lbs shrimp or chopped firm white fish instead of chicken. Reduce pressure cook time to 2 minutes to avoid overcooking. Add ½ tsp Old Bay seasoning for that classic seafood flavor.
Loaded Baked Potato Style
Stir in 2 cups diced potatoes with the carrots and celery. Replace thyme with 1 tsp onion powder and add ½ cup shredded cheddar to the filling. Top with a biscuit crust for the ultimate comfort food mashup.
Herb Crust Elevation
Brush the pie crust with 1 beaten egg and sprinkle with 1 tbsp everything bagel seasoning before air frying. This adds a beautiful golden sheen and extra flavor to every bite. I love the crunch this gives the crust! ✨
Nutrition Facts
Frequently Asked Questions
Can I use pre-cooked chicken?
Yes, but reduce pressure cook time to 3 minutes. Add shredded rotisserie chicken at the end with the cream to prevent overcooking.
What if my crust isn’t browning?
Air fry for an extra 2-3 minutes at 375°F. Brush with egg wash before baking for a deeper golden color.
Can I make this ahead?
Assemble without baking, refrigerate up to 24 hours. Bake when ready, adding 5 minutes to the cook time.
How do I prevent a soggy bottom crust?
Sprinkle 1 tablespoon flour over the filling before adding the crust. This creates a barrier against moisture.

- 6 Egg Cake Recipe with Oil: Light as Air With Buttery Moisture - October 4, 2026
- 4 Bean Casserole Recipe: One-Pan Heartiness With Smoky Paprika Depth - October 4, 2026
- 3-Ingredient Keto Mug Cake Recipe: Microwave Magic in 2 Minutes - October 4, 2026