
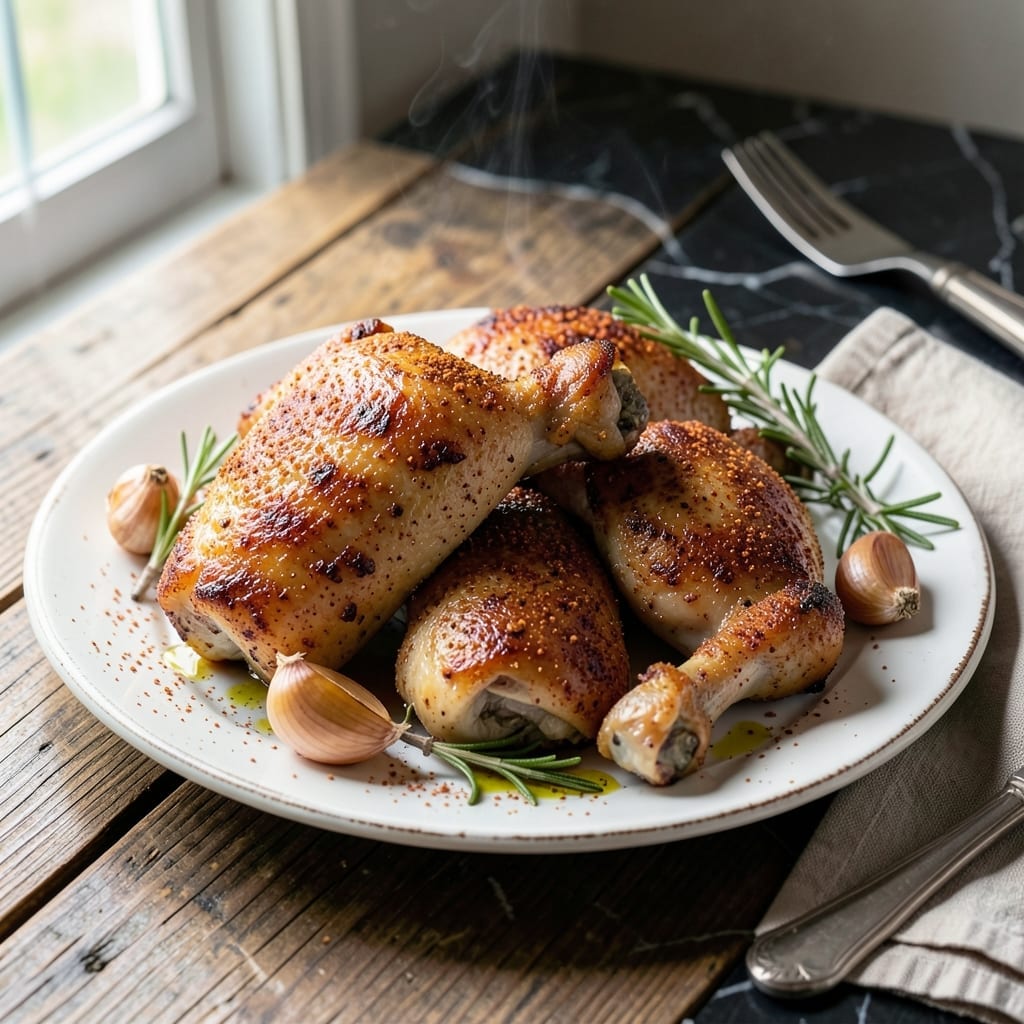
This baked chicken delivers the crispy skin and juicy meat that made Southern cooking famous. I’ve perfected the technique to ensure every piece comes out golden and tender.
The secret lies in the simple preparation—just a few pantry staples and the right oven temperature. At 400°F, the skin renders perfectly while keeping the meat moist.
What you’ll get is chicken with a shatteringly crispy exterior and flavorful, succulent meat underneath. The aroma alone will have everyone gathering in the kitchen.
Serve it with classic sides like mashed potatoes or green beans for a complete Southern meal. Here’s how to make it right.
Ingredients for Paula Deen Baked Chicken
Southern charm starts with these carefully selected ingredients for perfect baked chicken every time.
| Ingredient | Amount | Notes |
|---|---|---|
| Chicken Thighs 🍗 | 4 lb | Bone-in, skin-on preferred |
| Kosher Salt 🧂 | 1 tbsp | Diamond Crystal preferred |
| Black Pepper 🌶️ | 1 tsp | Freshly ground for best flavor |
| Garlic Powder 🧄 | 1 tsp | Not garlic salt |
| Onion Powder 🧅 | 1 tsp | Enhances savory depth |
| Paprika 🌶️ | 1 tsp | Sweet or smoked variety |
| Dried Thyme 🍃 | ½ tsp | Crushed between fingers |
| Dried Rosemary 🍃 | ½ tsp | Crushed for full aroma |
| Unsalted Butter 🧈 | 4 tbsp | Melted for basting |
| All-Purpose Flour 🌾 | ¼ cup | For dredging skin |
| Vegetable Oil 🫒 | 2 tbsp | Neutral flavor for crisping |
The chicken is non-negotiable—bone-in, skin-on thighs render the best fat for crisping. Source from Whole Foods or Costco for consistent sizing. Diamond Crystal kosher salt is the professional choice for even seasoning. Freshly ground black pepper releases more aroma than pre-ground. Don’t skip the melted butter basting; it’s the Paula Deen signature touch for golden skin.
No fresh herbs? Dried thyme and rosemary at half the amount of fresh work perfectly. Swap paprika for Cajun seasoning if you want heat. For a lighter option, olive oil replaces butter (though the flavor won’t be as rich). The flour dredge can be skipped for gluten-free, but the skin won’t crisp as dramatically. Always use skin-on—it’s what delivers that shatter.
Best eaten fresh, but leftovers keep 3-4 days in the fridge. Reheat in the oven at 350°F to revive the crispiness. The seasoning blend can be pre-mixed and stored in an airtight container for up to 3 months.
Why You’ll Love This Recipe
- One Pan Magic: I just toss the thighs with salt, pepper, and those powders, then let the oven do the work—no babysitting required.
- Crispy, Juicy Bite: The skin gets this golden crunch while the meat stays so tender, thanks to that simple garlic-onion dry rub.
- Meal Prep Hero: I make a double batch Sunday and we’re set for lunches all week—still tasty cold or reheated.
- Budget Winner: Chicken thighs are cheap, and this recipe needs nothing fancier than what’s already in my pantry.
Step-by-Step Instructions for Baked Chicken
Here’s the method. Straightforward, tested, works every time.
Step 1: Season and Dredge the Chicken
Pat the 4 lb Chicken Thighs completely dry with paper towels—this is essential for achieving crispy skin. I always use bone-in, skin-on thighs for this recipe as they stay juicier during baking.
In a small bowl, combine the 1 tbsp Kosher Salt, 1 tsp Black Pepper, 1 tsp Garlic Powder, 1 tsp Onion Powder, 1 tsp Paprika, 0.5 tsp Dried Thyme, and 0.5 tsp Dried Rosemary. Crush the dried herbs between your fingers to release their aroma. Rub this seasoning blend evenly over all sides of the chicken thighs, pressing gently to adhere.
Dredge each thigh in the 0.25 cup All-Purpose Flour, shaking off any excess. The flour creates a light crust that enhances the crispiness of the skin during baking.
Step 2: Sear the Chicken for Extra Flavor
Preheat your oven to 400°F. While the oven heats, warm the 2 tbsp Vegetable Oil in a large oven-safe skillet over medium-high heat until shimmering. The oil should be hot but not smoking—this ensures a proper sear without burning.
Carefully place the floured chicken thighs skin-side down in the hot oil. Sear for 4-5 minutes until the skin is deep golden brown and crispy. Avoid moving the pieces too soon—let them develop a good crust before turning.
Flip the thighs and sear the other side for 2-3 minutes. The chicken won’t be fully cooked yet, but this initial searing builds a flavor foundation and jumpstarts the crisping process.
Step 3: Bake to Perfection
Transfer the skillet with the seared chicken to the preheated oven. Bake uncovered for 25-30 minutes, or until the internal temperature reaches 175°F when measured with a meat thermometer. The skin should be deeply browned and crispy all over.
Halfway through the baking time, baste the chicken with the 4 tbsp Unsalted Butter. I melt the butter beforehand for easier application. This basting step adds richness and helps the skin crisp uniformly.
The chicken is done when the juices run clear and the skin has that characteristic Southern-style crispness. If the skin isn’t crispy enough, broil for 1-2 minutes at the end, watching carefully to prevent burning.
Step 4: Rest and Serve
Remove the skillet from the oven and transfer the chicken to a paper towel-lined plate to drain any excess fat. Let the chicken rest for 5-10 minutes before serving—this allows the juices to redistribute throughout the meat.
Serve the chicken hot, with the pan juices spooned over the top if desired. The skin should remain crispy for several minutes after baking, especially if you’ve followed the drying and searing steps properly.
This method guarantees tender, juicy meat with skin so crispy it crackles when cut. The seasoning blend provides a well-balanced flavor that complements the natural richness of the chicken thighs.
Pro Tips For Making Paula Deen Baked Chicken
- Pat Thighs Dry: Use paper towels to thoroughly dry the chicken thighs before seasoning—this guarantees a crispy skin instead of a soggy mess. I learned this the hard way after pulling out a pan of steamed-looking chicken.
- Season Under Skin: Gently loosen the skin and rub some of the salt, pepper, garlic powder, and onion powder directly on the meat. Sounds weird, but it works: every bite stays flavorful, not just the surface.
- Start Skin-Side Down: Place the thighs skin-side down on the baking rack for the first 20 minutes at 400°F, then flip. This renders the fat and gets the skin extra crispy without burning.
- Rest Before Serving: Give the chicken a solid 5-10 minutes to rest after baking—it keeps the juices locked in. I skip this when I’m lazy, but the dish is noticeably better when I don’t.
Common Mistakes When Making This Recipe
Skipping the Drying Step
I can’t stress this enough: patting the chicken thighs completely dry is crucial. Wet skin steams instead of crisping, leaving you with rubbery results. Use paper towels and press firmly to remove all moisture before seasoning. 💡
Overcrowding the Pan
Give each piece space in your skillet—at least 2 inches apart. Crowding lowers the oil temperature, causing chicken to steam rather than sear. Cook in batches if needed; it’s worth the extra 5 minutes for that perfect crisp.
Skipping the Sear
Searing builds the flavor foundation that makes this dish special. Don’t rush this step—let the skin develop a deep golden brown crust for 4-5 minutes before flipping. The Maillard reaction here creates complex flavors you can’t get from baking alone.
Not Using a Thermometer
Guessing doneness leads to dry or undercooked chicken. Invest in a meat thermometer and cook to 175°F internal temperature. I use ThermoWorks Instant Read—it’s accurate and gives results in 2-3 seconds. 🌡️
Basting Too Early
Wait until halfway through baking to baste with butter. Adding it too soon can wash off your seasoning. The 4 tbsp melted butter should go on when the skin is already crisping, about 12-15 minutes into baking.
Skipping the Rest
Let your chicken rest for 5-10 minutes after baking. Cutting too soon causes juices to escape, leaving dry meat. The skin stays crispy during this time if you’ve followed the other steps properly.
Nutrition Facts
Frequently Asked Questions
Can I use chicken breasts instead of thighs?
You can, but breasts dry out more easily. Thighs stay juicier due to higher fat content. If using breasts, reduce baking time to 20-25 minutes and check temperature at 165°F.
Why do we bake at such a high temperature?
The 400°F oven ensures the skin crisps quickly before the meat overcooks. Lower temps can leave skin rubbery. This method mimics frying without the mess.
How do I keep the skin crispy when serving?
Serve immediately on a wire rack, not a plate. Steam from the hot chicken can soften the skin. Avoid covering with foil, which traps moisture.
Can I make this ahead of time?
Bake and cool completely, then refrigerate. Reheat at 375°F for 10-15 minutes to restore crispiness. Avoid microwaving—it ruins the texture.

- 6 Egg Cake Recipe with Oil: Light as Air With Buttery Moisture - October 4, 2026
- 4 Bean Casserole Recipe: One-Pan Heartiness With Smoky Paprika Depth - October 4, 2026
- 3-Ingredient Keto Mug Cake Recipe: Microwave Magic in 2 Minutes - October 4, 2026