
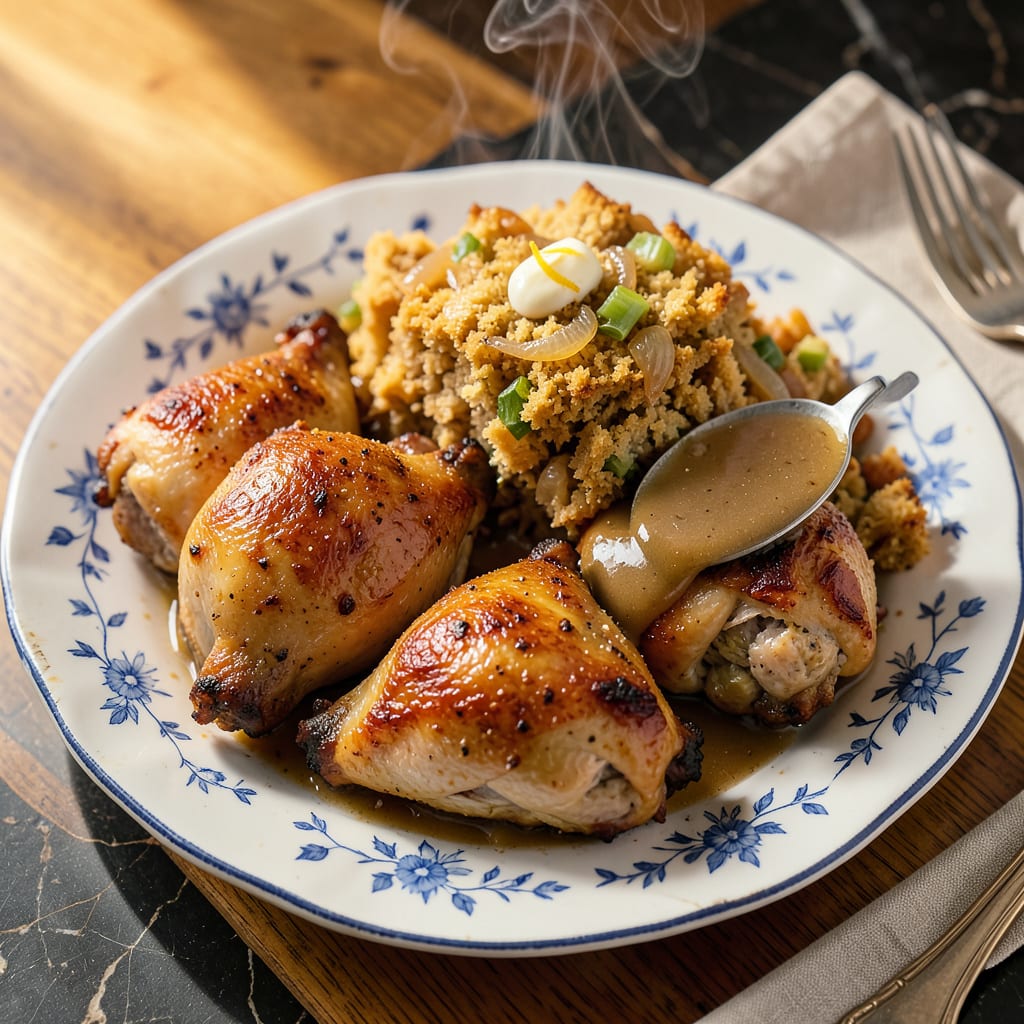
There’s nothing quite like Paula Deen’s chicken and dressing to bring Southern comfort to your table. This one-pan wonder combines tender chicken with rich, buttery cornbread dressing, creating a dish that feels like home. The secret lies in the perfect balance of savory herbs and creamy broth, baked until golden and irresistibly crisp on top.
The chicken cooks until juicy and flavorful, then gets nestled into the dressing mixture before baking. What emerges is a hearty, satisfying meal that’s ideal for Sunday suppers or holiday gatherings. Every bite delivers that nostalgic taste of traditional Southern cooking, just like Paula would make it.
Ingredients for Paula Deen Chicken and Dressing
This is Southern comfort in a pan—tender chicken, buttery cornbread, and savory herbs come together just right.
| Ingredient | Amount | Notes |
|---|---|---|
| Chicken Thighs 🍗 | 6 whole | Bone-in, skin-on for flavor |
| Cornbread 🍞 | 6 cups | Crumbled, day-old preferred |
| Chicken Broth 🍲 | 3 cups | Low-sodium for control |
| Celery 🌿 | 1 ½ cups | Finely diced for texture |
| Yellow Onion 🧅 | 1 whole | Medium, finely chopped |
| Unsalted Butter 🧈 | ¾ cup | Melted for richness |
| Large Eggs 🥚 | 2 whole | Lightly beaten for binding |
| Dried Sage 🌿 | 1 ½ tsp | Rubbed between palms to release flavor |
| Dried Thyme 🌿 | 1 tsp | Or use 1 tbsp fresh |
| Poultry Seasoning 🧂 | 1 tbsp | Paula’s signature touch |
| Salt 🧂 | 1 ½ tsp | Divided, to taste |
| Black Pepper 🌶️ | 1 tsp | Freshly ground preferred |
| Garlic Powder 🧄 | 1 tsp | For depth of flavor |
| All-Purpose Flour 🌾 | 2 tbsp | For thickening broth |
| Fresh Parsley 🌿 | ¼ cup | Chopped, for garnish |
[recipeingredientscaler]
The cornbread is key here. Day-old from a local bakery works best (it soaks up broth like a dream), but a box mix in a pinch is fine too. I grab White Lily for the flour—it’s what Paula uses, and it makes a difference in the texture. For the chicken, bone-in thighs stay juicier than breasts, and that skin gets crispy under the broiler. Most grocery stores carry pre-diced celery/onion mixes (near the salad stuff) to save time—no shame in shortcuts for a weeknight version.
No poultry seasoning? Mix 1 tsp sage + ½ tsp thyme + ¼ tsp marjoram—close enough. Fresh herbs work if you’ve got them (double the dried amounts). Swap vegetable broth to make it vegetarian-friendly, though the flavor won’t be quite as rich. The butter can be half butter, half olive oil if you’re watching saturated fat (but hey, this is Paula Deen—live a little). For extra crispiness, toss the cornbread cubes in the oven for 10 minutes before mixing.
This reheats like a champ—cover with foil and warm at 325°F for 20 minutes. Dressing keeps 3-4 days in the fridge (the flavors just get better), or freeze portions for up to 2 months. I like to make the cornbread a day ahead—saves time and gives it that perfect stale texture for soaking up all the good juices.
Why You’ll Love This Recipe
- I’ll be real: it tastes even better the next day, when the flavors meld and the dressing firms up just enough to slice. Two meals for the effort of one, and it freezes like a dream. Budget and sanity saver.
- One-Pan Magic: Honestly, I love that everything—juicy chicken thighs, crumbly cornbread, even the celery and onion—bakes together in one dish. No juggling pots or extra cleanup, just layer it, bake it, and call it dinner.
- That Golden Crust: Here’s what sold me—the way the cornbread soaks up the chicken broth but still gets crispy on top, with little pockets of celery and onion tucked inside. It’s like the best stuffing you’ve ever had, but with actual substance.
- Sunday or Tuesday: Between us, this is my secret for feeding a crowd or just my picky nephew. Swap store-bought cornbread if you’re rushed, or make it ahead for Thanksgiving. (Yes, even on a Tuesday night.)
Instructions
This classic Southern dish comes together in simple steps that build rich, comforting flavors.
Step 1: Cook the Chicken Thighs for Maximum Flavor
Start by seasoning the 6 whole Chicken Thighs generously with 1 tsp Salt, 1 tsp Black Pepper, and 1 tsp Garlic Powder. I like to really work the seasoning into the skin and meat for even flavor. Heat a large skillet over medium-high heat and add the chicken thighs skin-side down.
Cook undisturbed for 6-8 minutes until the skin turns deep golden brown and crispy. This is where you build that rich, savory foundation. Flip the thighs and cook another 5-6 minutes until they reach an internal temperature of 165°F. Remove them to a plate, but keep that flavorful fat in the skillet—it’s liquid gold for the dressing.
Step 2: Sauté the Vegetables in the Chicken Fat
In the same skillet with the chicken fat, add the 1.5 cups Celery and 1 whole Yellow Onion (finely chopped). Cook over medium heat for 5-7 minutes, stirring occasionally, until the vegetables soften and the onion becomes translucent. You’ll know it’s ready when the kitchen smells sweet and aromatic.
Sprinkle in the 2 tbsp All-Purpose Flour and stir constantly for 1-2 minutes to cook off the raw flour taste. This creates a light roux that will thicken your dressing beautifully. The mixture should look like wet sand when it’s ready for the next step.
Step 3: Combine Everything with Cornbread and Broth
In a large mixing bowl, crumble the 6 cups Cornbread into coarse pieces. Pour the sautéed vegetable mixture over the cornbread, then add the 3 cups Chicken Broth, 0.75 cup Unsalted Butter (melted), 2 whole Large Eggs, 1.5 tsp Dried Sage, 1 tsp Dried Thyme, and 1 tbsp Poultry Seasoning.
Gently fold everything together until just combined—don’t overmix or the dressing will be dense. The mixture should be moist but still hold its shape when pressed. I like to let it sit for 5 minutes before baking to allow the cornbread to absorb some of the liquid.
Step 4: Bake Until Golden and Set
Transfer the dressing mixture to a greased 9×13-inch baking dish and spread it evenly. Nestle the cooked chicken thighs on top, skin-side up. Bake at 375°F for 30-35 minutes until the top is golden brown and the dressing is set around the edges but still slightly jiggly in the center.
The dressing is done when a knife inserted in the center comes out clean and the top has formed a crispy crust. If it’s browning too quickly, tent loosely with foil for the last 10 minutes of baking. That crispy top with the moist interior is what makes this dish so comforting.
Step 5: Rest and Garnish Before Serving
Let the dish rest for 10 minutes after removing from the oven. This allows the dressing to firm up slightly for cleaner serving. While it rests, chop the 0.25 cup Fresh Parsley for garnish.
Sprinkle the parsley over the top just before serving. The bright green color against the golden dressing makes for a beautiful presentation. Serve family-style right from the baking dish while it’s still warm and the flavors are at their peak. Each bite should have tender chicken, crispy skin, and that perfect balance of moist, flavorful dressing.
Essential Equipment for This Dish
Large Skillet
A heavy 12-inch cast iron skillet is my top choice for this recipe—it distributes heat evenly and develops that perfect crispy skin on the chicken. I use my trusty Lodge skillet that’s been seasoned for years. The deep sides prevent splattering when you’re searing those thighs. 🔥
Mixing Bowls
You’ll need a large mixing bowl (at least 4-quart capacity) for combining the dressing ingredients. I prefer glass bowls with non-slip bottoms—I use the Pyrex 8-cup that lets me see how well everything’s mixing. The wide opening makes folding in the cornbread much easier.
Baking Dish
A 9×13-inch baking dish is essential for even baking. I recommend stoneware like Le Creuset for consistent heat distribution, but a good glass dish works too. Make sure it’s at least 2 inches deep to accommodate the dressing mixture and chicken without overflowing.
Chef’s Knife
Invest in a quality 8-inch chef’s knife for chopping the celery and onion. My Wüsthof Classic stays sharp through years of use. A sharp knife makes prep faster and safer—no slipping on tough celery stalks. Keep it honed with a steel sharpener before starting.
Measuring Tools
Accurate measurements matter in baking. I use OXO Good Grips measuring cups and spoons—they’re comfortable and the markings are easy to read. For the broth, a liquid measuring cup with a spout prevents spills when pouring into the mixture. Don’t eyeball the herbs—too much sage can overpower.
Whisk and Spatula
A sturdy whisk helps blend the eggs into the broth smoothly, while a heat-resistant silicone spatula is perfect for scraping every bit of flavor from the skillet. I like the GIR brand spatulas—they won’t melt and have a comfortable grip. These tools make combining ingredients effortless. 💛
Nutrition Facts

- 6 Egg Cake Recipe with Oil: Light as Air With Buttery Moisture - October 4, 2026
- 4 Bean Casserole Recipe: One-Pan Heartiness With Smoky Paprika Depth - October 4, 2026
- 3-Ingredient Keto Mug Cake Recipe: Microwave Magic in 2 Minutes - October 4, 2026