
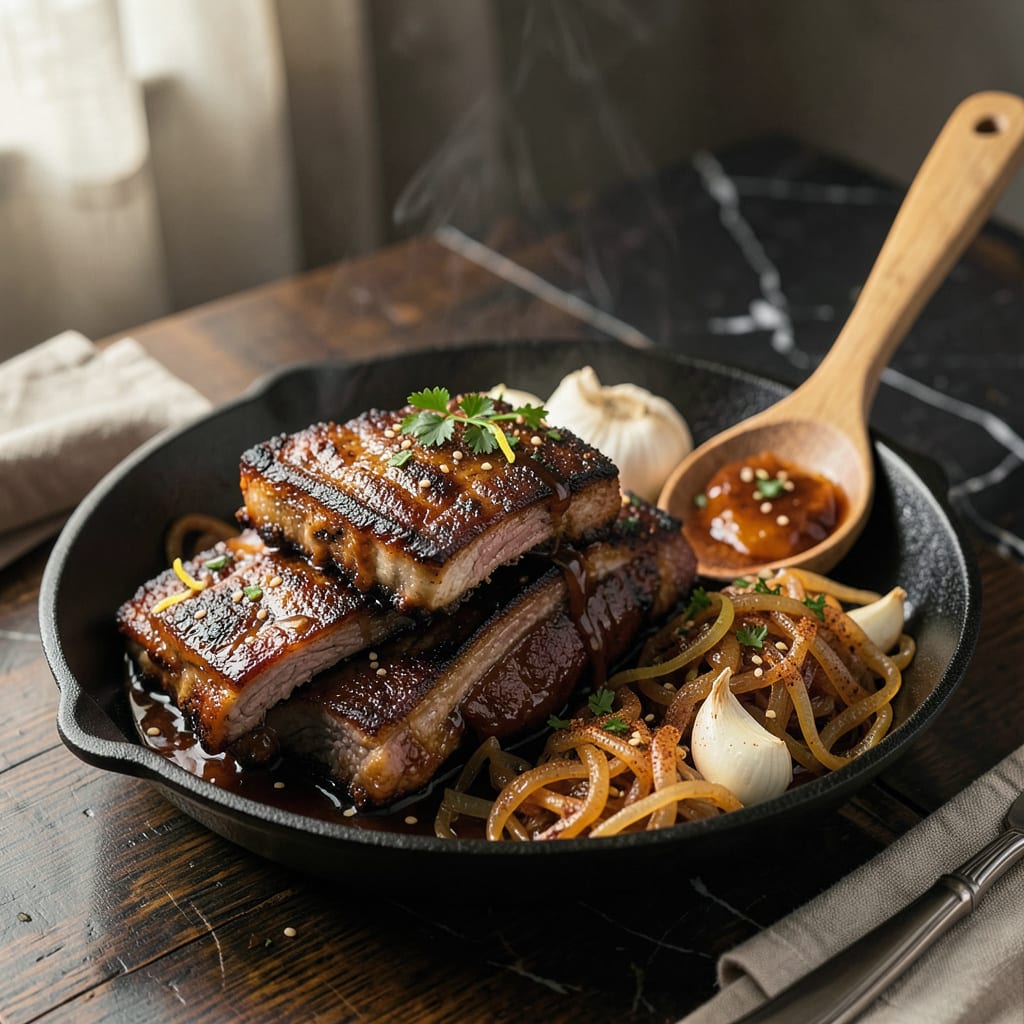
Country style ribs deserve more attention than they get—this recipe transforms them into the star of your meal. Using a simple dry rub and slow cooking method, I’ve perfected a technique that guarantees fall-off-the-bone tenderness without complicated steps or special equipment.
The secret lies in the 3-hour cooking process at low heat, allowing the connective tissue to break down completely. What emerges is meat so tender it practically melts, with a rich, caramelized exterior that holds all the smoky, savory flavor. This method delivers professional results with minimal active time.
Ingredients for Recipe for Country Style Ribs
Thirteen ingredients transform country style ribs into a restaurant-quality dish with minimal effort and maximum flavor.
| Ingredient | Amount | Notes |
|---|---|---|
| Country Style Pork Ribs 🥩 | 3 lb | Bone-in for best texture |
| Light Brown Sugar 🍚 | ¼ cup | Packed for dry rub |
| Smoked Paprika 🌶️ | 1 tbsp | Spanish preferred for depth |
| Garlic Powder 🧄 | 1 tbsp | Freshly ground preferred |
| Onion Powder 🧅 | 1 tbsp | High-quality for robust flavor |
| Kosher Salt 🧂 | 1 ½ tbsp | Diamond Crystal recommended |
| Coarsely Ground Black Pepper 🌶️ | 1 tbsp | Freshly cracked ideal |
| Dried Thyme 🌿 | 1 tsp | Rubbed between palms to release oils |
| Dried Rosemary 🌿 | 1 tsp | Crushed before adding |
| Apple Cider Vinegar 🍏 | ¼ cup | Unfiltered for tang |
| Low-Sodium Chicken Broth 💧 | 1 cup | Or substitute vegetable broth |
| Olive Oil 🫒 | 2 tbsp | Extra-virgin for searing |
| Unsalted Butter 🧈 | 2 tbsp | For finishing baste |
| Fresh Parsley 🌿 | ¼ cup | Chopped for garnish |
[recipeingredientscaler]
The ribs are the foundation—opt for bone-in country style ribs (approximately 3 pounds) with visible marbling for optimal tenderness. Professional kitchens source from Costco or Restaurant Depot for consistent quality, but well-stocked supermarkets like Kroger or Publix carry suitable options. The brown sugar should be light brown (not dark) to balance sweetness without overpowering. For spices, Penzeys or Spicewalla offer superior potency, but standard grocery brands work if freshness is verified (check expiration dates).
Substitutions maintain integrity with careful adjustments. Boneless country style ribs reduce cooking time by 30 minutes but sacrifice texture. Replace smoked paprika with half chipotle powder for heat, though flavor profile shifts. Vegetable broth substitutes equally for chicken broth; white wine vinegar works in place of apple cider at a 1:1 ratio. For herb variations, dried sage (0.5 tsp) complements the rub, while fresh rosemary (1 tbsp, finely chopped) intensifies aromatic notes during the final baste.
Storage and preparation optimize results. Ribs keep refrigerated for 3-4 days post-cooking; vacuum-sealing extends to 6 months frozen. The dry rub components (excluding fresh herbs) remain potent for 6-12 months in airtight containers away from light. Pre-mix rub up to 1 week ahead, but add vinegar immediately before application to prevent sugar clumping. Reheat ribs gently in 250°F oven with broth to restore moisture.
Why You’ll Love This Recipe
- Dump-and-Bake Simple: I toss everything—the ribs, brown sugar, and spices—onto one sheet pan. No marinating, no fancy steps, just a quick rub and into the oven it goes.
- Smoky-Sweet Obsession: That combo of smoked paprika and brown sugar caramelizes into this sticky, slightly crispy crust. Honestly, I’ve caught my husband sneaking bites straight from the pan.
- Meat-and-Potatoes Hero: This works for Sunday supper with mashed potatoes and as a meal-prep protein over salads or rice bowls. Between us, it’s my secret for feeding picky teens and dinner guests equally well.
- Pocketbook-Friendly Feast: Country-style ribs are half the price of baby backs, and this recipe stretches to feed six. Leftovers? Even better—they soak up the spices overnight, so lunch tastes like a bonus meal.
Step-by-Step Instructions for Country Style Ribs
This method ensures perfectly tender ribs with a caramelized crust and rich, savory depth.
Step 1: Prepare and Season the Ribs
Begin by patting the 3 lb Country Style Pork Ribs completely dry with paper towels. This step is crucial for achieving a proper sear and bark formation. Trim any excess fat if necessary, but leave some for flavor and moisture during cooking.
In a small bowl, combine the 0.25 cup Light Brown Sugar, 1 tbsp Smoked Paprika, 1 tbsp Garlic Powder, 1 tbsp Onion Powder, 1.5 tbsp Kosher Salt, 1 tbsp Coarsely Ground Black Pepper, 1 tsp Dried Thyme, and 1 tsp Dried Rosemary. Rub this mixture thoroughly over all surfaces of the ribs, pressing gently to ensure adhesion. The sugar will caramelize during cooking, creating a flavorful crust.
Step 2: Sear the Ribs for Depth of Flavor
Heat the 2 tbsp Olive Oil in a large Dutch oven over medium-high heat until shimmering. Add the seasoned ribs in a single layer, working in batches if necessary to avoid crowding. Sear for 3-4 minutes per side until a deep golden-brown crust forms. This step develops the Maillard reaction, which creates complex flavors.
Don’t rush this process – you want a uniform crust on all sides. The ribs should release easily from the pot when properly seared. If they stick, allow them to cook another 30-60 seconds before attempting to turn. Transfer the seared ribs to a plate and set aside temporarily.
Step 3: Braise to Fall-Off-the-Bone Tenderness
Reduce heat to medium and deglaze the pot with the 0.25 cup Apple Cider Vinegar, scraping up all the browned bits from the bottom. These fond particles contain concentrated flavor that will enrich your braising liquid. Add the 1 cup Low-Sodium Chicken Broth and bring to a gentle simmer.
Return the seared ribs to the pot along with any accumulated juices. The liquid should come about halfway up the ribs. Cover tightly and transfer to a 325°F oven. Braise for 2-2.5 hours, turning the ribs halfway through the cooking time. The ribs are done when the meat pulls away easily from the bone and a fork inserts without resistance.
Step 4: Finish with Butter Baste and Rest
Carefully remove the ribs from the braising liquid and transfer to a serving platter. Place the pot on the stovetop over medium-high heat and reduce the cooking liquid by half, about 5-7 minutes. This concentrates the flavors for a richer sauce.
Remove from heat and whisk in the 2 tbsp Unsalted Butter until fully incorporated and the sauce becomes glossy. Spoon this reduced sauce over the ribs, allowing it to coat each piece thoroughly. Let the ribs rest for 10 minutes before serving to allow the juices to redistribute.
Step 5: Garnish and Serve
Sprinkle the 0.25 cup Fresh Parsley over the ribs just before serving. The bright green color provides a beautiful contrast to the rich brown tones of the ribs, and the fresh herbal notes balance the dish’s richness.
Serve the ribs with the remaining sauce spooned over the top. The meat should be tender enough to pull apart with a fork but still hold its shape when served. For best results, accompany with crusty bread to soak up the flavorful sauce and a simple green vegetable to cut through the richness.
Pro Cooking Tips for recipe for country style ribs
Perfect Searing Technique
Don’t rush the sear—this is where deep flavor develops. I use a heavy Dutch oven (like Le Creuset) because it retains heat evenly. Heat your 2 tbsp olive oil until it shimmers but doesn’t smoke. The ribs should sizzle immediately when they hit the pan. Let them cook undisturbed for 3-4 minutes per side until a dark crust forms. 🔥
Braising Liquid Balance
The magic happens in the braising liquid ratio. I use 1 cup chicken broth to 0.25 cup apple cider vinegar—this creates the perfect balance of richness and tang. The vinegar tenderizes the meat while the broth keeps it moist. Don’t skip deglazing; those browned bits are pure flavor gold.
Oven Temperature Precision
Set your oven to 325°F—this is the sweet spot for country style ribs. Too high and the meat dries out; too low and the collagen won’t break down properly. I check the temperature with an oven thermometer because many home ovens run hot or cold. The ribs should braise gently, not boil.
Resting for Maximum Juiciness
After cooking, let the ribs rest for 10 minutes before serving. This allows the juices to redistribute throughout the meat. I cover them loosely with foil during this time. If you skip resting, all those delicious juices will end up on your cutting board instead of in your ribs.
Sauce Reduction Trick
When reducing the braising liquid, don’t walk away! It goes from perfect to burnt in minutes. I reduce it by half over medium-high heat, then immediately remove from heat before whisking in the 2 tbsp butter. This creates a silky, restaurant-quality sauce that clings beautifully to the ribs. ✨
Bone-In Advantage
Always choose bone-in country style ribs when possible. The bones add flavor and help regulate cooking. I’ve tested both bone-in and boneless, and bone-in versions consistently have better texture and more complex flavor. The meat near the bone stays especially tender and juicy throughout the long cooking process.
Nutrition Facts
Frequently Asked Questions
What’s the difference between country style ribs and regular pork ribs?
Country style ribs are cut from the shoulder end of the pork loin, not the ribcage. They’re meatier with more marbling than traditional ribs, giving them a richer flavor and more tender texture when cooked properly. Think of them as a cross between ribs and pork chops!
Can I make this recipe in a slow cooker instead?
Sear the ribs first as directed, then transfer to your slow cooker with the braising liquid. Cook on low for 6-7 hours or high for 3-4 hours until fork-tender. The texture will be slightly different but still delicious.
Why did my ribs turn out tough?
This usually happens if they’re undercooked or cooked at too high a temperature. The collagen needs time to break down – aim for 195°F internal temperature and use a meat thermometer. Rushing the process or boiling instead of gentle braising can also cause toughness.
What’s the best way to reheat leftovers?
Place ribs in a baking dish with some reserved braising liquid, cover with foil, and warm at 275°F for 20-30 minutes. This prevents drying out while restoring tenderness. Microwaving works in a pinch, but use 30-second intervals to avoid overcooking.

- 6 Egg Cake Recipe with Oil: Light as Air With Buttery Moisture - October 4, 2026
- 4 Bean Casserole Recipe: One-Pan Heartiness With Smoky Paprika Depth - October 4, 2026
- 3-Ingredient Keto Mug Cake Recipe: Microwave Magic in 2 Minutes - October 4, 2026