
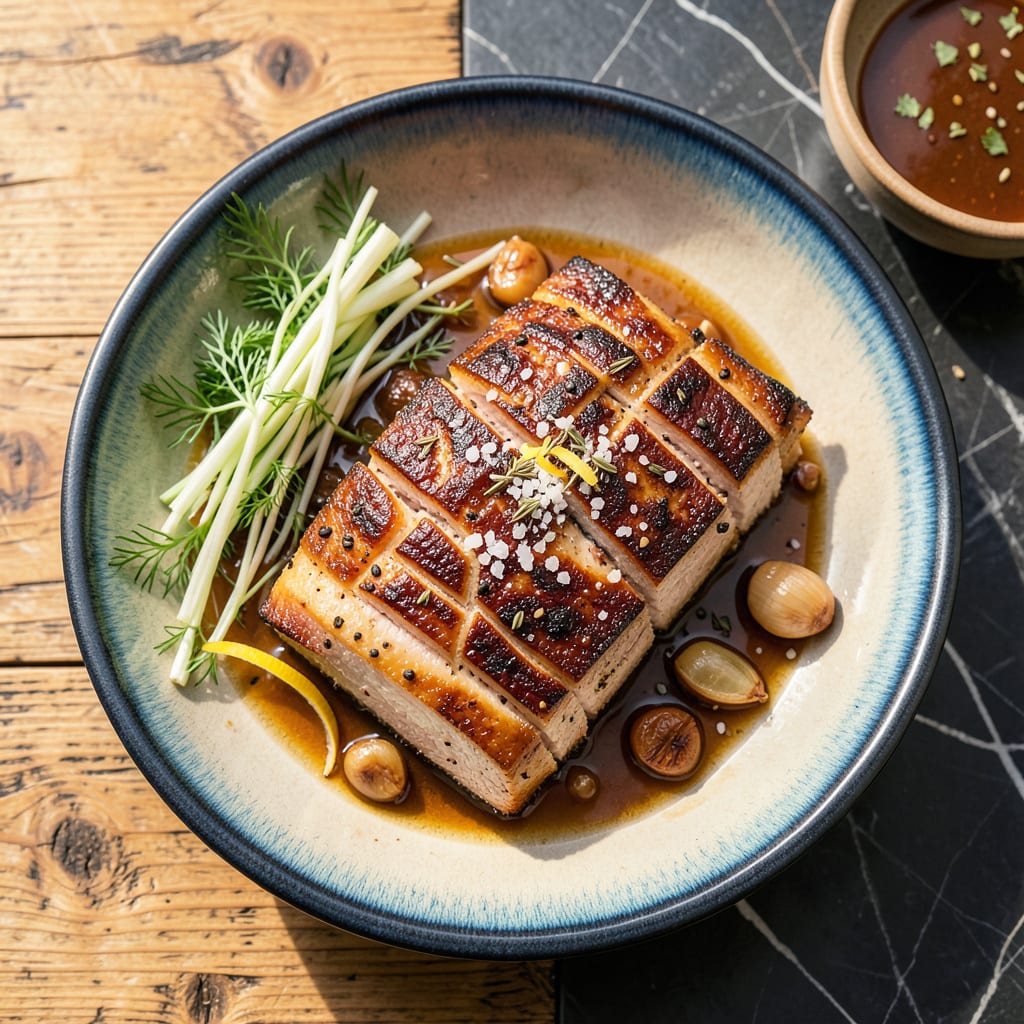
The perfect balance of crispy skin and fall-apart tender meat makes this slow-roasted pork belly worth every minute of patience. This method delivers professional results with simple ingredients and precise technique—no advanced skills required.
Low-and-slow roasting at 275°F transforms tough pork belly into buttery, melt-in-your-mouth perfection while creating that coveted crackling exterior. The secret lies in proper skin preparation and controlled oven temperature—guaranteed to impress even the most discerning eaters.
Ingredients for Slow Roasted Pork Belly
Twelve precision-selected ingredients transform humble pork belly into restaurant-quality perfection with crispy skin and unctuous interior.
| Ingredient | Amount | Notes |
|---|---|---|
| Pork Belly Slab 🥓 | 2 lb | Skin-on, even thickness preferred |
| Diamond Crystal Kosher Salt 🧂 | 2 tbsp | For initial dry-brine curing |
| Granulated White Sugar 🍚 | 1 tbsp | Balances salt in dry brine |
| Freshly Ground Black Pepper 🌶️ | 1 tsp | Coarse grind for texture |
| Fennel Seeds 🌿 | 1 tsp | Lightly crushed for aroma |
| Dried Thyme Leaves 🍃 | 1 tsp | Rubbed between palms to release oils |
| Garlic Cloves 🧄 | 6 cloves | Minced to fine paste consistency |
| White Wine Vinegar 🍷 | 2 tbsp | For skin-crisping acidity |
| Extra-Virgin Olive Oil 🫒 | 1 tbsp | High-quality for basting |
| Low-Sodium Chicken Stock 🍲 | ½ cup | For deglazing roasting pan |
| Unsalted Butter 🧈 | 2 tbsp | For final basting glaze |
| Fresh Rosemary Sprigs 🌿 | 2 whole | For aromatic garnish |
The pork belly quality determines final texture. Opt for skin-on slabs with even fat distribution—Whole Foods or local butchers typically offer superior product to supermarket pre-packaged options. Diamond Crystal kosher salt is non-negotiable for the dry brine; its flake structure ensures proper moisture extraction without over-salting. For the fennel seeds, Penzeys offers exceptional quality, but bulk sections at natural food stores provide cost-effective alternatives. The sugar in the brine isn’t for sweetness—it’s critical for Maillard reaction development during roasting.
Substitutions require careful consideration to maintain textural integrity. Sea salt can replace kosher salt at half the volume by weight, but avoid iodized table salt entirely. If fennel seeds are unavailable, caraway seeds at equal quantity provide comparable aromatic depth. For the vinegar component, apple cider vinegar works in a pinch, though its fruitiness slightly alters the flavor profile. The chicken stock can be substituted with vegetable stock for dietary restrictions, but reduce final salt addition by 25% to compensate for lower sodium content.
Proper ingredient storage ensures optimal results. The pork belly should be used within 3 days of purchase or frozen for up to 3 months—vacuum-sealing prevents freezer burn. Dry ingredients (salt, sugar, spices) maintain potency for 6-12 months in airtight containers away from light and heat. Fresh aromatics like garlic and rosemary should be used within 5 days for maximum flavor impact. The dry brine mixture can be prepared 24 hours in advance and stored at room temperature in a sealed container.
Why You’ll Love This Recipe
- Five-Ingredient Magic: Honestly, the hardest part is remembering to buy the pork belly. Salt, sugar, pepper, fennel seeds—stuff I already have in my pantry. No last-minute grocery runs, no fancy equipment, just a slab of meat and spices you can measure with your fingers.
- That Crispy, Melty Contrast: Here’s what sold me—the way the sugar and salt pull double duty. You get this crackling, caramelized crust that shatters under your fork, then the fat just collapses into silk. The fennel seeds? They’re the sneaky little flavor bombs hiding in every bite.
- Sunday Supper or Taco Tuesday: I’ve served this sliced thick over polenta for a fancy-ish dinner, then shredded the leftovers into banh mi the next day. It’s the kind of dish that plays dress-up—equally at home on a platter with roasted veggies or stuffed into a tortilla with quick-pickled onions.
- Leftovers Beat Takeout: Between us, the second day might be better. Cold from the fridge, that pork belly gets this chewy, almost candied texture. I stash it in the freezer too—portioned into cubes for ramen or fried rice. One slab feeds us for days, and my wallet notices.
Step-by-Step Instructions for Slow Roasted Pork Belly
Master the technique for achieving perfectly crisp skin while maintaining tender, succulent meat throughout.
Step 1: Prepare the Dry Brine for Maximum Flavor Penetration
Begin by combining the 2 tbsp Diamond Crystal Kosher Salt, 1 tbsp Granulated White Sugar, 1 tsp Freshly Ground Black Pepper, 1 tsp Fennel Seeds, and 1 tsp Dried Thyme Leaves in a small bowl. The sugar balances the salt’s intensity while the fennel and thyme create aromatic depth. Rub this mixture evenly over the entire 2 lb Pork Belly Slab, ensuring complete coverage including the skin.
Place the seasoned pork belly on a wire rack set over a baking sheet. This elevation allows air circulation, which is crucial for developing crispy skin. Refrigerate uncovered for 12-24 hours to allow the dry brine to penetrate deeply and draw out excess moisture from the skin. The longer curing time yields more pronounced flavor and better texture.
Step 2: Score and Prep for Roasting
Remove the pork belly from the refrigerator and let it sit at room temperature for 30 minutes. Using a sharp knife, score the skin in a crosshatch pattern at ¼-inch intervals, cutting through the skin and fat but not into the meat. This scoring creates more surface area for crisping and allows fat to render more efficiently during cooking.
Pat the skin completely dry with paper towels—this is essential for achieving maximum crispness. The drier the skin, the better it will blister and crackle in the oven. Position the pork belly skin-side up on a clean wire rack in a roasting pan, ready for the initial high-heat blast that will start the crisping process.
Step 3: Initial High-Heat Roast for Skin Development
Preheat your oven to 450°F. Roast the pork belly for 30 minutes at this high temperature. This initial blast renders some fat and begins the skin-crisping process. Watch for the skin to start blistering and turning golden—this visual cue indicates proper Maillard reaction development.
After 30 minutes, reduce the oven temperature to 300°F. In a small bowl, combine the 6 cloves Garlic Cloves (minced to a paste), 2 tbsp White Wine Vinegar, and 1 tbsp Extra-Virgin Olive Oil. Brush this mixture over the scored skin. The vinegar’s acidity helps break down proteins in the skin, promoting better crisping while the garlic adds aromatic complexity.
Step 4: Slow Roast to Tender Perfection
Continue roasting at 300°F for 2-2.5 hours, basting the pork belly with its rendered fat every 30 minutes. This slow cooking at lower temperature allows the connective tissue to break down gradually while the fat renders out, creating that coveted fall-apart tenderness. The meat should reach an internal temperature of 195°F when tested with a probe thermometer.
During the final 30 minutes of cooking, add the 0.5 cup Low-Sodium Chicken Stock to the roasting pan. This creates steam that keeps the meat moist while allowing the skin to continue crisping. The liquid will reduce and concentrate, forming the base of your pan sauce.
Step 5: Rest and Finish with Aromatic Glaze
Transfer the pork belly to a cutting board and let it rest for 15 minutes. This resting period allows the juices to redistribute throughout the meat. While it rests, place the roasting pan on the stovetop over medium heat. Add the 2 tbsp Unsalted Butter and 2 whole Fresh Rosemary Sprigs, swirling to create an aromatic glaze.
Slice the pork belly into ½-inch thick pieces, ensuring each portion includes both crispy skin and tender meat. Spoon the rosemary-infused pan juices over the slices before serving. The contrast between the shatteringly crisp skin and unctuous meat should be pronounced, with the aromatic glaze adding a final layer of flavor complexity.
Pro Cooking Tips for Great Slow Roasted Pork Belly
Skin Scoring Secrets
The key to maximum crispiness lies in proper scoring technique. Use a sharp chef’s knife (I prefer my Wüsthof Ikon) to make parallel cuts ¼-inch apart through the skin and fat cap. Cut deep enough to expose the meat layer—this creates more surface area for rendering fat and crisping. 🔥
After scoring, pat the skin bone-dry with paper towels. I use Bounty Select-A-Size because they’re more absorbent. The drier the skin, the better it will blister and crackle during that initial high-heat phase. Don’t skip this step—it’s the difference between good and extraordinary crackling.
Temperature Control Mastery
Invest in a dual-probe thermometer like the ThermoWorks Smoke—one probe for oven temp, one for internal meat temp. The initial 450°F blast should be precise, then drop to 300°F for the slow phase. I’ve found even 10°F fluctuations can affect skin texture and cooking time.
Monitor the internal temperature closely. You’re aiming for 195°F in the thickest part. Below 190°F, the connective tissue won’t break down sufficiently, and above 200°F, the meat can become dry. The sweet spot gives you that perfect balance of tender meat and crispy skin.
Basting Technique Perfection
Every 30 minutes during the slow roast, baste the pork belly with its rendered fat using a silicon basting brush. I prefer OXO’s angled brush for better reach. This isn’t just about moisture—it’s about building layers of flavor through the Maillard reaction.
For the final baste, mix the rendered fat with 1 tbsp butter and 1 crushed garlic clove. The butter adds richness while the garlic infuses aromatic depth. Apply this mixture during the last 20 minutes of cooking for maximum flavor impact.
Resting Protocol
This might be the hardest part—waiting! Transfer the pork belly to a cutting board and let it rest for 15-20 minutes. I cover it loosely with foil to keep it warm while allowing steam to escape. This resting period lets juices redistribute throughout the meat.
If you slice too soon, all those precious juices will spill onto your cutting board instead of staying in the meat. I learned this the hard way after ruining my first few attempts. Patience really does pay off with pork belly.
Slicing for Optimal Texture
Use a long, thin-bladed slicing knife—my Mercer Culinary 12-inch is perfect for this. Slice against the grain into ½-inch thick pieces, ensuring each portion includes both crispy skin and tender meat layers. The contrast in textures is what makes this dish extraordinary.
For presentation, arrange slices skin-side up on a warm platter. The crispy skin should glisten slightly from the basting, while the meat underneath should appear moist and tender. This visual contrast is as important as the flavor experience.
Pan Sauce Elevation
Don’t waste those flavorful pan drippings! After removing the pork belly, place the roasting pan on the stovetop over medium-high heat. Add ¼ cup chicken stock and 1 tbsp butter, then scrape up all the browned bits with a wooden spoon.
Strain the sauce through a fine-mesh sieve to remove any solids, then drizzle it over the sliced pork belly before serving. This simple step transforms good pork belly into restaurant-quality perfection. The sauce adds moisture and concentrated flavor to every bite. ✨
Nutrition Facts
Frequently Asked Questions
Why is my pork belly skin not crispy?
Soggy skin usually results from insufficient drying before roasting. Pat the skin completely dry after scoring, then let it air-dry uncovered in the fridge for 12-24 hours. The initial 450°F blast is also crucial—don’t skip this high-heat phase.
Can I make this ahead of time?
Roast the pork belly completely, then cool and refrigerate whole for up to 2 days. Reheat in a 350°F oven for 15-20 minutes to restore crispiness. The flavors actually improve overnight as the seasonings penetrate deeper.
What’s the best way to slice it?
Use a sharp, long knife to cut ½-inch thick slices against the grain. Ensure each piece includes both crispy skin and tender meat layers. For presentation, arrange slices skin-side up to showcase that perfect crackling.
Is there a substitute for the fennel seeds?
If you don’t have fennel seeds, use caraway seeds at equal quantity for similar aromatic depth. In a pinch, 1 tsp ground coriander works, though the flavor profile will shift slightly toward citrusy notes.

- 6 Egg Cake Recipe with Oil: Light as Air With Buttery Moisture - October 4, 2026
- 4 Bean Casserole Recipe: One-Pan Heartiness With Smoky Paprika Depth - October 4, 2026
- 3-Ingredient Keto Mug Cake Recipe: Microwave Magic in 2 Minutes - October 4, 2026