
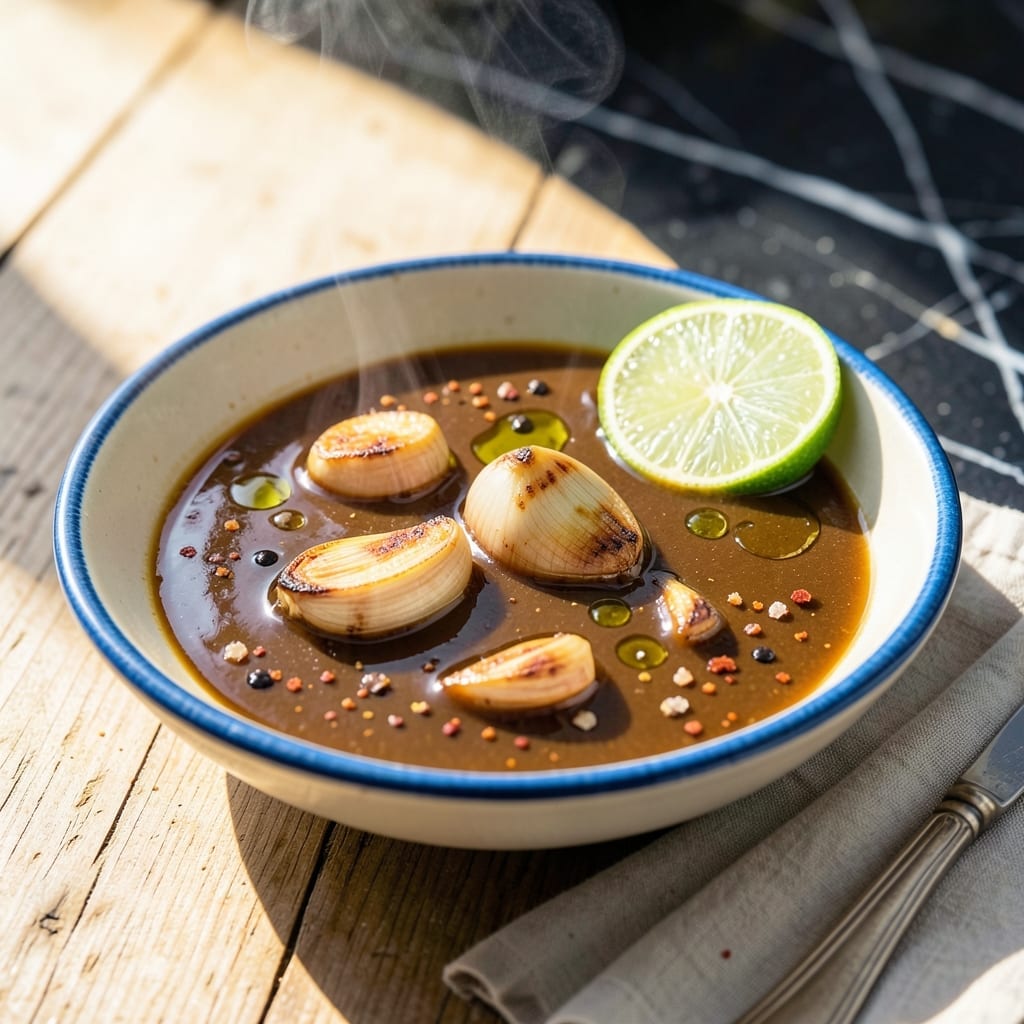
This Thai garlic sauce delivers bold umami depth that transforms simple dishes into restaurant-quality meals. I developed this recipe to capture the authentic balance of sweet, salty, and tangy flavors that define Thai cuisine.
The secret lies in slowly caramelizing the garlic in oil until it turns golden, creating a rich base for the sauce. A careful blend of fish sauce, lime juice, and palm sugar builds complex layers without overpowering the garlic’s natural sweetness.
What you get is a versatile sauce perfect for dipping spring rolls, dressing salads, or drizzling over grilled meats. It stores beautifully in the fridge, allowing the flavors to deepen over time.
Make a batch and keep it on hand for an instant flavor boost to any meal.
Ingredients for Thai Garlic Sauce
Eight simple ingredients create this bold, umami-packed Thai sauce for dipping and dressing.
| Ingredient | Amount | Notes |
|---|---|---|
| Garlic Cloves 🧄 | 12 cloves | Peeled, thinly sliced |
| Neutral Oil 🫒 | ¾ cup | For caramelizing garlic |
| Vegan Fish Sauce 🐟 | 3 tbsp | Or coconut aminos |
| Palm Sugar 🍚 | 3 tbsp | Or brown sugar |
| Fresh Lime Juice 🍈 | 3 tbsp | About 2-3 limes |
| Soy Sauce 🥄 | 1 tbsp | Tamari for gluten-free |
| Rice Vinegar 🍚 | 1 tbsp | Adds tangy brightness |
| Water 💧 | 2 tbsp | To thin sauce if needed |
The garlic is non-negotiable here—fresh cloves only, none of that jarred stuff. I grab mine from Trader Joe’s or the bulk section at Whole Foods. For the oil, any neutral kind works (vegetable, canola, avocado), but don’t use olive oil—it’ll overpower the flavor. The vegan fish sauce is key for that authentic taste; Red Boat or Ocean’s Halo are great brands.
No vegan fish sauce? Coconut aminos at a 1:1 ratio gets you 90% there. Palm sugar can be swapped for brown sugar or even maple syrup in a pinch. Short on limes? Bottled juice works (but fresh is always better). For a spicier kick, add half a teaspoon of crushed red pepper. The soy sauce can be tamari if you need gluten-free.
This keeps for 2 weeks in the fridge in an airtight jar. The flavors actually get better after 24 hours as everything melds. Freezing isn’t ideal—it can separate—but if you must, it’ll last 3 months. Just give it a good stir after thawing.
Why You’ll Love This Recipe
- Five Ingredient Magic: I just dump garlic, oil, vegan fish sauce, palm sugar, and lime juice in a pan—no fancy prep.
- Sweet-Savory Punch: The palm sugar caramelizes with the garlic while the lime cuts through with this bright, tangy zing.
- Drizzle on Everything: I slather it on noodles, use it as a dip for spring rolls, even spoon it over grilled tofu.
- Keeps for Days: Honestly, it tastes even better the next day and stays good in the fridge for a full week.
Step-by-Step Instructions for Thai Garlic Sauce
This method delivers that perfect balance of sweet, salty, and tangy with minimal effort.
Step 1: Caramelize the Garlic Slowly
Heat the 0.75 cup Neutral Oil in a small saucepan over medium-low heat. Add all 12 cloves Garlic Cloves and cook for 8-10 minutes, stirring frequently, until the slices turn golden brown at the edges.
Here’s the thing—this isn’t the time to rush. You want the garlic to cook evenly without burning, which would make it bitter. I’ve found that keeping the heat low and steady is key. The oil should gently bubble around the garlic, not sizzle aggressively. You’ll smell the aroma transform from sharp and pungent to deep and nutty—that’s your cue.
Step 2: Add the Sweet and Umami Base
Once the garlic is golden, carefully add the 3 tbsp Palm Sugar, 3 tbsp Vegan Fish Sauce, and 1 tbsp Soy Sauce. Stir constantly as the sugar begins to melt and dissolve into the oil.
This is the moment that matters: the sugar will create a light caramel that coats the garlic, while the vegan fish sauce and soy sauce build that signature umami depth. Watch for the mixture to turn a light amber color and thicken slightly. If it starts to darken too quickly, reduce the heat. You want it to bubble gently, not furiously.
Step 3: Balance with Tangy Acidic Elements
Remove the saucepan from heat and let it cool for 1 minute. Then stir in the 3 tbsp Fresh Lime Juice and 1 tbsp Rice Vinegar. The mixture will bubble up as the acid reacts with the hot caramel—this is normal.
This step transforms the sauce from rich and salty to bright and complex. The lime juice adds a fresh citrus note, while the rice vinegar contributes a subtle tang. Taste at this point and adjust if needed, but remember the flavors will meld further as it cools.
Step 4: Adjust Consistency and Finish
If the sauce seems too thick, stir in the 2 tbsp Water, 1 tablespoon at a time, until it reaches your desired consistency. I prefer it slightly thick but still pourable—perfect for dipping or drizzling.
Let the sauce cool to room temperature. As it cools, it will thicken slightly more. The garlic will continue to infuse the oil, and all the flavors will harmonize. You’ll end up with a glossy, fragrant sauce that’s packed with layers of flavor. Transfer to a jar and store in the refrigerator for up to 2 weeks.
Pro Tips For Making Thai Garlic Sauce
- Low and Slow Heat: Cook the garlic on medium-low heat—high heat burns it fast, turning the sauce bitter. I learned this the hard way after ruining two batches with charred garlic.
- Slice, Don’t Mince: Use thinly sliced garlic instead of minced for even cooking and a sweeter, more mellow flavor. Minced garlic can burn before it infuses the oil properly.
- Balance the Sugar: Dissolve the palm sugar in the lime juice before adding it to the sauce. This prevents grainy texture and helps it blend smoothly with the other ingredients.
- Taste as You Go: Adjust the vegan fish sauce and lime juice gradually—start with half the amount, taste, then add more. Sounds obvious, but it’s easy to overshoot and end up with a sauce that’s too salty or sour.
Flavor Customization for This Recipe
Sweet Heat Addition
For a sweet and spicy twist, stir in 1-2 tsp sriracha or 1 tsp gochujang after cooling. The heat builds gradually, balancing the caramelized garlic beautifully. I love how it adds complexity without overpowering the original flavors. 🌶️
Herb-Infused Version
Add 2 tbsp finely chopped cilantro and 1 tbsp mint leaves to the finished sauce. This brightens the profile for spring rolls or grilled chicken. The herbs release their aromas as the sauce sits, creating a fresh, vibrant variation.
Nutty Depth
Toast 2 tbsp crushed peanuts in a dry pan until golden, then mix into the cooled sauce. This adds crunch and earthiness, perfect for dipping satay or roasted vegetables. The peanuts also help thicken the sauce slightly.
Citrus Forward
Increase the brightness by adding 1 tbsp orange zest and 1 tsp grated ginger with the lime juice. This version pairs wonderfully with seafood or as a salad dressing. The citrus oils make the sauce more aromatic.
Smoky Variation
Replace 1 tbsp of the neutral oil with toasted sesame oil for a deep, nutty aroma. This works particularly well with grilled meats or noodles. Just a small amount adds significant depth.
Creamy Texture
For a richer version, whisk in 2 tbsp coconut cream after the sauce cools. This creates a luscious texture ideal for drizzling over curries or roasted vegetables. The cream softens the garlic’s sharpness while maintaining all the bold flavors.
Nutrition Facts
Frequently Asked Questions
Can I use jarred minced garlic?
Fresh cloves are essential for the best flavor and texture. Jarred garlic lacks the sweetness and depth that develops when cooking fresh slices.
What’s the best way to store this?
Keep it in an airtight jar in the fridge for up to 2 weeks. The flavors deepen over time as everything melds together.
How can I make it spicier?
Stir in 1-2 tsp sriracha or 1 tsp gochujang after cooling. This adds heat while balancing the caramelized garlic.
Can I freeze this sauce?
It’s not ideal as it may separate, but if needed, freeze for up to 3 months. Stir well after thawing.

- 6 Egg Cake Recipe with Oil: Light as Air With Buttery Moisture - October 4, 2026
- 4 Bean Casserole Recipe: One-Pan Heartiness With Smoky Paprika Depth - October 4, 2026
- 3-Ingredient Keto Mug Cake Recipe: Microwave Magic in 2 Minutes - October 4, 2026