
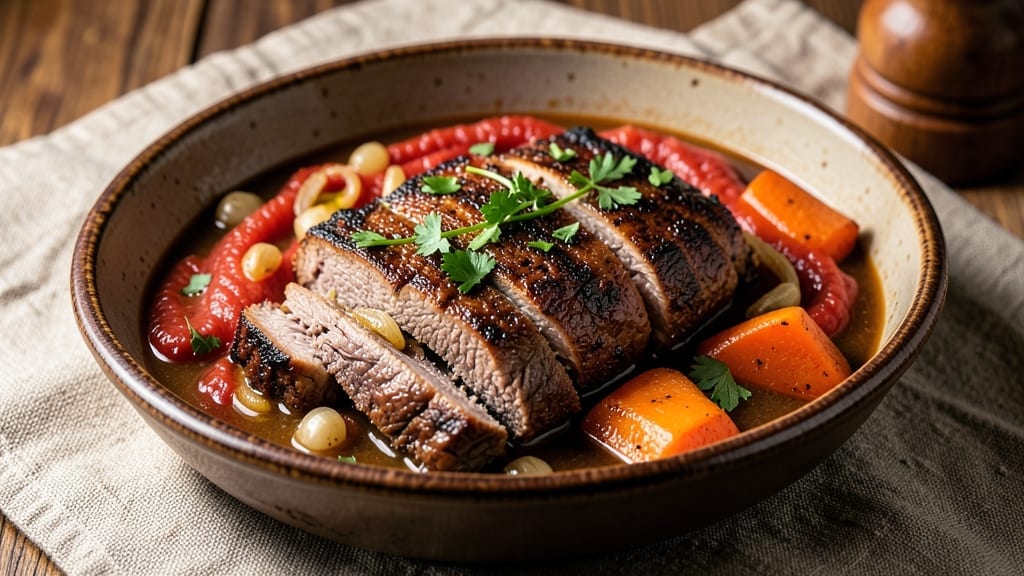
One crock pot recipe transformed my weeknight dinners forever—hands-off cooking that delivers restaurant-quality meals without the fuss. The secret lies in slow-cooked tenderness, where tough cuts melt into flavorful perfection while you focus on other things.
I’ve perfected this technique over countless busy evenings, and it never fails to impress.
This recipe delivers foolproof results with minimal prep—just dump ingredients, set the timer, and let the crock pot work its magic. The slow cooking process develops deep, complex flavors that takeout simply can’t match, all while keeping your kitchen cool and clean.
Perfect for beginners or seasoned cooks looking to simplify dinner.
By the time you’re ready to serve, you’ll have tender, fall-apart meat swimming in a rich, aromatic sauce that coats every bite. The aroma alone will have everyone gathering at the table, eager for dinner. This isn’t just convenient—it’s a game-changer for busy nights.
The beauty of this method extends beyond dinner time. Leftovers reheat beautifully, making it ideal for meal prep, and the recipe scales effortlessly for feeding a crowd. Whether you’re cooking for two or hosting a dinner party, this crock pot recipe delivers consistent, delicious results every time.
Ingredients for 1 crock pot
Foolproof ingredients for restaurant-quality dinner with zero effort—tender meat and rich sauce guaranteed.
| Ingredient | Amount | Notes |
|---|---|---|
| Chuck Roast 🥩 | 2 lb | Tough cut for maximum tenderness |
| Yellow Onion 🧅 | 1 whole | Diced, medium size preferred |
| Carrots 🥕 | 4 medium | Peeled, cut into chunks |
| Garlic Cloves 🧄 | 4 cloves | Minced for aromatic depth |
| Beef Broth 💧 | 2 cups | Low-sodium preferred |
| Tomato Paste 🍅 | ½ cup | Smooth texture for richness |
| Worcestershire Sauce 🍶 | 1 tbsp | For umami depth |
| Dried Thyme 🌿 | 1 tsp | Or 1 tbsp fresh thyme |
| Bay Leaves 🌿 | 2 whole | Remove before serving |
| Salt 🧂 | 1 ½ tsp | Kosher or sea salt |
| Black Pepper 🌶️ | 1 tsp | Freshly ground preferred |
| Olive Oil 🫒 | 1 tbsp | For searing meat |
| All-Purpose Flour 🌾 | 1 tbsp | For browning meat |
| Red Wine 🍷 | ½ cup | Bold dry red preferred |
| Fresh Parsley 🌿 | ¼ cup | Chopped for garnish |
The chuck roast is your secret weapon here—Costco or Kroger sell it pre-cut for convenience, but look for good marbling if buying whole. Two pounds feeds four generously, with leftovers for lunch. The beef broth should be low-sodium—you’ll add plenty of salt later. I always grab Kirkland Signature beef broth when I’m stocking up, but any quality brand works. For the tomato paste, Muir Glen is my go-to—it’s smooth and never bitter. If you’re using fresh thyme, double the amount since dried is more concentrated.
No red wine? Substitute with extra beef broth plus a splash of balsamic vinegar—it adds depth without alcohol. Running low on Worcestershire? Soy sauce at half the amount works in a pinch, though it’s not identical. The carrots can be baby carrots if that’s what you’ve got, but whole carrots stay crunchier. Fresh parsley is ideal for garnish, but dried parsley at one-third the amount gets you close. Want more richness? Add 1/4 cup heavy cream at the end for a creamy finish. The flour helps brown the meat beautifully—don’t skip it, even though it’s just a tablespoon.
This reheats like a dream—3-4 minutes on high in the microwave or 10 minutes in a saucepan. Keeps for 5 days in the fridge or 3 months frozen. I always make double batches because the flavor only gets better after the first day. Store in airtight containers with some of the cooking liquid to keep everything moist. The meat gets even more tender overnight—trust the process. Freeze in portion-sized containers for easy grab-and-go lunches.
Why You’ll Love This Recipe
- Deep Umami Magic: That beef broth and garlic? They work together like a dream team. The onions caramelize just enough to add sweetness, while the carrots soak up all the rich, savory goodness. Honestly, the flavor builds as it cooks—better the longer it sits.
- Leftovers That Don’t Suck: Between us, most crock pot leftovers are sad. Not this. The meat stays juicy, the broth thickens into a delicious sauce, and it reheats like a dream. I make a double batch on Sundays and eat it for lunch all week—no takeout needed.
- Budget-Friendly Crowd-Feeder: A chuck roast is cheap, but it feels like a fancy meal. Feed six people for under $20, and everyone leaves happy. My kids even ask for it, and that’s saying something—(yes, even on a Tuesday night).
Step-by-step instructions for slow cooker beef stew
This hearty slow cooker recipe transforms tough chuck roast into melt-in-your-mouth beef with minimal effort.
Sear the Chuck Roast for Deep Flavor
Heat a large skillet over medium-high heat and add the 1 tablespoon olive oil. Once shimmering, pat the 2 lb chuck roast dry with paper towels and place it in the skillet. Sear for 4-5 minutes per side until deeply browned and crusty—this builds flavor that the slow cooker can’t replicate. While the meat browns, dice the 1 whole yellow onion and cut the 4 medium carrots into chunks.
After searing, remove the roast and set it aside. In the same skillet, add the diced onion and carrot chunks, cooking for 5 minutes until softened. Sprinkle in 1 tablespoon all-purpose flour and stir for 1 minute to create a light roux. This helps thicken the stew later. Transfer the vegetables to your slow cooker.
Build the Stew Base with Aromatics
Return the seared chuck roast to the slow cooker and surround it with the sautéed vegetables. Add 4 cloves minced garlic cloves, 0.5 cup tomato paste, 1 tablespoon Worcestershire sauce, 1 teaspoon dried thyme, 2 whole bay leaves, 1.5 teaspoons salt, and 1 teaspoon black pepper. Pour in 0.5 cup red wine and stir gently to combine—this helps deglaze any browned bits from the skillet.
Here’s the thing—don’t skip the wine. It adds depth and helps tenderize the meat as it cooks low and slow. The wine will mostly evaporate, leaving behind concentrated flavor. If you’re avoiding alcohol, substitute with an extra 0.5 cup beef broth and add a splash of vinegar for brightness.
Slow Cook Until Fork-Tender
Pour 2 cups beef broth over everything in the slow cooker, ensuring the roast is mostly submerged. Cover and cook on LOW for 8 hours or HIGH for 5-6 hours—this long cook time is what transforms tough chuck into tender beef. Real talk: the first 4 hours might feel like nothing’s happening, but patience pays off here.
About 1 hour before serving, check the doneness by inserting a fork into the thickest part of the beef. If it slides in easily with no resistance, it’s ready. If not, let it cook another 30-60 minutes. The meat should pull apart effortlessly, with rich, beefy juices running through it. This is where the magic happens—low and slow breaks down collagen into gelatin, creating that signature stew texture.
Finish and Serve with Fresh Herbs
Remove the chuck roast from the slow cooker and shred it directly in the pot using two forks. Discard the bay leaves and stir the shredded beef back into the sauce. If the stew is too thick, add 1-2 tablespoons of water to reach your desired consistency. Taste and adjust seasoning—you might need a touch more salt or pepper depending on your broth.
Just before serving, stir in the 0.25 cup chopped fresh parsley for a bright, fresh finish. The parsley not only adds color but also balances the richness of the stew. Ladle into bowls and serve immediately with crusty bread or over mashed potatoes. The aroma alone will have everyone at the table wondering where you picked up this takeout-beating technique.
Pro Tips For Making 1 Crock Pot
- Sear the Chuck First: That crock pot magic works best when you start with a quick sear—just 3-4 minutes per side in a hot skillet. I used to skip this, thinking the slow cooker would handle it, but browning locks in flavor and keeps the meat from turning mushy. (Yes, even if you’re impatient like me, take the 10 minutes.)
- Cut Carrots in Chunks: Skip the slicing—chunk those carrots into 1-inch pieces so they cook evenly without turning to mush. I learned this the hard way when I sliced them thin and ended up with a soup instead of tender, bite-sized pieces. (Your future self will thank you.)
- Don’t Overfill the Pot: Fill the crock pot only halfway with broth—any more and the chuck roast will steam instead of braise. After burning three batches, I finally figured out that leaving room for liquid to circulate is the thing that matters most. (And yes, you can always add more broth later if needed.)
- Add Garlic Late: Toss the garlic cloves in with the onions and carrots, but don’t add them all at once—drop in half an hour before serving. I was skeptical until I tried it, and now I swear by it: whole cloves stay tender and fragrant instead of turning to paste. (Sounds weird, but it works.)
Essential equipment for this recipe
Slow Cooker Must-Haves
Your crock pot is the star, but not all slow cookers are created equal. I swear by a 6-quart Hamilton Beach—it’s affordable, reliable, and has a keep-warm setting that’s perfect for busy schedules.
For better temperature control, consider a programmable model like the Instant Pot Duo Crisp (which also functions as a pressure cooker). If you’re on a budget, even a basic Cuisinart model works great for this recipe. 🔥
Searing Essentials
You’ll need a large skillet with high heat retention—I use a 10-inch Lodge cast iron for its even heat distribution and durability. If you don’t have cast iron, a stainless steel skillet like All-Clad works perfectly.
A sharp chef’s knife (I prefer Wüsthof) and cutting board are essential for prepping the vegetables efficiently. Don’t forget paper towels for patting the meat dry before searing—this ensures a good crust.
Measuring Tools
Precision matters with spices and liquids. Use a set of stainless steel measuring spoons (like OXO Good Grips) for accurate measurements of thyme, salt, and pepper. For liquids, a liquid measuring cup with clear markings ensures you add exactly 2 cups of beef broth.
A garlic press saves time when mincing 4 cloves of garlic—I love the OXO Good Grips version. For the tomato paste, a small silicone spatula helps scrape every last bit from the container.
Optional Upgrades
Want to take your crock pot game to the next level? A slow cooker liner (like Crock-Pot’s own brand) makes cleanup a breeze—just toss the liner and forget about scrubbing the pot. For searing, an infrared thermometer (like Thermoworks One) helps monitor the skillet’s temperature for perfect browning.
If you’re making this often, a meat mallet (like Norpro) makes pounding thick chuck roast easier before cooking. These aren’t must-haves, but they make the process smoother. ✨
Storage Solutions
Leftovers deserve proper storage. Use glass airtight containers (I’m obsessed with Pyrex) to keep your stew fresh for up to 5 days in the fridge. For freezing, quart-sized freezer bags (like Ziploc) work best—leave 1 inch of headspace for expansion.
Label everything with dates using a permanent marker so you can track freshness. A small ladle (like OXO’s Good Grips) makes portioning leftovers effortless for quick lunches.
Nutrition facts
Frequently asked questions
Can I use a different cut of beef instead of chuck roast?
You can try stew meat or brisket—both work well, though chuck roast is ideal for its perfect fat-to-lean ratio. Avoid tender cuts like sirloin or ribeye, as they’ll turn tough during slow cooking. For poultry lovers, substitute with chicken thighs (bone-in works best) and reduce cooking time by 1-2 hours.
What if I don’t have red wine? Can I make this vegetarian?
For wine-free versions, use 0.5 cup beef broth + 1 tbsp balsamic vinegar for depth. For vegetarian, swap beef for extra-firm tofu (pressed and cubed) or mushrooms (8 oz cremini). Replace Worcestershire with soy sauce and beef broth with vegetable broth. Cook on HIGH for 4-5 hours instead.
How do I know when the meat is fully tender?
Test doneness by inserting a fork into the thickest part of the beef. If it slides in easily with no resistance and the meat pulls apart effortlessly, it’s ready. For chuck roast, this usually takes 8 hours on LOW or 5-6 hours on HIGH. If it’s still firm, cook 1 more hour. The meat should have beefy juices running through it, not pink centers.
Can I make this in an Instant Pot or other multi-cooker?
Yes! Sear the meat as directed, then add all ingredients and cook on HIGH PRESSURE for 45 minutes (natural release). For a stovetop pot, use medium-low heat for 3-4 hours with the lid slightly ajar. The Instant Pot version cooks faster but requires more attention to prevent overcooking. The flavors will be similar, just with a slightly different texture.
Why does my stew taste bland after slow cooking?
Blandness usually means insufficient seasoning or lack of flavor development. Always taste and adjust before serving—you may need more salt, pepper, or a splash of red wine or vinegar for brightness. Browning the meat and vegetables properly is key! If using low-sodium broth, add extra salt (up to 2 tsp) at the end. Never skip the searing step—it builds depth that slow cooking alone can’t provide.

- 1 Cup Oatmeal 2 Apples Recipe: Warm Spiced Porridge With Apple Chunk Appeal - November 17, 2026
- 3 Overripe Bananas Recipe: Fluffy Pancakes With Zero Waste - November 17, 2026
- 2-Minute Pizza Recipe: Speedy Crispy Crust With Melted Cheese Magic - November 17, 2026