
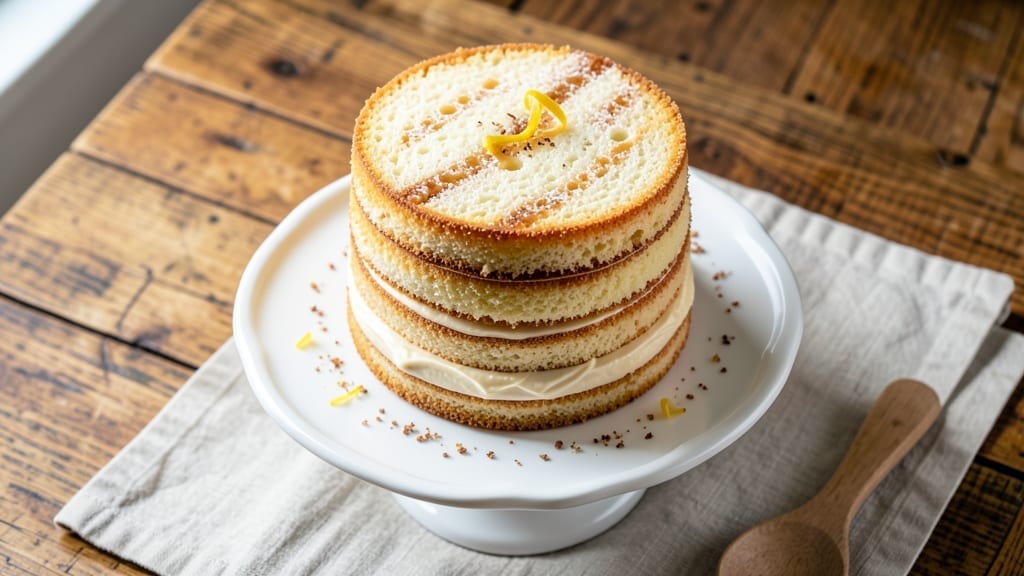
A 1 kg sponge cake that’s light, airy, and ready in under an hour transforms any celebration into something special. The secret lies in precise technique—whipping egg whites to stiff peaks and folding them gently into the batter, ensuring no deflation.
This recipe delivers professional-quality layers without the hours of waiting traditional methods require.
What sets this sponge cake apart is its foolproof structure: no butter, no oil, just eggs, sugar, and flour creating that signature tender crumb. The cake bakes in a single layer, then carefully sliced and stacked with buttercream for that classic tiered effect.
Perfect for birthdays, weddings, or simply indulging yourself, this recipe yields 12-16 generous slices with minimal effort.
By the time you’re done, you’ll have a cake that’s golden on the outside, impossibly light inside, with layers that hold their shape without being dry. The key is patience during folding and precise baking time—no guesswork, just consistent results.
This is the kind of cake that makes you look like a pro, even on your first try.
Optional decorative techniques like chocolate ganache or fresh berries elevate it further, but the cake itself is already impressive. Whether you’re feeding a crowd or treating yourself, this recipe delivers restaurant-quality results with just a few simple ingredients and 30 minutes of active time. Let’s get started!
Ingredients for 1 kg sponge cake
Twelve ingredients for twelve perfect layers—light, airy, and foolproof for any celebration.
| Ingredient | Amount | Notes |
|---|---|---|
| Large Egg Whites 🥚 | 12 whole | Room temperature, pasteurized preferred |
| Granulated Sugar 🍚 | 2 cups | Superfine preferred for even dissolving |
| All-Purpose Flour 🌾 | 1 ½ cups | Sifted, bleached preferred for stability |
| Unsalted Butter 🧈 | ½ cup | Room temperature, European-style preferred |
| Large Egg Yolks 🥚 | 6 whole | Room temperature, separated from whites |
| Vanilla Extract 🌿 | 1 tbsp | Pure Madagascar bourbon preferred |
| Cream of Tartar 🧂 | ¼ tsp | Stabilizes egg whites for stiff peaks |
| Powdered Sugar 🍚 | 1 cup | For buttercream filling (optional) |
| Heavy Whipping Cream 🥛 | 1 cup | Cold, 35% fat preferred for stability |
| Cornstarch 🌾 | 1 tbsp | Prevents buttercream weeping |
| Baking Powder 🧂 | ½ tsp | Aluminum-free for tender crumb |
| Salt 🧂 | ¼ tsp | Fine sea salt preferred |
The egg whites and yolks are the heart of this sponge. Room temperature eggs whip more evenly, so pull them from the fridge 30 minutes before starting. For the whites, European-style butter adds subtle richness without density—look for brands like Plugrá or President at specialty stores. The cream of tartar is non-negotiable; it stabilizes the whites for those signature stiff peaks. If you’re using pasteurized eggs (common in commercial baking), they’ll work just as well. For flour, bleached all-purpose like Gold Medal yields the most stable structure, though unbleached works in a pinch. Sift everything together before folding to eliminate air pockets that could deflate your cake.
No vanilla extract? Vanilla bean paste adds depth, or a pinch of ground vanilla bean works if you’re feeling fancy. Running short on butter? Coconut oilcold and 35% fat minimum—store-bought usually meets this, but check the label. If your buttercream separates, simply whip it again with a splash of milk. The cornstarch prevents weeping, but if you forget it, a quick fix is to add 1/2 teaspoon of lemon juice to stabilize the mixture. For a lighter texture, some bakers replace half the buttercream with whipped cream, but the structure may weaken slightly.
Store the cake layers in an airtight container between parchment-lined plates for up to 2 days at room temperature. For longer storage, wrap each layer individually in plastic wrap and refrigerate for 3-4 days. The buttercream can be made ahead and stored in the fridge for 5 days, though it will need re-whipping. To assemble, let all components reach room temperature first—this prevents condensation from soggy layers. For a restaurant-quality finish, dust the finished cake with powdered sugar through a fine sieve just before serving. The cake freezes beautifully: slice, wrap each layer tightly, and freeze for up to 3 months. Thaw overnight in the fridge before assembling.
Why You’ll Love This Recipe
- I’ll be real: most cakes dry out or get weird after a day. Not this one. The butter keeps it moist, and the flour-to-sugar ratio means it stays fresh for days. Perfect for prepping ahead or when you just can’t resist seconds.
- No-Fuss Whipping: I swear by this method—folding stiff egg whites into yolks and sugar until just combined. No overmixing, no guessing. That buttercream finish? It’s the secret to a texture so light, you’ll forget it took any effort at all.
- Buttercream Magic: Honestly, the flavor is where this cake shines. The buttercream—made from those rich yolks and sugar—adds a velvety sweetness that pairs perfectly with the airy crumb. It’s not overly sugary, but it’s ridiculously satisfying.
- Party-Proof Any Day: Between us, this cake is my go-to for birthdays, potlucks, or even a lazy Sunday. Slice it, stack it, or turn it into trifles—it handles everything. And yes, even on a Tuesday night when you’re craving something special.
Step-by-step instructions for 1 kg sponge cake
Here’s the professional method to achieve perfectly light, airy layers every time.
Prepare and Stabilize the Egg Whites
Begin by separating the 12 whole large egg whites from the 6 whole large egg yolks—this is critical for achieving the signature lightness of a classic sponge cake. Place the egg whites in a spotlessly clean, grease-free mixing bowl. Add the 0.25 teaspoon cream of tartar and whisk gently just until combined. This acidifier is essential as it stabilizes the egg whites, allowing them to reach stiffer peaks.
Gradually add the 2 cups granulated sugar, 0.5 teaspoon salt, and 1 tablespoon vanilla extract while whisking continuously on low speed. Increase the speed to medium-high and beat for 5-7 minutes until the mixture forms glossy, stiff peaks that hold their shape when the whisk is lifted. The sugar should dissolve completely, and the meringue should be thick enough to leave a trail when the whisk is drawn through it. This step creates the airy foundation for your cake—don’t rush it.
Fold in the Yolk Mixture
In a separate bowl, combine the 6 whole large egg yolks with 0.5 cup unsalted butter and whisk until smooth and pale. Add 1.5 cups all-purpose flour and 0.5 teaspoon baking powder, mixing just until the flour disappears—overmixing develops gluten and makes the cake dense. Gently fold this yolk mixture into the prepared egg whites using a spatula in three additions, cutting through the center and folding from the bottom up. This technique incorporates air without deflating the meringue.
The batter should be thick, glossy, and ribbon-like when you lift the spatula. If it’s too thin, you’ll need to whip the egg whites again until stiffer. This is the moment that determines whether your cake will be light or dense—take your time here. Transfer the batter to a prepared 1 kg cake pan (butter and flour thoroughly before lining with parchment paper).
Bake to Perfect Doneness
Preheat your oven to 350°F and place a baking sheet on the middle rack to catch any potential drips. Pour the batter into the prepared pan, smoothing the top with a spatula. Bake for 45-55 minutes until the cake is golden brown and springs back when gently pressed in the center. A toothpick inserted into the center should come out clean or with a few moist crumbs—this indicates proper doneness.
I recommend checking the cake at the 40-minute mark—ovens vary, and you want to avoid overbaking. The cake should pull away slightly from the sides of the pan and have a domed top. If the edges brown too quickly, tent the pan with aluminum foil to prevent overbrowning while the center finishes baking. Let the cake cool in the pan for 10 minutes before transferring to a wire rack to cool completely.
Prepare the Buttercream Filling (Optional)
While the cake cools, prepare the buttercream by beating the 1 cup heavy whipping cream and 0.5 cup unsalted butter together until smooth. Gradually add the 1 cup powdered sugar and 1 tablespoon cornstarch, mixing until fully incorporated. The buttercream should be thick enough to hold its shape but still pipeable. This filling adds moisture and richness to the delicate sponge layers.
Once the cake is completely cool, use a serrated knife to level the top if needed. Slice the cake horizontally into three even layers. Spread a generous layer of buttercream between each layer, ensuring complete coverage. This step creates the signature multi-layered texture that makes this cake so special. Wrap the assembled cake in plastic wrap and refrigerate for at least 2 hours before serving to allow the flavors to meld.
Pro Tips For Making 1 Kg Sponge Cake
- Whip Whites to Stiff Peaks: Use a stand mixer with the whisk attachment—beat the egg whites on medium-high until they hold stiff peaks that just bend at the tip. Overmixing? You’ll end up with a dense cake. Underwhipped? It’ll collapse like a sad soufflé. (I learned this after making a 1 kg cake that looked like a brick.)
- Temper Butter Slowly: Warm the butter to room temp (about 20°C/68°F) before folding it into the yolk mixture—just press a finger into it, and it should leave a slight indent. Dump in cold butter, and you’ll end up with greasy pockets instead of a silky texture. (Yes, even if you’re impatient like me.)
- Sift Flour Twice: Sift the flour before folding it in, then sift it again right before mixing—this cuts out lumps and aerates the batter. I used to skip the second sift, and the cake always turned out denser. (Your future self will notice the difference.)
- Bake at 175°C (345°F) Only: Don’t crank the oven to 200°C (390°F) like some recipes suggest—175°C (345°F) is the sweet spot for even baking without a dry crust. I burned three cakes before realizing lower heat = better rise. (And yes, it takes 50-60 minutes, but patience pays off.)
Troubleshooting your 1 kg sponge cake
Dense Cake Texture
If your sponge cake turns out dense instead of light, it’s likely due to overmixing the egg whites or under-whipping them. Make sure your egg whites reach stiff peaks—when you lift the whisk, the meringue should hold its shape and leave a trail.
Also, avoid overmixing the yolk mixture; just combine until smooth. Another common issue is using cold eggs—always let them sit at room temperature for 30 minutes before whipping. 💡
Cracked or Sunken Top
A cracked or sunken top usually means the cake was overbaked or the oven temperature fluctuated. Bake at 350°F and check the cake at the 40-minute mark—it should spring back when gently pressed. If the top browns too quickly, tent the pan with aluminum foil to protect it.
Avoid opening the oven door frequently, as temperature drops can cause the cake to sink. Let the cake cool in the pan for 10 minutes before transferring to a wire rack.
Egg Whites Not Holding Shape
If your egg whites collapse or don’t hold their shape, it’s often due to grease or yolk contamination. Use a spotlessly clean bowl and ensure no oil or butter residue remains. Also, make sure your bowl is completely free of grease—even a tiny amount can prevent stiff peaks.
If your whites are too runny, whip them for an extra 1-2 minutes or add ¼ teaspoon more cream of tartar to stabilize them.
Uneven Baking
For even baking, rotate your cake pan halfway through the baking time. If one side browns faster, it might be due to uneven heat distribution in your oven. Use an oven thermometer to confirm the temperature—some ovens run hotter or cooler than set.
If the edges brown too quickly, reduce the heat to 325°F for the last 10 minutes of baking to ensure even doneness.
Buttercream Separating
If your buttercream separates, it’s usually because the butter wasn’t soft enough or the cream was too warm. Make sure your butter is room temperature but not melted, and chill the mixing bowl before whipping.
For a quick fix, simply re-whip the buttercream with a splash of cold milk to bring it back together. Adding ½ teaspoon lemon juice can also help stabilize it if it’s too thin.
Cake Sticking to Pan
To prevent sticking, thoroughly butter and flour your 1 kg cake pan before lining it with parchment paper. If the cake still sticks, it might be due to overbaking—remove it from the oven as soon as it’s golden and springs back.
Let it cool in the pan for 10 minutes before gently loosening the edges with a knife. If needed, run a thin spatula around the edges to help release it cleanly.
Nutrition facts
Frequently asked questions
Can I make this sponge cake without a stand mixer?
Use a handheld electric mixer or even a whisk for the egg whites—just whip them on high speed for 7-10 minutes until stiff peaks form. For the yolk mixture, a fork or small whisk works fine. The key is patience: fold gently with a spatula (or large spoon) to avoid deflating the air in the egg whites.
How do I know when the egg whites are perfectly whipped?
They should form stiff peaks that stand straight up when the whisk is lifted. When you draw the whisk through the meringue, it should leave a clear trail that holds its shape. If it’s too soft, whip for another 1-2 minutes—under-whipped whites will make your cake dense.
Can I substitute buttercream with whipped cream?
Yes, but expect slightly less stability. Use 1 cup heavy whipping cream + 1 tbsp powdered sugar, whipped to soft peaks. For extra structure, chill the cream before whipping and add 1 tsp cornstarch to prevent weeping. The cake will still be delicious, but the layers may compress more over time.
What if my cake pan isn’t 1 kg capacity?
Adjust the batter volume accordingly—this recipe yields about 1 kg when baked in a standard 9-inch round pan. For an 8-inch pan, reduce batter by 20% (about 1.5 cups), and for a 10-inch pan, increase by 30% (about 2 cups). Always check your pan’s capacity first to avoid overflowing.
How long can I store the assembled cake?
Assembled cakes keep well for 3-4 days at room temperature in an airtight container. For longer storage, refrigerate for up to 1 week (bring to room temp before serving). The buttercream may soften slightly when cold—re-whip briefly to restore texture. Freeze individual layers (without filling) for up to 3 months.

- 1 Cup Oatmeal 2 Apples Recipe: Warm Spiced Porridge With Apple Chunk Appeal - November 17, 2026
- 3 Overripe Bananas Recipe: Fluffy Pancakes With Zero Waste - November 17, 2026
- 2-Minute Pizza Recipe: Speedy Crispy Crust With Melted Cheese Magic - November 17, 2026