
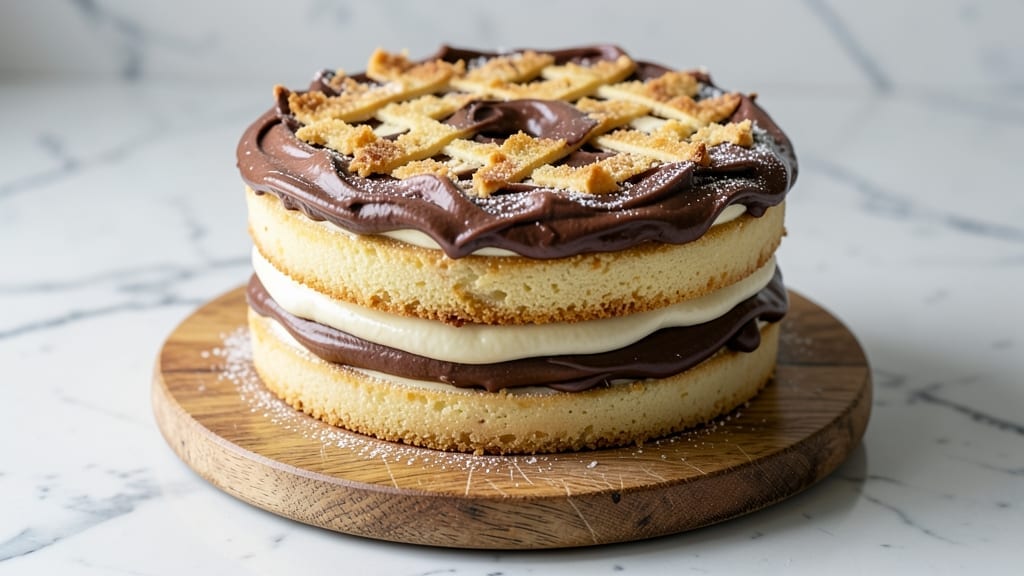
An 11×15 sheet cake transforms any celebration into a showstopper—whether it’s a birthday, wedding, or office party. 🎉 This triple-layered vanilla cake delivers light, fluffy layers with buttery, melt-in-your-mouth frosting that’s easier to assemble than you’d think.
The secret lies in precise layering and a foolproof buttercream that stays smooth and stable, even under piping pressure.
What sets this recipe apart is its versatility—use it for sheet cakes, trifles, or even layered cupcakes.
The vanilla sponge cake bakes up tender yet sturdy enough to hold three generous layers, while the buttercream (made with just 4 ingredients) develops a silky texture that’s perfect for swirls, borders, or clean edges. No stand mixer required—just a hand mixer and patience.
By the time you’re done, you’ll have a showcase-worthy dessert that’s as impressive as it is delicious. The cake’s golden layers contrast beautifully with the creamy frosting, and the clean, professional finish makes it look like you spent hours decorating.
Best of all? It keeps well for days, so you can bake ahead and enjoy stress-free serving.
Ready to bake? This recipe breaks down into simple steps—from mixing the batter to frosting like a pro. Whether you’re a beginner or a seasoned baker, the techniques here ensure restaurant-quality results without the fuss. Let’s get started!
Ingredients for 11×15 cake
Fourteen ingredients transform your kitchen into a bakery—light, fluffy layers and velvety frosting await.
| Ingredient | Amount | Notes |
|---|---|---|
| All-Purpose Flour 🌾 | 3 ½ cups | Sifted for light texture (spooned & leveled) |
| Granulated Sugar 🍚 | 2 ¼ cups | Divided for batter & buttercream |
| Unsalted Butter 🧈 | 1 ¾ cups | Room temperature, full-fat preferred |
| Large Eggs 🥚 | 6 whole | Room temperature for even mixing |
| Vanilla Extract 🌿 | 2 tsp | Pure, high-quality extract (not imitation) |
| Baking Powder 🧂 | 1 ½ tsp | Diamond Crystal brand preferred |
| Salt 🧂 | ½ tsp | Fine sea salt for balance |
| Milk 🥛 | 1 cup | Whole milk for richness |
| Powdered Sugar 🍚 | 4 cups | Sifted for smooth buttercream |
| Heavy Whipping Cream 🥛 | 1 cup | Cold for stable buttercream |
| Vanilla Bean Paste 🌿 | 1 tbsp | Or 1 tsp pure extract (optional) |
| Lemon Zest 🍋 | 1 tsp | Brightens the buttercream |
| Unsweetened Cocoa Powder 🍫 | ¼ cup | For optional chocolate drizzle |
| White Chocolate Chips 🍫 | ½ cup | For decorative accents |
The flour and butter are your cake’s foundation. King Arthur or Gold Medal flour gives the best rise, but any all-purpose works in a pinch. Butter should be room temperature but not greasy—press a thumbprint into it; if it springs back, it’s ready. Eggs? Freshness matters—whisk them until frothy for maximum volume. I always buy organic eggs from the grocery store’s refrigerated section, but store-bought works fine. For the vanilla, Madagascar bourbon vanilla adds depth, but pure extract is perfect if you’re on a budget. Sift your dry ingredients together first—this prevents lumps and ensures even baking.
No powdered sugar? Confectioners’ sugar from the store works, but sifting is non-negotiable. Short on heavy cream? Substitute with 3/4 cup whipping cream + 1/4 cup milk, but chill it first. The lemon zest can be skipped if you’re not a fan, but it’s what makes this buttercream truly special. For the cocoa powder, Hershey’s Special Dark is my go-to, but any natural brand works. White chocolate chips? Trader Joe’s or Ghirardelli melt beautifully for drizzling. Pro tip: zest your lemon right before using—it loses potency fast. And if you’re making this ahead, store the dry ingredients in airtight containers for up to 3 months.
This cake keeps beautifully—3 days at room temperature covered, 5 days refrigerated, or 3 months frozen. For freezing, wrap each layer individually in plastic wrap, then place in a freezer bag. Buttercream? Store in an airtight container with parchment between layers to prevent sticking. Thaw in the fridge overnight before assembling. The secret to restaurant-quality results? Let the cake cool completely between layers—this prevents sogginess. And if you’re nervous about piping, practice on parchment first—it’s easier than it looks!
Why You’ll Love This Recipe
- No Mixer Needed: I swear by this one—just cream butter and sugar until light, then fold in eggs and vanilla like you’re making a snow angel. The flour’s measured right, so no guessing, and the batter’s so smooth it practically mixes itself.
- Vanilla Butter Bliss: That first bite? Rich, buttery layers with vanilla so deep it feels like a hug. The sugar caramelizes just enough to give it this subtle, melt-in-your-mouth sweetness—no artificial flavors, just pure comfort.
- Party or Snack: Bake it once, slice it forever. Too big for a gathering? No problem—it keeps beautifully for days. Too small for a crowd? Perfect for a lazy Sunday with coffee. My go-to for birthdays, potlucks, or just because.
- Pantry Goldmine: You already have everything. Butter, sugar, flour, eggs—basic stuff that doesn’t break the bank. And honestly? The leftovers are even better the next day, especially when you reheat a slice with a little extra butter.
Step-by-step instructions for triple-layered vanilla sheet cake
Here’s how to create a showstopping 11×15 sheet cake with perfect layers and velvety buttercream.
👨🍳 Step 1: Prepare the Cake Batter for Lightness
Preheat your oven to 350°F and line three 11×15-inch sheet pans with parchment paper. In a large mixing bowl, whisk together the 3.5 cups all-purpose flour, 1.5 tsp baking powder, and 0.5 tsp salt. Sift the mixture to aerate the flour and eliminate lumps—this ensures a tender crumb.
In a separate large bowl, beat the 1.75 cups unsalted butter and 1.25 cups granulated sugar (from the total 2.25 cups) on medium speed until light and fluffy, about 3-4 minutes. This creaming process incorporates air, creating that signature cake texture. Add the 6 whole eggs, one at a time, mixing well after each addition, then stir in the 2 tsp vanilla extract.
With the mixer on low speed, alternately add the 1 cup milk and the flour mixture to the butter-sugar mixture, beginning and ending with the flour. Mix just until combined—overmixing develops gluten and makes the cake tough. Divide the batter evenly among the prepared pans.
🔥 Step 2: Bake the Layers to Perfect Doneness
Bake the cakes for 18-22 minutes until a toothpick inserted in the center comes out clean. The edges should be golden brown, but the tops should remain slightly springy to the touch. Rotate the pans halfway through baking for even cooking.
I’ve found that sheet cakes often bake faster than expected, so start checking at the 15-minute mark. If the tops brown too quickly, loosely tent the pans with aluminum foil. Let the cakes cool in the pans for 10 minutes, then transfer to a wire rack to cool completely before assembling.
🥘 Step 3: Create the Ultimate Vanilla Buttercream
In a stand mixer fitted with the paddle attachment, beat the remaining 1 cup granulated sugar and the 1.75 cups unsalted butter on medium speed until light and fluffy, about 3-4 minutes. Add the 1 cup heavy whipping cream, 1 tbsp vanilla bean paste, and 1 tsp lemon zest, mixing until fully incorporated.
Gradually add the 4 cups powdered sugar, sifted, mixing on low speed to avoid a sugar cloud. Increase the speed to medium and beat for another 3-4 minutes until smooth and fluffy. The buttercream should be thick enough to hold peaks but still spreadable. If it’s too thick, add 1-2 tablespoons milk to loosen it.
🎂 Step 4: Assemble and Decorate the Cake
Place one cake layer on a serving tray lined with parchment paper. Spread about 1 cup buttercream evenly over the top, leaving a ½-inch border for the sides. Repeat with the second layer, then the third. For the sides, spread buttercream evenly, using an offset spatula to create smooth, even layers.
For decoration, melt the 0.5 cup white chocolate chips in a double boiler or microwave, then drizzle over the cake in zigzag patterns. Dust the top with the remaining 0.25 cup unsweetened cocoa powder for a beautiful contrast. Chill the cake in the refrigerator for 30 minutes before slicing to help the buttercream set.
Pro Tips For Making 11×15 Cake
- Cream Butter Properly: Beat the butter and sugar until it’s light and fluffy—think ribbons, not crumbs. I used to rush this, and the cake turned out dense. Take the extra 2-3 minutes; it’s the foundation for that tender crumb.
- Sift That Flour: Sift the flour before mixing—yes, even if the recipe doesn’t say it. It aerates the batter and prevents lumps, which means a smoother texture. (I know, I know, but trust me on this one.)
- Room-Temp Eggs Matter: Let your eggs sit out for 30 minutes before cracking them into the batter. Cold eggs can make the butter seize up, and you’ll end up with a weird, grainy mix. No one wants that.
- Don’t Overbake the Edges: Pull the cake out when the center still has a slight wobble—about 3-5 minutes before the recipe’s suggested time. Overbaking dries out the edges while the middle stays underdone. A toothpick with a few moist crumbs is perfect.
Make-ahead tips for 11×15 cake
Batter Prep Ahead
Mix your cake batter up to 24 hours in advance and store it in an airtight container in the fridge. The flavors meld beautifully overnight, and the batter will be perfectly room temperature when you’re ready to bake.
Just let it sit at room temperature for 30 minutes before dividing into pans for even baking. 💫
Layered Cake Storage
Assemble your cake layers with buttercream but skip the final decorations if baking ahead. Wrap each fully assembled layer in plastic wrap and store them stacked in an airtight container in the fridge for up to 2 days.
When ready to serve, simply add the decorations and let it sit at room temperature for 1 hour before slicing.
Buttercream Prep
Make your buttercream 1 day ahead and store it in an airtight container at room temperature. Before using, let it sit at room temperature for 30 minutes to soften slightly—this makes it easier to spread.
If it hardens in the fridge, let it sit at room temperature for 10-15 minutes to soften before using. 🥛
Freezing Layers
For longer storage, freeze your baked cake layers individually in plastic wrap for up to 3 months. Thaw them in the fridge overnight before assembling. Never freeze the buttercream—it becomes grainy when thawed. To save time, make the buttercream fresh the day you assemble the cake.
Decorating Shortcuts
Pre-melt your white chocolate chips and store them in a small airtight container in the fridge. This way, you can quickly reheat them in the microwave for 10 seconds when ready to drizzle.
For cocoa powder dusting, sift it into a small bowl and store it in a resealable bag to keep it fresh for up to 1 month. 🎂
Nutrition facts
Frequently asked questions
Can I bake this 11×15 cake in a 9×13-inch pan instead?
Yes, but you’ll need to adjust the baking time and layer thickness. Use the same batter quantity but divide it into two 9×13-inch pans instead of three. Bake for 25-30 minutes at 350°F and let the layers cool completely before stacking. The cake will be slightly taller, so reduce the buttercream between layers to ½ cup per layer instead of 1 cup.
Why does my buttercream look grainy?
Grainy buttercream usually means the powdered sugar wasn’t sifted or the butter wasn’t softened enough. Always sift the powdered sugar and ensure your butter is room temperature but not melted. Beat the mixture on medium-high speed for 5-6 minutes total—this helps dissolve any sugar crystals and creates a silky texture.
How do I prevent my cake layers from crumbling when frosting?
Let the cake layers cool completely before assembling—even slightly warm layers can turn mushy. Brush each layer with a thin layer of simple syrup (equal parts sugar and water, heated until dissolved) before adding buttercream. This adds moisture and helps the frosting adhere without crumbling.
Can I substitute vanilla extract with vanilla bean paste?
Use a 1:1 ratio—for every 1 teaspoon of vanilla extract, use 1 tablespoon of vanilla bean paste. The paste adds beautiful flecks and a more intense vanilla flavor, making it perfect for special occasions. Just be sure to whisk it smooth before adding to the batter or buttercream.
What’s the best way to transport a fully frosted 11×15 cake?
Wrap the cake tightly in plastic wrap, then place it on a sturdy tray covered with a clean towel. For extra protection, secure the tray with tape and place it in a box with packing material around the sides. Keep it refrigerated if transporting for more than 2 hours, and let it sit at room temperature for 30 minutes before serving.

- 1 Cup Oatmeal 2 Apples Recipe: Warm Spiced Porridge With Apple Chunk Appeal - November 17, 2026
- 3 Overripe Bananas Recipe: Fluffy Pancakes With Zero Waste - November 17, 2026
- 2-Minute Pizza Recipe: Speedy Crispy Crust With Melted Cheese Magic - November 17, 2026