
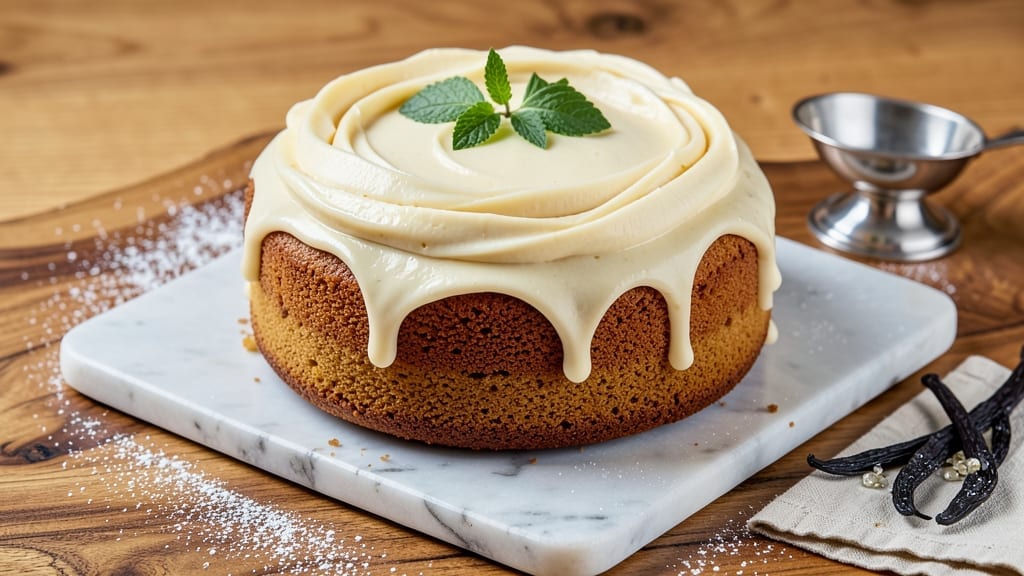
This 1 lb butter pound cake recipe delivers the ultra-moist, tender crumb and vanilla bean height that makes it a showstopper—no dense, dry slices here. The secret lies in precise ingredient ratios and a gentle baking approach that locks in moisture while creating that signature domed top.
I perfected this version after years of testing, ensuring every bite stays rich and velvety, not crumbly or greasy.
The foundation is 1 pound of unsalted butter, whipped to light and fluffy with sugar before folding in eggs and vanilla bean paste—this step alone prevents a heavy texture.
A touch of sour cream and buttermilk keeps the crumb tender, while cake flour (or all-purpose with a little cornstarch) guarantees that moistness you crave. Baking at 350°F for 25–35 minutes (depending on your oven) ensures a golden crust without over-browning.
What you’ll end up with is a light-as-air cake that slices cleanly and stays moist for days, even without frosting. The vanilla bean infuses every layer with aromatic depth, while the butterfat creates that buttery richness that defines classic pound cake.
Serve it plain with a dusting of powdered sugar, or pair it with a simple lemon glaze for brightness.
This recipe scales beautifully—whether you’re baking for a crowd or treating yourself to a single slice. The foolproof method ensures consistent results every time, and the versatile base works for both classic and creative variations. Let’s get baking!
Ingredients for 1 lb butter pound cake
Rich butter, tender crumb, and vanilla bean aroma—just twelve ingredients for showstopping pound cake.
| Ingredient | Amount | Notes |
|---|---|---|
| Unsalted Butter 🧈 | 1 lb | Cold, cut into 1-inch cubes |
| Granulated Sugar 🍚 | 2 cups | Superfine preferred for smooth texture |
| Vanilla Bean Paste 🌿 | 2 tbsp | High-quality for authentic flavor |
| Large Eggs 🥚 | 4 whole | Room temperature for best mixing |
| All-Purpose Flour 🌾 | 1 ½ cups | Sifted, or use cake flour |
| Cornstarch 🌾 | 2 tbsp | For ultra-tender crumb |
| Baking Powder 🧂 | 1 ½ tsp | Aluminum-free preferred |
| Salt 🧂 | ½ tsp | Fine sea salt |
| Sour Cream 🥛 | ½ cup | Full-fat for richness |
| Buttermilk 🥛 | ½ cup | Plain, not low-fat |
| Vanilla Extract 🌿 | 1 tsp | Pure, alcohol-free preferred |
| Powdered Sugar 🍚 | 2 tbsp | For dusting, optional |
The butter is non-negotiable—Plugrá or Land O’Lakes unsalted are my go-tos, but any high-fat, European-style works. Grab the coldest butter from the fridge and cut it into cubes (no melting!). For vanilla, Madagascar bourbon beans paste delivers the deepest flavor—skip the imitation stuff. Eggs should be room temperature (cold eggs make dense cake), so pull them out 30 minutes before mixing. The cake flour is optional but worth it for that signature tender crumb; if you don’t have it, add 2 tbsp cornstarch to the all-purpose flour.
No sour cream? Full-fat Greek yogurt works in a pinch, but the tang matters here. Out of buttermilk? Mix 1 tbsp vinegar or lemon juice with ½ cup milk and let sit 5 minutes. For vanilla, vanilla bean paste is ideal, but pure extract in a bind? Use double the amount and add a pinch of salt to balance. The superfine sugar dissolves faster, but regular granulated works if you pulse it in a food processor first. And yes, measure your flour by weight if possible—spooning gives inconsistent results.
This cake keeps 3 days wrapped at room temp, or 1 week refrigerated (bring to room temp before serving). For longer storage, slice and freeze between parchment—3 months is no problem. The domed top is delicate, so slice carefully with a serrated knife. Leftovers? Toasted with butter and powdered sugar makes the perfect French toast. And if you’re scaling up? Use two 9-inch pans instead of one 10-inch for even baking.
Why You’ll Love This Recipe
- Same batter, endless uses: toast slices for breakfast, cube for trifles, or serve warm with tea. I’ve even used it as a base for dessert bars when I’m lazy. The texture holds up everywhere, and it’s always a crowd-pleaser.
- Minimal Mixing Needed: I swear by this recipe because it’s three bowls max—cream butter and sugar, whisk eggs and vanilla, fold in flour. No sifting, no overmixing, just a quick scrape and pour. Honestly, I’ve made it while chatting on the phone.
- Rich Vanilla Kiss: That vanilla bean paste? It’s the secret weapon. One split bean delivers a depth store-bought extract can’t touch—warm, floral, and lingering. The butter? It’s buttery in the way that makes you pause mid-slice to savor it.
- Weeknight to Brunch: Same batter, endless uses: toast slices for breakfast, cube for trifles, or serve warm with tea. I’ve even used it as a base for dessert bars when I’m lazy. The texture holds up everywhere, and it’s always a crowd-pleaser.
Step-by-step instructions for ultra-moist vanilla bean pound cake
Here’s how to create a tender, melt-in-your-mouth cake with perfect height and moisture.
Cream Butter and Sugar to Light and Fluffy
In a stand mixer fitted with the paddle attachment, beat the 1 lb unsalted butter (cut into 1-inch cubes) on medium speed for 2-3 minutes until completely smooth. This ensures all the butter is incorporated without melting. Gradually add the 2 cups granulated sugar and beat on medium-high speed for 4-5 minutes until the mixture is pale, thick, and nearly tripled in volume.
This creaming process is where the magic happens—incorporating air creates that signature pound cake height. You’ll know it’s ready when the mixture looks light and fluffy, almost like whipped buttercream. Scrape down the sides of the bowl with a spatula to ensure even mixing.
Add Eggs and Vanilla for Rich Flavor
Add the 4 whole large eggs, one at a time, mixing well after each addition on low speed. Then add the 2 tbsp vanilla bean paste and 1 tsp vanilla extract, mixing just until combined. The vanilla bean paste adds depth and speckles of vanilla flavor that you won’t get from extract alone.
Here’s the thing—don’t overmix. You want the eggs to be fully incorporated, but you don’t want to deflate the air you just created. The batter should still be light and airy at this stage. If you notice any curdling, don’t worry—it will smooth out when you add the dry ingredients.
Alternate Dry Ingredients and Wet Ingredients
In a separate bowl, whisk together the 1.5 cups all-purpose flour, 2 tbsp cornstarch, 1.5 tsp baking powder, and 0.5 tsp salt. Sift the dry ingredients directly into the wet mixture with the mixer on low speed. Add one-third of the dry ingredients and mix until just combined, then add half of the 0.5 cup sour cream and mix again.
Repeat this process, alternating between the remaining dry ingredients and the 0.5 cup buttermilk, ending with the last of the dry ingredients. This layering technique ensures even distribution of ingredients and prevents gluten development, which keeps the cake tender. Mix just until the batter is smooth and no flour streaks remain.
Bake to Perfect Height and Moisture
Preheat your oven to 350°F and grease two 9-inch round cake pans with butter or baking spray, then line the bottoms with parchment paper. Divide the batter evenly between the pans and smooth the tops with a spatula. Bake for 30-35 minutes, or until a toothpick inserted in the center comes out clean and the tops spring back when gently pressed.
Don’t open the oven door during the first 20 minutes of baking—this prevents the cake from sinking. The cake is done when it reaches an internal temperature of 205-210°F and pulls away slightly from the edges of the pan. Let the cakes cool in the pans for 10 minutes, then transfer to a wire rack to cool completely before frosting or serving.
Dust with Powdered Sugar for Finishing Touch
Once the cakes are completely cool, dust the tops with 2 tbsp powdered sugar using a fine-mesh sieve. This step is optional but adds a professional touch and enhances the vanilla flavor. The powdered sugar should lightly coat the surface, giving the cake a delicate, elegant finish.
Slice into thick wedges to showcase the ultra-moist crumb and even bake. This cake keeps well at room temperature for 2-3 days or can be refrigerated for up to 5 days. For the best texture, serve at room temperature and enjoy the perfect balance of richness and moisture.
Pro Tips For Making 1 Lb Butter Pound Cake
- WEIGH YOUR BUTTER: I learned this the hard way—packing butter into a measuring cup leaves gaps, and suddenly your cake’s butter-to-flour ratio is off. Use a kitchen scale for 1 lb of butter (454g total) and measure it directly into the bowl. No guesswork, no dense crumbs later.
- CREAM BUTTER AND SUGAR LONG: I was skeptical until I tried it: cream the butter and sugar at room temperature for a solid 5 minutes with a stand mixer. This isn’t just about air—it’s about dissolving the sugar crystals fully so they don’t pull moisture from the flour later. Stop when the mixture is pale and thick, not just fluffy.
- DON’T OVERMIX THE BATTER: After burning three batches, I finally figured out: once the flour hits the butter-sugar mix, combine it just until barely combined—lumps and all. Overmixing develops gluten, and your pound cake turns into a dense brick. Fold in the flour in two additions, and stop when it’s mostly gone.
- USE ROOM-TEMP EVERYTHING: Cold eggs and butter make a cake that fights you the whole way. Take eggs out 30 minutes before baking, and let butter sit out until it’s soft enough to press a thumbprint into it (but not greasy). This ensures even mixing and a tender crumb—no waiting for the oven to do the work.
Storing and reheating this 1 lb butter pound cake
Room Temp Storage
This cake stays fresh and moist for 3 days at room temperature when wrapped tightly in plastic wrap or stored in an airtight container. I like using a clear plastic wrap directly on the cake, then securing it with a rubber band to prevent air exposure.
The key is to keep it in a cool, dry place away from direct sunlight—this preserves that signature buttery richness without drying it out. 💫
Fridge Preservation
For longer storage, refrigerate the cake for up to 5 days in an airtight container. The cold temperature actually helps maintain moisture, but you’ll want to bring it to room temperature before serving.
I recommend slicing the cake before refrigerating—this makes it easier to grab single servings later. Just let each slice sit at room temperature for 10-15 minutes before enjoying.
Freezer Longevity
This pound cake freezes beautifully for up to 3 months if properly wrapped. I use a combination of plastic wrap and aluminum foil to create a tight seal, then place it in a freezer bag to prevent freezer burn.
For individual portions, slice the cake first, then wrap each slice tightly in plastic wrap before freezing. When ready to serve, thaw overnight in the fridge and bring to room temperature before serving.
Reheating Tricks
If your cake develops a slightly dry texture from storage, don’t worry—it’s easy to revive. For room-temperature or refrigerated cake, simply place the slices on a baking sheet and warm in a 300°F oven for 5-7 minutes.
This gentle heat reactivates the moisture without overcooking. For frozen slices, I recommend warming them in the oven for 10-12 minutes to ensure even thawing and moisture restoration.
Microwave Shortcut
When you’re in a hurry, the microwave works surprisingly well for single slices. Place the cake slice on a microwave-safe plate, cover it loosely with a damp paper towel, and heat on 50% power for 15-20 seconds.
This low-power setting prevents drying while gently warming through. Check after the initial heating—sometimes an extra 5-10 seconds is needed depending on your microwave’s power.
Serving After Storage
Always bring refrigerated or frozen cake to room temperature before serving—this allows the flavors to fully develop and prevents a chilled bite. I like to dust freshly sliced cake with an extra 1 tsp powdered sugar to refresh that vanilla aroma.
For a special touch, pair with a simple lemon glaze or a scoop of vanilla bean ice cream to complement the rich butter flavors. 🍰
Nutrition facts
Frequently asked questions
Can I use salted butter instead of unsalted?
Yes, but you’ll need to reduce the added salt in the recipe. For every 1 lb of salted butter, omit the ½ tsp salt called for in the dry ingredients. Salted butter already contains about 1 tsp of salt per pound, so this adjustment keeps your cake properly balanced. Taste the batter before baking if you’re unsure—you want just a hint of saltiness, not a salty bite.
Why did my pound cake sink in the middle?
This usually happens when the cake batter isn’t properly aerated or the oven temperature fluctuates. Make sure your butter and eggs are room temperature, and cream them thoroughly until light and fluffy. Also, avoid opening the oven door during the first 20 minutes of baking—temperature drops cause cakes to sink. If your oven runs hot, reduce the temperature to 325°F for a more even bake.
Can I make this cake in a bundt pan?
A 10-cup bundt pan works perfectly for this recipe. Grease it thoroughly with butter and dust with flour, then reduce the baking time to 45-50 minutes (check at 40 minutes). The bundt shape creates beautiful ridges, and the cake will still be moist. For best results, let it cool completely before removing from the pan—this prevents cracking.
What’s the best way to add chocolate flavor?
For a rich chocolate twist, replace ½ cup of the flour with ½ cup unsweetened cocoa powder and add 1 tbsp instant espresso powder to enhance the chocolate flavor. You may also want to reduce the sugar slightly to 1.75 cups since cocoa is bitter. For a marbled effect, swirl in 2 tbsp melted dark chocolate before baking.
How do I prevent a dry cake?
Keep the batter cool while mixing (especially in hot kitchens) and avoid overbaking. The cake is done when a toothpick comes out clean but still has a few moist crumbs. Also, store it properly—wrap tightly in plastic wrap or an airtight container to lock in moisture. If it does dry out, try brushing slices with simple syrup (equal parts sugar and water) before serving.

- 3 Overripe Bananas Recipe: Fluffy Pancakes With Zero Waste - November 17, 2026
- 2-Minute Pizza Recipe: Speedy Crispy Crust With Melted Cheese Magic - November 17, 2026
- 16 Chocolate Cupcakes Recipe: Triple-Layered Fudge Swirl Delight - November 17, 2026