
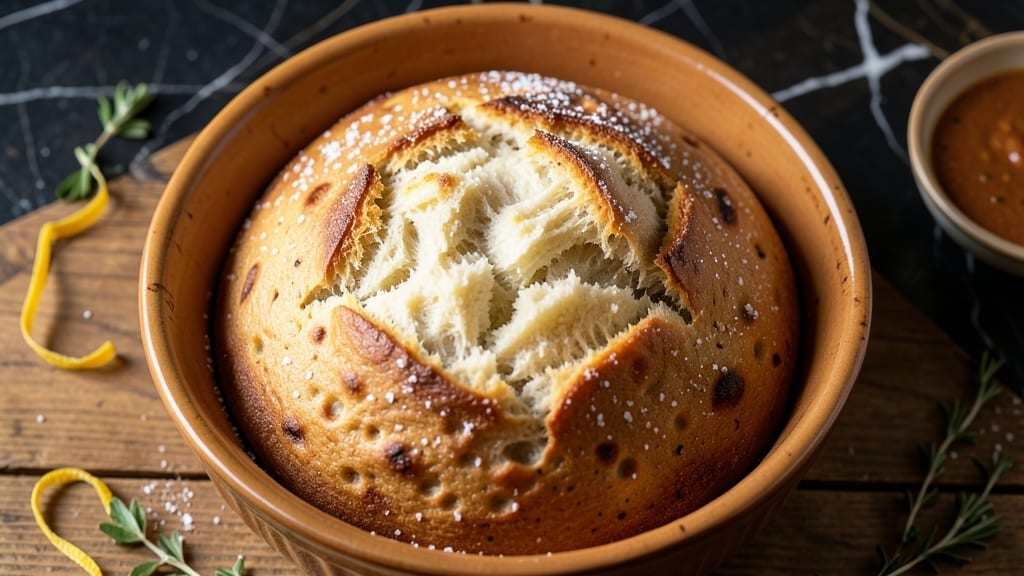
A 1-pound white bread recipe that delivers a fluffy, golden loaf in just 30 minutes is the perfect solution for homemade sandwiches, toast, or dinner rolls. This straightforward method uses simple ingredients and a foolproof technique to create bread with a tender crumb and crispy crust—no fancy equipment required.
The secret lies in proper kneading, proofing, and baking at the right temperature to ensure consistent results every time.
What sets this recipe apart is its efficiency—no long fermentation or complex steps. Warm milk activates the yeast quickly, while a touch of sugar enhances browning. The dough develops naturally through gentle kneading, and proofing at room temperature ensures a light, airy texture.
Baking at 375°F guarantees a golden crust while keeping the interior soft and even.
By the time you pull that perfect loaf from the oven, you’ll have restaurant-quality white bread with a crisp exterior and tender interior. The aroma alone will make your kitchen feel like a bakery.
This recipe scales easily—double the batch for rolls or sandwich loaves. Let’s get started on mastering your own homemade bread.
Whether you’re baking for a family meal or meal prepping, this foolproof method delivers consistent results. Store leftovers in an airtight container for up to 5 days, or freeze for longer storage.
The simplicity of this recipe makes it ideal for beginners, while the professional-quality outcome will impress even experienced bakers.
Ingredients for 1 pound white bread
Nine simple ingredients transform into a restaurant-quality 1-pound white loaf every time.
| Ingredient | Amount | Notes |
|---|---|---|
| All-Purpose Flour 🌾 | 3 ½ cups | Unbleached, high-protein preferred |
| Active Dry Yeast 🍞 | ¼ oz | Or 2.5g, ensure freshness |
| Granulated Sugar 🍚 | ½ tbsp | Enhances browning and yeast activation |
| Unsalted Butter 🧈 | ¼ cup | Softened to room temperature |
| Warm Whole Milk 🥛 | ¾ cup | 110°F for optimal yeast activation |
| Large Egg 🥚 | 1 whole | Room temperature for even mixing |
| Diamond Crystal Kosher Salt 🧂 | 1 ½ tsp | Adjust to taste after baking |
| Cornmeal 🌽 | ¼ cup | For dusting baking sheet |
| Water 💧 | ¼ cup | Room temperature if needed |
Flour is the foundation—King Arthur or Bob’s Red Mill yield the best texture here. The yeast must be fresh (test by dropping a pinch in warm water; it should foam within 5 minutes). Warm milk activates the yeast quickly—110°F is ideal. Butter should be softened but not melted; European-style butter adds extra richness. If your milk isn’t warm enough, microwave it for 20 seconds. The egg binds everything together, so ensure it’s at room temperature for even incorporation. For the best results, use Diamond Crystal kosher salt—it dissolves more easily than table salt.
No warm milk? Substitute warm water with 1 tsp sugar—the sugar helps activate the yeast. Out of butter? Olive oil or melted coconut oil works in a pinch, though texture may vary slightly. Running low on flour? Whole wheat flour at 10% replacement adds nutrition but may darken the crumb. For a lighter loaf, add 1 tsp baking powder to the flour. The cornmeal isn’t strictly necessary but creates a beautiful crust. If you’re making this in a high-altitude area, reduce yeast by 25% to prevent overproofing.
Freshly baked bread is best enjoyed within 24 hours, but this loaf stays fresh for 5 days when stored in an airtight container at room temperature. For longer storage, freeze the loaf unwrapped for 1 hour, then wrap tightly in plastic. Reheat slices in a 350°F oven for 5 minutes to restore freshness. The dough can be refrigerated for up to 24 hours before shaping and baking. For a crispier crust, brush with melted butter after baking.
Why You’ll Love This Recipe
- No-Fuss Starter: Between us, this dough comes together faster than my coffee brews. Just mix, knead once (I promise, 5 minutes max), let it rise while you fold laundry—yes, really—and you’ve got fresh bread. The yeast in warm milk wakes up fast, so no waiting around like some sourdough experiments.
- Buttery Soft Magic: That single stick of butter? It’s the secret weapon. You’re not just making bread—you’re making something that melts in your mouth like a hug. The sugar caramelizes just enough to give it a subtle sweetness, but the flour’s richness keeps it classic. Honestly, I’ve caught myself eating slices straight from the pan.
- Weeknight Hero: This isn’t just for sandwiches. Toast it for breakfast, tear it into croutons, or freeze slices for quick grilled cheese later. I’ll be real: I’ve used it to soak up soup broth when I forgot to buy crackers. And because it’s a small batch, it’s the only bread I bake when I’m feeding just myself—or a crowd of one very hungry kid.
- Pantry Goldmine: You already have everything. Flour, sugar, butter—these are staples that don’t beg for special trips to the store. A pound means you’re not left with a mountain of bread that’ll go stale before you can eat it. Plus, it keeps for days wrapped in a towel, or freeze half for when you’re too tired to bake. Budget-friendly? More like pocket-friendly.
Step-by-step instructions for fluffy white bread
Master this method and you’ll achieve a perfectly golden, fluffy loaf every time—no kneading machine required.
Activate the Yeast with Warm Milk
In a small bowl, combine the 0.75 cup warm whole milk (should feel like bathwater, 110°F) with the 0.5 tbsp granulated sugar and 0.25 oz active dry yeast. Let this sit for 5-10 minutes until frothy with bubbles—this confirms the yeast is alive and ready to work. If no bubbles form, your yeast may be dead, and you’ll need to start over.
This activation step is critical. Cold milk slows yeast activity while warm milk (not hot) creates the perfect environment for fermentation. The sugar provides initial food for the yeast to multiply, setting the foundation for a light, airy loaf. Don’t rush this waiting period—proper yeast activation prevents dense bread.
Mix the Dough Ingredients
In the bowl of a stand mixer fitted with the dough hook, combine the 3.5 cups all-purpose flour and 1.5 tsp diamond crystal kosher salt. Add the 0.25 cup softened unsalted butter and mix on low speed until the butter is fully incorporated and the mixture resembles coarse crumbs.
Create a well in the center and pour in the yeast-milk mixture along with the 1 whole large egg. Mix on low speed for 2 minutes until the dough begins to come together. The dough should be shaggy but cohesive—this is normal at this stage. Avoid overmixing, which develops gluten too early and can make the bread tough.
Knead Until Elastic and Smooth
Increase mixer speed to medium and knead for 5-7 minutes until the dough becomes smooth, elastic, and springs back when poked. You’ll know it’s ready when it forms a clean windowpane when stretched—this indicates proper gluten development without overworking.
If the dough feels sticky, add 1 tablespoon of flour at a time until it pulls away from the bowl but remains slightly tacky. Over-kneading creates tough bread, while under-kneading results in a dense loaf. The ideal dough should be soft but firm, with a slightly tacky surface that cleans up easily with a bit of flour on your hands.
First Rise Until Doubled in Size
Lightly grease a large bowl with oil, place the dough inside, and cover with a damp kitchen towel. Let it rise in a warm place for 1-1.5 hours until it has doubled in size. The dough should feel puffy and light when pressed gently with one finger—it should spring back slowly rather than immediately.
This first rise develops flavor and allows the gluten to relax slightly. Place the bowl near a warm oven (with the light on) or in a slightly warm spot in your kitchen. Avoid cold drafts, which slow fermentation. If the dough rises too quickly (in under 45 minutes), your kitchen may be too warm—cover it more tightly to slow the process.
Shape and Second Rise Before Baking
Punch down the risen dough to release air, then turn it onto a lightly floured surface. Gently shape it into a 1-pound loaf (about 8×4 inches) by folding the sides toward the center and rolling it tightly from one end to the other. Place seam-side down in a greased 9×5-inch loaf pan and let it rise again for 30-45 minutes until it domes slightly above the pan.
For an even better crust, sprinkle 0.25 cup cornmeal on the bottom of the pan before adding the dough. This prevents sticking and creates a beautiful golden crust. The second rise should be shorter than the first—this final proofing ensures the bread expands properly in the pan without collapsing during baking.
Bake to Golden Perfection
Preheat your oven to 375°F. Bake the loaf for 25-30 minutes until it’s golden brown and sounds hollow when tapped on the bottom. The internal temperature should reach 190-200°F when measured with an instant-read thermometer.
For maximum browning, brush the top with 0.25 cup water just before baking if desired. Rotate the pan halfway through for even browning. The bread is done when it pulls away from the sides of the pan and has a deep golden color. Let it cool in the pan for 10 minutes, then transfer to a wire rack to cool completely before slicing—this prevents a gummy texture.
Pro Tips For Making 1 Pound White Bread
- Bloom the Yeast: Skip the guesswork—mix the yeast with warm milk (110°F) and 1 tsp sugar, then let it sit for 5–10 minutes until bubbly. If nothing happens after 15 minutes, your yeast is dead, and you’ll save yourself a sad, flat loaf.
- Soften Butter First: Take the butter out of the fridge 30 minutes before mixing—it should be soft but not melted. Cold butter creates lumps that won’t blend smoothly, and your dough will fight you every step.
- Don’t Over-Knead: The dough is ready when it springs back slowly after poking (not instantly). Over-kneading develops too much gluten, making the bread dense. I learned this after making a brick that took a sledgehammer to cut.
- Use a Thermometer: For the milk, aim for 110°F—not boiling, not ice-cold. Too hot kills the yeast; too cool slows fermentation. A cheap instant-read thermometer makes this foolproof—no more staring at the clock wondering if it’s ready.
Common mistakes when making this dish
Over-Kneading the Dough
The most common mistake is kneading too long, which overdevelops the gluten and creates tough, chewy bread. I’ve seen home bakers knead for 10+ minutes instead of the recommended 5-7 minutes, resulting in bread that’s more like a dense brick than fluffy loaf.
Always check for the windowpane test: stretch a small piece of dough—if it forms a thin, translucent membrane, it’s ready. Stop immediately when you see this sign.
Skipping Yeast Activation
Many beginners skip the critical 5-10 minute yeast activation in warm milk, assuming it’s optional. Without this step, the yeast may not fully activate, leading to slow or uneven rising. I’ve had doughs that took 3+ hours to rise instead of the expected 1-1.5 hours because the yeast was sluggish.
Always test your yeast first by dropping a pinch in warm water—if it doesn’t foam within 5 minutes, replace it.
Ignoring Dough Temperature
Cold dough rises slowly or not at all, while dough that’s too warm ferments too quickly, collapsing during baking. The ideal dough temperature is 75-80°F. If your kitchen is cold, let the dough rise near the oven (with the light on) or in a proofing box.
I once left dough in a 50°F kitchen and it barely doubled—always check your environment before proofing.
Underproofing or Overproofing
Underproofed dough (rising too little) results in dense bread, while overproofed dough (rising too much) collapses during baking. For this recipe, the first rise should take 1-1.5 hours until doubled, and the second rise 30-45 minutes until slightly domed.
Press your finger gently into the dough—it should spring back slowly (not immediately or not at all). If it springs back quickly, it’s underproofed; if it leaves an indent, it’s overproofed.
Using the Wrong Flour
All-purpose flour works here, but using cake flour or bread flour can ruin the texture. Cake flour lacks protein for structure, while bread flour has too much, making the bread dense. Stick to King Arthur or Bob’s Red Mill all-purpose flour for consistent results.
I once used whole wheat flour by mistake—my loaf turned out heavy and crumbly. Always double-check your flour type before mixing.
Baking at the Wrong Temperature
Baking at 350°F instead of 375°F slows down the Maillard reaction, resulting in pale, underbaked bread. Conversely, baking at 400°F+ can cause the crust to brown too quickly before the interior is fully cooked.
Use an oven thermometer to confirm your oven’s accuracy—many ovens run 25°F hotter or colder than set. For this recipe, 375°F is non-negotiable for that perfect golden crust and soft interior.
Nutrition facts
Frequently asked questions
Why does your recipe make only 1 pound of bread?
This recipe yields a 1-pound loaf because it’s perfect for small households, meal prepping, or testing new recipes. A standard loaf pan (9×5 inches) holds about this weight when fully baked. Need more? Simply double the ingredients for a 2-pound loaf or divide into 4 dinner rolls by shaping smaller portions before proofing.
Can I make this bread without a stand mixer?
Mix the ingredients by hand until combined, then knead on a floured surface for 8-10 minutes until smooth and elastic. Use the windowpane test (stretch a small piece—it should be thin and translucent) to check doneness. The kneading process just takes a bit more elbow grease without a mixer.
How do I know when the bread is fully baked?
Your bread is done when it reaches an internal temperature of 190-200°F (measured with an instant-read thermometer) and sounds hollow when tapped on the bottom. The crust should also be a deep golden brown. If unsure, bake for 5 more minutes—underbaked bread continues cooking after removal.
What’s the best way to store leftover bread?
Wrap the cooled loaf in plastic wrap or place in an airtight container to keep it fresh for 5 days at room temperature. For longer storage, freeze the bread unwrapped for 1 hour, then wrap tightly. To revive slices, warm in a 350°F oven for 5 minutes or toast until crispy.
Can I substitute whole wheat flour?
You can replace up to 25% of the all-purpose flour with whole wheat, but expect a denser texture. For best results, use King Arthur whole wheat flour (it has better baking properties). The bread will have more flavor but may brown faster. Reduce the water by 1 tablespoon if the dough feels too sticky.

- 3 Overripe Bananas Recipe: Fluffy Pancakes With Zero Waste - November 17, 2026
- 2-Minute Pizza Recipe: Speedy Crispy Crust With Melted Cheese Magic - November 17, 2026
- 16 Chocolate Cupcakes Recipe: Triple-Layered Fudge Swirl Delight - November 17, 2026