
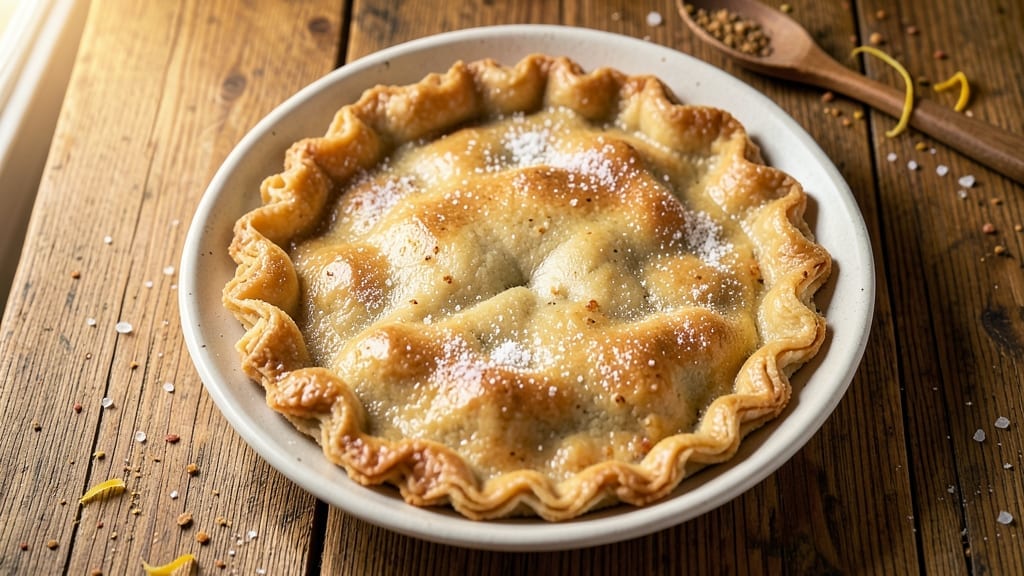
A 10-inch single pie crust with layers so flaky they practically melt in your mouth is within reach—no rolling stress required. This recipe transforms simple ingredients into a sturdy yet delicate crust that holds fillings perfectly while delivering that coveted flaky texture.
The secret lies in cold fat and minimal handling, ensuring tender layers that separate effortlessly when baked.
Professional bakers swear by this method: combining cold butter with flour and ice water creates a crust that stays crisp at the edges while remaining tender inside. No special equipment needed—just a food processor (or strong hands) and a 10-inch pie dish to shape it directly.
Blind-baking instructions are included for quiches or custard pies, so you can prep ahead without worrying about soggy bottoms.
By the time you slide this crust into the oven, you’ll have a golden, well-structured base ready for any filling—whether it’s classic apple, rich chocolate ganache, or savory spinach and cheese.
The key is patience: chilling the dough between steps prevents shrinking, and a quick blind-bake (if needed) ensures your pie holds its shape under even the heaviest fillings.
Ready to master the foundation of every great pie? This foolproof crust delivers restaurant-quality results with just five ingredients and 20 minutes of active time. Let’s get started.
Ingredients for 10 inch single pie crust
Five ingredients, one food processor, and a 10-inch pie dish—this is all you need for golden, flaky perfection.
| Ingredient | Amount | Notes |
|---|---|---|
| All-Purpose Flour 🌾 | 2 ½ cups | Sifted for even distribution |
| Unsalted Butter 🧈 | 1 cup | Cold, cubed (1/2-inch pieces) |
| Ice Water ❄️ | ⅓ cup | Chilled, not melted |
| Diamond Crystal Kosher Salt 🧂 | ½ tsp | Fine grain preferred |
| Granulated Sugar 🍚 | 1 tbsp | For crust edges |
The butter is non-negotiable here. European-style butter (like Plugrá or President) has higher fat content, which means extra flakiness. Grab it from the international foods aisle at your grocery store if your regular store doesn’t carry it. Keep those butter cubes ice-cold—if they start melting before mixing, pop them back in the freezer for 10 minutes. The flour? King Arthur or Gold Medal are my go-tos—they’re protein-balanced for that tender-yet-sturdy texture. And don’t skip sifting it; those clumps can make your crust tough.
No ice water? Cold tap water with ice cubes works in a pinch—just make sure it’s frigid. Running short on butter? Lard or shortening can substitute, but you’ll lose that buttery flavor. The sugar is optional but worth it for that crisp, golden edge—skip it if you’re making a savory pie. For the salt, Diamond Crystal is less salty than Morton, so use it if you’re sensitive to sodium. Prefer a different flour? Pastry flour works too, but all-purpose is foolproof and what most home kitchens have on hand.
This dough is a diva about chilling—keep it cold at every step. Wrap it in plastic and refrigerate for at least 1 hour before rolling (if you’re not shaping it directly in the pie dish). It’ll keep in the fridge for 3 days or frozen for 3 months. For blind-baking, use pie weights or dried beans—never skip this step for custard pies. The crust reheats beautifully too, so make extras and freeze them for future pies.
Why You’ll Love This Recipe
- Fewer Messy Mistakes: I’ve ruined pie crusts by overworking the dough—this recipe stops me cold. The cold butter and ice water keep it from sticking, so I’m not scrubbing flour off my countertop or my hands.
- Butter’s Rich Promise: That cold, unsalted butter? It melts into pure, golden layers—flaky, crisp, and almost too perfect. Honestly, the first time I bit into it, I paused mid-chew.
- Pie Pan or Plate: Use it for a classic apple pie, a savory chicken pot pie, or even a rustic tart with jam and cream. (Yes, I’ve done all three.) The 10-inch size fits just about any dish without forcing me to scale recipes.
- Budget-Friendly Staples: All-purpose flour, butter, and salt? Ingredients I already have. No specialty items, no last-minute grocery runs—just what’s in my pantry, ready to go. And leftovers? Freeze half for next month.
Step-by-step instructions for a 10-Inch single pie crust
Here’s how to build a perfect, flaky crust without the frustration of rolling out dough.
Cut and Mix the Cold Butter
Place the 1 cup unsalted butter, cut into ½-inch cubes, in the bowl of a food processor. Pulse until the butter resembles coarse crumbs but still has some pea-sized pieces remaining. This texture is crucial—it creates pockets of fat that melt during baking, giving you that signature flakiness.
Add the 2.5 cups all-purpose flour, the 0.5 tsp diamond crystal kosher salt, and the 1 tbsp granulated sugar to the food processor. Pulse just until the mixture comes together into pea-sized crumbs with some flour still visible. Don’t over-process or the butter will melt and you’ll lose that flaky texture. The goal is to distribute the butter evenly throughout the flour without developing gluten.
Incorporate Ice Water Gradually
With the food processor running, slowly add the 0.33 cup ice water through the feed tube. The ice water is key—it keeps the butter cold and helps create steam during baking, which separates the layers. Add the water 1 tablespoon at a time, pulsing after each addition, until the dough just comes together when pressed.
Test the dough by pressing a small amount between your fingers. It should hold together but still feel slightly crumbly. If it’s too dry, add 1 teaspoon more ice water; if it’s too wet, sprinkle in 1 tablespoon more flour. The dough should be cold to the touch—if it starts to warm up, chill it for 10 minutes before proceeding. This step ensures your crust won’t shrink during baking.
Form and Chill the Dough
Turn the dough out onto a lightly floured surface and gently shape it into a 10-inch round disk. Don’t press or handle it too much—this develops gluten and makes the crust tough. Wrap the dough tightly in plastic wrap and refrigerate for at least 1 hour (or up to 2 days). Chilling relaxes the gluten and firms up the fat, making it easier to handle and preventing shrinking when it goes into the oven.
Here’s the thing—this resting period is non-negotiable. Skipping it means your crust will be more likely to shrink or develop a tough texture. If you’re in a hurry, you can freeze the dough for 30 minutes instead, but chilling overnight yields the best results. The cold dough also helps prevent the butter from melting prematurely during baking.
Roll and Transfer to the Pan
On a lightly floured surface, roll the chilled dough into a 12-inch circle (about ⅛-inch thick). The dough will naturally spring back slightly, so don’t force it. If it resists, let it rest for 5 minutes and try again. The goal is to create an even thickness—this ensures even baking and prevents a soggy bottom.
Carefully transfer the dough to a 10-inch pie dish by gently rolling it around a rolling pin and then unrolling it into the pan. Trim the edges to ½-inch overhang, then fold the overhang under itself to create a neat, sealed edge. Crimp the edges using your fingers or a fork to create a decorative border. This technique seals in the filling and creates that classic pie crust look.
Pre-Bake for a Perfect Base
Preheat your oven to 375°F. Line the crust with parchment paper or aluminum foil, then fill it with dried beans, pie weights, or ceramic pie weights. Bake for 15 minutes, then remove the weights and bake for another 5-7 minutes until the edges are golden brown. This pre-baking step, called “blind baking,” prevents a soggy bottom and gives you a sturdy base for your filling.
Watch the edges closely—they should turn a deep golden brown while the center remains slightly pale. If the edges brown too quickly, tent the crust with foil to prevent over-browning. Once baked, remove the crust from the oven and let it cool for 10 minutes before adding your filling. This resting period helps the crust firm up and prevents it from shrinking when the hot filling goes in.
Pro Tips For Making 10 Inch Single Pie Crust
- CHILL THE BUTTER FIRST: Take that cold butter straight from the fridge—no thawing, no softening—just cut it into cubes while it’s still rock-hard. I learned this the hard way when I used slightly softened butter and ended up with a greasy, flaky mess instead of a crisp, layered crust. Cold butter = crisp crust. Period.
- WEIGH YOUR FLOUR: Scoop that flour? Nope. Use a kitchen scale for precision—this isn’t a baking show, but a 10-inch crust needs consistency. I used to eyeball it, and my crusts would either be doughy or brittle. Two cups of all-purpose flour isn’t always two cups by volume. Get it right the first time.
- WORK FAST, HANDLE GENTLY: Once you add ice water, stop messing with the dough. Fold it just enough to hold, then let it rest—no kneading, no overworking. I used to panic and keep mixing, and my crust would turn tough. Keep your hands dry, fold once, then chill. That’s it.
- SALT THE WATER: Skip the extra salt in the crust—just dissolve ½ teaspoon of kosher salt into the ice water first. The butter already has salt, and you don’t want a flavor bomb. Trust me, your crust will taste balanced without overdoing it. (And yes, even if you’re impatient like me, wait for the water to fully dissolve the salt.)
Pro cooking tips for perfect results
Cold Butter Magic
The secret to flaky layers is keeping that butter ice-cold throughout the process. I like to cube the butter into ½-inch pieces and freeze them for 10 minutes before mixing—this ensures they stay firm. If your kitchen gets warm, pop the butter back in the freezer between steps.
The goal is to have butter that’s cold enough to hold its shape but not so hard it won’t pulse in the food processor. 🧈
Food Processor Precision
Pulsing the butter and flour is an art, not a science. You want pea-sized crumbs with some flour still visible—this creates those signature flaky layers. Over-processing turns the butter into a paste, which ruins the texture. If your dough starts looking like wet sand, you’ve gone too far.
I recommend using a Cuisinart Food Processor for consistent results, but a strong mixer with a dough hook works too. Just keep those pulses short and gentle!
Ice Water Technique
Never use warm water—this is where most home bakers go wrong. The ice water keeps the butter cold and helps create steam during baking, which separates the layers beautifully. Add it 1 tablespoon at a time while pulsing, and stop as soon as the dough just holds together.
If you add too much, the crust will be tough. Pro tip: Use a measuring spoon to control those tiny additions precisely. ❄️
Chilling is Non-Negotiable
Skipping the chill step is the fastest way to ruin your crust. The dough needs to rest for at least 1 hour in the fridge to relax the gluten and firm up the fat. I often chill mine overnight for even better results.
If you’re in a hurry, freeze the dough for 30 minutes—just don’t skip this step entirely. The cold dough rolls out much easier and holds its shape beautifully in the pan.
Rolling Without Stress
Roll the dough on a lightly floured surface to prevent sticking, and keep it ⅛-inch thick for even baking. If the dough resists, let it rest for 5 minutes—forcing it will develop gluten and make the crust tough.
I like to use a 12-inch rolling pin for smooth, even pressure. The dough will spring back slightly, so don’t worry if it doesn’t look perfect at first. Patience here pays off with a beautifully even crust!
Blind-Baking Secrets
For custard pies or quiches, blind-baking is a must. Use dried beans or pie weights to keep the crust from puffing up. Bake at 375°F for 15 minutes with weights, then remove them and bake another 5-7 minutes until golden.
Watch those edges—they should turn deep brown while the center stays pale. If they brown too fast, tent with foil. Let the crust cool for 10 minutes before filling to prevent shrinking. 🔥
Nutrition facts
Frequently asked questions
Can I make this crust without a food processor?
Use a pastry cutter or two forks to cut 1 cup cold butter into 2.5 cups flour until you get pea-sized crumbs. Work quickly to keep everything cold, and mix in the ice water by hand using a fork. Just be extra gentle when combining to avoid overworking the dough.
Why does my crust shrink when baking?
Skipping the chill time is the #1 cause of shrinking. Always refrigerate the dough for at least 1 hour—this relaxes the gluten and prevents contraction. If your kitchen is warm, chill the dough longer or use frozen butter cubes. Also, avoid over-handling when rolling or transferring to the pan.
What’s the best way to store leftover crust?
Wrap the dough tightly in plastic wrap and refrigerate for up to 3 days. For longer storage, freeze the dough (unbaked) for 3 months. Thaw overnight in the fridge before using. Pre-baked crusts can be frozen for 2 months—just reheat at 350°F for 10 minutes before adding filling.
Can I use this crust for savory pies?
Yes! This recipe works perfectly for quiches or savory galettes. Just omit the sugar and use 1 tsp salt instead. For extra flavor, add 1 tbsp fresh herbs (like thyme or rosemary) to the dough. The buttery richness pairs beautifully with eggs, cheese, or veggie fillings.
How do I fix a cracked crust?
Brush cracks with beaten egg wash and bake until golden. For deep cracks, patch with extra dough scraps before baking. The good news? Cracks don’t affect flavor—just the appearance. If you’re making a fruit pie, the filling will often hide any minor imperfections beautifully.

- 5 Lb Eye Round Roast Recipe: Slow-Braised to Melt-in-Mouth Tenderness - November 3, 2026
- 3-Hour Ciabatta Bread Recipe: Crusty Chews and Airy Holes Mastered - November 3, 2026
- 5 Fruit Salad Recipe: Vibrant Rainbow Layers With No Brown Spots - November 3, 2026