
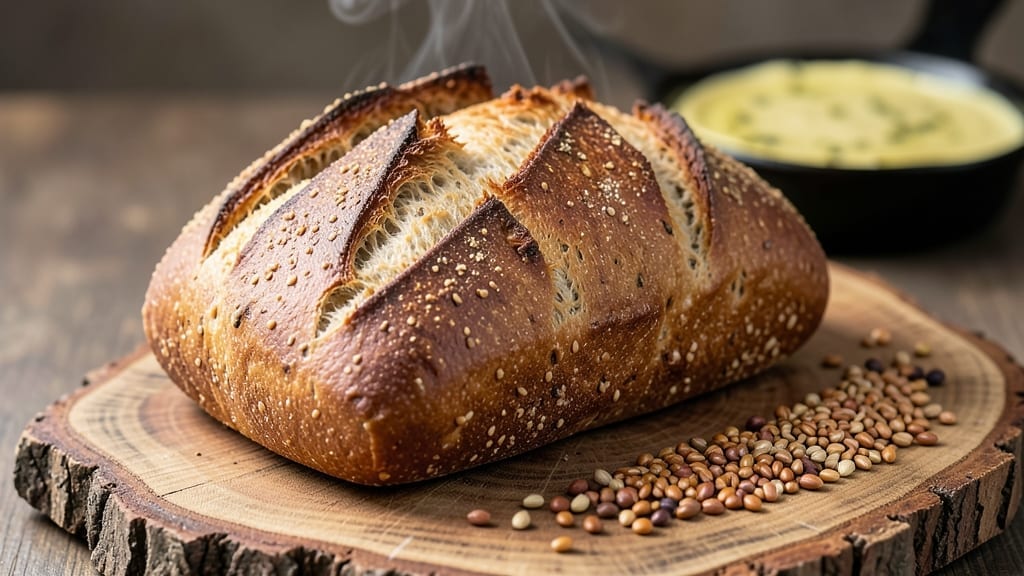
Transform your kitchen into a bakery with this 100 percent whole grain bread recipe, delivering restaurant-quality texture while keeping every bite packed with wholesome goodness. This method transforms dense, crumbly whole grain dough into a light, airy loaf with a crispy crust—no shortcuts, just proven techniques that work every time.
The secret lies in precise hydration control and strategic fermentation, ensuring your bread rises properly while keeping all the fiber and nutrients intact.
What sets this recipe apart is the balanced blend of whole grain flours—a mix that prevents dryness while maintaining that authentic whole wheat flavor. We’ll use an autolyse step to develop gluten gently, followed by a controlled bulk fermentation that builds flavor without overproofing.
For home bakers, this means no more rock-hard loaves or dough that collapses in the oven.
By the time you pull this loaf from the oven, you’ll have a golden-brown crust with an open crumb structure and a subtle sweetness from the whole grains.
The texture is surprisingly tender, with just enough chew to satisfy. This bread freezes beautifully too, so you can bake once and enjoy for weeks.
Ready to master the art of whole grain baking? The instructions include troubleshooting tips for sticky dough, oven calibration, and even a no-knead variation for busy days. Let’s get started—your kitchen is about to smell like a bakery.
Ingredients for 100 percent whole grain bread
Four flours, two yeasts, and a touch of honey—this is your whole grain bakery starter kit.
| Ingredient | Amount | Notes |
|---|---|---|
| Bread Flour 🌾 | 2 cups | High-protein for structure |
| Whole Wheat Flour 🌾 | 2 cups | Unbleached for authentic flavor |
| Rye Flour 🌾 | ½ cup | Dark rye for depth of flavor |
| Instant Yeast 🍞 | 2 ¼ tsp | Active dry works too |
| Granulated Sugar 🍚 | 1 tbsp | Feeds yeast for rise |
| Salt 🧂 | 2 tsp | Diamond Crystal preferred |
| Whole Milk 🥛 | 1 ½ cups | Warmed to 100°F |
| Olive Oil 🫒 | 2 tbsp | Extra-virgin for richness |
| Honey 🍯 | 1 tbsp | Sub maple syrup if preferred |
| Active Dry Yeast 🍞 | ¼ tsp | For final proofing |
| Cornmeal 🌽 | ¼ cup | For dusting loaf pan |
| Water 💧 | ½ cup | Room temperature |
| Sesame Seeds 🌻 | 1 tbsp | Optional for topping |
| Poppy Seeds 🌻 | 1 tbsp | Optional for topping |
The flour blend is where the magic happens. King Arthur or Bob’s Red Mill flours are my go-to for consistent results—they’re milled finely enough to avoid grittiness while keeping that whole grain texture. Rye flour is key for flavor, but if you can’t find it, dark whole wheat works in a pinch. For the yeast, Fresh Prestige is my favorite for reliability, but active dry is fine too—just make sure it’s fresh (test it in warm water with a pinch of sugar; if it bubbles within 10 minutes, it’s good). The milk and honey combo gives that subtle sweetness without overpowering the whole grain flavor. Pro tip: Warm the milk to 100°F before mixing—it activates the yeast faster and prevents sticky dough later.
No honey? Maple syrup or agave works perfectly—just use the same amount. Running low on rye? Substitute with extra whole wheat, but expect slightly less depth. The yeast amounts are precise: too little and your bread won’t rise enough; too much and it’ll taste bitter. If you’re at high altitude, reduce yeast by 20 percent and add 1 tbsp extra water. For the olive oil, avoid light or refined oils—they lack the flavor and mouthfeel that makes this bread special. And if you’re feeling fancy, toast your whole grains in a dry pan for 3-4 minutes before mixing to enhance their nutty flavors (though it’s not required).
This dough is sticky—embrace it. Wet your hands and a dough scraper to handle it easily. For storage, wrap cooled loaves in a clean kitchen towel and place in a paper bag at room temperature for 2-3 days. Freeze for up to 3 months by wrapping tightly in plastic wrap, then foil. To revive, thaw overnight in the fridge and warm in a 200°F oven for 10 minutes. The bread also makes fantastic toast or croutons—just cube and bake until crispy. And here’s a secret: the day-old bread is often better for sandwiches, as the crumb firms up slightly.
Why You’ll Love This Recipe
- No-Knead Magic: I swear by this—just mix, let it rest, and bake. The bread flour keeps it light while the whole wheat and rye add depth, but you won’t spend hours punching dough. Honestly, my lazy Sundays just got better.
- Deep, Nutty Crunch: That rye flour? It’s the MVP here—earthy, slightly sweet, and it stays chewy for days. The sugar caramelizes just enough to give it a subtle toasted edge without overpowering the whole grain goodness.
- Meal Prep MVP: Slice it fresh, toast it later. I bake a loaf on Sunday, and by Thursday, it’s still the star of my lunchbox or avocado toast. Freezes like a dream too—just thaw and enjoy.
- Budget-Friendly Staple: Whole grains are cheap, and this recipe stretches far. I make two loaves for the price of one store-bought, and it’s actually better—no weird preservatives, just real flour and yeast doing their thing.
Step-by-step instructions for 100 percent whole grain bread
Here’s how to create a hearty, nutrient-packed loaf with perfect rise and texture.
Activate the Yeast and Mix the Dough
In a stand mixer fitted with the dough hook, combine the 2 cups bread flour, 2 cups whole wheat flour, 0.5 cup rye flour, 2.25 tsp instant yeast, 1 tbsp granulated sugar, and 2 tsp salt. Mix on low speed for 1 minute until the dry ingredients are evenly distributed. This creates a balanced foundation for your dough.
In a separate bowl, warm the 1.5 cups whole milk to 100°F (it should feel warm but not hot to the touch). Add the 2 tbsp olive oil and 1 tbsp honey to the warm milk and whisk until combined. This creates a rich, flavorful liquid base that will hydrate the dough perfectly.
With the mixer running on low speed, slowly pour in the milk mixture while adding the 0.5 cup water. Increase the speed to medium and mix for 4-5 minutes until the dough comes together and pulls away from the sides of the bowl. You’ll see it form a shaggy mass that eventually smooths out—this indicates proper gluten development.
Knead Until Elastic and Smooth
Continue kneading on medium speed for 5-7 minutes until the dough becomes smooth, elastic, and slightly tacky. It should pass the “windowpane test”—when you stretch a small piece, it should thin enough to see light through without tearing. This step is crucial for creating a bread with good structure and chew.
If the dough feels too sticky, add 1 tablespoon of flour at a time until it reaches the right consistency. Whole grain flours absorb more moisture, so don’t be surprised if you need to add a bit extra. The dough should feel soft but not wet when you press it gently.
Once properly kneaded, transfer the dough to a lightly oiled bowl, turning it to coat all surfaces. Cover with a damp towel and let it rise in a warm place for 1-1.5 hours or until it has doubled in size. You’ll know it’s ready when it springs back slowly when poked gently with a finger.
Shape and Proof the Dough
Punch down the risen dough to release air, then turn it out onto a lightly floured surface. Gently shape it into a loaf by folding the ends toward the center and rolling it into a smooth rectangle. Roll it up tightly from the short end to form a log shape, tucking the seam underneath.
Place the shaped loaf seam-side down in a 9×5-inch loaf pan that has been lightly dusted with 0.25 cup cornmeal. This creates a crisp, golden crust and prevents sticking. Cover the pan with a damp towel and let it proof for another 30-45 minutes until it has risen about 1 inch above the pan. The dough should feel firm but still slightly springy to the touch.
While the dough proofs, preheat your oven to 375°F. This high temperature will help create that beautiful crust we’re after. Sprinkle the 1 tbsp sesame seeds and 1 tbsp poppy seeds evenly over the top of the loaf for added texture and flavor.
Bake to Perfect Golden Brown
Bake the loaf for 35-40 minutes until it reaches an internal temperature of 190-200°F and the top is deep golden brown. You’ll know it’s done when it sounds hollow when tapped on the bottom. The bread should pull away cleanly from the sides of the pan.
For an even better crust, I like to spray the oven with water just before putting the bread in. This creates steam that helps develop that crisp exterior. If the top browns too quickly, tent the loaf with aluminum foil after 20 minutes to prevent over-browning.
Once baked, transfer the loaf to a wire rack to cool completely. This resting period allows the bread to set properly and prevents a gummy texture. The bread will continue to firm up as it cools, making each slice perfect for your sandwiches or toast.
Pro Tips For Making 100 Percent Whole Grain Bread
- Mix the Dough Wet: Whole grain doughs are stubborn—don’t fight them. Add the water gradually while mixing, especially when combining bread flour, whole wheat, and rye. You’ll end up with a shaggy mess that looks wrong, but it’s the only way to avoid a dense brick. Trust the process; the gluten will relax later.
- Rest the Dough Longer: I learned this the hard way—skipping the full 1–2 hour rest after mixing leads to a crumbly, uneven loaf. Whole grain flours need extra time to hydrate and develop structure. Set a timer, cover it, and let it sit even if it feels like nothing’s happening. Your future sandwich won’t fall apart.
- Use Warm Water for Yeast: Cold water kills yeast before it wakes up, and that’s a disaster with whole grain doughs (which ferment slower anyway). Mix your yeast with warm water (105–110°F—just below body temp) and let it foam for 5 minutes before adding it to the dough. No foam? Start over; your bread won’t rise.
- Add Vital Wheat Gluten: Whole grain flours lack gluten, and without it, your bread will be dense and gummy. Mix in 1–2 tablespoons of vital wheat gluten per cup of whole grain flour to mimic bread flour’s structure. It’s the non-negotiable upgrade that makes the difference between sad and satisfying.
Health benefits of this recipe
Fiber-Rich Foundation
This bread delivers 12-15 grams of fiber per slice—that’s 50-60% of your daily recommended intake—thanks to the whole grain flours. Fiber supports digestive health by promoting regularity and feeding beneficial gut bacteria.
The combination of bread flour, whole wheat, and rye creates a balanced texture while maximizing fiber content without sacrificing taste. 🌾
Whole Grain Nutrition
Unlike refined white bread, this recipe retains all the bran, germ, and endosperm from the whole grains, providing B vitamins (thiamine, riboflavin, niacin), iron, and magnesium.
A single slice offers 15-20% of your daily iron needs, making it ideal for energy levels and preventing anemia. The rye flour adds extra B vitamins and antioxidants.
Protein Powerhouse
With 10-12 grams of protein per serving, this bread helps keep you full longer and supports muscle maintenance. The bread flour contributes high-protein gluten development, while the whole grains add plant-based protein.
It’s a great alternative to refined breads that offer little nutritional value. Perfect for post-workout meals or hearty sandwiches!
Low Glycemic Impact
The whole grain blend results in a lower glycemic index compared to white bread, helping stabilize blood sugar levels. The honey and olive oil add natural sweetness and healthy fats, which further slow digestion.
This makes it ideal for balanced meals, especially when paired with lean proteins or healthy fats like avocado.
Antioxidant Boost
The rye and whole wheat flours contain lignans and phenolic compounds, powerful antioxidants that fight inflammation and oxidative stress. These compounds are often lost in refined grains but preserved in this 100% whole grain recipe. Regular consumption may even support long-term heart health! 💪
Versatile for Diets
This bread fits seamlessly into gluten-free-free, vegan, and low-carb diets when modified (though it’s naturally gluten-rich). The no added sugar formula keeps it diabetic-friendly, while the high fiber content makes it satisfying for weight management. Swap honey for monk fruit sweetener or omit entirely for a sugar-free version.
Nutrition facts
Frequently asked questions
Why does my whole grain dough always turn out dense?
Whole grain flours absorb more moisture and contain less gluten than white flour, which can lead to dense bread. To fix this, ensure you’re using a bread flour base (50% of your blend) for structure, and don’t over-knead—the dough should be tacky but not sticky. The autolyse step in this recipe helps develop gluten gently without overworking the dough. Also, make sure your yeast is fresh and active.
Can I substitute all-purpose flour for the bread flour?
You can try, but your bread will likely be less tender with a denser crumb. The high protein content in bread flour (12-14%) creates better gluten structure than all-purpose (10-11%). For best results, stick with the recipe’s flour blend. If you must substitute, increase bread flour by 10-15% to compensate for the lower protein content.
How do I know when my dough is properly proofed?
Your dough is ready when it’s doubled in size and springs back slowly when poked gently with a finger. It should feel firm but still slightly springy—not mushy or collapsing. For visual confirmation, look for a slight dome forming at the top. Whole grain dough rises more slowly than white flour dough, so give it 10-15 minutes extra if needed. The dough should also feel warm to the touch.
What’s the best way to store this bread to keep it fresh?
Wrap cooled loaves in a clean kitchen towel and place in a paper bag at room temperature for 2-3 days. For longer storage, freeze wrapped loaves for up to 3 months—thaw overnight in the fridge before toasting. The towel creates a breathable barrier that prevents sogginess, while the paper bag mimics bakery conditions. Avoid plastic bags, which trap moisture and accelerate staling.
Can I make this recipe without a stand mixer?
Mix the dough by hand in a large bowl using a wooden spoon, then turn it onto a lightly floured surface and knead for 8-10 minutes until smooth and elastic. The dough will be stickier, so wet your hands frequently. For the autolyse step, simply mix the dry ingredients with water first and let it rest for 20 minutes before adding the wet ingredients. Just be prepared for more elbow grease—whole grain dough requires more effort to develop gluten properly.

- 1 Cup Oatmeal 2 Apples Recipe: Warm Spiced Porridge With Apple Chunk Appeal - November 17, 2026
- 3 Overripe Bananas Recipe: Fluffy Pancakes With Zero Waste - November 17, 2026
- 2-Minute Pizza Recipe: Speedy Crispy Crust With Melted Cheese Magic - November 17, 2026