
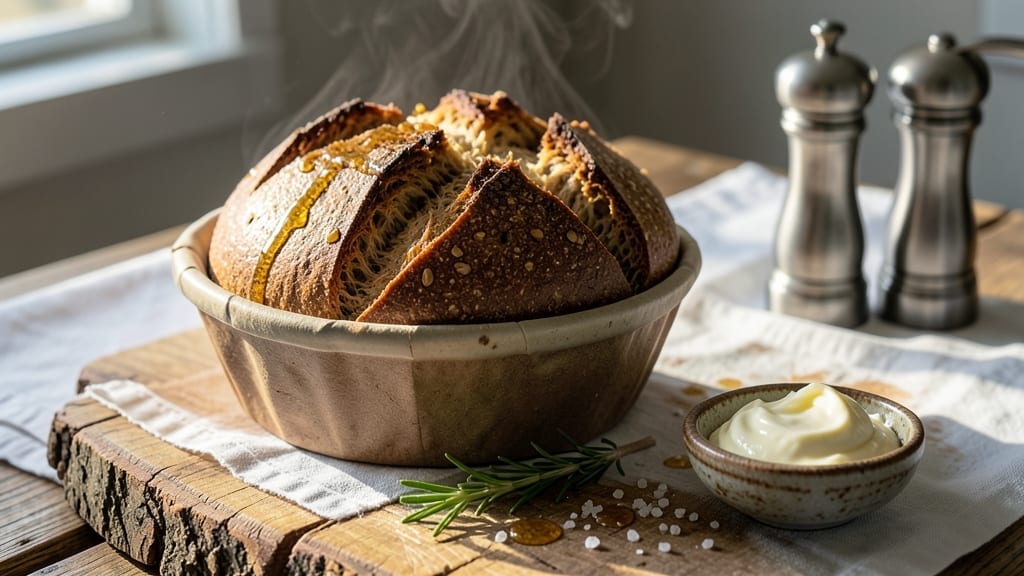
Mastering 100 percent whole wheat sourdough bread transforms dense, dry loaves into artisanal masterpieces with a crisp crust and airy crumb. The secret lies in proper fermentation—letting whole grains develop flavor and lightness through time rather than shortcuts.
This recipe delivers restaurant-quality results at home, with a methodical approach that builds confidence for beginners and refines technique for experienced bakers.
The process begins with a well-fed starter, then moves to high-hydration dough that requires patience but rewards with an open crumb structure. Whole wheat flour demands extra attention to hydration and fermentation time, but the payoff is a loaf packed with nutty depth and chewy texture.
Each step—from bulk fermentation to final proof—is critical for achieving that perfect balance of crusty exterior and tender interior.
By the time you pull this loaf from the oven, you’ll have a crusty, flavorful loaf that rivals commercial sourdough—without the guilt of refined flour. The aroma alone will transform your kitchen into a bakery, and every slice will be proof that whole grains can deliver both nutrition and indulgence.
Let’s get started on creating your perfect loaf.
This recipe accommodates dietary needs while delivering exceptional flavor, making it ideal for vegetarians seeking whole-grain options. The extended fermentation not only improves digestibility but also develops complex flavors that set this bread apart. Whether you’re baking for daily enjoyment or special occasions, the results speak for themselves.
Ingredients for 100 percent whole wheat sourdough bread
Whole wheat flour needs patience, but this starter and hydration balance creates restaurant-style sourdough at home.
| Ingredient | Amount | Notes |
|---|---|---|
| Active Sourdough Starter 🍞 | ½ cup | Well-fed, bubbly, 100% hydration |
| 100% Whole Wheat Flour 🌾 | 3 ½ cups | High-protein, freshly milled preferred |
| Filtered Water 💧 | 2 ¼ cups | Room temperature, 75°F |
| Unsalted Butter 🧈 | ¼ cup | Cold, cubed for lamination |
| Kosher Salt 🧂 | 1 ½ tsp | Diamond Crystal preferred |
| Honey 🍯 | 1 tbsp | Raw, for starter feeding |
| Olive Oil 🫒 | 2 tbsp | Extra-virgin, for dough handling |
| Cornmeal 🌽 | ¼ cup | Fine, for dusting |
| Semolina Flour 🌾 | ¼ cup | For final dusting |
| Ice Water ❄️ | ½ cup | For shaping |
| Rice Flour 🌾 | 2 tbsp | Optional, for crust enhancement |
The sourdough starter is your foundation—it should be active, bubbly, and doubled in size after 4-6 hours with honey. King Arthur or Bob’s Red Mill whole wheat flours work best here due to their high protein content, but any 100% whole wheat will do. If your starter smells tangy but isn’t bubbly, feed it twice more before using. The butter should be cold and cubed—this creates those coveted laminations. For the flour, King Arthur’s 100% Whole Wheat is my go-to, but any brand with 14-16% protein will work. Store your starter in a glass jar with a loose lid in a warm spot (75°F is ideal).
No active starter? Feed your discard with 1 cup flour + 1 cup water twice daily for 2 days before using. Running short on time? Instant yeast at 0.25 tsp can jumpstart fermentation, though flavor won’t be as developed. The honey is optional but helps feed the starter—local raw honey adds subtle floral notes. For the butter, European-style unsalted like Plugrá or President melts beautifully. Swapping whole wheat flour? Add 1 tbsp vital wheat gluten per cup to improve gluten structure. The cornmeal and semolina should be finely ground—coarse versions won’t dust properly.
Your starter should be freshly fed 4-6 hours before mixing—it needs to be at peak activity. Store unused flour in airtight containers in the freezer for up to 6 months to preserve freshness. The dough can be bulk fermented overnight in the fridge for deeper flavor—just let it sit at room temp for 1 hour before shaping. For the final loaf, steam the Dutch oven by placing a metal tray with boiling water underneath while preheating. This creates that perfect oven spring. Leftover dough? Portion into balls and freeze for up to 3 months—thaw overnight in the fridge before baking.
Why You’ll Love This Recipe
- I’ll be real: this bread requires zero standing-at-the-counter energy. Just mix your starter, whole wheat flour, and water—no punching, no rolling—then let it rise while you do dishes. The butter and salt work themselves into the dough during bulk fermentation, so even the shaping feels effortless.
- No-Knead Magic: I’ll be real: this bread requires zero standing-at-the-counter energy. Just mix your starter, whole wheat flour, and water—no punching, no rolling—then let it rise while you do dishes. The butter and salt work themselves into the dough during bulk fermentation, so even the shaping feels effortless.
- Nutty, Tangy Crust: That crispy, caramelized crust? It’s all thanks to the whole wheat flour’s natural sugars and the sourdough’s slow fermentation. The butter adds a buttery richness inside, while the salt cuts through the earthy wheat—like a hug for your sandwich or toast.
- Meal Prep MVP: Between us, this bread lasts forever. I’ve had loaves for five days, and they’re still fresh enough to toast. Slice it for breakfast, pack it in lunches, or freeze half for when you’re too tired to bake. The sourdough starter’s tang even improves with age—yes, really.
Step-by-step instructions for 100 percent whole wheat sourdough bread
Here’s how to transform whole wheat flour into a bread with perfect crust and open crumb.
Feed and Prepare the Sourdough Starter
Begin by feeding your active sourdough starter with 1 tbsp honey and 1 cup of the 100% whole wheat flour. Mix well until fully combined, then let it sit at room temperature for 4-6 hours until it’s bubbly and has roughly doubled in size. This feeding ensures your starter is vigorous enough to handle the dense whole wheat flour.
I like to test the starter by doing a float test—drop a spoonful in water. If it floats, it’s ready. If not, give it another hour. The starter should have a slightly tangy aroma and be light enough to hold its shape when dropped. This preparation is crucial because whole wheat flour absorbs more water and ferments differently than white flour.
Mix the Dough with Butter Lamination
In a large mixing bowl, combine the 3.5 cups of 100% whole wheat flour, 1.5 tsp kosher salt, and the 0.5 cup active sourdough starter. Make a well in the center and add 2.25 cups filtered water and 2 tbsp olive oil. Mix vigorously until a shaggy dough forms, scraping down the sides as needed.
Now for the butter lamination: cut the 0.25 cup unsalted butter into small cubes and distribute them evenly throughout the dough. Using your hands, work the butter into the dough until fully incorporated. The butter should create pockets that will give your bread a tender crumb. This step takes about 5 minutes of kneading by hand—don’t rush it. The dough will be sticky but should come together when pressed.
Autolyse and Bulk Ferment for Maximum Development
Cover the dough with a damp towel and let it rest for 1 hour. This autolyse step allows the flour to fully hydrate and develop gluten, which is especially important with whole wheat flour that tends to be denser. After the hour, perform a series of stretch and folds every 30 minutes for 2 hours total. This builds strength in the dough and ensures an open crumb structure.
During the bulk fermentation, the dough will rise slowly—this is normal with whole wheat. Look for about 50% increase in volume and a jiggly texture when gently shaken. The dough should smell slightly sweet and tangy. If it’s not rising well after 4 hours, it may need a warmer environment (try placing it near a slightly warm oven with the light on). Patience here pays off with better flavor and texture.
Shape and Cold Proof for Crust Development
Turn the dough onto a lightly floured surface and shape it into a round boule. I like to use the “stretch and fold” method for shaping—grab one side, stretch it upward, and fold it over itself. Rotate the dough and repeat until all sides are tight. Place it seam-side up in a well-floured banneton or bowl.
Cover with plastic wrap and refrigerate for 12-16 hours. This cold proofing slows fermentation, allowing flavors to develop and the gluten to relax. The dough should rise about 25-30% during this time. Before baking, dust the dough with 0.25 cup semolina flour and place it on a parchment-lined baking sheet. Let it sit at room temperature for 1 hour to develop tension in the skin—this creates that beautiful oven spring.
Bake with Steam for Maximum Crust Development
Preheat your oven to 450°F with a Dutch oven inside for 45 minutes. Remove the Dutch oven and carefully transfer the dough (with parchment) into it. Immediately pour 1 cup of ice water into the bottom of the Dutch oven to create steam. Cover with the lid and bake for 20 minutes.
Remove the lid and continue baking for 25-30 minutes until the internal temperature reaches 205-210°F and the crust is deep golden brown. For extra crust enhancement, brush the top with a mixture of 2 tbsp rice flour and 1 tbsp water during the last 10 minutes of baking. This creates that beautiful shatter crust characteristic of artisanal bread.
Cool and Enjoy with Proper Technique
Remove the bread from the Dutch oven and transfer it to a wire rack. Let it cool completely for at least 2 hours before slicing. I know it’s tempting to cut into warm bread, but this cooling period allows the crumb to set properly and prevents a gummy texture. The bread will continue to develop flavor as it cools—this is when the magic really happens.
Once cooled, slice with a sharp serrated knife and serve. Each slice should have a crisp crust that gives way to an open, airy crumb with pockets of tender whole wheat goodness. Store any leftovers wrapped in a cloth bag at room temperature for up to 3 days, or freeze for longer storage. The flavor actually improves over time as the starches retrograde!
Pro Tips For Making 100 Percent Whole Wheat Sourdough Bread
- Autolyse First: Mix your whole wheat flour and water alone for 30 minutes before adding starter—this relaxes the tough bran, making the dough easier to handle and less likely to turn gummy. I used to skip this, and my dough always fought me during shaping.
- Weigh Your Starter: Use a scale for your active starter (aim for 10-15% of total flour weight) instead of eyeballing it—whole wheat’s density throws off volume measurements. One time, I added too much starter, and my loaf collapsed like a sad soufflé.
- Steam the Oven: Place a metal tray with boiling water in the oven before baking to create steam for the first 10 minutes—this helps the crust form without cracking. I learned this after watching my first batch develop a sad, uneven dome.
- Skip the Butter Too Late: Fold in the unsalted butter during the final stretch-and-fold (after bulk fermentation) to keep it from melting into the dough too early. I once added it at the start, and my bread tasted like buttery mush instead of rich, flaky layers.
Essential equipment for this dish
Dutch Oven Essentials
Your Dutch oven is the heart of this recipe—it traps steam for that perfect oven spring and creates a crisp crust. I recommend a 5-6 quart enameled cast iron like Lodge or Le Creuset. The enameled version prevents rust and makes cleanup easier.
If you’re on a budget, a Lodge Pre-Seasoned Dutch Oven works perfectly for whole wheat sourdough. The key is to preheat it thoroughly with the lid on to create that steam chamber. 🔥
Banneton and Towels
A banneton (proofing basket) is non-negotiable for shaping your boule. I use a rattan-lined banneton from Amazon or King Arthur Baking—the natural fibers prevent sticking and add texture. If you don’t have one, a well-floured bowl lined with a damp kitchen towel works in a pinch.
The towel helps maintain humidity during the cold proof. For the final proof, a parchment-lined baking sheet is essential to prevent sticking when transferring to the Dutch oven.
Digital Thermometer
Whole wheat dough ferments differently, so a digital instant-read thermometer (like Thermoworks Thermapen) is your best friend. Use it to check the internal temperature of the dough during bulk fermentation—ideal range is 75-78°F. For baking, monitor the oven temperature and bread’s internal temp (aim for 205-210°F).
Pro tip: Place the thermometer probe in the center of the loaf when it’s done—if it reads lower, bake longer. This precision is especially critical with whole wheat, which can underbake if not monitored closely. 🌡️
Scale for Precision
While cups work, a digital kitchen scale (like OXO Good Grips) ensures consistency, especially with whole wheat flour, which varies in density. Weigh your flour by grams for accuracy—420g total for this recipe. For water, use the scale too: 540g (2.25 cups) gives the right hydration.
A scale eliminates guesswork and helps troubleshoot issues like overly dense crumb or sticky dough. I keep mine on my counter for all baking projects.
Proofing Tools
For cold proofing, a plastic wrap or beeswax wrap keeps the dough moist without sticking. If your kitchen is dry, add a humidity tray (a shallow tray with hot water near the fridge shelf) to prevent the dough from drying out.
For shaping, a dough scraper (like Jamie Geller) helps handle the sticky whole wheat dough without tearing. Dust your work surface with semolina flour—it’s finer than all-purpose and prevents sticking better during shaping. 💫
Optional Extras
For that shatter crust, a rice flour slurry (2 tbsp rice flour + 1 tbsp water) brushed on during the last 10 minutes of baking adds a beautiful sheen. A laser thermometer (like Kizen) helps monitor oven temperature fluctuations, which are common with whole wheat’s longer bake time.
If you love crusty bread, a bread lame (like La Cloche) scores the loaf before baking for dramatic slashes. These extras elevate your bread from homemade to bakery-quality.
Nutrition facts
Frequently asked questions
Why does my whole wheat sourdough turn out dense?
Whole wheat flour absorbs more water and lacks gluten proteins, making it prone to dense results. To fix this, extend bulk fermentation to 6-8 hours (or overnight in the fridge) and perform stretch-and-folds every 30 minutes for 2 hours to strengthen the dough. Also ensure your starter is active and bubbly—a weak starter won’t develop enough gas for proper rise.
Can I substitute all-purpose flour for some of the whole wheat?
Yes! For a lighter texture, replace 1-1.5 cups of whole wheat with all-purpose flour. This improves gluten structure while keeping some whole grain benefits. Start with a 70/30 split (70% whole wheat, 30% all-purpose) and adjust based on your preferred density. The butter lamination will still work, but reduce butter to 0.125 cup since all-purpose dough handles less fat.
How do I know when the dough is fully proofed?
Look for these signs: the dough should rise 50-75% in volume, have a jiggly texture when gently shaken, and leave a clean finger indent that slowly springs back. For whole wheat, use a digital thermometer—ideal proofing temp is 75-78°F. Cold proofing (fridge) slows fermentation, so check for 25-30% rise after 12-16 hours. If it’s not rising, your starter may need refreshing or your kitchen is too cold.
What’s the best way to store leftover whole wheat sourdough?
Wrap cooled bread in a cotton towel or beeswax wrap and store at room temperature for 3-4 days—this preserves freshness better than plastic. For longer storage, slice and freeze portions in a sealed bag for up to 3 months. To revive, toast frozen slices directly in the toaster or warm in a 350°F oven for 5-7 minutes. Avoid refrigerating—it dries out the crumb faster.
Can I make this without a Dutch oven?
Use a commercial baking stone or steel pan on the lowest oven rack with a tray of boiling water below for steam. Preheat for 1 hour and bake at 425°F instead of 450°F. For extra crust, spray the loaf with water before baking. The texture won’t be identical, but you’ll still get a flavorful loaf. If using a sheet pan, bake at 375°F and tent with foil after 20 minutes to prevent over-browning.

- 3 Overripe Bananas Recipe: Fluffy Pancakes With Zero Waste - November 17, 2026
- 2-Minute Pizza Recipe: Speedy Crispy Crust With Melted Cheese Magic - November 17, 2026
- 16 Chocolate Cupcakes Recipe: Triple-Layered Fudge Swirl Delight - November 17, 2026