
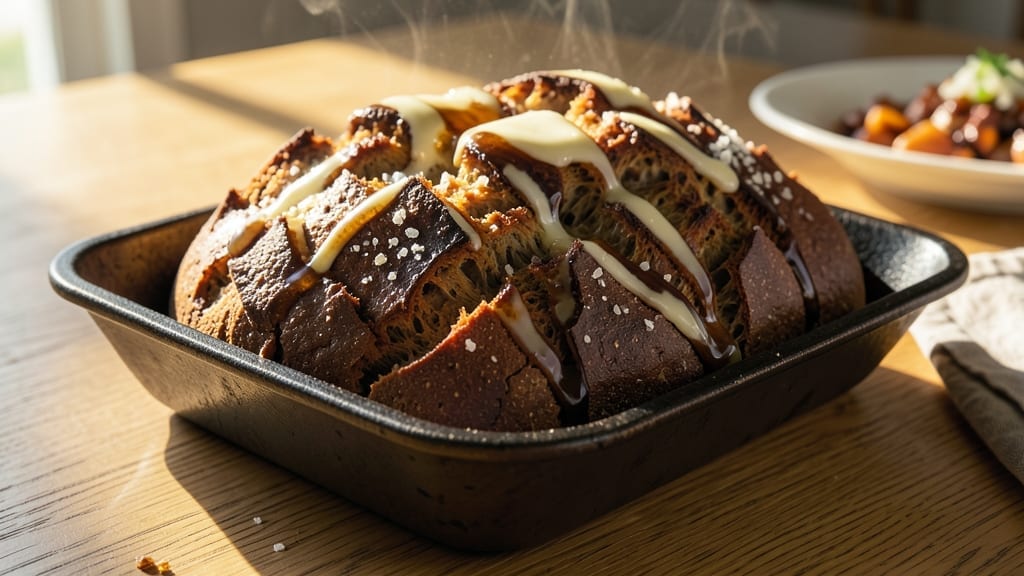
This 100 rye bread machine recipe transforms your bread maker into a bakery-worthy powerhouse, delivering that authentic European tang and crusty crumb without the trip. This recipe unlocks the full potential of your machine by blending traditional rye techniques with modern convenience, ensuring a loaf that rivals artisanal bakeries.
The key lies in precise ingredient ratios and understanding your machine’s cycles—dough development, proofing, and baking all work together to create that signature dense yet airy texture.
What sets this rye bread apart is the balance between dark rye flour for depth and light rye flour for structure, creating a loaf with both hearty chew and subtle sweetness.
Unlike store-bought versions, this recipe builds flavor through proper yeast activation and controlled fermentation, resulting in a crust that crackles with every bite. The 100% rye formulation means no wheat flour shortcuts—just pure, unadulterated rye character that bakers have perfected for centuries.
By the time your machine finishes its cycle, you’ll have a loaf with a deep amber crust, a crumb that’s dense yet tender, and that unmistakable caramelized molasses aroma that makes rye bread irresistible.
This recipe works with most bread machine models, though I recommend using the basic white or whole wheat setting as your starting point before adjusting for your specific machine’s quirks. The proofing stage is where the magic happens—patience here ensures that perfect rise.
Perfect for sandwiches, open-faced rye with smoked fish, or simply toasted with butter, this bread keeps well for up to a week when stored properly. The recipe also accommodates optional additions like sunflower seeds for crunch or a touch of honey for subtle sweetness.
Let’s get started on creating your most authentic rye bread yet.
Ingredients for 100 rye bread machine
Authentic rye flavor starts with these 11 essential ingredients—no shortcuts, just pure European-inspired depth.
| Ingredient | Amount | Notes |
|---|---|---|
| Dark Rye Flour 🌾 | 3 cups | For deep, robust flavor |
| Light Rye Flour 🌾 | 1 cup | For structure and lift |
| Active Dry Yeast 🍞 | ¼ tsp | Instant yeast works too |
| Granulated Sugar 🍚 | ½ tsp | Feeds yeast activation |
| Unsalted Butter 🧈 | ¼ cup | Softened, full-fat preferred |
| Molasses 🍯 | 2 tbsp | Unsulphured for authentic flavor |
| Warm Water 💧 | 1 ¼ cups | 110°F for yeast activation |
| Salt 🧂 | 1 ½ tsp | Diamond Crystal preferred |
| Sunflower Seeds 🥜 | ¼ cup | Optional for texture |
| Honey 🍯 | 1 tbsp | Optional for subtle sweetness |
| Extra-Virgin Olive Oil 🫒 | 1 tbsp | For dough elasticity |
The flours are non-negotiable here. Bob’s Red Mill dark rye flour delivers that signature tang, while their light rye adds structure—don’t substitute with whole wheat. For yeast, Saf-Instant works perfectly in bread machines, but if using active dry, let it proof separately first. Molasses is where the soul of rye bread lives—unsulphured versions taste cleaner. I grab mine from Whole Foods bulk section, but any reputable grocery store carries it. The sunflower seeds? Costco’s bulk bin is unbeatable for price and freshness—just toast them 5 minutes at 350°F before adding for maximum crunch.
No dark rye flour? Substitute half with whole wheat—it won’t be identical, but better than store-bought. Short on molasses? Barley malt syrup at 1:1 ratio works in a pinch, though it lacks that caramelized depth. The honey is truly optional, but if you skip it, add an extra 0.5 tsp molasses for balance. For the butter, European-style (like Plugrá) has more flavor than American brands. If you’re dairy-free, coconut oil works but lacks richness. The olive oil? California Extra Virgin brands have the best balance of fruitiness and peppery finish—avoid the cheap supermarket stuff that’s been sitting on shelves.
This dough is sensitive—don’t let it sit too long before starting. The yeast activates fastest in warm water (110°F), so use a thermometer if your kitchen runs cold. Once mixed, let it rest 10 minutes before loading into your machine—this relaxes the gluten and prevents a dense crumb. For storage, wrap tightly in beeswax wrap or foil to maintain freshness. Keeps 5-7 days at room temperature, but the crust gets best after 24 hours when it fully develops its crunch. Freezes beautifully for up to 3 months—just thaw at room temp before slicing.
Why You’ll Love This Recipe
- Machine Does the Work: The bread machine handles all the kneading and rising—no elbow grease required. Just toss in the dark rye flour, light rye flour, and yeast, then let it do its magic while you prep dinner or answer emails.
- Deep, Nutty Crust: That mix of dark and light rye flour gives it a satisfying chew and a rich, almost caramelized crust. Honestly, the first slice out of the machine smells like a bakery, and it’s that good.
- Budget-Friendly Staple: A single batch costs pennies per serving, and the rye flour keeps well—no wasted ingredients. I’ve made this for breakfast, sandwiches, and even toasted it for charcuterie boards without breaking the bank.
- Weeknight Hero: Freezes like a dream for quick toast later, and the butter in the dough keeps it moist for days. Between us, this is the bread I reach for when I’m too tired to bake from scratch but still want something better than store-bought.
Step-by-step instructions for 100% rye bread machine recipe
Here’s how to transform simple ingredients into a loaf with deep rye flavor and perfect crust.
Mix the Wet Ingredients and Yeast
In the bread machine pan, combine the 1.25 cups warm water (about 110°F) with the 0.25 tsp active dry yeast. Let this mixture sit for 5 minutes until it becomes frothy—this confirms the yeast is active. Add the 2 tbsp molasses and 1 tbsp honey, stirring gently to dissolve completely. The molasses gives that signature tangy depth while the honey adds subtle sweetness to balance.
Next, whisk in the 0.25 cup softened unsalted butter and 1 tbsp extra-virgin olive oil until fully emulsified. The olive oil improves dough elasticity, preventing cracks in the final loaf. If the butter isn’t softened, melt it first but don’t let it get warm—you want it just pliable, not liquid.
Combine Dry Ingredients and Hydrate
In a separate bowl, whisk together the 3 cups dark rye flour, 1 cup light rye flour, and 1.5 tsp salt. The dark rye flour provides the robust flavor while the light rye adds structure. Gradually pour this mixture into the wet ingredients in the bread machine pan, mixing on the lowest speed setting until just combined—about 1 minute. You’ll want to see a shaggy dough form without any dry spots.
Add the 0.25 cup sunflower seeds (if using) and mix for another 30 seconds to distribute evenly. These seeds add delightful texture and a subtle nutty flavor. If you’re skipping them, simply proceed to the next step. The dough will be quite sticky at this stage, which is normal for rye bread.
Set the Bread Machine and Begin the Process
Transfer the dough to the bread machine pan, making sure it’s centered and not touching the sides. Select the “Basic White Bread“ setting on your machine—this typically includes a 2-hour cycle with kneading, rising, and baking phases. The machine will automatically handle the kneading for you, developing gluten and creating a smooth, elastic dough.
I like to place the bread machine in a warm spot in my kitchen—this helps the yeast activate more quickly during the rise. Listen for the machine to begin kneading; you’ll hear a rhythmic thumping sound as the dough is worked. The first rise should take about 45 minutes, until the dough doubles in size and fills about 75% of the pan.
Shape and Bake to Golden Perfection
Once the kneading and first rise are complete, the machine will automatically begin the baking cycle. Let it run its full course—this usually takes about 1 hour for the baking phase. The bread is done when the internal temperature reaches 190-200°F and the crust has a deep golden brown color with visible cracks.
When the cycle finishes, remove the loaf immediately and place it on a wire rack to cool for at least 30 minutes. This cooling period is crucial—it allows the steam inside the loaf to escape, preventing a gummy texture. The bread will continue to develop its rich, tangy flavor as it cools, so patience here pays off.
Slice and Serve for Maximum Enjoyment
After cooling, slice the loaf with a sharp serrated knife for clean cuts. The interior should have a dense, moist crumb with a slight open grain pattern. If you’re serving immediately, warm the slices in a 350°F oven for 5 minutes to enhance the aroma and texture. This bread pairs beautifully with sharp cheeses, smoked fish, or simply with butter and jam.
For best results, store any leftovers wrapped in plastic at room temperature for up to 3 days. You can also freeze slices for up to 3 months—just toast from frozen for a fresh-baked taste. The flavor actually improves slightly over the first day as the rye’s natural acids develop further.
Pro Tips For Making 100 Rye Bread Machine
- Mix Light First: Start with the light rye flour in the bread machine—it absorbs moisture faster and prevents a gummy dough. I learned this the hard way when my first batch turned into a sticky mess because I dumped everything in at once.
- Bloom Yeast in Butter: Dissolve the yeast in warm water with the sugar, then mix it into the melted butter before adding to the machine. The fat coats the yeast, giving it a head start and avoiding that sad, flat loaf when the yeast gets sluggish.
- Skip the Crowding: Resist the urge to peek or press down on the dough during the first 30 minutes—rye bread needs time to rise properly. I used to check every 10 minutes, and my loaves always came out dense. Let it do its thing.
- Use Cold Butter: Chill the unsalted butter before adding it to the machine—it slows gluten development and keeps the crumb tender. I was skeptical until I tried it; now my rye has that perfect balance of chew and softness without turning into a brick.
Pro cooking tips for this recipe
Yeast Activation Check
Before mixing everything, always verify your yeast is active by testing it in the warm water first. Sprinkle the 0.25 tsp active dry yeast into the 1.25 cups warm water (110°F) and wait 5 minutes—it should create noticeable bubbles and foam.
If it doesn’t, your yeast is dead, and you’ll need to start over. I keep a small jar of yeast in my fridge for freshness, but even fresh yeast can fail if the water’s too hot or cold. 💫
Dough Temperature Matters
Rye dough is trickier to handle than wheat-based dough because it’s naturally cooler and stickier. Aim for a dough temperature of 78-80°F before loading it into the machine—this ensures proper yeast activity during rising.
If your kitchen is cold, warm the mixing bowl slightly by running it under hot water for 30 seconds before combining ingredients. I use an instant-read thermometer to check dough temp after mixing.
Machine-Specific Adjustments
Not all bread machines handle rye dough the same way. If your loaf comes out dense, try switching to the “Whole Wheat” setting—it often has a longer kneading phase that rye dough benefits from.
For machines without specific rye settings, manually increase the kneading time by 10-15 minutes to fully develop the gluten. I’ve found that Panasonic and KitchenAid models handle rye better than some budget brands.
Proofing for Perfect Rise
The proofing stage is where rye bread develops its signature open crumb. If your machine’s proofing phase feels too short, pause the cycle after 30 minutes of kneading and let the dough rise uncovered at room temperature for an extra 15-20 minutes.
You’ll know it’s ready when the dough springs back slowly when poked and fills about 75% of the pan. Overproofing is the #1 cause of flat rye bread—trust your eyes, not just the timer. ✨
Crust Development Tricks
For that authentic bakery-style crust, create steam during baking by spraying the inside of your machine pan with water before starting the cycle. You can also place a small bowl of hot water on the baking tray if your machine allows it.
The crust should develop deep amber cracks—if it’s pale, increase the baking time by 5-10 minutes or cover loosely with foil during the last 10 minutes for even browning.
Post-Bake Cooling Hack
Never cut into rye bread immediately after baking—this traps steam and makes the crumb gummy. For faster cooling without sacrificing texture, place the loaf on a wire rack and fan it gently with a handheld fan for 5 minutes while it cools.
I also like to invert the loaf onto the rack right after baking to encourage an even rise. The bread will continue developing flavor for up to 24 hours as it cools completely. 💡
Nutrition facts
Frequently asked questions
Can I substitute whole wheat flour for rye flour in this recipe?
While you can replace up to 50% of the dark rye flour with whole wheat, the flavor and texture will differ significantly. Rye flour’s natural acidity and lower gluten content create that signature tangy crumb. For best results, use the specified rye flours—they’re what make this bread authentic. If you must substitute, use 100% whole wheat only for light rye flour.
Why did my rye bread turn out dense instead of having that open crumb?
Dense rye bread usually means underproofing or insufficient kneading. Try these fixes: extend the kneading phase by 10-15 minutes (pause the cycle and add time manually), or let the dough rise uncovered for 15-20 extra minutes before baking. Also ensure your dough temperature is 78-80°F—cold dough rises slower.
How do I know when my bread machine’s cycle is complete?
Your machine will signal completion with a beep and display. For visual confirmation, check for a deep golden brown crust with visible cracks. The internal temperature should reach 190-200°F. If unsure, tap the bottom—the sound should be hollow, not dull. Always remove the loaf immediately to prevent overcooking.
Can I add sweetener beyond the honey and molasses?
Yes, but use sparingly! Try 1 tbsp brown sugar or 1 tsp cinnamon for subtle sweetness. For a sweeter loaf (like Swedish limpa), increase honey to 2 tbsp and add 0.25 cup raisins. Just remember: traditional rye bread relies on molasses for its signature tang, so don’t overdo it or you’ll lose that authentic flavor.
What’s the best way to reheat sliced rye bread?
For maximum crispiness, toast slices in a 375°F oven for 3-5 minutes until golden. For softness, use a toaster set to medium heat. To revive stale slices, wrap them in foil and heat in the oven at 350°F for 8-10 minutes. Never microwave—it makes rye bread rubbery.

- 3lb Prime Rib Roast Recipe: Juicy Pink Center Guaranteed in 3 Hours - October 31, 2026
- 5 Spice Cake Recipe: Warmly Spiced Layers With Crunchy Top - October 31, 2026
- 1950’s Macaroni and Cheese Recipe: Nostalgic Creamy Cheese Sauce with Buttery Noodles - October 31, 2026