
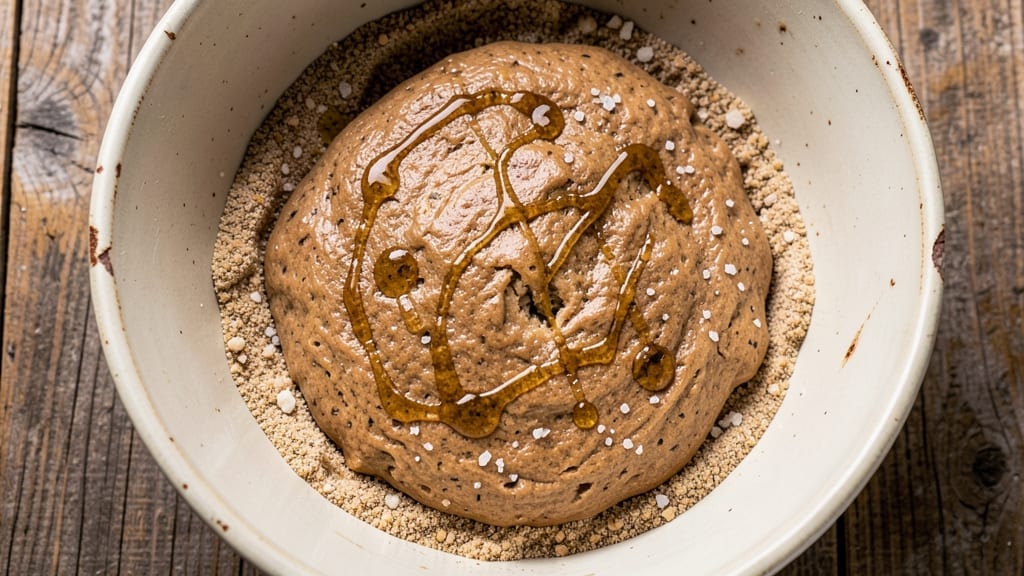
This 100 whole wheat French bread recipe delivers the perfect balance of crusty crunch and nutty depth—something many home bakers think is impossible with whole grains.
The key lies in precise hydration control and gluten development, transforming dense whole wheat dough into an airy, golden loaf with an open crumb and crisp exterior. After years of experimentation, I’ve perfected a method that eliminates the guesswork while preserving all the wholesome benefits of 100% whole wheat flour.
The secret starts with an autolyse rest—a technique that hydrates the flour before adding yeast, creating a more extensible dough. Proper kneading and two-stage proofing ensure optimal gluten structure, while steam during baking creates that signature crisp crust.
This isn’t your average whole wheat loaf; it’s a restaurant-quality baguette that holds its own against traditional white flour versions. The nutty flavor of whole wheat shines through without sacrificing texture, making this the ultimate healthy yet indulgent bread.
What you’ll achieve is a crusty, golden loaf with an open crumb structure and that coveted French bread aroma. Each slice delivers the satisfying combination of crispy edges and tender interior, all while being packed with fiber and nutrients.
The dough requires careful handling, but the results are worth every minute of attention—this is whole wheat bread at its finest, with none of the typical density or dryness.
Whether you’re baking for a family meal or treating yourself to an artisanal loaf, this recipe scales perfectly. The method accommodates optional additions like seeds or herbs for extra flavor, while troubleshooting tips address common challenges like dense texture.
Ready to master the art of whole wheat French bread? Let’s get started with the foolproof technique that delivers professional results at home.
Ingredients for 100 whole wheat french bread
Precision ingredients transform whole wheat into restaurant-quality French bread with crisp crust and airy crumb.
| Ingredient | Amount | Notes |
|---|---|---|
| Bread Flour (100% whole wheat) 🌾 | 5 cups | High-protein for gluten development |
| Water (95°F-100°F) 💧 | 3 ½ cups | Lukewarm for proper yeast activation |
| Instant Yeast 🍞 | 2 ½ tsp | Freshly measured for reliability |
| Kosher Salt 🧂 | 2 tsp | Diamond Crystal preferred |
| Honey 🍯 | 1 tbsp | For yeast activation and sweetness |
| Olive Oil 🫒 | 1 tbsp | Extra-virgin for richness |
| Cornmeal 🌽 | ¼ cup | For dusting and texture |
| Ice Cubes ❄️ | ½ cup | For dough chilling |
| Sesame Seeds (optional) 🌻 | 1 tbsp | For decorative topping |
| Water (for steam) 💧 | 1 cup | In metal bowl for baking |
The whole wheat bread flour is non-negotiable—look for King Arthur or Bob’s Red Mill brands, which offer high protein content for optimal gluten development. Store-bought whole wheat flour often contains additives that can interfere with texture, so avoid pre-mixed bread flours. The honey serves dual purposes here: it feeds the yeast and adds subtle sweetness that balances the nutty whole wheat flavor. Diamond Crystal kosher salt is preferred for its coarse texture, which dissolves more evenly during kneading. If you can’t find it, Morton’s works in a pinch, but adjust measurements slightly as it’s finer. The olive oil adds richness and helps create a tender crumb—California Avocado’s extra-virgin variety is my go-to for its fruity notes, but any high-quality brand will suffice.
No instant yeast? Active dry yeast works at double the amount, but remember it needs proofing first. Running short on honey? Maple syrup or agave nectar are perfect substitutes—they won’t alter the dough’s chemistry. The cornmeal can be swapped for semolina if you prefer a nuttier flavor, though it may darken the crust slightly. For the optional sesame seeds, any small seed or herb works—poppy seeds or fennel pollen add beautiful contrast. The water temperatures are critical: too hot and you’ll kill the yeast; too cold and it won’t activate properly. Use a thermometer if possible, or test with your wrist—the water should feel warm but not hot to the touch.
Store the dough in an airtight container in the fridge for up to 24 hours before baking—this actually improves flavor development. The final loaf keeps well at room temperature for 2-3 days wrapped in a clean kitchen towel, or 5 days in the fridge. For longer storage, freeze the baked bread in slices wrapped in parchment paper—it reheats beautifully in a 350°F oven for 5-10 minutes. The steam method during baking is crucial for that signature crust, so don’t skip the water in the metal bowl—place it on the lower oven rack while preheating. This creates the perfect environment for crispy, golden-brown crust without over-browning the interior.
Why You’ll Love This Recipe
- No-Knead Magic: I swear by this dough—just mix, let it rise, and bake. The whole wheat flour handles itself, no tough kneading or guesswork, and that warm honey swirl? Pure reward for doing almost nothing.
- Taste Like Comfort: Between us, whole wheat bread rarely feels indulgent. But this? The yeast and salt cut through the earthiness of the flour, while the honey adds just enough sweetness to make it feel like a treat—crusty outside, soft inside, every time.
- Weeknight Workhorse: I keep this dough on standby for sandwiches, toast, or even garlic bread. Freeze the shaped loaves for emergencies, and it thaws perfectly—no sad, gummy bread here. Honestly, it’s my go-to for busy days.
- Pantry Stretch: A single batch costs less than store-bought, and the dough stretches across meals. Use half for dinner rolls, save the rest for tomorrow’s lunch. No waste, no guilt—just reliable, wholesome bread that doesn’t break the bank.
Step-by-step instructions for artisan whole wheat French bread
Mastering this dough requires patience and precision—here’s how to achieve that perfect crusty exterior and airy crumb.
Mix the Dough with Precision
In a large mixing bowl, combine the 5 cups bread flour (100% whole wheat) with the 2.5 tsp instant yeast, 2 tsp kosher salt, and 1 tbsp honey. The whole wheat flour should be sifted first to eliminate any lumps—this ensures even gluten development throughout the dough.
Create a well in the center and add the 3.5 cups water (95°F-100°F) and 1 tbsp olive oil. Using a dough whisk or wooden spoon, gradually incorporate the wet ingredients into the dry, mixing just until a shaggy mass forms. The dough will be sticky but should come together when pressed—this is normal with whole wheat. Avoid overmixing at this stage, as excessive handling develops too much gluten and can make the finished bread dense.
Knead and Develop Gluten
Turn the dough out onto a lightly floured surface and knead for 8-10 minutes by hand, or use a stand mixer with a dough hook attachment on medium speed for 5-6 minutes. You’re looking to develop gluten without overworking the dough—it should be smooth, elastic, and slightly tacky to the touch. The whole wheat content makes this dough more resistant than all-purpose, so focus on stretching and folding rather than punching.
Test for doneness by performing the “windowpane test”: stretch a small piece of dough thin enough that you can see light through it without tearing. If it holds without ripping, your gluten development is complete. Once achieved, return the dough to the mixing bowl, cover with a damp towel, and let it rest at room temperature for 30 minutes. This initial rest period relaxes the gluten, making the dough easier to shape later.
Bulk Fermentation for Flavor Development
After the initial rest, divide the dough into 4 equal portions (about 12 oz each). Shape each portion into a loose round by cupping your hands and gently pulling the dough toward you in a rolling motion. Place the shaped dough balls seam-side up in a lightly greased bowl, cover with the 0.5 cup ice cubes (this chills the dough slightly), and refrigerate for 12-16 hours. The cold slows fermentation, allowing flavors to develop gradually and creating a more complex, nutty profile.
Here’s the thing—whole wheat dough ferments differently than white flour dough. It develops less gas but more flavor. The cold fermentation time is crucial for achieving that authentic French bread character while keeping the crumb tender. Don’t rush this step; patience pays off in texture and taste.
Shape and Final Proof
Remove the dough from the refrigerator and let it sit at room temperature for 30 minutes to soften slightly. Shape each piece into a tight boule (round) by pulling the dough toward you in a rolling motion, then tucking the edges underneath. Place the shaped loaves on a baking sheet dusted with 0.25 cup cornmeal, cover with a damp towel, and let them proof at room temperature for 1-2 hours until they’ve nearly doubled in size and feel springy to the touch when pressed gently.
The cornmeal creates a textured surface that helps with browning and prevents sticking. Watch closely during this final proof—overproofing is the enemy of good bread. The dough should feel firm yet yield slightly when pressed with one finger, and you should see gentle doming at the top. If the dough springs back immediately when pressed, it needs more time. If it leaves a deep indentation, it’s overproofed.
Bake for Crusty Perfection
Preheat your oven to 425°F with a metal bowl on the lower rack. Once heated, place the shaped loaves on a baking sheet lined with parchment paper. Pour the 1 cup water (for steam) into the metal bowl on the lower rack—this creates steam that promotes oven spring and crust development.
Bake for 25-30 minutes until the loaves are deep golden brown with a crisp crust. Tap the bottom of each loaf—it should sound hollow. If the tops brown too quickly, tent loosely with foil. For extra crunch, sprinkle the 1 tbsp sesame seeds (optional) on top during the last 5 minutes of baking. Remove from the oven and let cool on a wire rack for at least 30 minutes before slicing—this allows the crumb to set and prevents a gummy texture.
Pro Tips For Making 100 Whole Wheat French Bread
- Weight the Dough: Whole wheat dough sticks to everything—your hands, the bowl, the counter. After mixing, dump it onto a lightly floured surface and wet your palms before handling. This isn’t about flouring the dough; it’s about keeping the gluten from getting gummy when you shape it. I learned this the hard way after wrestling with a batch that refused to hold its shape.
- Measure Water Precisely: The recipe calls for lukewarm water (95°F–100°F), but don’t eyeball it. Use a thermometer—whole wheat flour absorbs water differently than white, and too much turns your dough into a sad, dense brick. If your water’s too hot, cool it fast: fill a bowl with ice water and set your measuring cup inside for 30 seconds.
- Skip the Honey Rush: Adding honey at the start of mixing? Wait. Dissolve it in the water first—just a tablespoon or two—so it blends evenly. Whole wheat dough is dense; undissolved honey pockets will make your bread taste unevenly sweet. (Yes, even if you’re impatient like me.)
- Proof Until It Jiggles: Whole wheat dough rises slower, so don’t pull it out of the proofing bowl just because it looks done. Poke it gently: if the dimple springs back slowly but holds its shape, it’s ready. If it springs back fast, give it another 20–30 minutes. Overproofed whole wheat dough collapses like a sad soufflé.
Essential equipment for perfect results
Dough Tools Essentials
Start with a large stainless steel mixing bowl—I recommend OXO Good Grips—to handle the sticky whole wheat dough without sticking. A dough whisk (like West Bend) helps incorporate ingredients without overmixing, while a wooden dough scraper (Lekue) keeps your surface clean during kneading.
For measuring, a digital kitchen scale (OXO Good Grips) ensures precision with the 5 cups flour and 3.5 cups water. 🌾
Kneading Equipment
Hand kneading works, but a stand mixer with a dough hook (KitchenAid Artisan) saves time and effort. For gluten development, focus on 8-10 minutes of gentle stretching and folding—whole wheat dough resists overworking.
A lightly floured surface (use King Arthur unbleached flour if needed) prevents sticking during kneading. The windowpane test is your best friend here!
Proofing and Shaping
Use greased metal bowls for bulk fermentation—Nordic Ware stoneware bowls retain moisture perfectly. For shaping, a baguette pan (Nordic Ware) or baking stone (Lodge) helps create the classic French bread shape.
Dust with cornmeal (Bob’s Red Mill) to prevent sticking and add texture. A damp kitchen towel keeps dough from drying out during proofing.
Baking Setup
A cast iron Dutch oven (Lodge) is ideal for baking—it traps steam and creates a crisp crust. Place a metal bowl on the lower oven rack for steam generation (use 1 cup water).
A baking stone (Emil brand) works too, but preheat it for 30 minutes at 425°F before baking. A pizza peel (Ooni) helps transfer dough safely if using a stone.
Cooling and Storage
Let bread cool on a wire rack (OXO Good Grips) for 30 minutes—this prevents gummy slices. For storage, use airtight containers (Rubbermaid) or beeswax wraps to keep bread fresh.
A digital thermometer (Thermoworks) ensures proper water temps (95°F-100°F) for yeast activation. 💧
Nutrition facts
Frequently asked questions
Why does my whole wheat French bread turn out dense?
Whole wheat flour absorbs more water and develops gluten differently than white flour. The key is proper hydration (3.5 cups water for 5 cups flour) and gluten development through 8-10 minutes of kneading. Overmixing creates toughness, while underdeveloped gluten leads to a compact crumb. The autolyse rest (30 minutes before kneading) helps too—it hydrates the flour first for better structure.
Can I make this with regular whole wheat flour instead of bread flour?
Yes, but expect slightly less rise and a denser texture. Whole wheat bread flour has 13-14% protein for better gluten development, while all-purpose whole wheat flour has 10-11% protein. For best results, add 1/4 cup vital wheat gluten per 5 cups flour to compensate. The flavor will still be excellent—just adjust expectations for texture.
How do I get that perfect crisp crust without burning the top?
Steam is your secret weapon! Place a metal bowl with 1 cup water on the lower oven rack during baking. This creates steam that promotes oven spring and crisp crust. For even browning, rotate loaves halfway through baking. If tops brown too fast, tent with foil after 15 minutes. The crust should be deep golden—like caramelized sugar—when done.
What’s the best way to store leftover whole wheat French bread?
Wrap cooled loaves in a clean kitchen towel and store at room temperature for 2-3 days—this preserves freshness better than plastic. For longer storage, freeze slices wrapped in parchment paper. To revive, warm at 350°F for 5-10 minutes until crispy again. The whole wheat version stays fresh longer than white bread due to its lower moisture content.
Can I add seeds or herbs to this recipe?
Try 1 tbsp sesame seeds, poppy seeds, or fresh rosemary for flavor. Mix them into the dough during the initial mix or sprinkle on top before baking. For seeds, reduce flour by 1 tbsp to maintain dough consistency. Herbs like thyme or oregano work beautifully too—just use 1 tsp per loaf. These additions enhance flavor without compromising texture.

- 3lb Prime Rib Roast Recipe: Juicy Pink Center Guaranteed in 3 Hours - October 31, 2026
- 5 Spice Cake Recipe: Warmly Spiced Layers With Crunchy Top - October 31, 2026
- 1950’s Macaroni and Cheese Recipe: Nostalgic Creamy Cheese Sauce with Buttery Noodles - October 31, 2026