
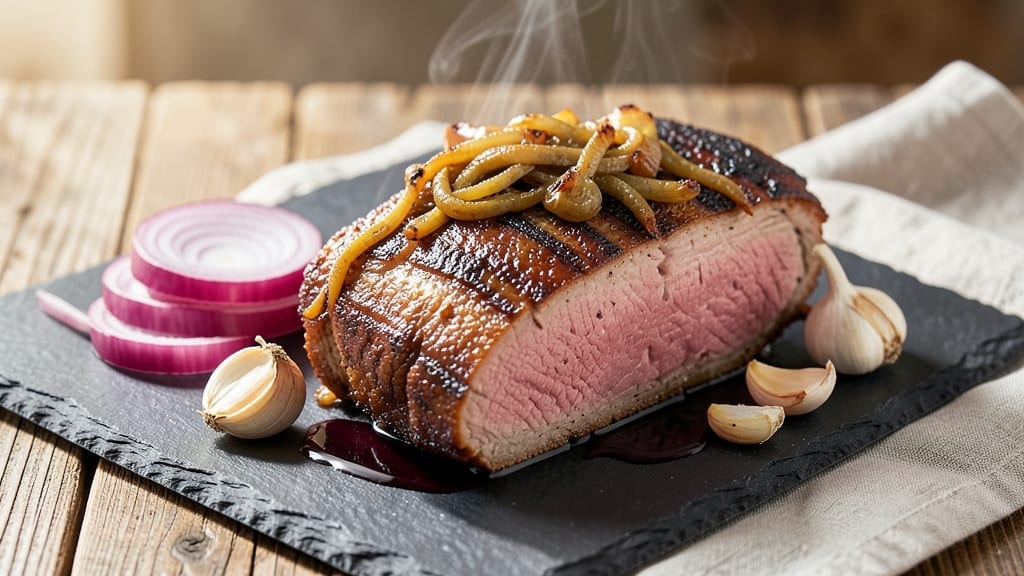
A 1.5 lb top round roast transformed from tough to juicy pink perfection through reverse searing is the game-changer you’ve been waiting for. This lean cut needs precision—too much heat, and it dries out; too little, and it stays chewy.
The secret? A low-and-slow oven bake followed by a high-heat sear to lock in moisture while creating a caramelized crust. I’ve perfected this method after years of trial and error, ensuring every bite delivers that tender, restaurant-quality texture at home.
The process starts with a simple seasoning of coarse salt and black pepper—no fancy rubs needed. The roast bakes uncovered in the oven until it reaches 110°F internally, then finishes with a quick sear in a screaming-hot cast-iron skillet.
This two-step approach guarantees a juicy pink core with a crisp exterior, even in a lean cut like top round. The key is patience: rushing this step will leave you with a dry, overcooked result.
What you’ll end up with is a perfectly balanced roast—tender enough to melt in your mouth yet firm enough to hold its shape. The crust will be deep golden and slightly charred, while the inside remains moist and pink, just shy of medium-rare.
This technique works equally well for medium or well-done preferences, giving you control over the final texture without sacrificing juiciness.
Serve with classic sides like roasted garlic mashed potatoes or a crisp green salad to round out the meal. The rich, savory flavor of the roast pairs beautifully with bold seasonings, making it ideal for family dinners or special occasions.
Ready to master this cut? Let’s get started with the full step-by-step method.
Ingredients for 1.5 lb top round roast
Lean cut, bold technique: these ingredients turn tough top round into melt-in-your-mouth perfection.
| Ingredient | Amount | Notes |
|---|---|---|
| Top Round Roast 🥩 | 1 ½ lb | Center-cut for even cooking |
| Coarse Kosher Salt 🧂 | 1 ½ tsp | Diamond Crystal preferred |
| Freshly Ground Black Pepper 🌶️ | 1 tsp | Cracked peppercorns preferred |
| Extra-Virgin Olive Oil 🫒 | 1 tbsp | For searing pan |
| Yellow Onion 🧅 | 1 whole | Sliced for serving garnish |
| Garlic Cloves 🧄 | 4 cloves | Smashed for aroma |
| Fresh Rosemary 🌿 | ½ tsp | Chopped, for finishing |
| Fresh Thyme 🌿 | ½ tsp | Leaves only, for finishing |
| Butter 🧈 | 2 tbsp | Unsalted, for basting |
| Beef Tallow or Duck Fat 🍳 | 1 tbsp | For extra crust development |
| Red Wine 🍷 | ½ cup | Dry cabernet for deglazing |
| Beef Consommé 🍲 | ¼ cup | For pan sauce |
The top round roast is your star here—center-cut is non-negotiable for even cooking. Most butchers will trim it for you, but if you’re buying whole, ask for the round tip section. Costco or local meat counters usually have it pre-cut, but if you’re shopping at Whole Foods, the organic version has better marbling. Look for a piece with visible fat streaks—this ensures moisture during the long bake. I always grab mine a day ahead to let it sit at room temp before cooking, which helps the seasoning penetrate deeper.
No kosher salt? Diamond Crystal is the gold standard, but any coarse salt works in a pinch. Short on time? Freshly cracked black pepper is worth the 30-second grind—pre-ground loses potency fast. The olive oil for searing should be smoke-point tested (light or extra-virgin), not the cheap stuff that burns. For the finishing aromatics, dried thyme at half the amount works if fresh isn’t available, but the rosemary’s piney notes are essential—don’t skip it. The beef tallow adds that restaurant-quality crust; if you can’t find it, duck fat or extra butter are solid swaps. And yes, you can use red wine substitute—just grape juice reduced by half works surprisingly well.
This roast reheats beautifully—10 minutes at 300°F with a splash of beef consommé keeps it juicy. Store leftovers in the fridge for 3-4 days, wrapped tightly in foil to lock in moisture. For freezer prep, slice against the grain into ½-inch medallions, then portion into airtight bags for up to 3 months. Pro tip: Save the pan drippings! Strain them, reduce with the red wine, and you’ve got instant pan sauce—just whisk in a tablespoon of cold butter at the end for that silky finish.
Why You’ll Love This Recipe
- That’s the magic here: the coarse salt and pepper create a caramelized crust while the olive oil keeps the inside juicy. Slice it thin, and you’ve got restaurant-quality texture with zero effort.
- Minimal Prep Required: I swear by this one—just a quick rub with salt, pepper, and olive oil, then a single onion sliced into rings. No fancy marinades, no last-minute shopping. The roast handles itself while you chop veggies or toss a salad.
- Crispy Outside, Tender Inside: That’s the magic here: the coarse salt and pepper create a caramelized crust while the olive oil keeps the inside juicy. Slice it thin, and you’ve got restaurant-quality texture with zero effort.
- Leftover Hero: Between us, this roast tastes even better the next day. Shred it for tacos, slice it for sandwiches, or toss it into a pasta. I’ve fed a crowd for days with just one roast—no waste, all flavor.
Step-by-step instructions for reverse-seared top round roast
Here’s how to transform tough top round into melt-in-your-mouth perfection using the reverse sear method.
Season and Low-Temperature Roast the Meat
Preheat your oven to 275°F—this low temperature is key for even cooking without drying out the meat. Pat the 1.5 lb top round roast completely dry with paper towels, then rub it generously with the 1.5 tsp coarse kosher salt and 1 tsp freshly ground black pepper on all sides. Place the roast on a wire rack set inside a rimmed baking sheet to allow air circulation.
Roast for 2 hours until the internal temperature reaches 115°F when measured with a meat thermometer. This slow cook ensures the meat stays tender throughout. I check the temperature every 30 minutes—patience here prevents a dry result. The roast should look pale and slightly firm to the touch but not yet cooked through.
Prepare the Searing Pan
While the roast cooks, slice the 1 whole yellow onion into thin rounds and set aside. Smash the 4 cloves garlic lightly with the side of your knife to release their aroma. In a large oven-safe skillet, heat 1 tbsp extra-virgin olive oil over medium-high heat until shimmering. Add the 1 tbsp beef tallow or duck fat—this extra fat will create a richer crust.
Let the fat heat until it’s just about to smoke, then add the roast to the pan. Sear for 2 minutes per side, pressing down gently with a spatula to ensure even contact. The goal is to develop a deep brown crust while keeping the interior tender. Don’t rush this step—the crust forms quickly once the pan is hot enough.
Complete the Sear and Baste with Butter
Transfer the skillet to a 450°F oven and roast for 10-12 minutes, flipping once halfway through, until the internal temperature reaches 130°F. This final high-heat finish creates the perfect crust while keeping the inside juicy. During the last 2 minutes, remove the roast from the oven and add the 2 tbsp butter to the skillet, tilting to coat the bottom.
Return the roast to the skillet and baste with the melted butter for 1 minute, spooning the butter over the surface to create a glossy finish. This basting step adds richness and helps carry flavors into the meat. The roast is now ready to rest—this is crucial for redistributing juices.
Rest and Slice for Maximum Juiciness
Transfer the roast to a cutting board and let it rest for 10 minutes before slicing. This resting period allows the juices to redistribute throughout the meat, ensuring every slice is moist and flavorful. While it rests, pour the 0.5 cup red wine into the hot skillet and deglaze, scraping up any browned bits with a wooden spoon. Simmer for 3 minutes to reduce slightly, then stir in the 0.25 cup beef consommé and reduce by half again.
Slice the roast against the grain into ¼-inch thick slices. Arrange the sliced meat on a platter, drizzle with the pan sauce, and garnish with the sliced yellow onion, chopped fresh rosemary, and fresh thyme. The result should be a perfectly pink center with a deep, flavorful crust—exactly what you want from top round.
Pro Tips For Making 1.5 Lb Top Round Roast
- SEAR FIRST, THEN SALT: The top round can dry out fast, so hit it with high heat in olive oil until deep brown—about 3 minutes per side—before adding salt. I learned this the hard way: salting early makes the crust soggy, and you’ll end up with a bland, dry roast. (Yes, even if you’re impatient like me.)
- SLICE THE ONION THIN: Cut the yellow onion into ⅛-inch slices—thin enough to caramelize fast but not so fine they turn to mush. My grandmother swore by this, and she was right: you want them golden and slightly crisp, not a watery glaze. Toss them in a dry pan first to release moisture before adding oil.
- USE A MEAT THERMOMETER: Top round hits 145°F for medium-rare, but guesswork leads to overcooking. I used to pull it at 150°F and wonder why it was tough—now I rest it until it hits 140°F internally, then slice against the grain. (Your future self will thank you.)
- SALT THE PAN AFTER SEARING: After removing the roast, wipe the pan clean, then add a pinch of kosher salt to the drippings. Toss in the sliced onions and let them crisp up in that salty fat—it adds depth without extra seasoning. Sounds weird, but it works: the onions soak up the meat’s natural juices and get a smoky kick.
Troubleshooting your 1.5 lb top round roast
Dry Roast Fix
If your roast turns out dry, the issue is usually overcooking. Use a meat thermometer to monitor internal temperature—130°F for medium-rare, 140°F for medium. For a dry roast, try the reverse sear method again but reduce the final oven time to 8-10 minutes.
If it’s already cooked, slice thinly and serve with a rich pan sauce to add moisture. 💡
Uneven Cooking
Uneven cooking often happens with thick or thin sections. Trim any excess fat and use a center-cut roast for even thickness. Place the roast on a wire rack in a baking sheet to allow air circulation.
If one side cooks faster, rotate the pan halfway through the bake. A Lodge cast iron skillet helps distribute heat evenly during searing. 🔥
Pale Crust
A pale crust means the sear wasn’t hot enough or the roast wasn’t pressed firmly. Heat your skillet until it smokes slightly before adding the roast, then press down with a spatula for 2-3 seconds per side.
For extra flavor, add 1 tbsp beef tallow to the oil before searing. If the crust is still pale, try a broiler finish for 1-2 minutes at the end. 🌟
Tough Texture
Toughness usually means the roast wasn’t rested long enough or was sliced against the grain incorrectly. Always rest for 10-15 minutes before slicing. Slice against the grain into ¼-inch thick pieces for tenderness.
If the roast is still tough, try marinating it overnight in ½ cup buttermilk and 1 tbsp Worcestershire sauce before cooking. 💪
Temperature Fluctuations
Fluctuations in oven temperature can lead to inconsistent results. Use an oven thermometer to check accuracy—many home ovens run 25°F hotter or cooler than set. For precise control, use a smoker or sous vide setup if available.
If your oven isn’t reliable, finish the roast on the stovetop over medium-high heat for better temperature consistency. ⚡
Nutrition facts
Frequently asked questions
Why does this recipe use a reverse sear for top round?
Top round is a lean cut that dries out easily with traditional high-heat methods. The reverse sear—low oven bake followed by a high-heat finish—keeps the interior juicy while creating a flavorful crust. This two-step approach ensures a tender pink core even in a tougher cut.
Can I cook this roast to medium or well-done?
For medium, aim for 140°F internal temp (about 125°F before the final sear). For well-done, target 150°F (about 140°F before searing). The reverse sear method works equally well for all doneness levels while preventing dryness.
What if I don’t have beef tallow or duck fat?
No problem! Use an extra 1 tbsp butter or 1 tbsp olive oil in the searing pan. While beef tallow adds extra richness, these substitutes still create a good crust. Just ensure your pan is screaming hot before adding the roast.
How do I know when the roast is done during the low oven bake?
Use a meat thermometer to check internal temperature: 110-115°F for medium-rare finish, 120-125°F for medium. The roast should look pale and slightly firm but not yet cooked through. Never rely on time alone—lean cuts like top round vary in thickness.
Can I make this ahead of time?
Yes! Cook the roast as directed, then refrigerate sliced pieces in an airtight container for 3-4 days. For freezer prep, slice against the grain into ½-inch medallions and freeze in portions for up to 3 months. Reheat in a 300°F oven for 10 minutes with a splash of beef consommé.

- 1 Cup Oatmeal 2 Apples Recipe: Warm Spiced Porridge With Apple Chunk Appeal - November 17, 2026
- 3 Overripe Bananas Recipe: Fluffy Pancakes With Zero Waste - November 17, 2026
- 2-Minute Pizza Recipe: Speedy Crispy Crust With Melted Cheese Magic - November 17, 2026