
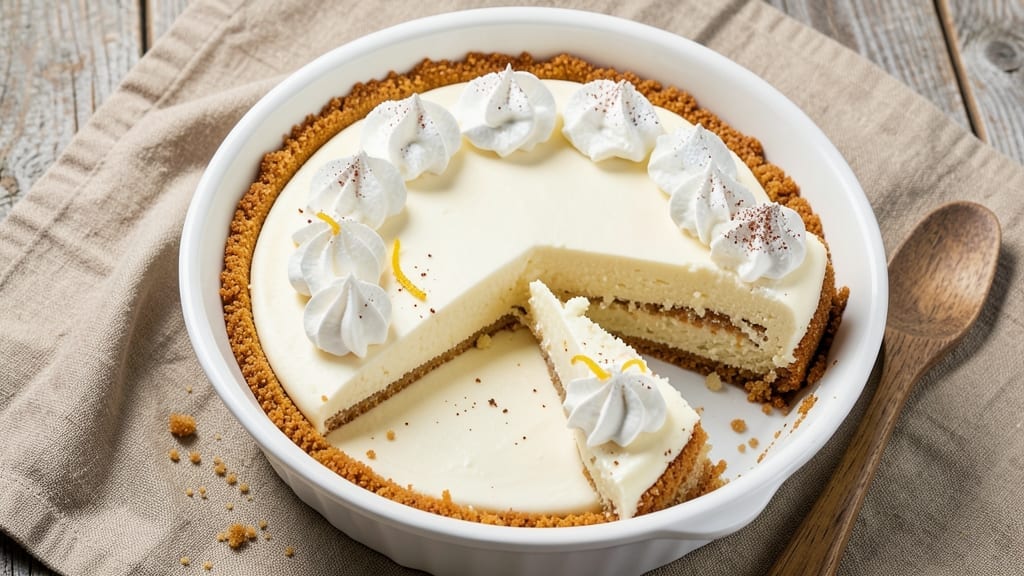
Mastering a two cream cheese cheesecake recipe that stays perfectly stable and crack-free is all about precision and technique. This recipe delivers a silky-smooth texture with a rich, creamy filling that’s built to impress—no wobbly layers or disappointing cracks in sight.
The secret lies in room-temperature ingredients and a gradual baking process that ensures even cooking. What sets this recipe apart is the double cream cheese approach, which creates a denser, more stable filling compared to traditional single-cream cheese recipes.
The crust, made with a buttery graham cracker base, provides the perfect foundation for the velvety layers above. Every step is designed to prevent common cheesecake pitfalls, so you can focus on enjoying the process.
By the time you slice into this dessert, you’ll be rewarded with creamy, luscious layers that hold their shape beautifully. The texture is rich yet light, with a perfect balance of tangy cream cheese and sweet vanilla.
This is the kind of cheesecake that makes you look like a pro—no matter how many times you’ve baked before. Serve it chilled with fresh berries or a drizzle of caramel for an elegant finish. Let’s get started on creating your perfect cheesecake.
Ingredients for 2 cream cheese cheesecake
These 13 ingredients transform into a silky, crack-free double cream cheese masterpiece.
| Ingredient | Amount | Notes |
|---|---|---|
| Full-Fat Cream Cheese 🧀 | 32 oz | Room temperature for blending |
| Granulated Sugar 🍚 | 2 cups | Superfine preferred for smoothness |
| Large Eggs 🥚 | 4 whole | Room temperature, separated |
| Sour Cream 🥛 | 1 cup | Full-fat for creaminess |
| Vanilla Extract 🌿 | 2 tsp | Pure vanilla preferred |
| Unsalted Butter 🧈 | ½ cup | Melted, room temperature |
| Graham Cracker Crumbs 🍪 | 2 cups | Homemade or store-bought |
| Melted Butter 🧈 | ½ cup | For crust binding |
| Light Brown Sugar 🍚 | ¼ cup | Packed, for crust |
| Salt 🧂 | ½ tsp | Fine sea salt preferred |
| Heavy Whipping Cream 🥛 | 1 cup | Cold for topping |
| Powdered Sugar 🍚 | ¼ cup | For whipped cream topping |
| Fresh Berries 🍓 | 2 cups | Optional garnish |
The cream cheese is the star—Philadelphia brand is my go-to for consistency, but any full-fat variety works. Grab two 8-ounce blocks (32 oz total) and let them sit out for at least 2 hours before blending. Room temperature is non-negotiable for smooth filling. The sour cream adds stability, so don’t skip it—trust me, it prevents cracks. For the crust, Honey Maid graham crackers (the classic kind) give the best texture, but any sturdy graham works. If you’re feeling fancy, toast the crumbs with a little brown sugar before mixing with butter for extra depth.
No sour cream? Greek yogurt at half the amount works in a pinch, though the texture won’t be identical. Short on vanilla? Vanilla bean paste adds flecks of magic, but pure extract is fine. The whipped cream topping can be made ahead—just whip it up when ready to serve. For a vegan twist, swap cream cheese for cashew cream (blend soaked cashews with lemon juice) and use flax eggs. The berries? Whatever’s freshest—strawberries, raspberries, or even a drizzle of caramel if you’re feeling indulgent. Pro tip: Chill your mixing bowls before whipping egg whites to get stiffer peaks.
This cheesecake tastes even better the next day—make it ahead if you can. Store the assembled (but unbaked) crust in the fridge for up to 24 hours before baking. Once baked, keep it covered at room temp for 2 hours, then refrigerate for at least 4 hours before slicing. The filling will firm up beautifully. Freezes perfectly for up to 2 months—just thaw overnight in the fridge. For serving, whip the cream last minute so it stays fluffy. And if you’re nervous about cracks? Bake low and slow—250°F is your friend here.
Why You’ll Love This Recipe
- No Fuss Mixing: Mixing this cheesecake is just folding—no food processor, no overmixing. I swear, the cream cheese and sugar blend together like butter on toast with a hand mixer in under 5 minutes.
- Creamy Edge, No Crack: That sour cream in the batter? It’s the secret to a silky texture without the dreaded cracks. Honestly, I’ve made cheesecakes that looked like they’d crumble at a sneeze—this one holds together like it’s been baked in a bubble.
- Party Ready: Slice it for a crowd or serve it whole for a showstopper dessert. Between us, it’s the one thing I always pull out for birthdays—zero stress, all wow factor.
- Leftovers? Better: This keeps for days, and honestly, the second day is even better. The flavors meld, and it’s still creamy, not dry. My go-to for when I bake for guests but know I’ll have leftovers.
Step-by-step instructions for 2 cream cheese cheesecake
Here’s how to build ultra-stable layers that stay crack-free from first bite to last.
Prepare the Crust for Maximum Stability
Preheat your oven to 325°F and grease a 9-inch springform pan thoroughly with melted butter. This prevents sticking and ensures clean slices later. In a large bowl, combine the 2 cups graham cracker crumbs, 0.5 cup melted butter, 0.25 cup packed light brown sugar, and 0.5 teaspoon salt.
Mix with your fingers or a fork until the crumbs are evenly moistened and the mixture holds together when pressed. Press firmly and evenly into the bottom of your prepared pan, creating a solid base. Here’s the thing—don’t just pat it down lightly. Press until the crust feels compact and dense, about ¼-inch thick. This prevents any shifting during baking that could cause cracks in your filling.
Blend the Filling for Perfect Texture
Reduce your oven temperature to 300°F for the filling stage. In a stand mixer fitted with the paddle attachment, beat the 32 oz full-fat cream cheese at medium speed until completely smooth—about 3-4 minutes. This step is crucial because any lumps will show up in your final cheesecake.
In a separate bowl, whisk together the 2 cups granulated sugar, 1 cup sour cream, and 2 teaspoons vanilla extract until smooth. With the mixer still running, gradually add the sugar mixture to the cream cheese, mixing on low speed until fully combined. Then add the 4 whole large eggs, one at a time, mixing just until each is incorporated. Here’s where it gets tricky—don’t overmix after adding the eggs or you’ll develop gluten that makes the cheesecake tough.
Layer and Bake for Stability
Pour half of the filling mixture over the prepared crust in the springform pan, spreading it evenly with a spatula. Then add the remaining filling, creating a second layer. The reason we layer is simple—it creates a more stable structure that’s less likely to crack as it bakes. Gently tap the pan on the counter a few times to release any air bubbles that might have formed.
Place the pan in your preheated 300°F oven and bake for 50-55 minutes. The edges should be set and the center should still have a slight wobble when gently shaken. Here’s the moment that matters: when the top looks mostly set but still has a slight jiggle in the center. This indicates the cheesecake is ready for the next critical step.
Water Bath and Cooling for Crack Prevention
Immediately after removing the cheesecake from the oven, place the springform pan in a larger baking dish. Carefully pour hot water into the larger dish until it reaches about halfway up the sides of the springform pan. This water bath creates a gentle, even heat distribution that prevents surface cracks from forming as the cheesecake cools.
Let the cheesecake cool completely in the water bath, about 1 hour. Then remove the pan from the water and refrigerate it uncovered for at least 4 hours, or preferably overnight. This slow cooling process is what makes this recipe so stable—it allows the cheesecake to set gradually without developing stress cracks. The longer it chills, the firmer and more sliceable it becomes.
Top and Serve with Confidence
Before serving, whip the 1 cup cold heavy whipping cream with the 0.25 cup powdered sugar until soft peaks form. Spread this lightly over the top of the chilled cheesecake. For presentation, arrange the 2 cups fresh berries decoratively on top or serve them on the side for dipping.
This cheesecake holds its shape beautifully when sliced, thanks to our layering technique and proper cooling. Each slice will have that perfect balance of creamy filling and crisp crust, with none of the dreaded cracks. Serve at room temperature for the best texture, and enjoy the satisfaction of a cheesecake that stays together from first slice to last.
Pro Tips For Making 2 Cream Cheese Cheesecake
- Beat the Cream Cheese: DESCRIPTION: Take your time whipping the cream cheese and sugar—at least 3-4 minutes with a hand mixer until it’s truly smooth and pale. I learned this the hard way: rushing leaves lumps that scream “amateur hour” even after baking. The batter should look like wet sand, not cottage cheese.
- Room-Temp Eggs Only: DESCRIPTION: Cold eggs from the fridge will curdle your batter faster than you can say “water bath.” Let them sit in warm water for 5 minutes first—just enough to make them yield easily when cracking. No one wants a cheesecake with the texture of a sponge.
- Don’t Overmix After Eggs: DESCRIPTION: Once you fold in the eggs and sour cream, mix just until combined—maybe 10-12 strokes. Overmixing introduces air that’ll make your cheesecake dense or crack like a dried riverbed. Think “gentle marriage,” not “blender mode.”
- Water Bath, Not Steam Bath: DESCRIPTION: Place your springform pan in a deep water bath—water should come at least halfway up the sides. Too little water = uneven baking; too much = a soggy bottom. Cover the pan with foil before adding water to prevent condensation drips. (Yes, even if you’re impatient like me.)
Troubleshooting great 2 cream cheese cheesecake
Crust Cracks
If your crust cracks during baking, it’s usually from uneven baking or temperature shifts. First, ensure your oven is fully preheated to 300°F and place a baking sheet on the rack below the pan to catch drips.
For extra insurance, wrap the springform pan in aluminum foil before baking—this helps maintain even heat distribution. After baking, let the cheesecake cool in the oven with the door slightly ajar for 10 minutes before transferring to the water bath.
This gradual temperature drop prevents sudden cooling that causes cracks. 🧁
Filling Too Runny
A runny filling often means the eggs weren’t fully incorporated or the oven temperature was too high. To fix this, always beat the eggs into the cream cheese mixture one at a time, mixing just until each is fully combined—no overmixing!
If your filling still looks too thin, bake it for 5-10 minutes longer at 275°F after the initial bake. For next time, chill the filling mixture for 30 minutes before pouring it into the crust to help it set faster. 🥣
Cheesecake Sinks in Center
A sunken center usually means the cheesecake baked too long or the oven temperature fluctuated. To prevent this, bake at 300°F until the edges are set but the center still has a slight jiggle (about 50-55 minutes).
If your cheesecake sinks after baking, try this trick: place a hot water bath around the pan immediately after removing it from the oven. This helps redistribute heat and firm up the center. For future bakes, use a thermometer to monitor internal temp—it should reach 150-155°F at the center. 🌡️
Dry or Grainy Texture
A dry or grainy texture happens when the cream cheese isn’t smooth enough or the eggs are overmixed. To avoid this, blend the cream cheese until completely smooth (no lumps!) before adding other ingredients.
For extra creaminess, replace ¼ cup of sour cream with ¼ cup of Greek yogurt—it adds moisture without altering the texture. If your cheesecake turns out dry, try brushing the top with 2 tablespoons of warm apricot jam before serving to add moisture and shine. 💧
Water Bath Leaks
If your water bath causes leaks, it’s likely because the springform pan isn’t properly sealed or the water is too hot. Always double-check the pan’s clasp to ensure it’s tightly closed before placing it in the water bath.
Use hot (not boiling) water—just enough to reach halfway up the sides of the pan. For extra protection, place the springform pan on a wire rack inside a larger baking dish to allow water to drain away from the pan. This keeps your cheesecake stable and dry. ⚡
Egg Whites Overmixed
If you accidentally overmix the egg whites, they’ll turn tough and rubbery instead of silky. To fix this, stop mixing as soon as soft peaks form—this is the ideal consistency for a light, airy topping.
For next time, chill your mixing bowl and beaters in the freezer for 10 minutes before whipping to get stiffer peaks with less effort. If your whipped cream turns out too thick, simply fold in a splash of cold milk to loosen it up. 🍦
Nutrition facts
Frequently asked questions
Why use double cream cheese in this recipe?
Double cream cheese creates a denser, more stable filling that’s less likely to crack. The extra fat content prevents shrinkage during baking, while the tangy flavor deepens with the second block. This technique is especially helpful for beginners who struggle with traditional single-cream cheese recipes that often develop cracks.
Can I make this cheesecake in a regular cake pan instead of springform?
Yes, but with adjustments! Use a 9-inch round cake pan and line the bottom with parchment paper. Grease the sides thoroughly and press the crust firmly. After baking, let it cool completely in the pan before refrigerating. The springform pan is ideal because it allows the cheesecake to release cleanly, but a cake pan works if you’re careful with removal.
How do I prevent the whipped cream topping from melting?
Whip the cream right before serving and keep it chilled until ready to use. For extra stability, fold in 1 teaspoon of cornstarch with the powdered sugar. Spread the topping just before serving, and store any leftovers in the fridge. If you need to prep ahead, make the whipped cream up to 2 hours early and refrigerate—just re-whip briefly before using.
Can I substitute sour cream with something else?
Use Greek yogurt (same amount) or crème fraîche for a similar tangy texture. For a lighter option, try 1 cup mascarpone cheese mixed with 2 tablespoons milk. Avoid cottage cheese—it’s too chunky and will affect the smoothness. The key is maintaining the same moisture level in the filling.
How long can I store this cheesecake?
Store it covered in the fridge for up to 5 days without losing quality. For longer storage, freeze the whole cheesecake (unwrapped) for up to 2 months. Thaw overnight in the fridge. The texture remains creamy when properly stored—just avoid temperature fluctuations that can cause condensation.

- 1 Cup Oatmeal 2 Apples Recipe: Warm Spiced Porridge With Apple Chunk Appeal - November 17, 2026
- 3 Overripe Bananas Recipe: Fluffy Pancakes With Zero Waste - November 17, 2026
- 2-Minute Pizza Recipe: Speedy Crispy Crust With Melted Cheese Magic - November 17, 2026