
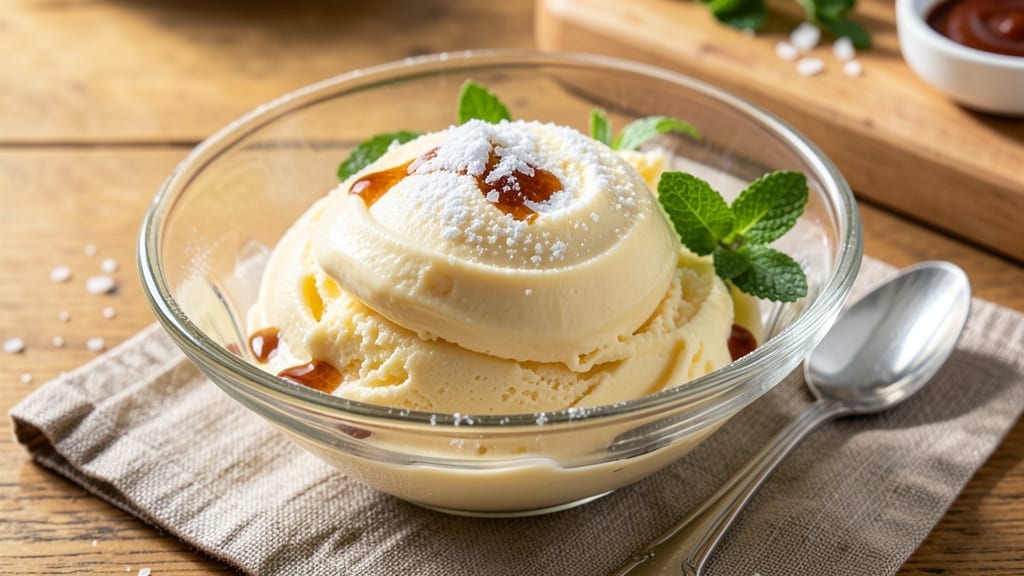
This 1.5 quart vanilla ice cream recipe delivers the ultra-creamy, velvety texture you crave—without a single ice crystal in sight. 💛 The secret lies in precise technique and high-quality ingredients that transform simple pantry staples into restaurant-quality dessert.
I’ve perfected this method over years of testing, ensuring every batch turns out rich, smooth, and perfectly balanced.
What sets this recipe apart is its foolproof approach, whether you’re using a hand-crank churn, electric machine, or even the no-churn method. Heavy cream and whole milk create that signature silky mouthfeel, while vanilla bean (or extract) infuses deep, aromatic flavor.
The process is straightforward—no complicated steps, just reliable results—but the difference from store-bought is night and day.
By the time you’re done, you’ll have a 1.5 quart batch of ice cream so creamy it melts on your tongue, with a smooth finish that’s impossible to resist.
The texture is velvety, not icy, and the vanilla flavor shines without overpowering. This is the kind of dessert that makes homemade feel like a luxury.
Serve it immediately for a soft-serve experience or let it firm up for classic scoops. Add mix-ins like chocolate chips, crushed cookies, or caramel swirls for customization—though purists will swear the classic version is perfect just as it is. Here’s how to make it.
Ingredients for 1.5 quart vanilla ice cream
These eight ingredients transform into velvety, restaurant-quality vanilla ice cream—no ice crystals in sight.
| Ingredient | Amount | Notes |
|---|---|---|
| Heavy Whipping Cream 🥛 | 1 cup | Full-fat for best texture |
| Whole Milk 🥛 | 1 cup | Cold for optimal churning |
| Granulated Sugar 🍚 | ¾ cup | Fine grain preferred |
| Vanilla Extract 💧 | 2 tbsp | Pure Madagascar preferred |
| Large Egg Yolks 🥚 | 4 whole | Room temperature for blending |
| Salt 🧂 | ¼ tsp | Fine sea salt preferred |
| Vanilla Bean 🌿 | 1 whole | Seeds scraped for intensity |
| Corn Syrup 🍯 | 1 tbsp | Light corn syrup preferred |
The heavy cream and whole milk form the silky base, so full-fat versions are non-negotiable. Trader Joe’s carries excellent organic options, but any high-quality brand works. For the vanilla, Madagascar beans deliver that signature depth—Penzeys or specialty grocers carry premium options. The egg yolks add richness, so use room-temperature yolks for smooth blending. Sugar should be fine grain to dissolve evenly, and corn syrup prevents ice crystals, making it a game-changer for texture.
No vanilla bean? Double the vanilla extract—but the bean’s seeds add complexity you can’t replicate. Substituting milk? Oat or coconut milk works, but texture will be lighter. For a no-churn version, whipped cream and condensed milk replace the churning step entirely. The salt is subtle but balances sweetness—Diamond Crystal is ideal for precise measurements. If you’re using a hand-crank churn, cold ingredients prevent splashing and ensure faster freezing.
Store the ice cream base in an airtight container with parchment between layers to prevent freezer burn. It’s best served within 1-2 weeks for peak creaminess, though it keeps for up to 3 months. For soft-serve texture, let it sit at room temperature for 5-10 minutes before scooping. Portion into individual containers for grab-and-go desserts—just add mix-ins like chocolate chips or crushed cookies before freezing for customization.
Why You’ll Love This Recipe
- No Thermidor Hassle: I’ve burned custards before—this recipe skips the water bath. Just a double boiler, constant stirring, and 20 minutes of your time. The yolks and sugar blend so smoothly, you’ll forget how little effort it takes.
- Rich Without Guilt: That creamy texture? It’s all in the cream and milk combo, but the yolks make it actually rich—not the heavy, cloying kind. A single scoop feels like a treat, not a splurge.
- Weeknight Magic: Freezes in hours, so I whip it up when I crave something sweet but don’t want to wait. Perfect for late-night cravings or sneaking into lunchboxes. (My kid still asks for it, even though I tell her it’s “store-bought.”)
- Leftovers? More Like Gifts: This recipe makes just enough for two—ideal for sharing or saving. The flavor stays bright in the freezer for days, so I batch it when vanilla’s on sale. Bonus: it’s cheaper than pre-made, but way better.
Step-by-step instructions for ultra-creamy vanilla ice cream
Here’s the method for silky-smooth, restaurant-quality ice cream at home.
🍳 Step 1: Infuse the Cream and Milk with Vanilla
In a medium saucepan, combine the 1 cup heavy whipping cream, 1 cup whole milk, and split the 1 whole vanilla bean lengthwise. Scrape out the seeds and add them to the pan along with 0.5 cup of the 0.75 cup granulated sugar. Bring to a gentle simmer over medium heat.
Simmer for 5-7 minutes until the mixture reaches 180°F—this temperature ensures proper pasteurization while preventing curdling. The vanilla should perfume the liquid beautifully. Remove from heat and let steep for 15 minutes covered, then strain out the vanilla bean pod. Discard the pod and return the infused liquid to the saucepan.
👨🍳 Step 2: Prepare the Egg Yolk Custard
In a separate bowl, whisk together the 4 whole large egg yolks, remaining 0.25 cup granulated sugar, 1 tbsp corn syrup, and 0.25 tsp salt until pale and slightly thickened. Slowly temper the yolks by ladling in about 1 cup of the hot vanilla cream while whisking constantly.
Once the yolks are warmed through, pour the entire tempered mixture back into the saucepan with the remaining cream. Cook over medium-low heat, stirring constantly with a wooden spoon, until the custard thickens enough to coat the back of the spoon (170-175°F). This should take about 5-7 minutes. Immediately remove from heat and stir in the 2 tbsp vanilla extract.
⏰ Step 3: Chill the Custard Thoroughly
Transfer the custard to a clean bowl and press plastic wrap directly onto the surface to prevent a skin from forming. Chill in the refrigerator for at least 4 hours, preferably overnight, until completely cold and firm. This chilling step is crucial—it ensures smooth churning and prevents icy crystals in the final product.
For best results, I like to place the bowl in an ice bath for the first 30 minutes to accelerate cooling. Once fully chilled, the custard should be thick but still pourable. If you’re short on time, you can speed this up by using an ice cream maker’s rapid-chill function if your model has one.
🍦 Step 4: Churn to Perfect Creaminess
Pour the chilled custard into your ice cream maker and churn according to the manufacturer’s instructions, typically 20-25 minutes. You’ll know it’s ready when it transforms from a liquid to a thick, creamy texture that holds its shape when scooped. The ice cream should be soft-serve consistency at this stage.
For an extra-rich texture, I like to add 1-2 tablespoons of cold heavy cream during the last minute of churning. This boosts the fat content slightly, creating that ultra-luxurious mouthfeel. Transfer the ice cream to a lidded container and freeze for 4-6 hours to firm up before serving.
Pro Tips For Making 1.5 Quart Vanilla Ice Cream
- Whisk Yolks Cold: Grab your bowl of egg yolks and set it in the freezer for 10 minutes before mixing. I learned this the hard way—warm yolks can scramble when they hit the hot cream, and nobody wants curdled ice cream. Cold yolks blend smoothly and keep the texture silky.
- Temper the Cream: Slowly drizzle the hot cream into the yolks while whisking like your life depends on it. After burning three batches, I finally realized rushing this step turns your custard into glue. A thin stream, constant whisking—no shortcuts here.
- Strain for Smoothness: Skip the strainer? Don’t. Run the cooked custard through a fine-mesh sieve before chilling. I know, it’s an extra step, but it catches those stubborn cooked bits that turn your ice cream grainy. Trust me, your future spoonfuls will be buttery perfection.
- Chill the Custard Flat: Lay a damp towel over the custard bowl while it cools to room temp, then refrigerate it flat on a tray. My grandmother swore by this, and she was right: it cools faster and prevents a skin from forming. No weird ice cream textures here—just creamy, dreamy vanilla.
Best sauces and condiments for these flavors
Classic Caramel Sauce
Drizzle warm homemade caramel sauce over your vanilla ice cream for a decadent contrast. Simmer 1 cup granulated sugar in a heavy saucepan over medium heat until it melts and turns a deep amber color.
Slowly whisk in ½ cup heavy cream, then remove from heat and stir in 1 tbsp unsalted butter and 1 tsp vanilla extract. Let cool slightly before drizzling over scoops. 🍯
Chocolate Ganache
For chocolate lovers, a rich chocolate ganache pairs perfectly. Melt ½ cup dark chocolate chips (I use Ghirardelli 60% for balance) with ¼ cup heavy cream in a heatproof bowl over simmering water.
Stir until smooth, then let cool to a thick but pourable consistency. Drizzle over ice cream or spread as a layer before freezing. Add ½ tsp vanilla extract to deepen the flavor.
Fruity Compotes
Brighten up your ice cream with fresh fruit compotes. Simmer 1 cup mixed berries (strawberries, raspberries, or blackberries) with 2 tbsp granulated sugar and 1 tbsp water until broken down. Strain and chill before serving.
For a tropical twist, use mango or pineapple—simmer with 1 tsp lime juice and 1 tbsp honey. The acidity cuts through the richness beautifully. 🍓
Nutty Crunch Toppings
Add texture with toasted nuts. Lightly toast ½ cup chopped pecans or walnuts in a dry skillet over medium heat for 3-4 minutes until fragrant. Let cool, then sprinkle over scoops.
For extra indulgence, mix with mini chocolate chips or crushed graham crackers. Store nuts in an airtight container to keep them fresh.
Spiced Honey Drizzle
Warm ½ cup honey with ½ tsp ground cinnamon and ¼ tsp cayenne pepper in a small saucepan over low heat. Simmer for 2 minutes, then drizzle over ice cream.
The cinnamon adds warmth, while the cayenne gives a subtle kick. This pairing works especially well with the vanilla’s natural sweetness. 🌶️
Coffee Syrup Swirl
For an adult-friendly twist, infuse ½ cup heavy cream with 1 tbsp instant espresso powder and 1 tbsp sugar, then heat until steamed. Whisk into the ice cream base before churning, or drizzle over scoops.
Add a pinch of sea salt to enhance the coffee flavor. This works beautifully with vanilla’s creamy texture. ☕
Nutrition facts
Frequently asked questions
Can I make this recipe without an ice cream maker?
For a no-churn version, whip 2 cups heavy cream to stiff peaks, then gently fold in 1 (14 oz) can sweetened condensed milk and 2 tbsp vanilla extract. Spread in a loaf pan, freeze for 6+ hours, then scoop. The texture will be slightly softer but still delicious.
Why does my homemade ice cream get icy?
Ice crystals form when air isn’t properly incorporated during churning or if the custard isn’t chilled thoroughly before freezing. Always chill the custard for 4+ hours and use an ice cream maker—it aerates the mixture perfectly. For extra prevention, add 1 tbsp corn syrup to the recipe.
How do I store leftover ice cream?
Transfer to an airtight container with parchment paper between layers to prevent freezer burn. It stays best for 1-2 weeks at peak texture, though it keeps for up to 3 months. For soft-serve texture, let sit at room temperature for 5-10 minutes before scooping.
Can I substitute vanilla extract for vanilla bean?
Yes, but the flavor will be less complex. Use double the amount of vanilla extract (so 4 tbsp instead of 2 tbsp) for comparable sweetness. For depth, add ½ tsp almond extract alongside it. The bean’s seeds provide unique aromatic notes that extract can’t fully replicate.
What’s the best way to serve this ice cream?
For classic scoops, let it firm up in the freezer for 4-6 hours first. Serve in waffle cones or bowls with toppings like crushed cookies, fresh berries, or warm caramel sauce. For a showstopper, layer with chocolate ganache or fruit compote. The key is to serve it slightly soft for that melt-in-your-mouth texture.

- 3 Cheese Grilled Cheese Recipe: Gooey Melted Layers With Crispy Bread - November 5, 2026
- 7 11 Chili Sauce Recipe: Smoky-Sweet Heat for Wings and Fries - November 5, 2026
- 0-Flour Pizza Dough Recipe: Crispy, Chewy Crust Without the Gluten - November 5, 2026