
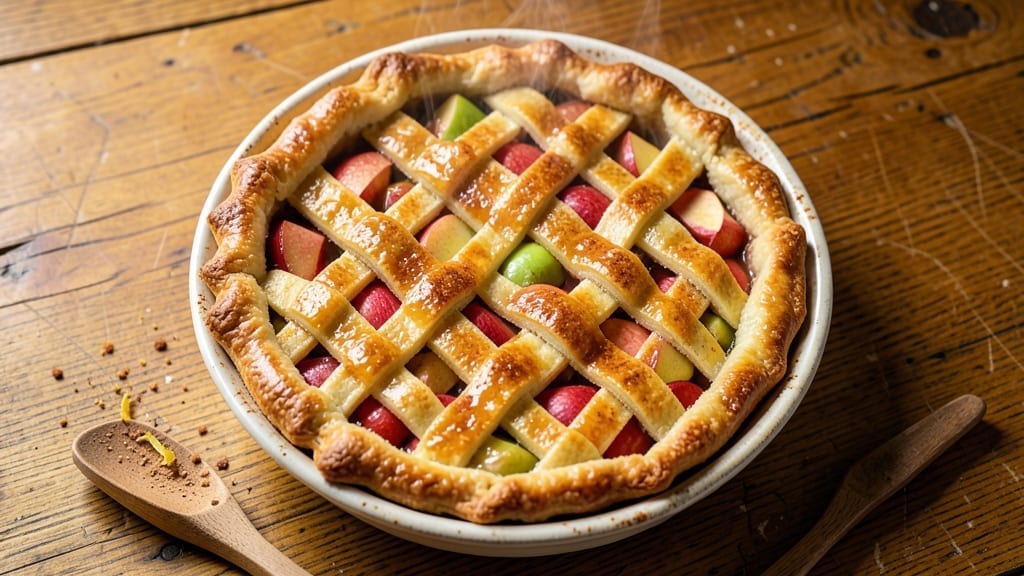
This 1950s apple pie recipe brings back the warmth of grandma’s kitchen with its flaky homemade crust and perfectly spiced filling. The secret lies in the slow-cooked apples that release their natural juices, creating a filling so tender it practically melts in your mouth. I’ve perfected this recipe over years of baking, ensuring every slice delivers that nostalgic comfort we all crave.
The crust gets its signature flakiness from cold butter cut into the flour, while the filling balances sweetness with just the right amount of cinnamon, nutmeg, and a touch of lemon. Baking at a lower temperature ensures the crust stays golden and crisp while the apples cook through evenly.
This isn’t just dessert—it’s a piece of culinary history you can recreate in your own kitchen.
What makes this pie truly special is the lattice crust option, which adds visual appeal while keeping the filling moist. The aroma filling your home as it bakes will have everyone gathering at the table, and each slice reveals that perfect balance of sweet, spiced apples with a buttery crust.
It’s the kind of pie that makes holidays feel complete.
Perfect for Thanksgiving, Christmas, or any special occasion, this recipe scales beautifully for gatherings of any size. The techniques here are timeless, ensuring your pie will be the centerpiece of any dessert spread. Let’s get baking—your kitchen will thank you for the memories you’re about to create.
Ingredients for 1950s apple pie
Six apples, a flaky crust, and spices that smell like nostalgia waiting to happen.
| Ingredient | Amount | Notes |
|---|---|---|
| All-Purpose Flour 🌾 | 3 ½ cups | Sifted, for flaky crust |
| Unsalted Butter 🧈 | 1 cup | Cold, cubed for flakiness |
| Granulated Sugar 🍚 | ¾ cup | White or light brown |
| Light Brown Sugar 🍚 | ½ cup | Packed, for filling |
| Apples 🍎 | 6 medium | Granny Smith or Honeycrisp |
| Ground Cinnamon 🌿 | 2 tbsp | Freshly ground preferred |
| Ground Nutmeg 🌿 | ½ tsp | Freshly grated nutmeg |
| Lemon Juice 🍋 | 1 tbsp | Freshly squeezed |
| Salt 🧂 | 1 tsp | Kosher or sea salt |
| Vanilla Extract 🌸 | 1 tsp | Pure vanilla preferred |
| Egg 🥚 | 1 large | For egg wash |
| Heavy Cream 🥛 | 2 tbsp | For egg wash |
The apples are non-negotiable—Granny Smith or Honeycrisp hold up best to slow baking. Local farmers markets often have the best selection, but any grocery store produce section will do. Look for firm, unblemished fruit—those bruises turn to mush. I always buy a few extra because one always gets eaten raw before baking. The butter? Cold is key—take it out of the fridge right before cutting it into the flour. And don’t skip the vanilla—it’s what makes this taste like grandma’s kitchen.
No Granny Smiths? McIntosh or Braeburn work too, but they’ll be softer. Running low on nutmeg? Cinnamon alone works in a pinch, but trust me, the nutmeg is what gives it that vintage 1950s flavor. The brown sugar can be swapped for white if needed, but the moisture difference shows. For the crust, if you don’t have heavy cream for the egg wash, milk or water works fine—just don’t skip the wash entirely. The lattice crust? Store-bought pie crust works if you’re short on time, but homemade makes all the difference.
Apples keep 2-3 weeks in the fridge, but bake within a week for best texture. The crust dough can be made a day ahead—wrap tightly and refrigerate. Once baked, pies reheat beautifully—350°F for 10 minutes restores that fresh-from-oven magic. I always make two pies for gatherings—one disappears faster than you think. Leftovers? Freeze slices between parchment paper for up to 3 months—just thaw at room temperature.
Why You’ll Love This Recipe
- No-Roll Crust Shortcut: I swear by this cold butter cut-in trick—it’s the same flaky magic as my grandma’s, but no chilling dough or rolling pins. Just pulse the flour and butter in the food processor, press into the pan, and you’re golden. (Yes, even if you’re still in your pajamas.)
- Sweet-Spiced Apple Magic: That mix of granulated and brown sugar? It’s what turns bland apples into something ridiculously good—caramelized edges, tender centers, and a hint of buttery warmth. Honestly, I’ve tried fancier pies, but this one always wins.
- Weeknight or Holiday: Make it for a lazy Sunday supper or bring it to Thanksgiving—same effort, different vibes. The crust holds up for days, and the apples stay juicy even reheated. (Between us, it’s my go-to for potlucks because it’s foolproof.)
- Leftovers That Don’t Suck: Unlike some pies, this one actually tastes better the second day—crispier crust, sweeter filling. I freeze slices too, and they thaw perfectly for breakfast or a dessert emergency. Budget-friendly? Absolutely. Waste-free? Even better.
Step-by-step instructions for 1950s apple pie
Here’s how to make that classic homestyle pie with a perfect flaky crust and spiced filling.
Make the Classic Flaky Crust
In a large bowl, combine the 3.5 cups all-purpose flour with 1 teaspoon salt. Cut in the 1 cup cold unsalted butter using a pastry cutter or your fingers until the mixture resembles coarse crumbs with pea-sized butter pieces. This texture is crucial for that iconic flaky layering.
Add 2 tablespoons ice water one tablespoon at a time, mixing gently just until the dough comes together. Avoid overworking it—this develops gluten and makes the crust tough. Divide the dough into two equal portions, flatten into discs, wrap in plastic, and refrigerate for at least 1 hour. Chilling relaxes the gluten and makes rolling easier.
Prepare the Spiced Apple Filling
Peel, core, and slice the 6 medium apples into ¼-inch thick pieces. Toss them immediately with 1 tablespoon lemon juice to prevent browning while you work. In a large bowl, combine the apples with 0.75 cup granulated sugar, 0.5 cup packed light brown sugar, 2 tablespoons ground cinnamon, 0.5 teaspoon ground nutmeg, and 1 teaspoon vanilla extract. Mix gently but thoroughly—this ensures even distribution of spices throughout the filling.
Let the mixture sit for 15 minutes at room temperature. This allows the juices to start releasing, which helps create a thicker, more flavorful filling when baked. You’ll notice the apples soften slightly and the spices begin to mingle with the fruit’s natural juices.
Roll Out and Assemble the Pie
On a lightly floured surface, roll out one dough disc into a 12-inch circle (about ⅛-inch thick). Transfer it to a 9-inch pie dish, gently pressing it into the bottom and sides. Trim any excess dough hanging over the edge. Roll out the second dough disc the same way and set aside.
Spread the prepared apple filling evenly into the bottom crust, mounding it slightly in the center. This creates room for the filling to expand as it bakes. Dot the top with small pieces of the remaining 1 cup cold butter—this adds extra richness and flakiness to the top crust.
Create the Signature Lattice Top
Cut the second dough disc into 12 strips (about 1-inch wide). Arrange 6 strips in a staggered pattern over the filling, leaving ½-inch gaps between them. Brush the strips with the egg wash (1 large egg beaten with 2 tablespoons heavy cream). Fold back every other strip, then fold the adjacent strips over them to create the classic lattice pattern. Brush the entire lattice with more egg wash.
This lattice design allows steam to escape while keeping the filling moist and creating those beautiful golden-brown windows. The egg wash gives the crust that classic golden sheen and adds a subtle richness to the flavor.
Bake to Golden Perfection
Preheat your oven to 375°F. Place a baking sheet on the lower rack to catch any drips. Bake the pie for 50-55 minutes until the crust is deep golden brown and the filling is bubbling gently through the lattice. The edges should be crisp, and the filling should be thickened but still juicy.
For the last 5 minutes, increase the oven temperature to 400°F to get that beautiful caramelized color on the lattice. Let the pie cool on a wire rack for at least 2 hours before slicing—this resting time allows the filling to set properly and makes for cleaner slices.
Pro Tips For Making 1950s Apple Pie
- CHILL THE BUTTER FIRST: Cold butter in pie dough is non-negotiable—take it out of the fridge 15 minutes before mixing, then refrigerate the dough for at least 30 minutes after shaping. I learned this the hard way when my first attempt turned into a greasy mess instead of flaky layers. Trust me, the wait makes the difference.
- PEEL AND GRATE APPLES: Skip the peeling if you’re short on time, but if you want that classic 1950s texture, grate the apples instead of slicing them. The finer the shreds, the faster they’ll soften and release juice—no soggy bottom here. (Yes, even if you’re impatient like me.)
- Bake WITHOUT A CRUST SLOT: Cut a few steam vents in the top crust instead of using a pie crust shield or foil. The vents let moisture escape without letting the filling boil over, which is how you get that perfect balance of tender apples and crisp crust. I was skeptical until I tried it—now it’s my go-to.
- USE A THICKENED FILLING: Mix 2 tablespoons of cornstarch with the sugar before adding the apples to the filling. This isn’t just about thickening—it prevents the juice from turning the crust soggy. My grandmother swore by this, and she was right: the filling holds its shape, and the crust stays golden.
Perfect pairings for this recipe
Classic Vanilla Ice Cream
This pie deserves a cool, creamy companion that enhances its warm spiced flavors. My go-to is homemade vanilla bean ice cream—the rich vanilla notes complement the cinnamon and nutmeg beautifully.
Use a high-quality vanilla extract (like Madagascar Bourbon) and churn in an ice cream maker for that silky texture. Serve slightly softened with a drizzle of caramel sauce for that nostalgic 1950s diner feel.
Whipped Cream & Berries
A light cloud of homemade whipped cream (whipped heavy cream with 1 tbsp powdered sugar and ½ tsp vanilla) adds a refreshing contrast. Top with fresh strawberries or blueberries for a pop of color and acidity that cuts through the pie’s sweetness.
I like to arrange the berries in a circular pattern around the pie slice for an elegant presentation. For extra flair, dust with powdered sugar before serving.
Spiced Apple Cider
Warm spiced apple cider takes this dessert experience to another level. Simmer 4 cups apple cider with 2 cinnamon sticks, 1 star anise, 3 whole cloves, and 1 orange slice for 20 minutes.
Strain and serve warm—it’s the perfect beverage to sip alongside your pie. For a boozy twist, add 1 oz bourbon per serving. The cider’s warmth balances the pie’s richness beautifully.
Cheesecake or Pecan Pie
For a full dessert spread, pair this apple pie with New York-style cheesecake or pecan pie. The tangy creaminess of cheesecake contrasts wonderfully with the pie’s spiced sweetness, while pecan pie’s nutty richness adds depth.
I often serve them together at holiday gatherings—everyone gets their favorite. For a lighter option, add lemon bars to the mix for a citrusy balance.
Coffee & Chocolate
Finish the meal with strong black coffee or dark chocolate to cleanse the palate. A mocha latte made with espresso, hot milk, and a dash of vanilla syrup pairs perfectly with the pie’s flavors.
For chocolate lovers, offer dark chocolate-covered espresso beans or a chocolate-dipped strawberry as a final touch. These pairings elevate the pie from dessert to a full sensory experience.
Seasonal Twists
In fall, add maple syrup to the whipped cream or serve with roasted pecans for extra crunch. During winter holidays, garnish with candied cranberries and toasted almonds.
For summer, swap the lattice for a simple top crust and serve with vanilla bean gelato instead of ice cream. These seasonal variations keep the pie exciting year-round while staying true to its 1950s roots. 🍂
Nutrition facts
Frequently asked questions
Can I use store-bought crust instead of homemade?
For convenience, use two 9-inch store-bought pie crusts—just make sure they’re high-quality, like Pillsbury’s refrigerated crust. For extra flakiness, brush the bottom crust with 1 tablespoon melted butter before adding filling. The lattice technique still works perfectly with pre-made dough.
What if my apples are too watery after baking?
Watery filling usually means the apples weren’t cooked long enough. Try pre-cooking the apples for 5 minutes in a skillet with 1 tablespoon butter before adding to the pie. Also, reduce sugar slightly (0.5 cup total) and add 1 teaspoon cornstarch to thicken. Bake at 350°F instead of 375°F for a slower cook.
How do I make the lattice crust look perfect?
For clean lines, use a sharp knife to cut the strips and a ruler as a guide. Brush strips with egg wash before weaving to prevent sticking. Chill the lattice for 15 minutes before baking—this helps maintain shape. If edges brown too fast, cover with aluminum foil after 30 minutes.
Can I make this pie ahead of time?
Yes! Assemble the pie (unbaked) and refrigerate for up to 24 hours. Bake straight from cold. For best results, let it cool completely before slicing. Reheat slices at 350°F for 10 minutes to restore freshness. The flavors actually improve overnight as the spices meld.
What’s the secret to that authentic 1950s taste?
Three things: vanilla extract (not imitation), freshly ground spices (especially nutmeg), and slow baking. Preheat your oven thoroughly and use a dark metal pie dish—it conducts heat better. The low-and-slow method (375°F) creates that signature tender filling with crisp edges.

- 3 Overripe Bananas Recipe: Fluffy Pancakes With Zero Waste - November 17, 2026
- 2-Minute Pizza Recipe: Speedy Crispy Crust With Melted Cheese Magic - November 17, 2026
- 16 Chocolate Cupcakes Recipe: Triple-Layered Fudge Swirl Delight - November 17, 2026