
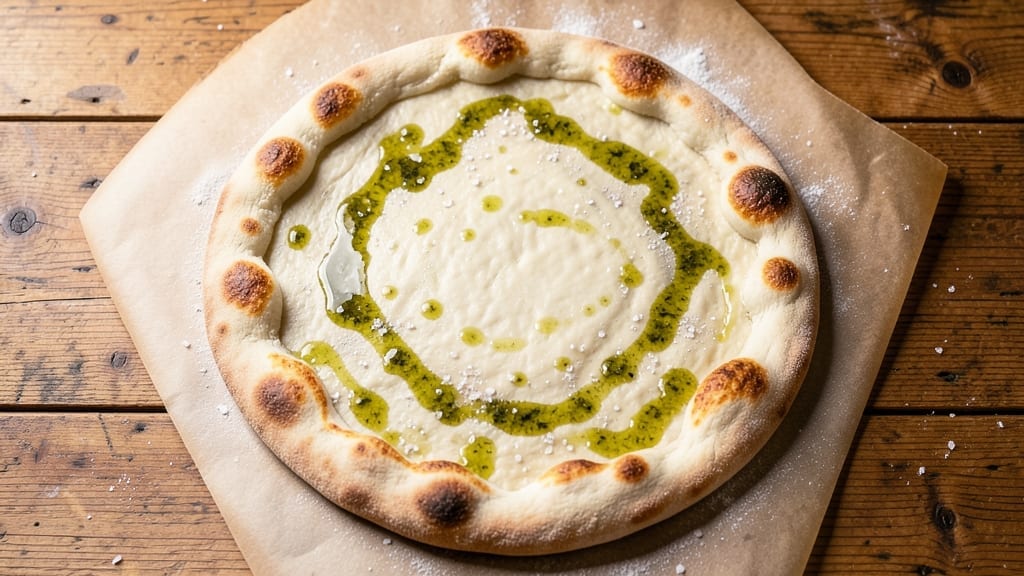
A 1kg flour pizza dough recipe that delivers a chewy, restaurant-quality crust in just one hour—no kneading required. This method transforms simple ingredients into a flexible, flavorful base that’s perfect for any pizza night.
The secret lies in proper hydration and a short rest, which develops gluten without overworking the dough.
What makes this dough special is its foolproof technique that balances texture and flavor. You’ll work with high-gluten flour for that signature chew, but the process remains simple: mix, rest, and shape.
The dough’s open crumb structure ensures a crispy yet soft crust, while the longer fermentation (even at room temperature) enhances flavor depth.
By the time you roll it out, you’ll have a smooth, elastic dough ready for your favorite toppings. The no-knead method saves time while still delivering professional results—ideal for busy weeknights or weekend pizza parties. Whether you prefer classic Margherita or loaded deep-dish, this dough is your foundation.
For extra versatility, try substituting half the flour with whole wheat or adding sourdough starter for a tangy twist. The key is patience—let the dough rest fully before shaping to avoid tearing. Now, let’s get started on your perfect pizza crust!
Ingredients for 1kg flour pizza dough
High-gluten flour plus a few pantry staples—this dough delivers restaurant-quality crust in one hour.
| Ingredient | Amount | Notes |
|---|---|---|
| High-Gluten Flour 🌾 | 1000 g | King Arthur or Caputo preferred |
| Warm Water 💧 | 600 ml | 105-110°F for optimal hydration |
| Instant Yeast 🍞 | 2 tsp | Active dry works too (proof first) |
| Fine Sea Salt 🧂 | 2 tsp | Diamond Crystal preferred |
| Extra-Virgin Olive Oil 🫒 | 2 tbsp | For dough elasticity |
| Sugar 🍚 | 1 tsp | Feeds yeast activation |
| Semolina Flour 🌾 | 2 tbsp | For dusting work surface |
| Cornmeal 🌽 | ¼ cup | For pizza peel |
The flour is everything here. King Arthur or Caputo give that signature chewy texture, but Bread flour works in a pinch. Grab a 1kg bag from King Arthur if you’re making this often—they ship fast. For yeast, instant yeast is foolproof, but active dry works if you proof it first. The water needs to be warm (105-110°F)—not hot, or you’ll kill the yeast. Use a thermometer if you’re unsure. Salt matters too: Diamond Crystal dissolves better than table salt, so I always stock it.
No high-gluten flour? All-purpose plus 2 tbsp vital wheat gluten gets you close. Short on olive oil? Avocado oil works, but the flavor won’t be as rich. The sugar is optional—skip it if you’re avoiding carbs, but it helps the yeast activate faster. For the dough’s final touch, semolina or cornmeal prevents sticking when rolling. I keep both on hand, but semolina gives that classic pizza vibe. If you’re making multiple pizzas, double the dough—it keeps well for 2 days in the fridge.
This dough doubles in size during rest, so don’t shape it early. Wrap tightly in plastic and let it sit at room temp for 1-2 hours—patience is key. Store any leftovers in the fridge for up to 3 days, or freeze portions for 3 months. For freezing, shape the dough into balls and wrap individually. Thaw overnight in the fridge before using. The longer it rests, the better the flavor—trust the process.
Why You’ll Love This Recipe
- No-Knead Magic: I swear by this dough—just mix, rest, and roll. The high-gluten flour does all the work, so no arm workout required. (Yes, even on a Tuesday night.)
- Chewy Gold Standard: That crispy-yet-chewy bite? It’s all in the high-gluten flour and olive oil. One taste, and you’ll understand why I keep a bag of this stuff on hand.
- Weekend Feast Starter: Doubles as a base for calzones, focaccia, or garlic knots—no extra dough needed. I’ve fed six people with one batch, and still had leftovers for lunch.
- Dollar Stretch: A kilogram of flour makes four pizzas, and the yeast and salt cost pennies. My grocery budget thanks me every time I pull this out. (Between us, it’s my go-to for date nights too.)
Step-by-step instructions for no-knead pizza dough
Here’s how to craft a chewy, elastic dough that develops deep flavor in just an hour.
Combine Wet Ingredients for Optimal Hydration
In a large mixing bowl, whisk together the 600 ml warm water (between 105-110°F) with the 1 tsp sugar and 2 tsp instant yeast. Let this mixture sit for 5 minutes until it develops a frothy, bubbly head—this confirms the yeast is active and ready to work. The warm water temperature is critical; too hot kills yeast, too cold slows activation.
Next, add the 2 tbsp extra-virgin olive oil and 2 tsp fine sea salt, stirring until fully dissolved. The olive oil will create microscopic pockets in the dough, contributing to that signature chewiness. The salt not only seasons but also strengthens gluten development. Give this mixture a final stir and let it rest for 2 minutes while you prepare your workspace.
Mix and Hydrate the High-Gluten Flour
Add the 1000 g high-gluten flour to the wet mixture all at once. Using a wooden spoon or dough whisk, cut through the flour from the center outward until you reach a shaggy, uneven mass. The high-gluten content means this dough will be stickier than all-purpose, so resist the urge to add extra water—hydration is key for that perfect open crumb structure.
Let the dough rest for 10 minutes while you dust your work surface with 2 tbsp semolina flour. This resting period allows the flour to fully absorb the liquid. After 10 minutes, the dough should pull away from the sides of the bowl slightly and look slightly more cohesive. If it’s still too sticky, add just 1 tbsp more water—but no more, or you’ll compromise texture.
Develop Gluten Through Gentle Stretching
Turn the dough onto your floured surface and begin the stretching process. Using your fingertips, gently press down on the dough and stretch it outward, then fold it back toward the center. Rotate the dough 90 degrees and repeat. This motion, called “autolyse stretching,” builds gluten without overworking the dough. Work for 5 minutes, then let it rest another 10 minutes—this two-stage approach prevents gluten overdevelopment while ensuring proper structure.
After the second rest, the dough should be smoother and more elastic. If it’s still slightly sticky, wet your hands and continue stretching for another 2 minutes. The goal is a dough that springs back slowly when poked—this indicates proper gluten development without toughness. Avoid using a rolling pin; the goal is to create tension through hand-stretching, not compression.
Final Rest and Preparation for Shaping
Shape the dough into a loose ball, place it back in the bowl, and cover tightly with plastic wrap or a damp towel. Let it rise at room temperature (70-72°F) for 30 minutes. You’ll notice it puffs slightly and develops small bubbles along the surface—these are visual confirmation that fermentation is active. The dough should feel noticeably softer and more pliable.
After the final rest, sprinkle a generous layer of 0.25 cup cornmeal on your pizza peel or baking surface. This creates a non-stick barrier that prevents sticking during stretching. The cornmeal also adds a subtle crunch to the crust’s base. Now your dough is ready for shaping—whether you’re making classic Neapolitan-style pizzas or thick New York slices, this elastic foundation will hold toppings perfectly.
Pro Tips For Making 1kg Flour Pizza Dough
- WEIGH YOUR WATER: High-gluten flour absorbs moisture like a sponge—use a scale for the warm water (about 600g) and adjust by 10g if the dough feels sticky or dry after the first 10 minutes of mixing. I learned this the hard way when my dough either stuck to my hands or turned out rock-hard.
- STRETCH, DON’T FOLD: When bulk-fermenting, resist the urge to knead or fold the dough—just let it rise. If it collapses or looks uneven, gently stretch the surface with wet hands (about 1-2 minutes) to redistribute the gluten without overworking it. This keeps the texture tender and prevents a tough crust.
- SALT THE OLIVE OIL: Dissolve the fine sea salt (about 15g) directly into the extra-virgin olive oil before mixing—it distributes evenly and prevents clumpy dough. I used to sprinkle it on top, and half the time, I’d forget to incorporate it properly.
- FERMENT COOLER: If your kitchen is warm, slow the rise by placing the dough in the fridge after the first 2 hours of bulk fermentation. The cold slows yeast activity, giving you more control over timing and a deeper flavor—just pull it out 1-2 hours before shaping. I skip this in summer and end up with overproofed dough every time.
Serving suggestions for this dish
Classic Toppings
Start with the timeless Margherita—drizzle with San Marzano tomato sauce, fresh burrata, and fresh basil leaves torn by hand. For a meat lover’s version, use pepperoni slices and crumbled mozzarella.
I always add a pinch of red pepper flakes for just a hint of heat. The high-gluten dough handles these toppings beautifully without tearing, even with wet ingredients like burrata. 🌿
Gourmet Upgrades
Elevate your pizza with truffle oil drizzle (just 1 tsp) and aged pecorino Romano shavings for a sophisticated touch. Try a fig and prosciutto combo—sauté 2 figs with 1 tbsp honey and 1 tbsp balsamic vinegar, then top with thin prosciutto slices and arugula.
The dough’s chewy texture contrasts perfectly with the sweet-savory figs. For a vegan option, swap cheese for cashew ricotta and add roasted eggplant and sun-dried tomatoes.
Seasonal Variations
Summer calls for grilled zucchini and cherry tomatoes with feta cheese and olive tapenade. In fall, roast butternut squash cubes with sage leaves and fontina cheese, then finish with toasted pecans.
Winter pizzas shine with caramelized onions, mushrooms, and Gruyère cheese. The dough’s structure holds up to heavy toppings without collapsing, making it ideal for seasonal twists. 🍂
Dipping Sauces
Serve with garlic aioli (mix ½ cup mayo, 1 minced garlic clove, and 1 tbsp lemon juice) or spicy marinara (simmer 1 cup tomato sauce with 1 tsp chili flakes and 1 tsp sugar).
For a creamy option, blend ½ cup ricotta with 1 tbsp olive oil, salt, and black pepper. The dough’s crisp edges soak up dipping sauces beautifully, balancing the rich toppings. 🍴
Presentation Tips
Use a pizza stone or cast-iron skillet for that classic char. For a rustic look, dust the peel with semolina flour before sliding the pizza onto the stone. Garnish with fresh herbs (basil, thyme, or oregano) just before serving.
If making ahead, shape the dough and refrigerate for up to 24 hours—the flavors deepen overnight. For a showstopper, add edible flowers or flaky sea salt right before baking. ✨
Nutrition facts
Frequently asked questions
Why does this dough need high-gluten flour?
The high-gluten flour creates that signature chewy, elastic texture that holds up to toppings without tearing. Regular all-purpose flour lacks the protein structure needed for that professional-quality bite. For a lighter crust, try mixing 800g high-gluten flour with 200g bread flour—it’ll still deliver great results.
Can I make this dough ahead of time?
Shape the dough into balls, wrap tightly in plastic, and refrigerate for up to 3 days. For longer storage, freeze portions for 3 months. Thaw overnight in the fridge before shaping—this actually enhances flavor through cold fermentation. The dough will be stiffer when cold, so let it sit at room temp for 30 minutes before stretching.
What if my dough is too sticky?
High-gluten dough should be tacky but manageable. If it’s unworkably sticky, sprinkle 1 tbsp more semolina flour while stretching (don’t add water—this weakens gluten). Wet your hands slightly to prevent sticking, and work quickly. The dough will firm up as it rests. If it’s still too wet after mixing, you may have added too much water—this dough’s hydration is precise for optimal texture.
How do I know when the dough is fully proofed?
Look for small bubbles on the surface and a 20-30% increase in size (it should feel soft and spring back slowly when poked). The dough should also smell slightly sweet and yeasty. For best results, proof at 70-72°F—warmer temps speed fermentation but can make the crust too open. If your kitchen is cold, extend proofing time to 45-60 minutes.
Can I add herbs or garlic to the dough?
Yes! For flavorful dough, mix in 1 tbsp chopped fresh rosemary or 2 minced garlic cloves with the wet ingredients. For a stronger flavor, use 1 tsp garlic powder or ½ tsp dried oregano in the flour. Just be aware that herbs can slightly alter the dough’s texture—start with small amounts. The high-gluten structure still holds up well to these additions.

- 5 Lb Eye Round Roast Recipe: Slow-Braised to Melt-in-Mouth Tenderness - November 3, 2026
- 3-Hour Ciabatta Bread Recipe: Crusty Chews and Airy Holes Mastered - November 3, 2026
- 5 Fruit Salad Recipe: Vibrant Rainbow Layers With No Brown Spots - November 3, 2026