
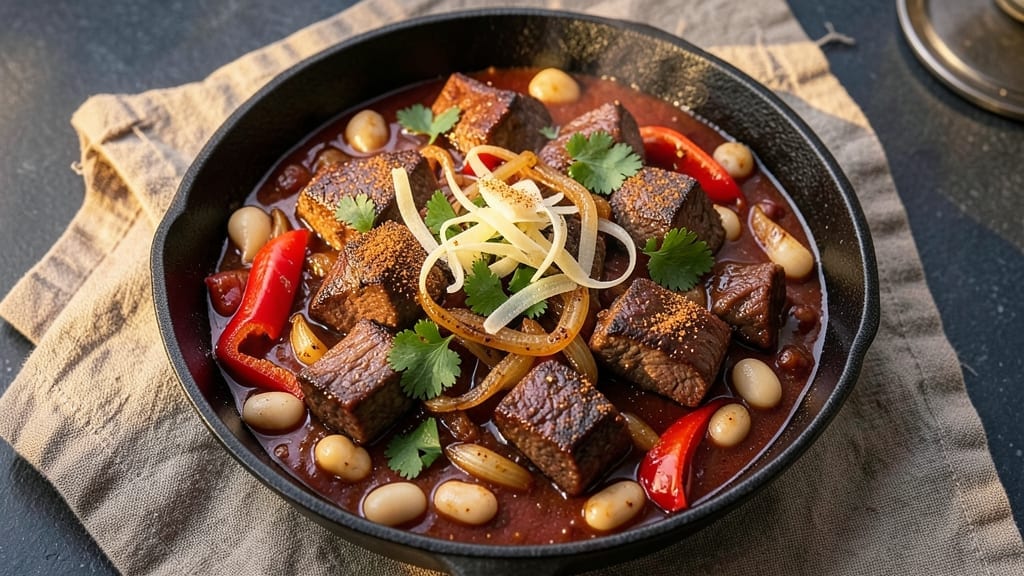
This 2-day chili recipe transforms simple ingredients into a deeply flavorful masterpiece through time and patience—where the magic happens between the first simmer and the final reheat. The initial browning of meat unlocks caramelized depth, while overnight refrigeration lets spices meld into a complex harmony that store-bought versions can’t match.
What starts as a hearty pot of chili evolves into something restaurant-worthy, with flavors that only develop after 48 hours of careful preparation.
The secret lies in the technique: slow-cooking the meat until tender, layering spices gradually, and letting the chili rest overnight to allow flavors to deepen. This isn’t just a recipe—it’s a process that rewards patience with rich, smoky notes and a texture that’s both hearty and balanced.
The result? A chili so flavorful, it becomes the centerpiece of any meal, whether served with cornbread or over rice.
By the second day, the chili will have developed a depth that’s impossible to achieve in a single cooking session. The meat becomes fork-tender, the spices harmonize perfectly, and the broth reduces to a velvety consistency that coats every spoonful.
This method ensures you’re not just making chili—you’re crafting a dish that tastes like it’s been simmering for hours, even if you only spent a few minutes active cooking.
Serve it with all the classic toppings—sour cream, shredded cheese, chopped onions, or fresh cilantro—to complete the experience. The chili’s improved flavor makes it perfect for meal prep, leftovers, or even gifting to neighbors. Here’s how to make it happen step by step.
Ingredients for 2 day chili
Sixteen ingredients, two days of transformation—where patience becomes flavor.
| Ingredient | Amount | Notes |
|---|---|---|
| Chuck Roast 🥩 | 2 ½ lb | Trimmed of excess fat, cut into 1-inch cubes |
| Yellow Onion 🧅 | 2 whole | Medium, diced into 1/4-inch pieces |
| Garlic Cloves 🧄 | 6 cloves | Peeled, minced finely for even distribution |
| Ground Cumin 🌿 | 2 tbsp | Freshly toasted for deeper aroma |
| Chili Powder 🌶️ | 2 tbsp | Medium heat level, not smokeless |
| Smoked Paprika 🌶️ | 1 tbsp | For authentic smoky depth |
| Dried Oregano 🍃 | 1 tsp | Mexican oregano preferred |
| Black Peppercorns 🌶️ | 1 tsp | Freshly cracked for robust flavor |
| Bay Leaves 🌿 | 2 whole | Remove before serving |
| Tomato Paste 🍅 | ½ cup | High-quality, no salt added |
| Diced Tomatoes (46 oz can) 🍅 | 1 can | San Marzano preferred for sweetness |
| Beef Broth 💧 | 4 cups | Low-sodium preferred, homemade if possible |
| Dark Brown Sugar 🍚 | 1 tbsp | Enhances caramelization |
| Extra-Virgin Olive Oil 🫒 | 2 tbsp | For searing meat, fruity variety |
| Kosher Salt 🧂 | 1 ½ tsp | Diamond Crystal preferred, added gradually |
The chuck roast is non-negotiable here—its marbling ensures tender results after slow cooking. Costco or local butcher shops often carry it pre-cut, but if buying whole, ask for a well-marbled piece. The San Marzano tomatoes are worth the splurge at Whole Foods or specialty grocers; their sweetness balances the spices perfectly. For the spices, Penzeys or bulk bins at natural markets guarantee freshness—ground spices lose potency within months. Toast your cumin and chili powder in a dry pan for 30 seconds before adding to deepen their flavors. The beef broth should be low-sodium to control seasoning; homemade is ideal but store-bought brands like Pacific Foods work well.
No chuck roast? Beef short ribs or lamb shoulder adapt beautifully, though cooking times increase. Substitute smoked paprika with liquid smoke (1/4 tsp)**—use sparingly, as it’s potent. Fresh oregano can replace dried at a 1:3 ratio, but Mexican oregano’s citrusy notes are unmatched. For tomato paste, Trader Joe’s squeeze tubes eliminate waste and last months. The brown sugar can be swapped for molasses (1 tbsp)—it adds complexity but darkens the chili. If using pre-minced garlic, toast it first—raw garlic burns easily during searing. Always taste the spices before adding to the pot; adjust in 1/4 tsp increments**—chili flavors build gradually.
This chili rewards patience—reheat gently—low heat or stovetop simmer—never microwave. The flavors peak on day two, so portion into airtight containers for up to 5 days in the fridge or 3 months frozen. For meal prep, freeze in 1-cup portions for easy servings. The meat becomes fork-tender after 48 hours, so skip the blender—this isn’t soup. Store spices in dark glass jars to preserve freshness. Leftovers? Double the batch—neighbors will thank you—this chili freezes beautifully and tastes even better the third day.
Why You’ll Love This Recipe
- I’ll be real: this is my go-to for busy nights. Make it on Sunday, reheat for lunches all week—it only gets better as it sits. Or serve it at a potluck where everyone leaves with a container. Works for date nights too, if you’re feeling fancy with toppings.
- Foolproof Slow Simmer: Between us, this chili needs two days to let the chuck roast turn tender enough to shred with a fork. No guesswork—just dump, simmer, and walk away. The onions caramelize into sweet pockets of flavor while the cumin and chili powder meld into something deeper than a one-day pot.
- Deep, Smoky Richness: Honestly, the garlic and cumin do all the heavy lifting here. The chuck roast breaks down into melt-in-your-mouth strips, and that crust of chili powder on top? It’s the kind of flavor that makes you reach for seconds without thinking. No sad, watery chili—just pure, satisfying heat.
- Weeknight & Meal Prep: I’ll be real: this is my go-to for busy nights. Make it on Sunday, reheat for lunches all week—it only gets better as it sits. Or serve it at a potluck where everyone leaves with a container. Works for date nights too, if you’re feeling fancy with toppings.
Step-by-step instructions for deep, smoky two-day chili
This method transforms tough chuck roast into melt-in-your-mouth texture through slow cooking and overnight development.
Sear the Chuck Roast for Maximum Flavor
Heat the 2 tablespoons extra-virgin olive oil in a heavy Dutch oven over medium-high heat until shimmering. Add the 2.5 lb chuck roast cut into 1-inch cubes and sear undisturbed for 3-4 minutes per side until developing deep brown crusts. This caramelization creates the foundation for your chili’s rich, complex flavor.
Work in batches if needed to avoid crowding the pan. Once all pieces are browned, transfer them to a plate and set aside. You’ll notice the meat releases easily when properly seared—this indicates the crust has formed. The rendered fat in the pot will become the flavor base for your chili, so don’t wipe it clean.
Build the Flavor Foundation with Aromatics and Spices
In the same Dutch oven, add the 2 whole yellow onions diced into ¼-inch pieces and cook for 5-6 minutes until softened and beginning to caramelize. Add the 6 cloves minced garlic cloves and cook for 30 seconds until fragrant—this prevents the garlic from burning and imparts its full sweetness.
Stir in the 2 tablespoons ground cumin, 2 tablespoons chili powder, 1 tablespoon smoked paprika, 1 teaspoon dried oregano, and 1 teaspoon cracked black peppercorns. Cook for 1 minute to toast the spices and release their essential oils. This step develops the chili’s signature depth of flavor that will continue to evolve over the two days.
Combine All Ingredients for Initial Braising
Return the seared chuck roast to the pot. Add the 0.5 cup tomato paste, scraping up any browned bits from the bottom with a wooden spoon. Pour in the 1 can diced tomatoes (with juices), 4 cups beef broth, and 1 tablespoon dark brown sugar. Stir well to combine all ingredients, then add the 2 whole bay leaves.
Bring the mixture to a gentle simmer over medium heat, then reduce heat to low. Cover and simmer for 2 hours, stirring occasionally, until the chuck roast is fork-tender and begins to pull apart easily. The chili should be thick and rich at this stage, with the meat nearly falling apart when tested with a fork.
First Overnight Refrigeration for Flavor Development
Remove the chili from heat and let it cool to room temperature. Transfer to an airtight container and refrigerate uncovered for 8-12 hours. This critical step allows the flavors to meld and intensify. The chili will develop a concentrated depth of flavor that you won’t achieve through cooking alone.
During this time, the fat will rise to the surface and solidify. The next day, skim off any solidified fat from the top before reheating. This step also helps thicken the chili naturally as moisture is absorbed. The chili should take on a more intense, complex aroma when you return to it the next day.
Complete the Cooking Process for Perfect Texture
Remove the 2 whole bay leaves from the chili. Return the chili to the Dutch oven and bring to a simmer over medium heat. Cook uncovered for 1-2 hours until the chili reaches your desired consistency, stirring occasionally. The chili should be thick enough to coat the back of a spoon but still have a slightly loose texture.
Taste and adjust seasoning with the remaining 1.5 teaspoons kosher salt if needed. The chili should be rich, smoky, and complex with well-developed meat flavors. Serve immediately with toppings like shredded cheese, sour cream, or fresh cilantro. The chili will continue to improve in flavor as it sits, so don’t be afraid to make extra for leftovers.
Pro Tips For Making 2 Day Chili
- Sear the Chuck Roast First: I learned this the hard way—skipping the sear means flavorless chili. Pat the chuck roast dry, then hit it with high heat in a heavy pot until deep brown all over (about 5 minutes per side). That crust locks in juices and builds depth that simmering alone can’t match.
- Slice Onions Paper-Thin: Sounds weird, but it works: thinly sliced yellow onions (almost translucent) cook faster and sweeten up better than chunks. Use a mandoline or sharp knife—this isn’t the time to hack through them. They’ll melt into the chili without leaving tough bits.
- Toast the Spices Together: Dry-toast the cumin and chili powder in the same pot for 30 seconds after browning the meat. The heat wakes up their aromas, making the chili taste deeper than just dumping them in cold. (Yes, even if you’re impatient like me.)
- Simmer Low and Long: After adding broth, keep the chili at a gentle simmer—tiny bubbles, not a rolling boil. Too much heat makes the meat tough, and you’re playing the long game here. Two days of simmering at 180°F (or lowest setting) turns tough chuck into fork-tender shreds.
Pro cooking tips for great 2 day chili
Sear Like a Pro
Never skip the sear—this is where flavor magic happens. Use a heavy Dutch oven like Lodge or All-Clad for even heat distribution. Pat the chuck roast dry with paper towels before searing to ensure maximum crust formation.
Work in single-layer batches to avoid steaming, and resist the urge to stir too early—let those browned bits build for 3-4 minutes per side. The rendered fat becomes your chili’s flavor foundation, so don’t wipe it out. 🔥
Spice Toasting Trick
Toast your spices in the same pot where you seared the meat—they’ll absorb those delicious meaty flavors. Use medium heat and cook for 1 minute until fragrant. This simple step amplifies the cumin’s earthiness and chili powder’s heat.
Pro tip: Toast the spices right after removing the meat to maximize flavor transfer. The aroma alone will make your kitchen smell like a Mexican cantina. 🌶️
Two-Stage Simmering
Start with a covered simmer for the first 2 hours to break down the meat’s connective tissue. Then switch to uncovered simmering during the second day to reduce the liquid slightly and intensify flavors. The uncovered portion allows excess moisture to evaporate while concentrating the spices.
Use a meat thermometer to check doneness—aim for 205°F internal temperature for fork-tender meat. This two-stage approach creates the perfect balance of thickness and richness.
Fat Skimming Secret
After the first overnight refrigeration, you’ll see a solidified fat layer on top. Use a spoon or fat separator to remove this before reheating—it prevents greasiness. The chili will naturally thicken as it sits overnight, but removing excess fat ensures a cleaner texture.
This step is especially important if you’re serving the chili at room temperature or for potlucks where presentation matters. The difference in texture is noticeable immediately. ❄️
Consistency Control
If your chili is too thin after the second day, simmer uncovered for 10-15 extra minutes to reduce. Need it thicker? Stir in 1 tablespoon tomato paste or 1/4 cup cornstarch slurry (mix cornstarch with cold water).
For a smoother texture, blend 1/2 cup of the chili separately and stir back in—just don’t over-blend or you’ll lose the meaty texture. The goal is spoon-thick consistency that coats the back of a spoon without being gluey.
Final Flavor Boost
Before serving, finish with a 1-minute high-heat simmer to brighten the flavors. Add a splash of beef broth if needed, then taste and adjust seasoning. The chili should sing with smoky, spicy, and sweet notes.
For an extra layer, stir in 1/2 teaspoon liquid smoke or a pinch of cinnamon (trust me, it works!). Garnish with fresh toppings like cilantro, green onions, or avocado to add freshness and color. The final product should taste like it’s been simmering for days. 💫
Nutrition facts
Frequently asked questions
Why does chili taste better after two days?
The overnight resting period allows flavors to meld and intensify through a process called flavor development. The spices infuse deeper, the meat tenderizes further, and excess moisture evaporates, creating a more concentrated, complex taste. This slow transformation is what separates homemade chili from instant versions.
Can I make this chili in a slow cooker instead?
Yes! Brown the meat first in a skillet, then transfer everything to your slow cooker. Cook on low for 8 hours (instead of the initial 2-hour simmer), then refrigerate overnight uncovered. On day two, transfer to a pot and simmer uncovered for 1-2 hours to reduce and thicken. The texture will be slightly different but still delicious.
What if my chili is too thin after day two?
Simmer uncovered for 10-15 extra minutes to reduce the liquid. For faster thickening, stir in 1 tablespoon tomato paste or make a cornstarch slurry (1 tbsp cornstarch + 2 tbsp cold water) and whisk it in. Avoid over-blending—this chili is meant to have texture! The goal is spoon-thick consistency that still has body.
How long will this chili keep in the fridge?
Store in an airtight container for up to 5 days in the refrigerator. The flavors actually continue improving! For longer storage, freeze in 1-cup portions for up to 3 months. Thaw overnight in the fridge before reheating—never microwave directly from frozen.
Can I add beans to this recipe?
For extra heartiness, add 1 can black beans or pinto beans (drained) during the initial 2-hour simmer on day one. Or stir in 1 cup cooked beans after the second day’s cooking. For best texture, use low-sodium canned beans and rinse them well. The beans will absorb the chili’s rich flavors beautifully.

- 6 Egg Cake Recipe with Oil: Light as Air With Buttery Moisture - October 4, 2026
- 4 Bean Casserole Recipe: One-Pan Heartiness With Smoky Paprika Depth - October 4, 2026
- 3-Ingredient Keto Mug Cake Recipe: Microwave Magic in 2 Minutes - October 4, 2026