
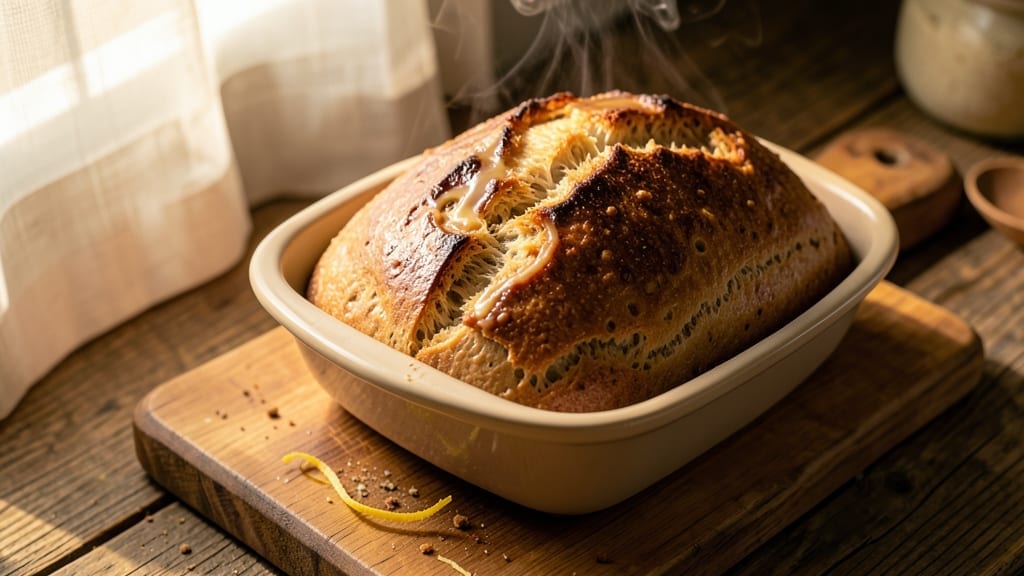
A 2-lb bread loaf with a crusty exterior and soft, airy interior transforms ordinary meals into something extraordinary. This recipe delivers professional-quality results with simple techniques—no bread machine required. The key lies in proper kneading, proofing, and steam during baking, creating that perfect contrast between crispy crust and tender crumb.
What sets this recipe apart is its foolproof method for achieving consistent texture every time. You’ll work with basic ingredients—flour, yeast, water, and salt—but precise timing and temperature control make all the difference.
The dough develops flavor during a long fermentation, while the baking process uses steam to create that coveted oven spring and crispy crust.
By the time your loaf emerges from the oven, you’ll have a golden-brown crust with deep crack lines and a light, airy interior that’s perfect for sandwiches or toast.
The aroma alone will have everyone gathering around the table. This recipe scales perfectly for home bakers and delivers restaurant-quality results with minimal effort.
Whether you’re making sandwich bread, dinner rolls, or an artisan loaf, this method ensures consistent success. The techniques here work for any bread style, and once you master them, you’ll never buy store-bought bread again. Let’s get started on creating your perfect loaf!
Ingredients for 2 lb bread loaf
Nine simple ingredients transform your kitchen into a bakery. Crusty perfection starts here.
| Ingredient | Amount | Notes |
|---|---|---|
| All-Purpose Flour 🌾 | 4 ½ cups | Bread flour preferred for better texture |
| Active Dry Yeast 🍞 | ¼ oz | One standard packet (2.25 tsp) |
| Granulated Sugar 🍚 | ½ tbsp | Feeds yeast for activation |
| Warm Water 💧 | 1 ¼ cups | 110°F for optimal yeast activation |
| Unsalted Butter 🧈 | ½ cup | Cold, cubed for easier mixing |
| Kosher Salt 🧂 | 1 ½ tsp | Diamond Crystal preferred |
| Ice Water ❄️ | ¼ cup | For final dough adjustment |
| Cornmeal 🌽 | ¼ cup | For dusting baking sheet |
| Extra-Virgin Olive Oil 🫒 | 1 tbsp | For dough shaping and steam |
The flour is where magic happens—bread flour gives that professional crumb, but all-purpose works too if that’s what you’ve got. Yeast is non-negotiable: grab Fresh & Easy brand from the store or King Arthur online for reliable performance. Store your flour in the freezer to preserve freshness (yes, really). The butter should be cold but not frozen—cut into small cubes for even distribution. Salt matters too: Diamond Crystal dissolves slower, so use it if you like that clean flavor.
No bread flour? Add 1 tbsp vital wheat gluten per cup of all-purpose for better structure. Yeast too old? Test it first: drop a pinch in warm water with sugar—if it bubbles in 5 minutes, it’s good. Butter substitute? Coconut oil or vegan butter works, but texture won’t be identical. The olive oil can be swapped for avocado oil, but stick with extra-virgin for that authentic bread aroma. For the steam trick, you can also use a metal bowl of boiling water in your oven instead of ice water.
Dough keeps for 3 days in the fridge, wrapped tightly in plastic. For longer storage, freeze shaped loaves (unbaked) for up to 3 months—thaw overnight before baking. The cornmeal layer prevents sticking, but semolina works too. Baked loaves stay fresh 2-3 days at room temperature, wrapped in a clean kitchen towel. Slice with a serrated knife for clean cuts—dull blades crush the crumb.
Why You’ll Love This Recipe
- No-Fuss Dough: I swear, this takes less effort than ordering takeout. Just mix the flour, yeast, sugar, and warm water—no kneading, no waiting around. The butter works its magic while you’re still measuring ingredients, and by the time it rises, you’ve done more scrolling than stirring.
- Buttery Crust, Soft Core: That crispy golden crust? Pure magic from just a pat of melted butter brushed on top. Inside, it’s pillowy and just slightly sweet from the sugar—like a hug for your sandwiches or toast. Honestly, I’ve never met bread this satisfying.
- Weeknight Workhorse: This loaf is my secret weapon for lazy dinners, charcuterie boards, or even breakfast toast. It’s big enough to feed a family but small enough to handle without a stand mixer. (Yes, even on a Tuesday night when you’re exhausted.)
- Budget Stretch: Flour, yeast, sugar, butter—these are pantry staples that won’t break the bank. One loaf lasts me days, and the leftovers? Perfect for croutons, French toast, or crumbs for meatballs. It’s the kind of recipe that makes grocery money go further.
Step-by-step instructions for crusty bread loaf with airy crumb
This method delivers that perfect balance of crispy crust and tender interior every single time.
Activate the Yeast for Maximum Rise
In a small bowl, combine the 1.25 cups warm water (should feel like bathwater, around 110°F) with the 0.5 tbsp granulated sugar and 0.25 oz active dry yeast. Let this sit for 5-10 minutes until you see frothy bubbles forming on the surface. This proves your yeast is alive and ready to work.
I always test the water temperature first with my finger—if it feels too hot, let it cool slightly. Overheating kills yeast, and you’ll end up with dense, flat bread. The bubbles should be vigorous and cover the entire surface within 5 minutes. If it’s sluggish, your yeast might be old or your water too cool.
Mix Dough and Develop Gluten for Structure
In the bowl of a stand mixer fitted with the dough hook attachment, combine the 4.5 cups all-purpose flour and 1.5 tsp kosher salt. Add the yeast mixture and mix on low speed for 2 minutes until just combined. Then add the 0.5 cup cold cubed butter and mix until the butter is incorporated but still visible in chunks.
Switch to medium speed and knead for 5-7 minutes until the dough forms a smooth, elastic ball that cleans the sides of the bowl. You’ll know it’s ready when you poke it and the indentation slowly fills back in. This gluten development creates that perfect airy crumb we’re after. If the dough sticks too much, add 1 tablespoon ice water at a time until it comes together.
First Rise for Flavor Development
Lightly oil a large bowl, place the dough inside, and cover with a damp kitchen towel. Let it rise in a warm place (I use my turned-off oven with the light on) for 1-2 hours, or until it has roughly doubled in size. The dough should feel light and springy when pressed gently.
This first rise is crucial for flavor development. You’ll see the dough puff up dramatically, and when you press two fingers into it, the indentation should stay for a moment before slowly filling back. If your kitchen is cold, place the bowl on top of your refrigerator to create a warm, draft-free environment. Patience here prevents a dense loaf—don’t rush this step.
Shape and Second Rise for Perfect Structure
Turn the dough onto a lightly floured surface and gently shape it into a 2-pound loaf by pulling the edges toward the center and sealing the seam. Place it seam-side down in a greased 9×5-inch loaf pan, brush the top with 1 tablespoon extra-virgin olive oil, and sprinkle evenly with 0.25 cup cornmeal for texture.
Cover again and let rise for another 45-60 minutes until the dough has risen about 1 inch above the pan. The cornmeal creates that beautiful golden crust while adding a subtle crunch. I like to do this final rise at room temperature for better oven spring. If the dough doesn’t rise much, your yeast might be weak or your environment too cold.
Bake to Golden Perfection with Steam
Preheat your oven to 375°F with a baking stone or inverted baking sheet on the lower rack. Place the loaf pan on the middle rack. Bake for 30-35 minutes until the top is deep golden brown and sounds hollow when tapped on the bottom. For extra steam, place a pan of boiling water on the lower rack during the first 10 minutes of baking.
This steam creates that perfect open crumb structure while keeping the crust crispy. When you remove the loaf, let it cool in the pan for 10 minutes before transferring to a wire rack. The internal temperature should read 190-200°F at the center. If the top browns too quickly, tent with foil after 20 minutes to prevent over-browning while the interior finishes cooking.
Pro Tips For Making 2 Lb Bread Loaf
- Test Yeast First: Skip the guesswork—mix 1 packet yeast, 1 tsp sugar, and ¼ cup warm water (110°F) in a small bowl. If it doesn’t bubble within 5-10 minutes, your yeast is dead or your water’s too hot. Toss the batch and start fresh. I learned this the hard way after baking a dense brick instead of bread.
- Knead Until Silky: Stop when the dough springs back slowly when poked and feels smooth, not sticky. Over-kneading makes gluten tough—your loaf will turn chewy instead of tender. If it sticks, add flour one tablespoon at a time (yes, even if you’re impatient like me). Under-kneaded dough collapses; over-kneaded dough fights back.
- Shape Tightly, Score Deeply: Pack the dough into the loaf pan firmly—no air gaps. Press the edges to the pan’s corners, then score the top with a sharp knife (½-inch deep, in an “X” or straight line). This prevents random cracks and guarantees an even rise. I used to slap the dough in and wonder why it split like a sad soufflé.
- Butter Matters: Use cold unsalted butter (cut from the fridge, not softened) and cut it into the flour first. This coats the flour better, preventing dryness and ensuring a richer crumb. If your butter’s warm, the dough will overproof faster—resulting in a gummy loaf. Trust me, your future self will notice the difference.
Common mistakes when making this recipe
Over-Kneading the Dough
The dough should feel smooth and elastic but not tough or rubbery. If you knead for more than 7-8 minutes on medium speed, you’ll over-develop the gluten, resulting in a dense, chewy loaf.
I’ve made this mistake when distracted—always check the dough’s readiness by poking it: if the indentation fills back in within 1-2 seconds, it’s perfect. 💡
Skipping the Steam
Steam is what creates that beautiful oven spring and crispy crust. Without it, your loaf will have a thick, dense crust instead of the light, airy texture we want. My first attempt without steam resulted in a loaf that looked more like a brick!
Place a pan of boiling water on the lower oven rack during the first 10 minutes of baking for that professional bakery effect.
Ignoring Proofing Times
Rushing the proofing stages is a surefire way to end up with a flat, dense loaf. The dough needs time to develop flavor and structure. If your kitchen is cold, place the bowl on top of your fridge to create a warm, draft-free environment.
The dough should double in size during the first rise and rise about 1 inch above the pan during the second rise. Patience here makes all the difference!
Using the Wrong Flour
While all-purpose flour works, it lacks the protein content of bread flour, which is essential for that perfect open crumb structure. If you don’t have bread flour, add 1 tbsp vital wheat gluten per cup of all-purpose flour to improve the texture.
I’ve tested this substitution, and it makes a noticeable difference in the final loaf’s airiness. 🌾
Incorrect Oven Temperature
Baking at the wrong temperature can ruin all your hard work. Too low, and your loaf will be gummy and undercooked. Too high, and the crust will burn before the interior is done.
Preheat your oven to 375°F with a baking stone or inverted baking sheet on the lower rack for even heat distribution. Use an oven thermometer to ensure accuracy—many home ovens run hot or cold.
Not Letting the Loaf Cool
Cutting into your loaf too soon releases steam and causes the crumb to collapse. Always let your loaf cool in the pan for 10 minutes before transferring it to a wire rack.
This allows the internal structure to set properly. I’ve learned this the hard way—patience at this stage ensures that perfect slice every time! ⏰
Nutrition facts
Frequently asked questions about making a 2-Lb bread loaf
Can I make this recipe without a stand mixer?
Use your hands instead. Knead the dough on a lightly floured surface for 8-10 minutes until it’s smooth and elastic. Push and fold the dough repeatedly, rotating it every 30 seconds to build gluten. This extra time is worth it for that perfect airy crumb.
How do I know when the dough is fully proofed?
Press two fingers gently into the dough. If it springs back slowly (takes 1-2 seconds to fill the indentation), it’s ready. The dough should also feel light and spongy. For the final rise, it should expand about 1 inch above the loaf pan. Patience here prevents a dense loaf!
What if my kitchen is too cold for proper rising?
Create a warm environment by placing the dough bowl on top of your turned-off oven with the light on. Alternatively, use a proofing box or microwave a bowl of water for 30 seconds to add humidity. The ideal temperature is 75-80°F—if it’s colder, your dough may take 2-3 hours to rise properly.
Can I make this recipe with whole wheat flour?
Yes, but replace 25% of the all-purpose flour with whole wheat. Whole wheat absorbs more moisture, so you may need 1-2 extra tablespoons of water during kneading. Expect a denser crumb—whole wheat bread benefits from a longer fermentation (2-3 hours) for better texture.
Why did my loaf turn out dense instead of airy?
Common causes include over-kneading, underproofing, or skipping the steam. Check your yeast (it should bubble vigorously in warm water), ensure proper kneading time (5-7 minutes on medium speed), and use steam during baking. A dense loaf often means the gluten was overdeveloped or the dough didn’t rise enough.

- 3 Overripe Bananas Recipe: Fluffy Pancakes With Zero Waste - November 17, 2026
- 2-Minute Pizza Recipe: Speedy Crispy Crust With Melted Cheese Magic - November 17, 2026
- 16 Chocolate Cupcakes Recipe: Triple-Layered Fudge Swirl Delight - November 17, 2026