
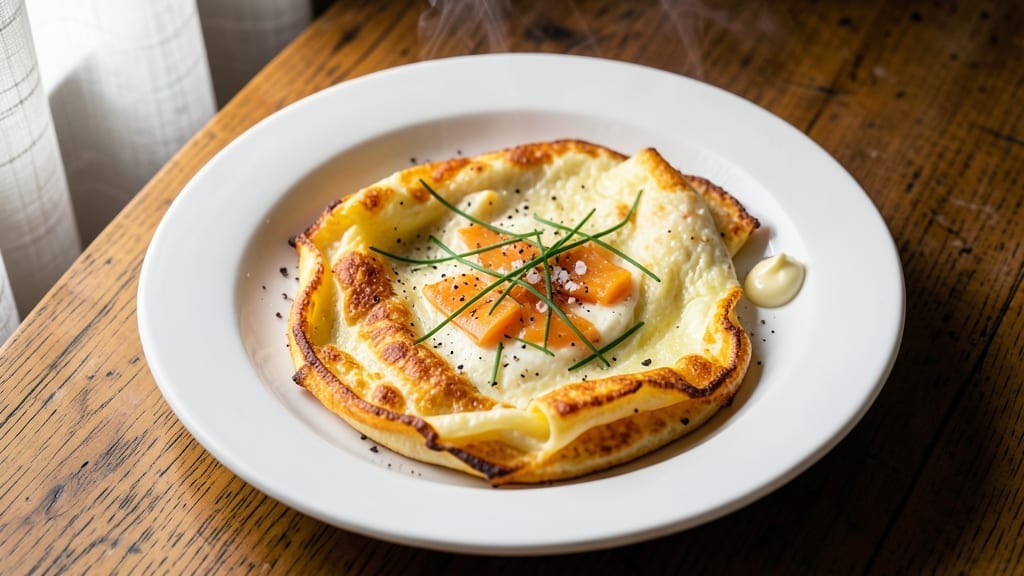
A 3-egg cheese omelette transforms breakfast from ordinary to extraordinary with its fluffy layers and perfectly melted, gooey centers—every bite is a balance of tender egg and rich, creamy cheese.
The secret lies in precise heat control and gentle folding, creating a restaurant-quality dish you can make at home in just 10 minutes. Whether you prefer sharp cheddar, tangy feta, or creamy goat cheese, this method ensures the filling stays luscious and the edges stay golden without drying out.
This recipe delivers foolproof results by focusing on three critical techniques: whisking eggs until completely smooth for even cooking, using medium-low heat to prevent browning, and folding the omelette just as it sets for that signature crepe-style finish.
No special equipment is needed—just a nonstick skillet and a spatula. The versatility of this dish makes it perfect for weeknight breakfasts, brunch gatherings, or even a light dinner when paired with a fresh salad.
What you’ll achieve is an omelette with silky, custardy layers that hold their shape when folded, while the cheese inside melts into a velvety pool. The edges remain tender and slightly crisp, not rubbery, and the filling stays perfectly centered—no dry or overcooked bits.
This recipe also accommodates dietary preferences, from vegetarian-friendly cheese options to gluten-free adjustments, ensuring everyone can enjoy it.
The best part? This method scales effortlessly—double the ingredients for a hearty meal, or keep it simple for a solo breakfast. Once you master the technique, you’ll never settle for store-bought again. Let’s get started on creating your perfect omelette.
Ingredients for 3 egg cheese omelette
Nine essential ingredients transform ordinary eggs into restaurant-worthy fluffiness with gooey cheese centers.
| Ingredient | Amount | Notes |
|---|---|---|
| Large Eggs 🥚 | 3 whole | Room temperature for even cooking |
| Sharp Cheddar Cheese 🧀 | ½ cup | Shredded, aged for maximum flavor |
| Unsalted Butter 🧈 | 1 tbsp | European-style preferred for higher smoke point |
| Fresh Chives 🌿 | 2 tbsp | Finely chopped for garnish |
| Diamond Crystal Kosher Salt 🧂 | ¼ tsp | Fine grain for delicate seasoning |
| Freshly Ground Black Pepper 🌶️ | ⅛ tsp | Freshly cracked for maximum aroma |
| Extra-Virgin Olive Oil 🫒 | ½ tsp | For skillet preheating |
| Heavy Cream 🥛 | 1 tbsp | Optional for extra richness |
| Nonstick Cooking Spray 💦 | 1 spray | For perfect release |
The eggs are the foundation—room temperature is non-negotiable for even cooking. Grab the freshest eggs you can find—the yolks should be vibrant orange, not pale. For cheese, sharp cheddar delivers that perfect balance of tang and melt, but Parmigiano-Reggiano or Gruyère work beautifully too. Shred it yourself if possible—pre-shredded gets clumpy. The butter matters here too: European-style has a higher smoke point and richer flavor than American butter. I always grab mine from the gourmet section at Whole Foods or Trader Joe’s—it makes all the difference in that silky texture.
No sharp cheddar? Pecorino Romano or feta add fantastic tang—just reduce to 0.375 cup since they’re saltier. Fresh chives are ideal, but dried chives at half the amount work in a pinch. The heavy cream is optional but worth it for that extra-luxurious finish—Hormel or Organic Valley are my go-tos. For the olive oil, California extra-virgin has a nice fruity note that pairs well with the eggs. If you’re watching calories, skip the cream and use an extra 0.25 tbsp butter instead. The nonstick spray? Misto brand is my secret weapon—it coats evenly without leaving residue.
Eggs keep best in the fridge for 3-4 weeks—use within a week for peak freshness. Cheese should stay wrapped in its original packaging until ready to use, then transfer to an airtight container for up to 2 weeks. The butter? Room temperature is key before using—just leave it out for 30 minutes. This recipe doubles easily—just increase eggs to 6 and cheese to 1 cup. Store leftovers in the fridge for up to 2 days, but honestly, they’re best fresh. For meal prep, make the filling ahead (cheese + herbs) and fold it in right before cooking—keeps everything gooey.
Why You’ll Love This Recipe
- Three-Ingredient Magic: I swear by this combo—eggs, sharp cheddar, and butter. That’s it. No fancy prep, no stress, just melt-in-your-mouth richness from the cheese and a buttery crisp on the edges. Honestly, it’s the kind of dish that makes you question why you ever complicate breakfast.
- No-Fuss Flavor Bomb: The sharp cheddar cuts through the richness of the eggs, while the chives add this bright, herby kick at the end. Between us, that first bite—when the cheese pulls just enough to make it gooey—is dangerously addictive. (Yes, even on a Tuesday night.)
- Breakfast or Brunch Fix: This is my go-to when I need something fast but still feels special. Serve it solo for a lazy morning or stack two with toast for a weekend brunch. My daughter picks out the chives like they’re fancy, but she still asks for seconds every time.
- Budget Breakfast Winner: Three eggs, a block of cheese, and butter? That’s less than $3 for a meal that fills me up. The leftovers reheat like a dream—just pop them in the microwave for a quick office lunch. Not the prettiest, but the taste makes up for it every time.
Step-by-step instructions for fluffy 3-Egg cheese omelettes
Here’s how to master the perfect omelette—light, airy layers with melty cheese centers every time.
Whisk Eggs to Ribbon Stage
Crack all 3 whole large eggs into a bowl and add the 0.25 tsp Diamond Crystal kosher salt and 0.125 tsp freshly ground black pepper. Using a fork or whisk, beat vigorously for 30-45 seconds until the yolks and whites blend completely. The mixture should become noticeably lighter in color and slightly thicker—this is the “ribbon stage,” where the eggs hold their shape when the whisk is lifted.
Here’s the thing—room temperature eggs incorporate air better, so if they’re straight from the fridge, let them sit at room temperature for 10-15 minutes before whisking. For extra richness, add the 1 tbsp heavy cream now and whisk until fully combined. This creates the signature fluffy texture that sets this omelette apart from standard versions.
Prep Your Cooking Surface
Lightly spray an 8-inch nonstick skillet with the nonstick cooking spray and place it over medium-low heat. Add the 1 tbsp unsalted butter and let it melt completely, swirling to coat the bottom evenly. The butter should foam gently but not brown—this ensures even heat distribution without burning. If you’re using the optional 0.5 tsp extra-virgin olive oil, add it now along with the butter for extra flavor depth.
Watch the butter carefully—it should bubble gently but not turn golden. If it starts to brown too quickly, reduce the heat slightly. The key here is patience; a well-buttered pan creates that perfect nonstick surface for fluffy layers. Once the butter is fully melted and the pan is hot, you’re ready for the eggs.
Cook the Omelette to Perfect Layers
Pour the egg mixture into the skillet and let it sit undisturbed for 10-15 seconds until the edges begin to set but the center still looks slightly runny. Using a heatproof spatula, gently push the cooked edges toward the center, tilting the pan slightly to let the raw egg flow to the edges. Repeat this motion for 20-30 seconds, creating small, even folds that build those signature fluffy layers.
Here’s where it gets fun—when the bottom is about 70% set (still slightly moist), sprinkle half of the 0.5 cup shredded sharp cheddar cheese evenly over one half of the omelette. Fold the empty half over the cheddar-filled side, pressing gently to melt the cheese slightly. The cheese should begin to soften and create those gooey pockets you crave.
Finish with Chives and Serve Immediately
Continue cooking for another 20-30 seconds until the cheese is fully melted and the omelette is cooked through. The edges should be golden, and the center should hold its shape when gently lifted with the spatula. Remove from heat and let it rest for 10 seconds—this brief pause helps the layers set slightly before serving.
Sprinkle the 2 tbsp finely chopped fresh chives evenly over the top, then fold the omelette in half once more if desired. Serve immediately while the cheese is still meltingly gooey. The contrast of crispy edges, fluffy layers, and molten cheese centers makes this the ultimate breakfast masterpiece. Pro tip: If you’re making two omelettes, keep the second one warm in a 200°F oven while you finish the first.
Pro Tips For Making 3 Egg Cheese Omelette
- Whisk Until Ribbons: Beat those eggs until they’re smooth and stretchy—like wet silk. I used to skip this, and my omelette would turn out dense. A full 30 seconds of vigorous whisking with a fork makes all the difference when folding later.
- Shred Cheese Fine: Sharp cheddar loses its punch when it clumps. Pulse it in a food processor for 3-4 seconds, or grate it yourself—no big chunks. You want it to melt into a creamy blanket, not sit like a chewy surprise.
- Salt the Butter First: Toss a pinch of kosher salt (about ¼ teaspoon) into the melted butter before it hits the pan. The butter’s saltiness balances the eggs, and it browns faster—no need to adjust later. Trust me, your first bite will prove it.
- Fold Fast, Flip Slow: Let the omelette cook until the bottom is set but the top still jiggles slightly (about 2 minutes). Fold it in half immediately—then slide it onto a plate to finish cooking. Waiting too long makes it rubbery; flipping too soon ruins the crust. Timing is everything.
Best sauces and condiments for these flavors
Classic Hollandaise
This creamy, buttery sauce is the ultimate omelette companion—its rich, tangy flavor cuts through the richness of the cheese while adding a luxurious finish.
To make it, whisk 3 egg yolks, 1 tbsp lemon juice, and ½ cup unsalted butter (melted and kept warm) over a double boiler until thickened. Season with ¼ tsp salt and pinch of cayenne for a subtle kick.
Drizzle over your omelette just before serving to create a restaurant-worthy presentation. 🍳
Spicy Salsa Verde
For a fresh, vibrant contrast, blend 1 cup chopped cilantro, ½ cup Greek yogurt, 2 tbsp lime juice, 1 minced garlic clove, ½ tsp salt, and ¼ tsp red pepper flakes until smooth.
This tangy, slightly spicy sauce brightens the richness of the cheese and adds a zesty kick. Serve it on the side or drizzle it over the omelette before folding. The yogurt keeps it creamy without overpowering the egg’s delicate texture.
Garlic Aioli
This bold, garlicky sauce elevates your omelette to new heights. Mix ½ cup mayonnaise, 1 tbsp minced garlic, 1 tsp Dijon mustard, 1 tbsp lemon juice, and ¼ tsp salt until smooth.
The garlic adds depth that pairs beautifully with sharp cheddar, while the mustard gives it a subtle tang. Spread a thin layer on your omelette before folding or serve it alongside for dipping. For extra richness, add 1 tbsp melted butter to the mix.
Smoky Chipotle Cream
For a smoky, slightly sweet contrast, blend ½ cup sour cream, 1 tbsp adobo sauce (from canned chipotle peppers), 1 tsp honey, and ¼ tsp salt until smooth. The chipotle adds a deep, smoky flavor that complements the cheese beautifully.
Drizzle this sauce over your omelette after cooking or use it as a dipping sauce. The honey balances the heat, making it perfect for those who love a little kick without overwhelming spice.
Herb Butter
This simple yet elegant sauce is perfect for finishing your omelette. Mix 2 tbsp softened unsalted butter, 1 tbsp finely chopped fresh chives, 1 tbsp chopped parsley, ½ tsp lemon zest, and a pinch of salt.
Swirl the herb butter into the warm omelette just before serving or serve it on the side for dipping. The fresh herbs add a bright, aromatic finish that enhances the flavors without overpowering them. 🌿
Nutrition facts
Frequently asked questions
Can I make this omelette with fewer eggs?
The recipe is designed for 3 eggs to create that signature fluffy texture, but you can adjust to 2 eggs for a smaller portion. Just reduce the cheese to 0.25 cup and keep the cooking time to 3-4 minutes total. The layers will still be tender, though slightly thinner. For 4 eggs, increase cheese to 0.75 cup and use a 10-inch skillet.
What’s the best cheese substitute if I don’t have cheddar?
For a tangy kick, try feta (reduce to 0.375 cup due to saltiness) or goat cheese (use 0.4 cup crumbled). For a nutty flavor, swap in Parmigiano-Reggiano or Gruyère. Avoid pre-shredded cheese—it contains anti-caking agents that make it clumpy when melted. Freshly grated always wins!
Why did my omelette turn out rubbery?
Rubbery omelettes usually mean one of two things: overcooking or eggs that weren’t whisked enough. First, ensure your heat is medium-low—too high burns the outside before the inside sets. Second, whisk eggs until they reach the “ribbon stage” (when you lift the whisk, the streaks hold their shape). Finally, don’t overfill—0.5 cup cheese is plenty for 3 eggs.
Can I make this ahead of time?
Omelettes are best served fresh, but you can prep components ahead. Whisk the eggs and store them in the fridge for up to 24 hours (add a splash of water to prevent skinning). For the cheese filling, shred it and store in an airtight container for 3 days. When ready to cook, let everything sit at room temperature for 10 minutes before assembling.
How do I keep the cheese from leaking out when folding?
Timing is everything! Add the cheese when the omelette is about 70% cooked (edges set but center still slightly runny). Fold immediately after adding cheese—don’t let it melt completely in the pan. For extra security, press gently with your spatula to seal the edges. If using a stretchy cheese like mozzarella, add it just before folding for best results.

- 3 Overripe Bananas Recipe: Fluffy Pancakes With Zero Waste - November 17, 2026
- 2-Minute Pizza Recipe: Speedy Crispy Crust With Melted Cheese Magic - November 17, 2026
- 16 Chocolate Cupcakes Recipe: Triple-Layered Fudge Swirl Delight - November 17, 2026