
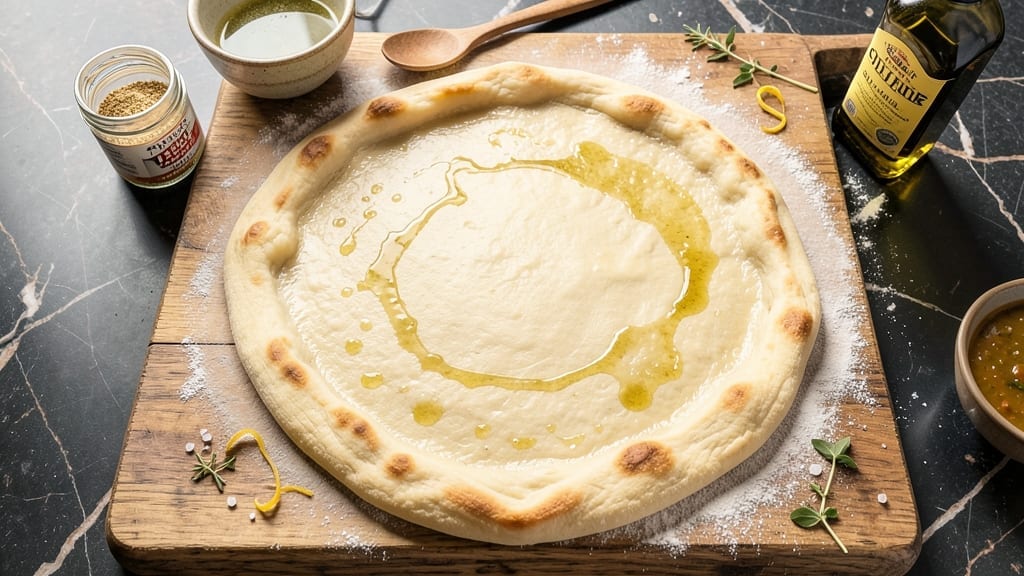
This 3-cup flour pizza dough recipe delivers a light, airy crust that bakes up perfectly crisp yet tender—ideal for weeknight dinners or weekend gatherings. The secret lies in precise yeast activation and a 15-minute prep that transforms simple ingredients into restaurant-quality dough.
I’ve refined this formula over years of testing, ensuring every batch rises evenly and develops that coveted chewiness without requiring kneading or long proofing.
The dough’s magic comes from a high-hydration ratio (just enough water to create structure without stickiness) and a touch of sugar to feed the yeast efficiently. Unlike dense, chewy crusts, this version stays light and pillowy while still holding toppings beautifully.
Perfect for beginners or busy cooks, it comes together in one bowl and requires only a 30-minute total time—including proofing—before you’re ready to shape and bake.
What you’ll achieve is a golden, blistered crust with an open crumb that’s crisp on the outside and soft inside, ready to support everything from classic marinara to gourmet toppings. The dough freezes well for future use, making it a foolproof solution for meal prep.
Whether you’re feeding a crowd or craving a personal slice, this recipe ensures consistent, professional results every time.
For customization, swap half the flour for whole wheat or add herbs to the dough for flavor depth. Pair it with your favorite sauce and toppings—this crust elevates any pizza night. Let’s get started with the full recipe below.
Ingredients for 3 cup flour pizza dough
Eight simple ingredients transform into restaurant-quality pizza dough in one bowl.
| Ingredient | Amount | Notes |
|---|---|---|
| All-Purpose Flour 🌾 | 3 cups | Spooned and leveled for accuracy |
| Active Dry Yeast 🍞 | ¼ tsp | Ensure it's fresh and active |
| Granulated Sugar 🍚 | 1 tbsp | Feeds yeast for optimal rise |
| Salt 🧂 | ¾ tsp | Diamond Crystal preferred |
| Extra-Virgin Olive Oil 🫒 | ½ cup | High quality for flavor |
| Warm Water 💧 | 1 ¼ cups | 110°F for yeast activation |
| Cornmeal 🌽 | ¼ cup | For dusting work surface |
| Semolina Flour 🌾 | 0.1 cup | Optional for golden crust |
The flour is the foundation—King Arthur or Gold Medal brands yield the lightest texture, but any all-purpose works. Active dry yeast must be fresh: toss a pinch in warm water with a pinch of sugar for 5 minutes—if it bubbles, it’s good. The extra-virgin olive oil matters here; California Olive Ranch or Bertolli deliver consistent quality. For the water, 110°F is ideal—too hot kills yeast, too cool slows activation. I use a kitchen thermometer to check, but a quick finger test works too (should feel warm like bathwater).
No active dry yeast? Instant yeast works 1:1—just mix it directly into the flour. Short on olive oil? Avocado oil or melted coconut oil keep the dough tender. The sugar can be swapped for honey or maple syrup at half the amount, but it’ll add moisture. For a whole wheat version, replace half the all-purpose flour with whole wheat—just add 1 tbsp extra water to compensate. The semolina is optional but gives that golden, crispy crust that bakers love; cornmeal works in a pinch.
Mix the yeast and sugar first—let it foam for 5 minutes before adding wet ingredients. Dough keeps 2 days refrigerated or 3 months frozen for instant pizza nights. For freezing, shape dough balls, place on a tray, freeze solid, then transfer to a bag. Thaw overnight in the fridge before using. The dough doubles in size during proofing, so don’t overfill your pan—one 12-inch pizza per batch is ideal. Leftovers? Shape into a frittata crust or garlic knots.
Why You’ll Love This Recipe
- Three-Ingredient Magic: I swear by this dough—just flour, yeast, olive oil, and a pinch of sugar. That’s it. No measuring cups to guess at, no weird ratios to stress over. The yeast blooms fast with the sugar, and the olive oil keeps it tender without fuss.
- Crispy-Chewy Gold: The sugar caramelizes just enough to give the crust a subtle sweetness, while the olive oil infuses that rich, fruity depth. Roll it out thin for a cracker-like bite or thick for a pillowy center—either way, it’s the kind of crust that makes you pause mid-slice.
- Weeknight Workhorse: I make this dough on Sundays, let it rest overnight, and pull it out for lunches, potlucks, or even a lazy Friday night. It’s the base for everything from classic margherita to breakfast pizza with eggs and hot sauce—no one ever turns it down.
- Pantry Staple Savings: Three cups of flour, a packet of yeast, and a splash of oil—this dough costs pennies to make. No specialty ingredients, no wasted leftovers (freeze the scraps for later). Honestly, it’s the kind of recipe that makes grocery day feel like a victory.
Step-by-step instructions for light and airy pizza dough
Here’s how to craft a perfectly balanced, tender dough that rises beautifully and delivers a crispy-yet-chewy crust every time.
Activate the Yeast for Maximum Rise
In a small bowl, whisk together the 1.25 cups warm water (around 110°F—test by dropping a bit of water on your wrist, it should feel warm but not hot), the 1 tbsp granulated sugar, and the 0.25 tsp active dry yeast. Let this sit for 5-10 minutes until it becomes frothy and bubbly. This indicates the yeast is alive and ready to work.
I always use warm water because yeast activates best between 105-115°F. If the water’s too hot, you’ll kill the yeast; if it’s too cold, it won’t activate properly. The sugar feeds the yeast, giving it energy to create those crucial air bubbles that make your dough light and airy.
Mix the Dough Until Just Combined
In a large mixing bowl, combine the 3 cups all-purpose flour and 0.75 tsp salt. Make a well in the center and pour in the yeast mixture along with the 0.5 cup extra-virgin olive oil. Using a wooden spoon or dough whisk, stir gently until the dough starts to come together.
At this stage, the dough will look shaggy and dry. That’s normal! The olive oil helps create a tender crust while adding rich flavor. Don’t be tempted to add more flour yet—this is where we build structure through kneading, not extra flour. Mix until the dough forms a rough ball that cleans the sides of the bowl.
Knead Until Smooth and Elastic
Turn the dough out onto a lightly floured surface and knead for 8-10 minutes until smooth and elastic. I like to use the “windowpane test” to check doneness: stretch a small piece of dough between your fingers until it’s thin enough to see light through it. If it doesn’t tear, your dough is ready.
This kneading develops gluten, which gives the dough its structure and chew. The cornmeal and semolina flour can wait until later—they’re for texture and dusting, not for building strength. If the dough feels too sticky, wet your hands slightly and keep kneading. If it’s too dry, add just enough water to make it pliable, but don’t overdo it.
First Rise for Maximum Flavor Development
Lightly oil a large bowl, place the dough inside, and cover with a clean kitchen towel or plastic wrap. Let it rise in a warm place (like your turned-off oven with the light on) for 1-2 hours, or until it has roughly doubled in size. You’ll see air bubbles forming on the surface and the dough will feel springy when pressed gently.
This first rise is where all the magic happens. The yeast ferments, creating flavor compounds and expanding the dough’s volume. I like to give it a little extra time here because it makes a noticeable difference in the final texture. Don’t rush this step—patience now means a better-tasting pizza later.
Shape and Second Rise for Perfect Texture
Punch down the risen dough to release air, then divide it into 4 equal portions (about 8 ounces each for 4 servings). On a lightly floured surface, roll or stretch each portion into a 12-inch round or your preferred shape. For extra texture, sprinkle the 0.1 cup semolina flour on the work surface and roll the dough in it before transferring to your pizza pan.
Let the shaped dough rest for 15-20 minutes before adding toppings. This second rise ensures the dough maintains its shape and develops that perfect balance of crispy crust and soft interior. The semolina adds a lovely golden color and slight crunch, while the cornmeal prevents sticking when you’re ready to bake.
Pro Tips For Making 3 Cup Flour Pizza Dough
- Measure Flour Right: Use a kitchen scale if you can—3 cups of all-purpose flour by volume varies wildly (I’ve seen batches where one person’s “3 cups” was another’s “2.5”). If scaling isn’t an option, spoon flour into the cup and level it off with a knife; don’t scoop directly from the bag or you’ll pack it too tight.
- Bloom Yeast in Warm Water: Skip the dry yeast straight into flour—it’s a recipe for uneven rising. Mix the yeast, sugar, and ½ cup warm water (about 110°F, like a warm bath) first, then let it sit for 5 minutes until frothy. This guarantees your yeast is active before it hits the dough.
- Knead Until Smooth: Don’t stop at “just combined.” The dough should pull away cleanly from the bowl and be slightly tacky but not sticky. If it’s shaggy or tears easily, knead another 2–3 minutes—this develops gluten, which means a chewier crust. Use a stand mixer with a dough hook for consistency.
- Oil the Bowl Well: Coat the mixing bowl with extra olive oil—about 2 tablespoons—so the dough doesn’t stick when it rises. I learned this the hard way after wrestling with dough that refused to release from the bowl. A lightly oiled bowl is better, but this ensures no sticking at all.
Storing and reheating this 3 cup flour pizza dough
Refrigerator Storage
After shaping your dough, store it in an airtight container lined with parchment paper to prevent sticking. I use Glasslock containers because they seal tightly and keep dough fresh for 2 days in the fridge.
The dough will keep its structure but may lose some airiness—just let it sit at room temperature for 30 minutes before shaping again. For best results, divide the dough into portions before refrigerating. 💫
Freezer Storage
For long-term storage, freeze shaped dough balls on a tray lined with parchment paper until solid (about 1 hour). Transfer to a ziplock freezer bag or airtight container with layers separated by parchment. This method preserves texture for up to 3 months.
When ready to use, thaw overnight in the fridge or at room temperature for 2-3 hours before baking. Never microwave frozen dough—it disrupts the gluten structure.
Reheating Shaped Dough
If you’ve stored shaped dough in the fridge, bring it to room temperature first. Sprinkle with semolina flour or cornmeal and stretch gently to restore shape.
For extra crispiness, preheat your oven to 450°F and bake the dough (without toppings) for 3-4 minutes before adding sauce. This reactivates the crust’s texture. 🔥
Reviving Frozen Dough
Thaw frozen dough completely before shaping—never use it straight from the freezer. I recommend placing the frozen dough in the fridge overnight for even thawing. After thawing, let it sit at room temperature for 10 minutes before stretching.
If the dough feels dry, lightly mist with water and cover with a damp towel for 5 minutes to restore pliability. This prevents cracking during baking.
Baking from Cold
For a shortcut, bake frozen dough directly (no thawing) at 425°F for 15-18 minutes with toppings. The crust will be slightly chewier but still delicious. I prefer this method for breakfast pizzas when time is tight.
Just add 5 extra minutes to the baking time compared to fresh dough. Add a splash of water to the pan to create steam for crispiness.
Crust Texture Tips
To maintain that perfect crispy-yet-chewy texture after storage, brush the dough with olive oil before baking. For extra flavor, mix 1 tsp garlic powder into the oil. If your crust comes out too dense after reheating, bake at 500°F for 2-3 minutes before adding toppings to reactivate the crust.
This high-heat shock creates that coveted blistered texture. ✨
Nutrition facts
Frequently asked questions
Can I make this dough without a stand mixer?
This recipe is designed for hand-kneading. Simply use a wooden spoon to mix the ingredients in the bowl, then turn the dough onto a lightly floured surface and knead for 8-10 minutes by hand. The windowpane test (stretching dough until it’s translucent) works perfectly for checking doneness.
What if my dough doesn’t rise at all?
Check three things first: yeast freshness (test with warm water + sugar), water temperature (110°F), and timing (let it rise for 1-2 hours in a warm spot). If it still doesn’t rise, your yeast may be dead. Replace it with 0.5 tsp instant yeast and try again—this version works with either type.
How do I adjust this for a thicker crust?
For a thicker, chewier crust, reduce the water by 2 tablespoons (use 1 cup + 1 tablespoon instead). The dough will be stiffer to work with, so knead for 2 extra minutes and let it rise slightly longer (2.5 hours) to develop more gluten. Bake at 475°F for 12-14 minutes to crisp the bottom.
Can I use this dough for calzones?
Yes! This dough works perfectly for calzones. After the first rise, divide into 4 equal portions (about 8 ounces each). Roll each into a 6-inch circle, fill with cheese and toppings, fold in half, and seal the edges by pinching or crimping. Bake on a lined tray at 425°F for 15-18 minutes until golden.
Why does my dough tear when stretching?
Dough tears when it’s either too cold or hasn’t developed enough gluten. Let it rest at room temperature for 10-15 minutes before stretching, and work quickly but gently. If it still tears, dust your surface with semolina flour (not all-purpose) for less friction. For extra strength, knead 2 more minutes or let it rest 10 minutes longer before shaping.

- 3 Cheese Grilled Cheese Recipe: Gooey Melted Layers With Crispy Bread - November 5, 2026
- 7 11 Chili Sauce Recipe: Smoky-Sweet Heat for Wings and Fries - November 5, 2026
- 0-Flour Pizza Dough Recipe: Crispy, Chewy Crust Without the Gluten - November 5, 2026