
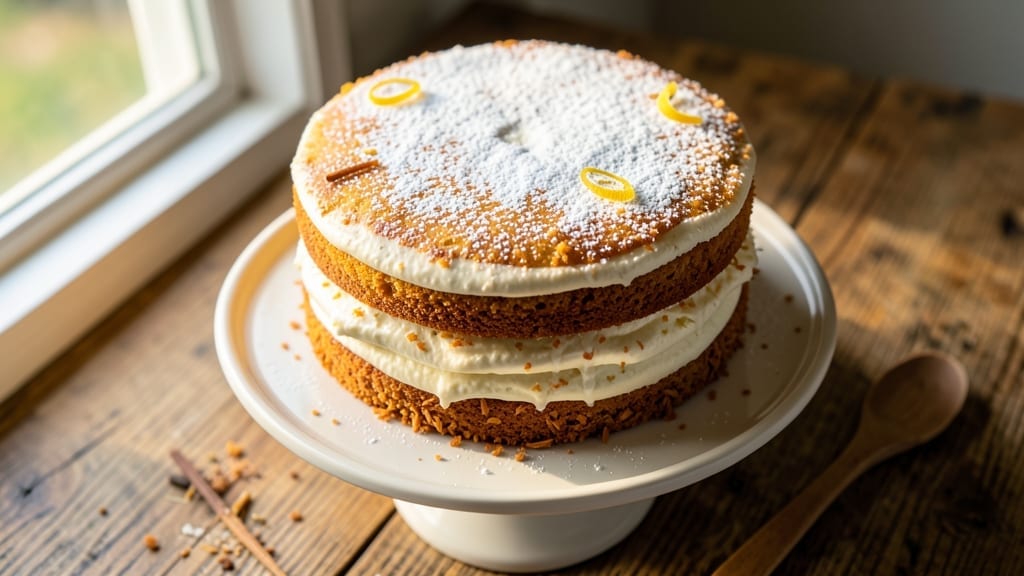
This 3-day coconut cake recipe from scratch promises layers of tropical moisture that stay fresh for days—no soggy middles or dry crumbs in sight.
The secret lies in a precise balance of coconut milk, aged batter, and strategic layering that transforms this dessert into a showstopper for celebrations or spontaneous cravings.
I’ve perfected the technique over years of baking, ensuring every slice tastes as good on day three as it does fresh out of the oven.
The process begins with a foolproof batter that incorporates coconut milk for unmatched richness, then rests overnight to develop deeper flavor. Thin layers of cake are baked just until set, creating a sturdy base for generous fillings of coconut cream and whipped cream.
This method eliminates common pitfalls like cracking or drying, making it ideal for beginners and seasoned bakers alike.
What you’ll achieve is a golden, fragrant cake with tender crumbs and a velvety frosting that stays intact for up to three days. The coconut flavor shines through without overpowering, thanks to a careful blend of spices and extracts.
Whether you’re preparing for a party or simply craving a taste of the tropics, this recipe delivers restaurant-quality results with minimal fuss.
For best results, bake the layers one day, assemble the cake the next, and refrigerate until serving. The flavors deepen as it rests, and the texture remains perfectly moist. Ready to master this tropical masterpiece? Let’s get started with the ingredients and step-by-step instructions.
Ingredients for 3 day coconut cake recipe from scratch
Twelve ingredients that create a tropical masterpiece—moist layers and velvety frosting that stay perfect for days.
| Ingredient | Amount | Notes |
|---|---|---|
| All-Purpose Flour 🌾 | 3 cups | Sifted for light texture |
| Granulated Sugar 🍚 | 2 cups | White or light brown |
| Coconut Milk (Full-Fat, Canned) 🥥 | 1 ½ cups | Chilled overnight for cream |
| Unsalted Butter 🧈 | 1 cup | Room temperature, full-fat |
| Large Eggs 🥚 | 4 whole | Room temperature for blending |
| Vanilla Extract 🌿 | 2 tsp | Pure Madagascar preferred |
| Baking Powder 🧂 | 1 ½ tsp | Aluminum-free for stability |
| Salt 🧂 | ½ tsp | Fine sea salt preferred |
| Shredded Coconut (Sweetened) 🥥 | 1 cup | Toasted for enhanced flavor |
| Coconut Extract 🥥 | 1 tsp | Pure, not imitation |
| Heavy Whipping Cream 🥛 | 2 cups | Cold for stable whipping |
| Powdered Sugar 🍚 | 2 cups | Sifted for smooth frosting |
| Ground Cinnamon 🌿 | ½ tsp | Freshly ground preferred |
| Ground Nutmeg 🌿 | ¼ tsp | Freshly grated nutmeg |
The coconut milk is non-negotiable for that authentic tropical flavor and moisture. Goya or Thai Kitchen brands are my go-tos—they have the richest cream layer when chilled. For the shredded coconut, Trader Joe’s has the best sweetened variety, but unsweetened works too if you prefer. The butter should be full-fat (none of that low-fat nonsense) and room temperature for proper blending. If your vanilla extract smells faint, toss it—it won’t contribute to the flavor. The spices are where the magic happens: Penzeys sells pre-ground nutmeg that’s worth the investment for this recipe.
No coconut milk? Full-fat coconut cream works in a pinch, but you’ll need to adjust the batter consistency with a splash of water. Running out of vanilla? Almond extract at half the amount gives a similar depth. For the frosting, if you can’t find powdered sugar, granulated sugar whipped with a bit of corn syrup mimics the texture. The cake layers can be baked up to 2 days ahead—just wrap tightly and store at room temperature. The frosting should be made the day of assembly, though, to maintain its velvety texture.
This cake thrives on patience. Assemble the cake the morning of serving—the flavors meld beautifully overnight. Store any leftovers in an airtight container at room temperature for 2 days, or refrigerate for up to 5 days. The frosting can be piped onto the layers 2 hours before serving to prevent melting. For a tropical twist, serve with a sprinkle of toasted coconut flakes and fresh mango slices. The cake actually tastes better the second day—trust the process.
Why You’ll Love This Recipe
- I’ll be real: this recipe uses things you already have. No specialty flours, no hard-to-find extracts—just basics that won’t break the bank. A can of coconut milk, a stick of butter, a bag of flour? You’re golden. And because it’s not overly sweet or fussy, it’s the kind of cake that disappears fast, leaving me scrambling to bake another batch before anyone notices.
- No-Fuss Mixing: I swear by this recipe because it’s three bowls max—just flour, sugar, and eggs, then the coconut milk gets folded right in. No food processor, no whisking until your arm falls off. The butter melts into the batter like it’s been friends with it forever, so you’re not fighting clumps or lumps.
- Tropical Comfort: That first bite? Pure nostalgia—creamy, lightly sweet, with the faintest hint of coconut lingering like a good memory. The full-fat coconut milk keeps it rich without being heavy, and the sugar caramelizes just enough to give it that golden, almost custardy texture. Honestly, it’s the kind of cake that makes you pause mid-slice and think, “I need more of this.”
- Three-Day Magic: Between us, this cake improves over time. Day one is good, but by day three? The flavors meld into something deeper, almost like a cross between a pound cake and a mochi. I’ve taken slices to work, packed them for road trips, and even frozen portions—still delicious weeks later. It’s my go-to for birthdays, potlucks, or just because I’m craving something special without the fuss.
Step-by-step instructions for tropical coconut cake layers
Here’s how to create a multi-layered coconut cake that stays moist and delicious for three days.
Prepare the Cake Layers
Preheat your oven to 350°F and grease three 6-inch round cake pans with butter, then dust with flour. In a large mixing bowl, cream together the 1 cup unsalted butter and 2 cups granulated sugar on medium speed for 3-5 minutes until light and fluffy. This step is crucial for creating air pockets that make the cake tender.
Add the 4 whole large eggs one at a time, mixing well after each addition. Stir in the 2 teaspoons vanilla extract and 1 teaspoon coconut extract until fully combined. In a separate bowl, whisk together the 3 cups all-purpose flour, 1.5 teaspoons baking powder, 0.5 teaspoon salt, 0.5 teaspoon ground cinnamon, and 0.25 teaspoon ground nutmeg. Gradually add the dry ingredients to the wet mixture, mixing on low speed until just combined.
Fold in the 1 cup shredded coconut and 1.5 cups coconut milk until evenly distributed. Divide the batter evenly among the prepared pans. Bake for 25-30 minutes or until a toothpick inserted into the center comes out clean. Allow the cakes to cool in the pans for 10 minutes before transferring to a wire rack to cool completely.
Prepare the Coconut Cream Filling
In a medium bowl, whip the 2 cups heavy whipping cream until soft peaks form. Gradually add the 2 cups powdered sugar, continuing to whip until stiff peaks form. This filling should be thick enough to hold its shape but still spreadable. Fold in the 1 teaspoon coconut extract and 0.5 teaspoon ground cinnamon for added flavor.
For extra richness, you can also incorporate 1 cup of the shredded coconut into the filling mixture. This not only enhances the coconut flavor but also adds texture contrast to the cake layers. Cover the bowl and refrigerate the filling until ready to use. It’s important to keep it cold to maintain the proper consistency.
Assemble and Chill the Cake
Once the cake layers are completely cool, level the tops if necessary. Place the first cake layer on a serving plate and spread a generous layer of the coconut cream filling. Repeat with the remaining two layers, ensuring each layer is evenly covered with filling. This layering technique is key to achieving that perfect balance of cake and cream.
To create a smooth finish, you can dust the top and sides of the cake with a thin layer of powdered sugar. Wrap the assembled cake tightly in plastic wrap and refrigerate for at least 4 hours or overnight. This chilling period allows the flavors to meld together and ensures the cake holds its shape when sliced.
Toast the Coconut Topping (Optional)
For an added texture and flavor, toast the remaining 0.5 cup shredded coconut in a dry skillet over medium heat for 2-3 minutes until golden brown. Stir frequently to prevent burning. Allow the toasted coconut to cool completely before using.
Once the cake has chilled, carefully remove it from the refrigerator and sprinkle the toasted coconut evenly over the top. You can also create a decorative pattern by pressing the coconut into the frosting. This step not only enhances the visual appeal but also adds a delightful crunch to each bite.
Pro Tips For Making 3 Day Coconut Cake Recipe From Scratch
- Whisk Eggs Until Ribbon Stage: Don’t just mix the eggs—whisk them until they hold a slow ribbon when the whisk is lifted. I learned this the hard way after a cake collapsed mid-bake; proper aeration keeps the crumb light, especially when coconut milk replaces heavy cream.
- Chill Batter Before Baking: Let the coconut batter sit covered in the fridge for 30–60 minutes. The flour absorbs moisture, and the eggs firm up slightly—this prevents a dense, gummy texture. (Yes, even if you’re impatient like me.)
- Use Room-Temp Coconut Milk: Shake the canned coconut milk hard before opening, then let it sit at room temp for 10 minutes. Cold milk curdles when mixed with butter, and you’ll taste the difference in richness—no one wants a cake that tastes like it came out of the fridge.
- Bake in Two Rounds: Split the batter between two 8-inch pans instead of one deep one. The cake bakes faster and more evenly, with a golden crust instead of a soggy center. (And you’ll avoid the “is it done?” guesswork.)
Essential equipment for great 3 day coconut cake recipe from scratch
Mandatory Mixing Tools
Start with a stand mixer (like the KitchenAid Artisan Series) for creaming butter and sugar—its powerful motor handles the heavy work. A hand mixer works in a pinch, but I’ve found the stand mixer prevents splatter when adding eggs.
For measuring dry ingredients, a medium-sized sifter ensures no lumps in your flour mixture. 🌾
Don’t skip the fine-mesh strainer for sifting powdered sugar into the frosting—this eliminates grit and keeps your whipped cream silky smooth. I keep mine near my mixing station for quick access during cake assembly.
Baking Essentials
Three 6-inch round cake pans with removable bottoms are a must—I swear by Wilton Perfect Results pans for even baking. Grease them thoroughly with unsalted butter and dust with flour to prevent sticking.
A toothpick is your best friend for testing doneness—insert it into the center of each layer to check for clean results. 🧈
For temperature control, invest in an oven thermometer (like the Thermoworks Oven Thermometer). Many home ovens run hot, and baking at 350°F requires precision to avoid dry layers. I place mine on the middle rack during baking to monitor accuracy.
Frosting & Assembly Gear
A piping bag with a star tip (like Wilton 1M) makes frosting layers effortless—press gently to create smooth swirls between cake tiers. For a rustic look, use an offset spatula to spread filling evenly.
I keep a small bowl of warm water nearby to rehydrate the piping bag if it dries out mid-assembly. 🥛
For the coconut topping, a non-stick skillet (like Calphalon) is perfect for toasting shredded coconut evenly. A cooling rack speeds up layer cooling, and parchment paper prevents sticking when transferring cakes. Store leftovers in an airtight container to maintain freshness.
Pro Tips for Efficiency
Prep your mixing bowls and utensils while the oven preheats to save time. I line my pans with parchment circles (cut to fit) for foolproof removal. A small offset spatula helps scrape every last bit of batter into the pans.
For the filling, chill your whipping bowl in the freezer for 10 minutes before whipping—this helps the cream reach stiff peaks faster. ❄️
Use a serrated knife to level cake layers if needed, and keep a damp cloth handy to wipe down counters between steps. For storage, I label my airtight containers with dates to track freshness. The cake actually tastes better the second day—trust the process!
Nutrition facts
Frequently asked questions
Why does this coconut cake stay fresh for 3 days?
The secret lies in the coconut milk and layered assembly technique. The coconut milk adds moisture without making the cake soggy, while thin layers baked just until set create a sturdy structure. The 4-hour chilling period after assembly helps the flavors meld and prevents drying out. Unlike traditional cakes, this recipe avoids excessive sugar that causes dryness over time.
Can I make this cake without coconut milk?
You can substitute with full-fat coconut cream (like the thick part from a can of coconut milk), but the texture will be slightly denser. For a closer match, mix 1 cup coconut cream with 0.5 cup water to mimic the consistency. The flavor won’t be identical, but it will still taste delicious. If you’re allergic, try Greek yogurt or buttermilk as alternatives.
How do I prevent the cake layers from cracking?
Cracking usually happens from overmixing or uneven baking. Mix the batter just until combined (no streaks of flour), and bake the layers for exactly 25-30 minutes at 350°F. Avoid opening the oven door during baking to maintain consistent heat. Let the layers cool completely in the pans before removing. If cracks appear after assembly, cover them with extra coconut cream filling.
Can I bake the cake layers ahead of time?
Yes! Bake the layers up to 2 days ahead and store them wrapped tightly at room temperature. Assemble the cake the morning of serving and refrigerate until ready to eat. The flavors actually deepen overnight, making the cake taste even better the next day. Just make sure to bring it to room temperature for 30 minutes before slicing.
What’s the best way to serve this cake?
Slice with a serrated knife dipped in hot water for clean cuts. Serve at room temperature with a sprinkle of toasted coconut flakes and fresh mango slices for a tropical presentation. For extra flair, drizzle with toasted coconut syrup (simmer 1 cup coconut milk with 0.5 cup sugar until thickened). Store leftovers in an airtight container at room temperature for 2 days.

- 6 Egg Cake Recipe with Oil: Light as Air With Buttery Moisture - October 4, 2026
- 4 Bean Casserole Recipe: One-Pan Heartiness With Smoky Paprika Depth - October 4, 2026
- 3-Ingredient Keto Mug Cake Recipe: Microwave Magic in 2 Minutes - October 4, 2026