
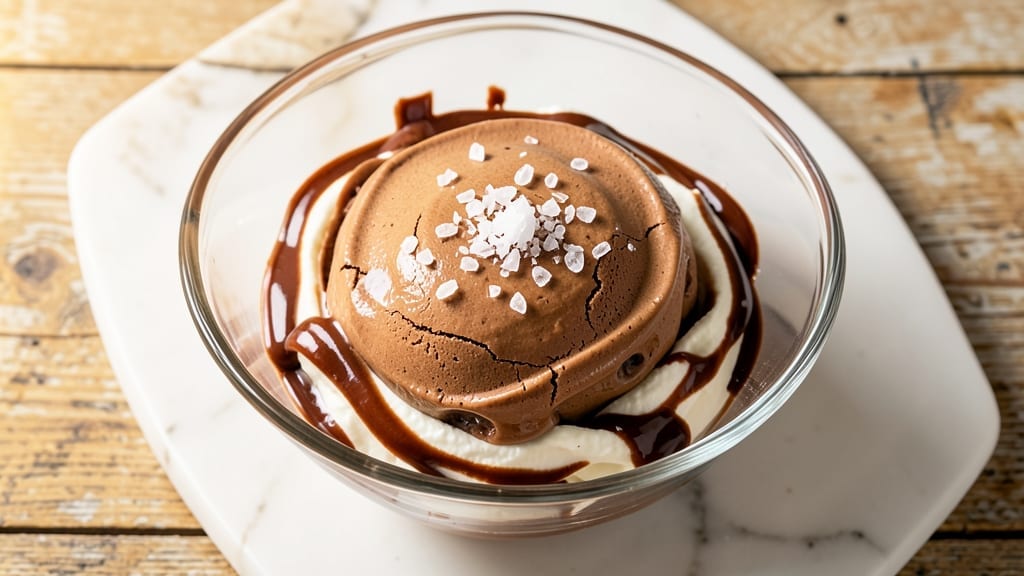
This 3-ingredient Nutella ice cream recipe delivers the creamiest, richest chocolate dream with zero fuss—just Nutella, heavy cream, and a pinch of salt. The secret lies in the perfect ratio of ingredients that creates a velvety texture without an ice cream maker, though one makes life easier.
I developed this after craving something decadent but simple, and it became an instant family favorite.
The magic happens when you whip the heavy cream to stiff peaks before folding it into melted Nutella. This technique ensures a smooth, airy texture that freezes beautifully without becoming icy.
No special equipment is needed—just a bowl, whisk, and freezer. The result? A dessert that tastes like you spent hours churning, but actually takes just 5 minutes of prep.
What you’ll end up with is a rich, fudgy ice cream with pockets of Nutella swirled throughout—no graininess, no freezer burn. The salt balances the sweetness, making every spoonful irresistible.
Serve it immediately for a soft-serve texture or let it firm up for classic scoopable ice cream. This is comfort food at its simplest.
Perfect for satisfying chocolate cravings without the guilt, this recipe scales effortlessly for parties or individual portions. Whether you’re using an ice cream maker or the no-churn method, the result is the same: a dessert that tastes like a fancy treat but requires just three ingredients. Let’s make it!
Ingredients for 3 ingredient nutella ice cream
Three simple ingredients transform into the creamiest chocolate ice cream with no special tools.
| Ingredient | Amount | Notes |
|---|---|---|
| Nutella 🍫 | 1 cup | High-quality, full-fat version |
| Heavy Whipping Cream 🥛 | 2 cups | Full-fat for best texture |
| Diamond Crystal Kosher Salt 🧂 | ¼ tsp | Fine grain preferred |
The quality of Nutella makes all the difference here. Ferrero’s original is the gold standard—avoid knockoffs that taste artificial. For the heavy cream, whipping cream with at least 36% fat is essential; anything lighter risks graininess. I always grab mine from Whole Foods or Trader Joe’s where they keep it cold. The salt should be fine-grained like Diamond Crystal—it dissolves better than sea salt flakes and balances the sweetness perfectly without overpowering.
No Nutella? Homemade chocolate-hazelnut spread works (mix melted dark chocolate with crushed hazelnuts), though store-bought is more convenient. Running low on heavy cream? Whipped topping from a can can substitute in a pinch, though texture won’t be as smooth. The salt is non-negotiable—it cuts through the richness. For a quicker version, use half-and-half with 1 extra tbsp cream cheese, but the texture will be slightly denser. Always use room-temperature cream for whipping; cold cream won’t reach stiff peaks.
This freezes beautifully—2-3 hours for soft-serve, 4-6 hours for firm scoops. Store in an airtight container with parchment paper between layers to prevent freezer burn. Portion into single servings for easy grab-and-go treats. Leftovers keep for up to 2 weeks in the freezer, though I rarely have any—it disappears too fast. For a richer texture, let it sit at room temperature for 10 minutes before serving.
Why You’ll Love This Recipe
- I’ll be real: this recipe is the kind of dessert that makes me feel like a hero without actually doing anything. Just Nutella, cold cream, and a pinch of salt—no churning, no waiting, no stress. The mixer does all the work while I sip my coffee and pretend I’m not secretly making dessert for breakfast.
- No-Fuss Magic: I’ll be real: this recipe is the kind of dessert that makes me feel like a hero without actually doing anything. Just Nutella, cold cream, and a pinch of salt—no churning, no waiting, no stress. The mixer does all the work while I sip my coffee and pretend I’m not secretly making dessert for breakfast.
- Rich Without Guilt: That first spoonful? Chef’s kiss. The Nutella’s chocolate-hazelnut depth gets a creamy upgrade from the heavy cream, but the flaky salt? It’s the secret weapon—cuts through the sweetness like a whisper. Honestly, it tastes like a fancy gelato, but I’m not telling anyone where it came from.
- Date Night Ready: Between us, this is my go-to for lazy Fridays when I don’t want to bake but still crave something decadent. Serve it in mugs for a cozy vibe or fancy glasses for a dinner party—no one will guess it took less time than boiling water. (Yes, even on a Tuesday night.)
Step-by-step instructions for 3-Ingredient Nutella ice cream
This method delivers creamy, dreamy ice cream with minimal effort and maximum flavor.
Whip the Heavy Whipping Cream to Stiff Peaks
Place the 2 cups Heavy Whipping Cream in a chilled mixing bowl. Using a stand mixer fitted with the whisk attachment, whip on medium-high speed until soft peaks form—about 2-3 minutes. This creates the foundation for our ice cream’s texture.
Here’s the thing—cold equipment matters. If your bowl or beaters aren’t chilled, the cream will take longer to whip properly. I like to place my mixing bowl in the freezer for 10 minutes before starting. Watch for the moment when the cream thickens noticeably and holds its shape when the whisk is lifted—this is your soft peak stage.
Fold in Nutella and Salt for Perfect Texture
Once the cream reaches stiff peaks (when the whisk leaves a trail that holds its shape), reduce speed to low and gradually add the 1 cup Nutella. Use a spatula to gently fold it in, cutting through the center of the mixture to ensure even distribution without deflating the whipped cream.
Add the 0.25 tsp Diamond Crystal Kosher Salt and continue folding until completely incorporated. The salt enhances the chocolate flavor and balances the sweetness. Be gentle here—overmixing can turn your creamy base into butter. You want to maintain that light, airy texture while ensuring the Nutella is fully combined.
Freeze for 4-5 Hours Until Firm
Transfer the mixture to a loaf pan or airtight container, spreading it evenly with a spatula. Cover with plastic wrap pressed directly against the surface to prevent ice crystals. Place in the freezer and freeze for 4-5 hours until completely firm.
Real talk: Don’t rush this step. The longer it freezes, the creamier the texture will be. I like to give it the full 5 hours for that perfect scoopable consistency. If you’re impatient, you can speed this up by placing the container in the coldest part of your freezer, but don’t sacrifice texture for speed.
Scoop and Serve Your Homemade Ice Cream
Once frozen solid, let the ice cream sit at room temperature for 5-10 minutes before scooping. This brief warm-up makes it easier to serve without getting ice crystals. Use a clean ice cream scoop to portion out 4 servings—each one will be rich, creamy, and perfectly balanced between sweet and salty.
For the best experience, serve immediately while still slightly soft. The texture should be smooth with no ice crystals, and each bite should deliver that perfect combination of velvety cream and intense chocolate flavor. Store any leftovers in an airtight container in the freezer for up to 2 weeks, though I doubt it will last that long!
Pro Tips For Making 3 Ingredient Nutella Ice Cream
- CHILL THE CREAM FIRST: Heavy whipping cream straight from the fridge whips like a dream—no need to warm it up. I used to take it out just before whipping, but now I let it sit for 10 minutes at room temp. This makes the texture smoother and cuts down on air bubbles that can turn your ice cream grainy later.
- MEASURE NUTELLA ACCURATELY: That jar of Nutella is deceptive—scoop it directly into your bowl, not by volume. A standard 1:1 ratio (1 cup Nutella to 1 cup cream) works, but if you eyeball it, you’ll end up with a thick paste instead of creamy ice cream. Use a kitchen scale if you’re feeling fancy—200g Nutella to 240g cream is foolproof.
- WHIP IN THE SALT LAST: Toss the salt in at the very end, when the cream is already stiff but still soft peaks. Sprinkle it over the top and fold it in gently—this way, it dissolves evenly without weighing down the mix. I learned this the hard way when my first batch tasted like a salt lick.
- FREEZE THE MIX QUICKLY: Don’t let that Nutella-cream blend sit around before freezing—transfer it to your ice cream maker within 30 minutes. The faster it chills, the smoother the final texture. If you’re in a rush, spread it thin in a freezer-safe dish and freeze for 10 minutes before churning—it’ll whip up faster and more stable.
Common mistakes when making perfect results
Overwhipping the Cream
This is the #1 mistake I see—pushing the heavy cream too far past stiff peaks. When you overwhip, the fat molecules break down and you end up with butter instead of creamy ice cream.
I know it’s tempting to keep going until it looks perfect, but stop when the peaks hold their shape and the mixture looks glossy. 🥛
Skipping the Salt
The 0.25 tsp salt isn’t just for flavor—it’s essential for balancing the sweetness of Nutella. Without it, your ice cream will taste cloying and one-dimensional. I’ve made this mistake myself and regretted it immediately. Trust me, that tiny pinch makes all the difference in enhancing the chocolate flavor.
Using Warm Ingredients
Cold ingredients are non-negotiable for this recipe. If your heavy cream or Nutella isn’t properly chilled, you’ll end up with grainy ice cream. I always keep my Nutella in the fridge for 30 minutes before using it and make sure my heavy cream is cold straight from the fridge.
Room-temperature ingredients will prevent proper whipping and create an icy texture.
Improper Freezing Technique
Not covering the surface with plastic wrap is a fast track to ice crystals. The wrap creates a barrier that prevents freezer burn and keeps the surface smooth. I also recommend freezing in a shallow container—it allows for even freezing rather than creating a thick layer that freezes unevenly.
For best results, press the wrap directly against the surface before freezing.
Rushing the Freezing Time
Trying to speed up the process by using a hot freezer or shorter freezing times will result in a scoop that’s too soft or icy. The 4-5 hour freeze time is crucial for developing that creamy texture.
I’ve learned this the hard way—when I tried to serve it after only 2 hours, it was more like a slushie than ice cream. Patience pays off here!
Not Letting It Rest Before Scooping
Skipping the 5-10 minute room-temperature rest before scooping can turn your beautiful ice cream into a crumbly mess. This brief warm-up helps the fat molecules relax and creates that perfect scoopable consistency.
I always give mine this little break, and it makes all the difference in getting clean, smooth scoops every time. ❄️
Nutrition facts
Frequently asked questions
Can I make this Nutella ice cream without an ice cream maker?
This recipe was designed for no-churn success. The key is whipping the heavy cream to stiff peaks before folding in Nutella—this creates the creamy texture without needing special equipment. Just follow the folding technique carefully to avoid deflating the mixture.
How do I fix grainy texture in my Nutella ice cream?
Graininess usually means the cream wasn’t whipped enough or ingredients weren’t cold. Next time, whip the cream to stiff peaks (not just soft) and chill your mixing bowl first. For a quick fix, blend the grainy ice cream briefly with 1 tablespoon heavy cream to smooth it out.
Can I substitute heavy cream with something else?
For best results, stick with heavy cream—it’s essential for that creamy texture. As a last resort, you could use half-and-half with 1 extra tbsp cream cheese, but the texture will be denser. Never use milk or light cream, as they won’t whip properly. The fat content in heavy cream is what creates that silky mouthfeel.
Why does my Nutella ice cream taste too sweet?
The salt is crucial for balancing the sweetness! If it tastes cloying, you likely skipped it or used too little. The 0.25 tsp salt enhances the chocolate flavor while cutting through the sugar. For a richer taste, try adding 1 tbsp cocoa powder when folding in the Nutella.
How can I make this recipe vegan?
For a vegan version, replace the heavy cream with full-fat coconut cream (chilled overnight) and use vegan Nutella (like Nocciolata). Whip the coconut cream to stiff peaks first, then fold in the Nutella substitute. Note that the texture will be slightly denser but still delicious.

- 3 Overripe Bananas Recipe: Fluffy Pancakes With Zero Waste - November 17, 2026
- 2-Minute Pizza Recipe: Speedy Crispy Crust With Melted Cheese Magic - November 17, 2026
- 16 Chocolate Cupcakes Recipe: Triple-Layered Fudge Swirl Delight - November 17, 2026