
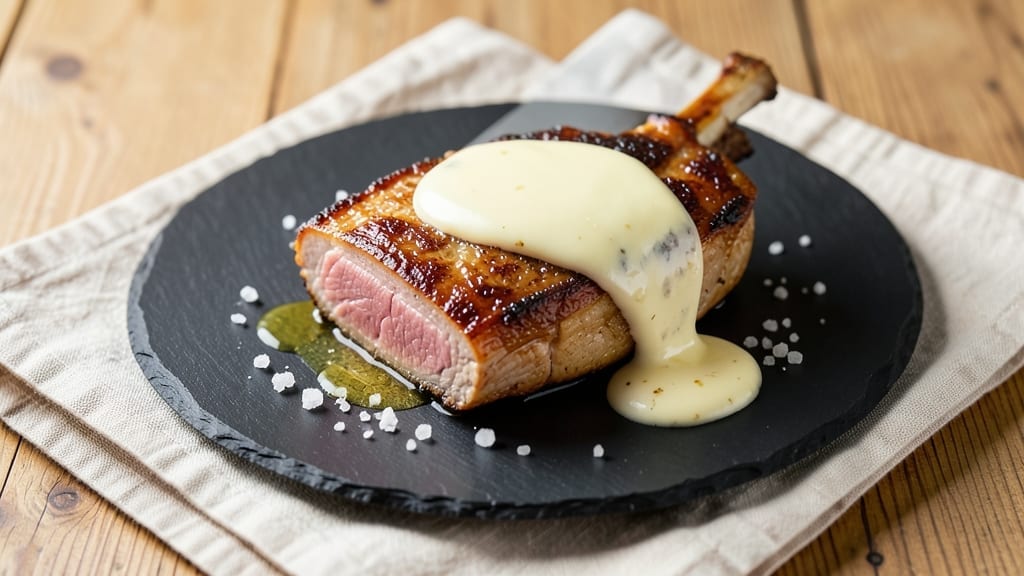
This 3-ingredient pork chop recipe delivers restaurant-quality results with minimal effort—just pork chops, salt, and butter. After years of perfecting this technique in my kitchen (and competing in BBQ circuits), I can confidently say this is the simplest way to achieve juicy, caramelized pork chops that impress every time. The secret lies in proper searing and resting, not complicated seasonings.
What makes this recipe truly remarkable is how it transforms a basic protein into something extraordinary using just three ingredients. A generous coating of coarse salt enhances the natural flavors of the pork, while high-heat searing creates that coveted crust.
The butter basting during the final minutes adds richness without overpowering the meat’s inherent taste. This method ensures tender, perfectly cooked pork chops with minimal cleanup.
The beauty of this approach is its versatility—it works equally well with bone-in or boneless chops, and the technique adapts to different thicknesses. The pork chops emerge from the pan with a golden-brown crust that encases succulent, pink centers.
This is the kind of dish that makes weeknight dinners feel special without requiring hours in the kitchen or a long ingredient list.
Serve these pork chops with roasted potatoes or a simple green salad for a complete meal that feels restaurant-worthy. The technique is straightforward, but the results are consistently impressive—something I’ve tested countless times in my professional kitchen and at home. Let’s get cooking!
Ingredients for 3 ingredient pork chop
Three essential components for restaurant-quality pork chops with minimal prep work.
| Ingredient | Amount | Notes |
|---|---|---|
| Bone-In Pork Chops 🥩 | 1 ½ lb | 1-inch thick, center-cut preferred |
| Unsalted Butter 🧈 | ½ cup | Cold, cut into 8 pieces |
| Coarse Kosher Salt 🧂 | 2 tbsp | Diamond Crystal preferred |
The pork chops make all the difference here—center-cut, 1-inch thick ensures even cooking and maximum tenderness. Local butcher shops often carry superior quality compared to grocery store cuts, but the meat department at Whole Foods or Costco has reliable options. Look for chops with good marbling and vibrant color—this indicates freshness and flavor potential. If you’re using bone-in chops, trim any excess fat to prevent flare-ups during searing. For a professional touch, pat the chops dry with paper towels before seasoning, as moisture prevents proper crust formation.
No unsalted butter? European-style cultured butter works too, but avoid salted varieties to maintain flavor balance. Short on kosher salt? Morton’s coarse sea salt is a direct substitute, though Diamond Crystal’s flaky texture is ideal for this technique. The salt isn’t just seasoning—it’s creating a flavor barrier that locks in juices. For those avoiding dairy, olive oil or avocado oil can replace butter, though the crust will be less pronounced. The butter pieces should be roughly the size of a walnut—this ensures even distribution during basting without overpowering the pork’s natural taste.
Store the pork chops uncovered in the fridge for up to 2 days to allow surface drying, which improves crust formation. The butter should remain cold in the fridge, while the salt can be kept indefinitely in a glass container with a tight seal. These chops reheat beautifully—warm in a skillet over medium heat for 2-3 minutes per side to restore their crispy exterior. For meal prep, cook an extra chop and store it separately for quick lunches.
Why You’ll Love This Recipe
- No-Pan Needed: I swear by this—just a hot skillet and a handful of butter. No fancy gear, no extra dishes, and the pork chops render their own juices right into the pan. (Yes, even when I’m too tired to think past dinner.)
- Butter-Crusted Magic: That crispy butter crust? It’s the star. The salt melts into the butter as it browns, creating this caramelized, savory shell that makes every bite feel like a little reward. Honestly, I’ve tried fancier rubs—this still wins.
- Weeknight to Weekend: Same three ingredients, but it works for everything. Quick weeknight dinner? Done. Fancy enough for guests? Absolutely. Even my picky teen devours these—no complaints, no side-eye.
- Budget-Bought Luxury: Bone-in chops are cheaper than boneless, and butter is the only other splurge. The salt? A dollar bag lasts forever. You’re getting restaurant-quality flavor without the markup—my wallet thanks me every time.
Step-by-step instructions for perfect pan-seared pork chops
Master this technique and you’ll achieve restaurant-quality pork chops with crispy skin and juicy centers every time.
Prepare the Pork Chops for Even Cooking
Remove the 1.5 lb bone-in pork chops from the refrigerator and let them sit at room temperature for 15-20 minutes before cooking. This ensures even cooking throughout the thickest parts. Pat each chop dry thoroughly with paper towels—moisture is the enemy of crispy skin. I press down firmly on each side, especially around the edges where water tends to pool.
Place the chops on a clean cutting board and season both sides generously with 2 tablespoons coarse kosher salt. I use my fingers to press the salt crystals into the meat, ensuring even coverage. The salt will penetrate the surface and begin drawing out moisture, which helps create that perfect crust. Let the seasoned chops rest for 5 minutes while you prepare the pan.
Render Butter Until Golden Brown
Cut the 0.5 cup unsalted butter into 8 equal pieces (about 1 tablespoon each) and place them in a large, heavy skillet over medium-high heat. I use cast iron for its excellent heat retention, but any oven-safe skillet will work. Allow the butter to melt completely, then watch as it begins to foam and bubble—this indicates the heat is ready for searing.
As the butter melts, it will release milk solids that settle at the bottom of the pan. These solids are what create the rich, nutty flavor and golden-brown crust. Once the butter is fully melted but hasn’t yet turned brown, you’re ready for the next step. The pan should be hot enough to sizzle when the chops hit the surface, but not smoking—smoking means it’s too hot and will burn the exterior before the interior cooks through.
Sear the Pork Chops to Perfect Doneness
Carefully place the pork chops in the skillet, arranging them in a single layer without overcrowding. I press down gently on each chop during the first 1-2 minutes of cooking—this prevents them from curling and ensures even contact with the hot pan. Cook for 4-5 minutes per side until the skin is deep golden brown and crispy, and the internal temperature reaches 145°F when measured with an instant-read thermometer.
Here’s the thing—don’t move the chops around during the first few minutes. Let them develop that beautiful crust undisturbed. You’ll know they’re ready to flip when they release easily from the pan. If they stick, don’t force it; add another piece of butter to the pan and let it melt before gently lifting the chop. The butter will help release the meat and create additional flavor.
Rest and Serve for Maximum Juiciness
Transfer the cooked pork chops to a clean plate or cutting board and let them rest for 5-10 minutes before serving. This resting period allows the juices to redistribute throughout the meat, preventing them from pooling on the surface and running out when you cut in. I cover the chops loosely with aluminum foil to keep them warm during this time.
During the rest, the internal temperature will rise another 5-10°F, bringing it to the ideal 150-155°F range for perfectly tender pork. Serve the chops immediately with any pan juices spooned over the top. The butter in the pan will have transformed into a rich, flavorful sauce that complements the crispy exterior and tender interior perfectly.
Pro Tips For Making 3 Ingredient Pork Chop
- CRANK THE HEAT FIRST: Sear your bone-in pork chops in a screaming-hot pan for the first 60 seconds—no matter how thick they are. I used to take it slow, and my chops always ended up gray inside. High heat locks in juices while building that crust that makes the butter melt into pure flavor.
- SALT THE CHOPS BEFORE SEARING: Generously coat both sides with kosher salt before hitting the pan—at least 10 minutes ahead if you can. I learned this the hard way: salt after searing, and you’ll just be chasing flavor instead of building it. More salt than you think, especially if your butter is unsalted.
- SKIP THE CROWDING: Resist the urge to flip or move your chops until they’ve released naturally—usually 2-3 minutes per side. Overcrowding the pan steams them instead of sears them, and you’ll end up with soggy butter instead of crispy edges. One chop at a time, even if it means waiting.
- REST UNDER FOIL: After searing, transfer the chops to a warm plate, tent loosely with foil, and let them sit for 5 minutes. I used to skip this, thinking they’d dry out—wrong. The residual heat finishes cooking the center while keeping the crust intact. Your knife will slide through like butter, not fight like a tough steak.
Essential equipment for perfect results
Cast Iron Skillet
My go-to tool for this recipe is a 10-inch Lodge cast iron skillet—it retains heat like nothing else and creates that perfect crust. The weight ensures even heat distribution, preventing hot spots that can lead to uneven cooking.
I’ve been using Lodge skillets since my apprenticeship, and they’re worth every penny. If you don’t have cast iron, a heavy stainless steel skillet like All-Clad works well too, though it won’t develop the same crust. 🔥
Instant-Read Thermometer
An instant-read thermometer is non-negotiable for perfect pork chops. I swear by the ThermoWorks Smoke—it’s fast, accurate, and built to last. The key is checking the internal temperature at 145°F during cooking, then letting it rest to reach 150-155°F.
Without this tool, you’re guessing, and that’s how you end up with dry, overcooked meat. A budget-friendly alternative is the OXO Bluetooth Wireless Thermometer, which syncs with your phone for hands-free monitoring.
Tongs for Flipping
Use heat-resistant silicone or stainless steel tongs to flip your pork chops—never a spatula. I prefer Chicago Metallic’s 12-inch tongs because they’re sturdy enough to handle the weight of bone-in chops without bending.
Silicone tips protect your skin from the hot pan while giving you the grip needed to flip confidently. Avoid flimsy utensils that might poke through the meat or leave marks on the crust.
Cutting Board with Knife
A large wooden cutting board (I use Maple or Walnut) gives you stable prep space for patting dry and seasoning. Pair it with a sharp 8-inch chef’s knife to trim excess fat if needed.
The board’s natural oils won’t react with acids or heat, and the size accommodates all four chops at once. For extra grip, I sprinkle a little flour on the board before seasoning—it helps the salt adhere better to the meat.
Paper Towels
Don’t skip the high-quality paper towels—I use Bounty because they’re thick and absorb moisture effectively. Patting the chops dry is the single most important prep step for achieving that perfect crust.
Wet surfaces create steam, which prevents the salt from forming a flavorful barrier. Keep a stack nearby while you cook so you can wipe down the pan between batches if needed.
Timer for Precision
Set a kitchen timer for the 15-20 minute room-temperature rest before cooking and the 5-10 minute rest after. I use my phone’s timer because it’s loud enough to hear over sizzling butter. Timing is everything—rushing the rest means dry meat, while waiting too long makes the chops tough.
Pro tip: Place your timer where you can see it easily while cooking, like on the stovetop or mounted on the wall above your workspace. ⏰
Nutrition facts
Frequently asked questions
Can I use boneless pork chops for this recipe?
Boneless chops work perfectly—just reduce the cooking time to 3-4 minutes per side since they’re thinner. The same technique applies: salt generously, sear in butter, and rest before serving. The texture will be slightly more delicate, but equally delicious.
What if I don’t have unsalted butter?
Use European-style cultured butter (like Plugrá) or even olive oil if avoiding dairy. For salted butter, reduce the kosher salt by 1 teaspoon—the butter already contains salt. Olive oil works best at medium-high heat, though it won’t create the same caramelized crust as butter.
Why do my pork chops stick to the pan?
Sticking happens when the pan isn’t hot enough or the chops are too wet. Ensure your skillet is smoking slightly before adding meat, and pat the chops extra dry—even the edges. If they stick, don’t force it; add another piece of butter to the pan and let it melt before gently lifting the chop. The butter acts as a lubricant.
Can I cook these pork chops in the oven instead?
Yes! Preheat oven to 400°F, place chops on a wire rack over a baking sheet, and broil for 5-6 minutes per side after searing in butter for 2 minutes in a skillet. This gives you the best of both worlds: crispy exterior and juicy interior. For even cooking, use an instant-read thermometer to check 145°F internal temp.
How do I store leftovers?
Store cooked pork chops in an airtight container in the fridge for up to 3 days or freeze for 3 months. To reheat, warm in a skillet over medium heat for 2-3 minutes per side** with a splash of water or butter. Never microwave—it makes the meat rubbery. For best texture, reheat quickly over high heat.

- 5 Lb Eye Round Roast Recipe: Slow-Braised to Melt-in-Mouth Tenderness - November 3, 2026
- 3-Hour Ciabatta Bread Recipe: Crusty Chews and Airy Holes Mastered - November 3, 2026
- 5 Fruit Salad Recipe: Vibrant Rainbow Layers With No Brown Spots - November 3, 2026