
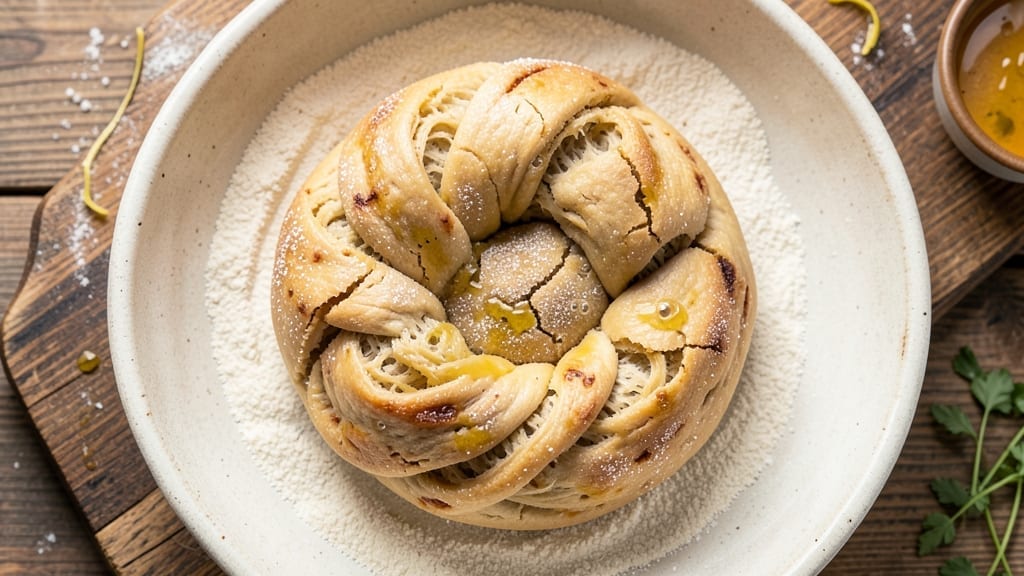
Mastering a 4-hour pizza dough recipe transforms your homemade pizza into something restaurant-quality—with a crispy yet airy crust that develops deep, complex flavors through slow fermentation. This method eliminates the guesswork of traditional kneading while creating a texture that’s impossible to achieve quickly.
The secret lies in patience: letting the dough rest at room temperature allows the gluten to relax and the yeast to work its magic, resulting in a crust that’s both tender and sturdy enough to hold toppings without collapsing.
The beauty of this approach is its simplicity: just five core ingredients—high-quality flour, yeast, water, salt, and olive oil—come together with minimal effort. Unlike rushed doughs that yield dense, chewy results, this slow-fermented version develops a delicate balance of crispness and chewiness, with a golden-brown surface that’s impossible to resist.
The process requires only a bowl, a spoon, and time, making it accessible even for beginners who’ve struggled with sticky, overworked dough in the past.
What you’ll end up with is a dough that’s ready to shape after just 4 hours—no overnight wait required—while still delivering flavors and texture that rival artisanal pizzerias.
The slow fermentation enhances the natural sweetness of the flour and deepens the aroma, so every bite carries that unmistakable taste of a well-made crust. Whether you’re making a classic Margherita or a loaded meat lover’s pie, this dough becomes the star of your pizza night.
Once you try this method, you’ll never go back to quick doughs again. The key is consistency in temperature and timing, which we’ll cover in the instructions to ensure your crust turns out perfectly every time.
Let’s get started on creating pizza dough that tastes like it came from a brick oven.
Ingredients for 4 hour pizza dough
Five simple ingredients transform into restaurant-quality pizza dough with just 4 hours of patience.
| Ingredient | Amount | Notes |
|---|---|---|
| Bread Flour (High-Protein) 🌾 | 3 ½ cups | 14% protein minimum for structure |
| Active Dry Yeast 🍞 | ¼ tsp | Fresh yeast doubles amount |
| Extra-Virgin Olive Oil 🫒 | ¼ cup | Fruity, not bitter |
| Warm Water 💧 | 1 ½ cups | 105-110°F ideal |
| Diamond Crystal Kosher Salt 🧂 | 1 ½ tsp | Fine grain preferred |
| Semolina Flour (Optional) 🌾 | ⅛ cup | For dusting work surface |
| Cornmeal (Optional) 🌽 | ⅛ cup | For pizza peel |
The flour is where the magic happens—King Arthur or Caputo Tipo 00 are my go-tos, but any high-protein bread flour (14%+ protein) works. King Arthur is widely available at grocery stores, while Caputo gives that authentic Italian touch (find it at specialty markets or online). Yeast is non-negotiable here: if it’s old or dead, your dough won’t rise. Test it by dropping a pinch in warm water with a pinch of sugar—if it bubbles within 5 minutes, it’s good. The olive oil should be extra-virgin, not the cheap stuff. California Olive Ranch or Colavita are reliable brands that won’t break the bank.
No bread flour? All-purpose flour plus 1 tbsp vital wheat gluten gets you close, though texture won’t be identical. Running short on yeast? Instant yeast works 1:1, but active dry needs the 5-minute activation in water. The water temperature is critical—too hot kills yeast, too cold slows fermentation. 105-110°F is perfect; if your tap runs cold, heat it gently. For salt, Diamond Crystal dissolves faster than Morton’s, so adjust to taste. Semolina and cornmeal are optional but worth it: semolina prevents sticking when shaping, while cornmeal creates that perfect crispy bottom.
This dough keeps beautifully—wrap tightly in plastic and refrigerate for up to 3 days (let it come to room temp before shaping). For longer storage, freeze shaped dough balls for 3 months—thaw overnight in the fridge. The longer it ferments, the better it tastes, so don’t rush it. If your kitchen runs warm, extend the rest time to 5-6 hours for even deeper flavor. And trust me, the extra hour is worth it for that brick-oven crust texture.
Why You’ll Love This Recipe
- No-Knead Magic: I swear by this dough—just mix, wait, and roll. No punishing kneading, no sticky mess, just a few ingredients and a bowl. The high-protein flour does all the heavy lifting while you sip your coffee.
- Golden Crust Promise: That crispy, caramelized edge with a pillowy center? The olive oil and kosher salt work together to create it every time. Honestly, the first time I tried it, I nearly licked the pan.
- Weeknight Wonder: Need pizza for a game night? A last-minute date? This dough handles it all. I keep a batch in the fridge all week—just pull it out, shape it, and bake. Even my picky teenagers don’t complain.
- Budget-Friendly Stretch: Five ingredients, one bowl, zero waste. A single batch feeds four, and leftovers freeze like a dream. Between us, this is how I feed my family for under $5—no takeout guilt here.
Step-by-step instructions for slow-fermented pizza dough
Here’s how to create a dough with incredible flavor and texture through slow fermentation.
Mix the Dough with High-Protein Flour
In a large mixing bowl, combine the 3.5 cups of bread flour (high-protein) with 1.5 teaspoons of diamond crystal kosher salt. This high-protein flour gives your dough the structure needed for a chewy, flavorful crust. Use a whisk to break up any flour lumps before adding the other ingredients.
Create a well in the center of the flour mixture and add the 0.25 teaspoon of active dry yeast to it. Pour in the 0.25 cup of extra-virgin olive oil next, letting it pool in the well. The olive oil adds richness and helps create a tender crust. Be careful not to overmix once you start adding the wet ingredients—just enough to combine everything.
Hydrate with Warm Water
Gradually add the 1.5 cups of warm water (105-110°F) to the flour mixture while stirring with a wooden spoon or your hands. You’re aiming for a shaggy, sticky dough that pulls away from the sides of the bowl. The warm water activates the yeast without killing it, which is crucial for proper fermentation.
Once all the water is incorporated, use your hands to bring the dough together. It should be tacky but not too wet—if it’s too sticky, add a tablespoon or two more of bread flour. Kneading isn’t necessary at this stage because the slow fermentation will develop the gluten naturally. Cover the bowl loosely with a damp kitchen towel or plastic wrap and let it rest at room temperature for 30 minutes.
First Bulk Fermentation
After the initial rest, the dough should look slightly puffed and feel more cohesive. This is your signal to begin the 4-hour fermentation. Place the covered bowl in a warm spot—ideally between 75-80°F—for 3 hours. You’ll see the dough rise gradually, but don’t expect dramatic expansion like with quick-rise doughs.
During this time, the yeast will slowly break down the gluten and sugars, creating complex flavors. After 3 hours, the dough should have roughly doubled in size and feel noticeably lighter. If it hasn’t, check your yeast—it might be old or your environment too cool. This slow rise is what gives your pizza dough its deep, developed flavor.
Shape and Second Fermentation
Turn the dough out onto a lightly floured surface dusted with 0.125 cup of semolina flour (optional). Gently shape it into a rough ball, then divide it into 4 equal portions (about 8 ounces each). Roll each portion into a smooth ball, sealing any seams to prevent air from getting trapped.
Place the dough balls on a floured tray, cover them with a damp towel, and let them rest at room temperature for 1 hour. This second fermentation allows the dough to relax and develop even more flavor. The balls should rise slightly but not dramatically—think of them as puffy but still firm. If you’re not using all the dough immediately, you can refrigerate the balls for up to 24 hours for even more flavor development.
Stretch and Cook
When ready to use, dust your work surface with 0.125 cup of cornmeal (optional) and gently stretch each dough ball into a 12-inch circle. Avoid over-handling the dough—let gravity and your fingertips do the work. The dough should be thin at the edges and slightly thicker in the center, with no tears.
Preheat your oven to its highest setting, ideally with a pizza stone or steel inside for at least 1 hour. Once preheated, slide your stretched dough onto the stone or steel, add your toppings, and bake for 10-15 minutes until the crust is golden and the cheese is bubbly. The slow fermentation ensures a perfectly balanced crust—crispy at the edges but still tender enough to hold up to your favorite toppings.
Pro Tips For Making 4 Hour Pizza Dough
- Measure Water by Weight: The 4-hour window starts with precision—use a kitchen scale for water (150g for this dough). I learned this the hard way after swapping cups for grams and ending up with dough that either stuck to my hands or was too dry. Bread flour absorbs differently than all-purpose, so don’t eyeball it.
- Bloom Yeast in Oil: Mix the yeast with olive oil first, then add water—this keeps it from sinking to the bottom. I was skeptical until I tried it: the yeast blooms faster, and the dough develops a richer flavor. Skip this, and you’ll end up with uneven fermentation.
- Salt the Water Hard: Use the full 2% of dough weight in kosher salt (about 10g for this recipe). Yes, it sounds like a lot, but under-salting makes the dough bland. My grandmother swore by this, and she was right: the salt tightens the gluten and balances the yeast’s tang.
- Stretch, Don’t Roll: After bulk fermentation, stretch the dough by hand—no rolling pin. This creates surface tension for a crispier crust. I used to roll it out, and the edges always turned soggy. Works best if you’re patient (or at least pretend to be).
Flavor customization for this recipe
Herb-Infused Dough
Add 1 tablespoon of finely chopped fresh rosemary or thyme directly to the flour mixture before mixing. The herbs infuse the dough with earthy, aromatic notes that pair perfectly with tomato-based sauces.
I like to toast the herbs lightly in a dry pan for 30 seconds before adding them to deepen their flavor. 🌿
Garlic and Parmesan Boost
Mix 2 tablespoons of minced garlic and ¼ cup of grated Parmesan cheese into the dough during the initial mixing stage. This creates a savory, umami-rich base that works wonderfully with minimal toppings.
For extra richness, add 1 tablespoon of olive oil along with the garlic. The Parmesan also helps balance any overly sweet toppings.
Spicy Arrabbiata Twist
Incorporate 1 teaspoon of red pepper flakes and ½ teaspoon of crushed fennel seeds into the dough for a subtle kick. This variation works especially well with creamy toppings like ricotta or mozzarella.
The heat mellows during baking, leaving just a pleasant warmth. For a smokier version, swap the fennel for ½ teaspoon of smoked paprika.
Sweet and Tangy Variations
Add 1 tablespoon of honey or agave syrup to the water before mixing for a slightly sweet crust. This pairs beautifully with tangy toppings like fig jam or prosciutto. For a citrus twist, zest 1 lemon or orange into the dough and add 1 teaspoon of zest to the water.
The bright flavors cut through rich cheeses like gorgonzola or burrata.
Whole Wheat or Seed Enhancements
Replace ½ cup of bread flour with whole wheat flour for a nuttier, heartier crust. For extra texture, stir in 2 tablespoons of toasted sesame or poppy seeds during mixing.
These additions work well with savory toppings like caramelized onions or roasted vegetables. The seeds add crunch while the whole wheat boosts fiber content.
Cheesy Dough Balls
Divide the dough into balls as usual, but press 1 tablespoon of shredded mozzarella into the center of each before sealing. This creates pockets of melted cheese that burst during baking.
For a richer version, use a mix of mozzarella and fontina. The cheese-infused dough pairs especially well with lighter toppings like fresh basil and tomato slices.
Nutrition facts
Frequently asked questions
Why does this dough need 4 hours instead of the usual 30 minutes?
The slow fermentation develops deeper flavor and better texture through controlled gluten relaxation. This creates a crust that’s crispy at the edges but still tender enough to hold toppings without tearing. The extended time also allows yeast to break down sugars more thoroughly, giving that authentic artisanal taste.
Can I use all-purpose flour instead of bread flour?
Yes, but add 1 tablespoon of vital wheat gluten per 3.5 cups to mimic bread flour’s protein content. Without it, your crust may be less chewy and more prone to tearing. The gluten helps create that perfect balance between crispness and stretch.
What’s the best way to check if my dough is ready after 3 hours?
Gently press your finger into the dough—if it springs back slowly (not immediately), it’s ready. Look for about 50% increase in volume and a slightly jiggly surface. The dough should also feel noticeably lighter when lifted. If unsure, err on the side of underproofing—overproofed dough collapses when stretched.
How do I fix dough that didn’t rise properly?
First check your yeast—test fresh yeast in warm water with sugar (should bubble in 5 minutes). If yeast is good, try placing the dough in a warmer spot (80-85°F) for another 1-2 hours½ tsp more yeast and let it rest 30 minutes before continuing. Never microwave dough to speed up rising.
Can I make this dough ahead of time?
Shape the dough balls and refrigerate them for up to 3 days (let them warm to room temp before shaping). For even better flavor, ferment them 12-24 hours in the fridge. The cold slows fermentation, creating more complex flavors. Just add 30-60 minutes of extra room temp rest before baking.

- 5 Lb Eye Round Roast Recipe: Slow-Braised to Melt-in-Mouth Tenderness - November 3, 2026
- 3-Hour Ciabatta Bread Recipe: Crusty Chews and Airy Holes Mastered - November 3, 2026
- 5 Fruit Salad Recipe: Vibrant Rainbow Layers With No Brown Spots - November 3, 2026