
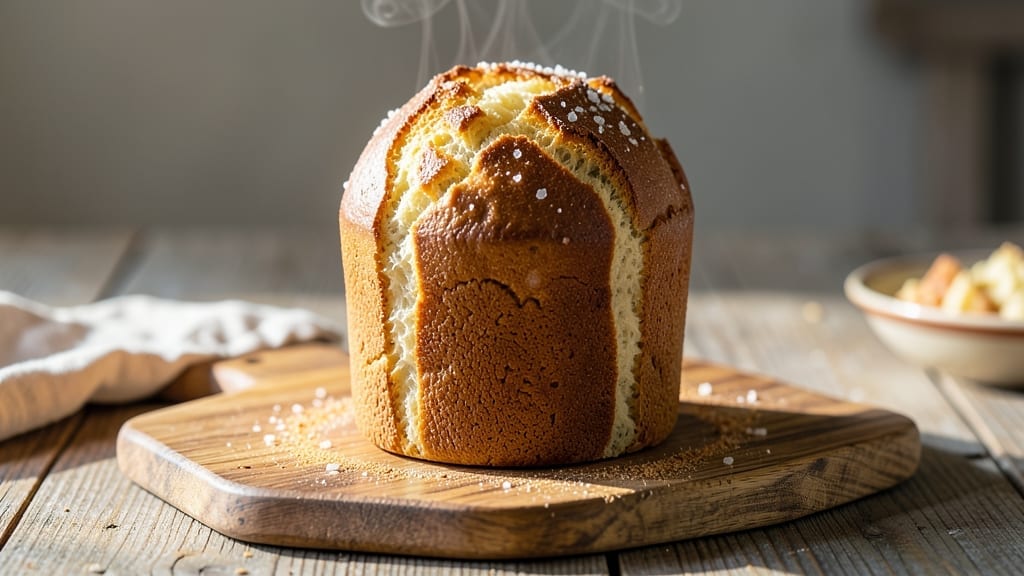
This 4-ingredient sandwich bread recipe delivers restaurant-quality results using only flour, yeast, water, and salt—no fancy ingredients or complicated steps required. The secret lies in proper kneading and fermentation, which transform simple pantry staples into bread with a crisp crust and soft interior.
I’ve perfected this method over years of baking, ensuring every loaf turns out perfectly every time.
The beauty of this recipe is its simplicity: just mix, knead, let it rise, and bake. With minimal effort, you’ll achieve bread that’s ideal for sandwiches, toast, or even French toast. The dough develops natural sweetness as it ferments, creating a flavor profile that’s both comforting and satisfying.
Perfect for beginners or anyone short on time, this bread comes together in under 2 hours with minimal hands-on work.
What you’ll end up with is a loaf of bread that’s crusty on the outside and tender on the inside, with a golden-brown crust that’s perfect for slicing. The texture is just right—neither too dense nor too airy—making it ideal for sandwiches without falling apart.
This recipe proves that great bread doesn’t require complicated techniques or expensive ingredients, just patience and attention to detail.
Use this versatile bread for classic sandwiches, garlic toast, or even as a side for soups and stews. The simplicity of the recipe means you can easily adjust the shape or size to fit your baking pan, ensuring you always have fresh, homemade bread on hand.
Let’s get started on creating your perfect loaf!
Ingredients for 4 ingredient sandwich bread
Just four ingredients transform into the perfect sandwich bread—crusty, tender, and full of flavor.
| Ingredient | Amount | Notes |
|---|---|---|
| All-Purpose Flour 🌾 | 3 ½ cups | Unbleached, high-protein preferred |
| Active Dry Yeast 🍞 | 1 tbsp | Freshly opened, room temperature |
| Warm Water 💧 | 1 ¼ cups | 110°F for optimal yeast activation |
| Kosher Salt 🧂 | 1 ½ tsp | Diamond Crystal preferred |
The flour is where magic happens—King Arthur or Gold Medal are my go-tos for consistent results. Whole wheat flour can replace up to 20% if you want a nuttier flavor, but stick with all-purpose for that classic sandwich bread texture. The yeast must be active dry, not instant—this recipe is designed for that. Test it by dropping a pinch in warm water with a pinch of sugar; if it foams in 5 minutes, it’s good to go. Bob’s Red Mill or Saf-Instant are solid brands, but any active dry will work if fresh. The water temperature is critical: too hot kills the yeast, too cold and it won’t activate. Aim for lukewarm—like bath water.
No yeast? Sourdough starter can replace it at a 1:1 ratio, but fermentation time doubles. Short on flour? Whole wheat or rye flour works, but expect a denser crumb. The salt is non-negotiable—it controls yeast activity and enhances flavor. Diamond Crystal is finer and dissolves better, but any kosher salt works if measured precisely. For a chewier crust, add 1 tbsp honey or sugar to the dough. Want more flavor? Swap 1/4 cup of the water for garlic-infused oil—just infuse neutral oil with minced garlic and a pinch of salt for 10 minutes.
This dough keeps beautifully—cover tightly and refrigerate for up to 3 days. For best results, let it rise at room temperature for 1-2 hours before baking. The baked loaf stays fresh for 5-7 days at room temperature, wrapped in a clean kitchen towel. Freeze slices for up to 3 months—toast straight from frozen for crispy results. Pro tip: Brush the crust with melted butter after baking for that artisanal touch. Leftovers? Perfect for croutons or breadcrumbs—just pulse in a food processor.
Why You’ll Love This Recipe
- I’ll be real: this recipe costs me pennies per loaf. Four ingredients, minimal waste, and it keeps for days wrapped in a towel. My wallet—and my lunchbox—thank me every time.
- Four-Ingredient Magic: I swear by this—no fancy mix-ins, just flour, yeast, water, and salt. That’s it. The simplicity means I never overthink it, and the dough comes together faster than I can finish my morning coffee.
- Crusty-Center Perfection: Honestly, the texture blows me away. The outside gets that satisfying crunch while the inside stays soft and pillowy—no dense, heavy loaves here. It’s the kind of bread that makes toast actually worth eating.
- Everyday Superstar: Between us, this is my go-to for sandwiches, toast, or even garlic bread. Freeze half the batch, and you’ve got fresh bread for whenever. Picnics? Check. Weeknight dinners? Double-check.
Step-by-step instructions for 4-Ingredient sandwich bread
Here’s the method that transforms pantry basics into artisanal-style bread with a crisp crust and airy crumb.
Activate the Yeast with Warm Water
In a medium bowl, combine the 1.25 cups warm water (about 110°F) with the 1 tbsp active dry yeast. Let it sit for 5-10 minutes until frothy—this confirms the yeast is alive and ready to work. The water should feel pleasantly warm to your wrist, not hot. If it doesn’t bubble, your yeast may be old, and you’ll need to start over.
I always use a glass bowl for this step so I can easily spot the froth forming. This activation process is critical—it kickstarts fermentation, which gives your bread that signature lightness. Don’t rush it; patience here prevents dense bread later.
Mix the Dough with Flour and Salt
Add the 3.5 cups all-purpose flour and 1.5 tsp kosher salt to the yeast mixture. Using a wooden spoon or your hands, stir vigorously until a shaggy dough forms. The dough will be sticky at first, but keep mixing—it’s normal at this stage. After about 2 minutes, the dough should begin to pull away from the sides of the bowl.
Here’s the thing—high-protein flour helps develop gluten naturally, but we’re giving it a head start by mixing vigorously. The dough should be smooth and elastic when pressed, though it’ll still feel slightly tacky. If it’s too sticky to handle, sprinkle a tiny bit of flour on your work surface, but don’t overdo it—extra flour makes for tough bread.
Knead the Dough Until Elastic
Turn the dough onto a lightly floured surface and knead for 8-10 minutes by hand, or use a stand mixer with a dough hook on medium speed for 5-6 minutes. You’re looking for a dough that springs back when poked and feels smooth to the touch. The gluten development happens during this step—it’s what gives sandwich bread its satisfying chew.
I know kneading sounds tedious, but this is where the magic happens. The dough should be firm enough to hold its shape when pressed but still pliable. If it tears easily, knead another minute. For best results, work in a cool kitchen—warmth speeds up fermentation and can make the dough sticky before it’s properly developed.
Let the Dough Rise Until Doubled
Place the kneaded dough in a lightly greased bowl, cover with a damp towel or plastic wrap, and let it rise in a warm place for 1-2 hours. The dough should rise until it’s about doubled in size and puffy to the touch. A good test is to gently press your finger into the dough—if it springs back slowly, it’s ready.
This first rise develops flavor and lightens the crumb. I like to place the bowl near a slightly warm oven (with the light on) or on top of my fridge for consistent warmth. Don’t let it rise too long—overproofed dough collapses during baking. If you’re in a hurry, you can speed this up by using slightly warmer water (up to 115°F), but don’t exceed that or you’ll kill the yeast.
Shape and Proof for Final Rise
Punch down the risen dough to release air, then shape it into a loaf pan (greased or lined with parchment paper). Let it rise again for 30-45 minutes until it’s just slightly puffy above the pan. This second rise ensures the bread expands properly in the oven.
For shaping, I like to gently press the dough into the corners of the pan to create an even rise. The edges should touch the sides of the pan while the top remains slightly domed. Bake immediately after shaping—delaying baking can cause the dough to overproof and lose its structure. Preheat your oven to 375°F while the final rise happens to ensure it’s ready when you are.
Bake Until Golden and Hollow-Sounding
Bake the bread for 30-35 minutes until the top is golden brown and sounds hollow when tapped on the bottom. The internal temperature should reach 190-200°F. For extra crispness, I like to spray the oven with water just before baking—this creates steam that helps develop that perfect crust.
Resist the urge to open the oven door early. The steam inside is what gives the bread its oven spring. If the top browns too quickly, tent loosely with foil. When done, transfer to a wire rack to cool completely before slicing—this prevents a gummy interior. The bread will be warm, fragrant, and ready to make perfect sandwiches in no time.
Pro Tips For Making 4 Ingredient Sandwich Bread
- Use 110°F Water: DESCRIPTION: I learned this the hard way—yeast hates extremes. Too hot and it kills instantly; too cold and it takes forever. Test the water by dipping your pinky in—should feel like a warm bath, not a sauna. If you don’t have a thermometer, let tap water sit for 10 minutes after boiling, then check again.
- Salt the Water: DESCRIPTION: Skip this and your bread will taste flat. Dissolve the kosher salt in the warm water before mixing—it helps control yeast activity and spreads flavor evenly. (Yes, even if the recipe says “add salt later,” do it now.)
- Knead Until Silky: DESCRIPTION: This isn’t the prettiest method, but it’s the tastiest. Work the dough for 8–10 minutes by hand until it’s smooth and slightly sticky—not dry, not gummy. Over-kneading? Your arms will tell you. Under-kneaded? The bread collapses. Find the sweet spot.
- Proof at Room Temp: DESCRIPTION: No oven or proofing box? No problem. Place the dough in a lightly oiled bowl, cover with a damp towel, and let it rise in a spot where your hand feels comfortable after 30 seconds—like near a closed oven door or a sunny windowsill. (Your future self will thank you for not rushing this.)
Creative variations of these flavors
Sweet & Sticky Variations
Add 2 tbsp honey or 1 tbsp brown sugar to the dough for a caramelized crust and slightly sweeter crumb—perfect for French toast or cinnamon rolls. I like to brush the baked loaf with melted butter mixed with 1 tsp honey for extra stickiness.
For a dessert twist, fold in ¼ cup raisins or chopped dried fruit during kneading. 🍯
Herb & Garlic Infusions
Swap ¼ cup of the water for garlic-infused olive oil (simmer 3 garlic cloves in ¼ cup oil for 5 minutes, then strain) for a savory kick. Add 1 tbsp dried rosemary or thyme directly to the dough for an aromatic twist.
Fresh herbs like cilantro or parsley work too—just chop finely and mix in at the end. This version pairs beautifully with soups or grilled meats.
Whole Wheat or Seed Boosts
Replace 1 cup of the all-purpose flour with whole wheat flour for a nuttier flavor and denser texture—ideal for heartier sandwiches. For extra nutrition, stir in 2 tbsp vital wheat gluten or 1 tbsp ground flaxseeds during mixing.
I also love adding 1 tbsp sesame or poppy seeds for crunch. These variations keep the same simple approach but add depth and texture. 🌾
Crusty vs. Soft Textures
For a crusty baguette-style loaf, shape the dough into a long batard and bake on a preheated baking sheet at 425°F for 20 minutes before reducing to 375°F until golden. For a soft sandwich loaf, brush the baked bread with melted butter while warm.
The key is the final rise—longer proofing (up to 1 hour) creates a lighter crumb, while shorter proofing keeps it denser.
Global Twists
Make focaccia-style bread by shaping the dough into a flat rectangle, dimpling with your fingers, and drizzling with 2 tbsp olive oil before baking. For a Mexican-inspired version, add 1 tsp cumin and ½ tsp smoked paprika to the dough.
A Japanese milk bread twist involves adding ¼ cup milk powder (or 2 tbsp powdered milk) and a touch of sugar for a softer, slightly sweet loaf. Each variation keeps the 4-ingredient spirit while adding cultural flair.
Make-Ahead & Freezer-Friendly
Shape the dough into a loaf, refrigerate overnight, then bake straight from the fridge for a slower rise and deeper flavor. For freezer storage, bake the bread, cool completely, slice, and freeze in airtight containers for up to 3 months.
Toast frozen slices directly for crispy results. This method works for all variations—just adjust baking times slightly if using cold dough (add 5-10 minutes to the bake). ❄️
Nutrition facts
Frequently asked questions
Can I use this recipe without a stand mixer?
This recipe works perfectly by hand. Knead the dough for 8-10 minutes on a lightly floured surface until it becomes smooth and elastic. The key is consistent pressure—press down with the heel of your hand and fold the dough over itself. If it feels too sticky, add just a tiny bit of flour, but don’t overdo it or the bread will turn out tough.
What if my dough doesn’t rise?
If your dough isn’t rising after 2 hours, check these three things first: 1) Your yeast may be old—test it in warm water with sugar to confirm it’s active. 2) The water might be too hot (115°F max) or too cold (should feel like bath water). 3) Keep the dough in a warm spot—try placing it near a turned-on oven light or on top of your fridge. If it still doesn’t rise, try fresh yeast or let it rise longer (up to 3 hours).
How do I make this bread without a loaf pan?
Shape the dough into a free-form loaf or even a round boules. For a rustic look, bake on a parchment-lined baking sheet at 375°F for 30-35 minutes. For extra crustiness, bake at 425°F for 20 minutes first, then reduce to 375°F until golden. Brush with melted butter after baking for that artisanal touch. The texture will be slightly denser without a pan, but still perfect for sandwiches!
Can I add seeds or herbs to this recipe?
Yes! For added texture, mix in 1 tbsp sesame seeds, poppy seeds, or flaxseeds during kneading. For flavor, swap ¼ cup of water for garlic-infused oil or add 1 tbsp dried herbs (like rosemary or thyme). Just don’t exceed ¼ cup total additions—too much can make the dough too dense. Fresh herbs work too, but chop them finely first.
Why does my bread turn out dense?
Dense bread usually means one of three things: 1) Under-kneaded dough (needs 8-10 minutes of kneading), 2) Overproofed dough (bake sooner if it rises too long), or 3) Too much flour added during handling. Start over with fresh yeast, knead thoroughly, and let it rise just until doubled. Also, ensure your oven is fully preheated—cold oven = poor oven spring. For extra lightness, let the dough rise in a warm spot (like a turned-off oven with light on).

- 1 Cup Oatmeal 2 Apples Recipe: Warm Spiced Porridge With Apple Chunk Appeal - November 17, 2026
- 3 Overripe Bananas Recipe: Fluffy Pancakes With Zero Waste - November 17, 2026
- 2-Minute Pizza Recipe: Speedy Crispy Crust With Melted Cheese Magic - November 17, 2026