
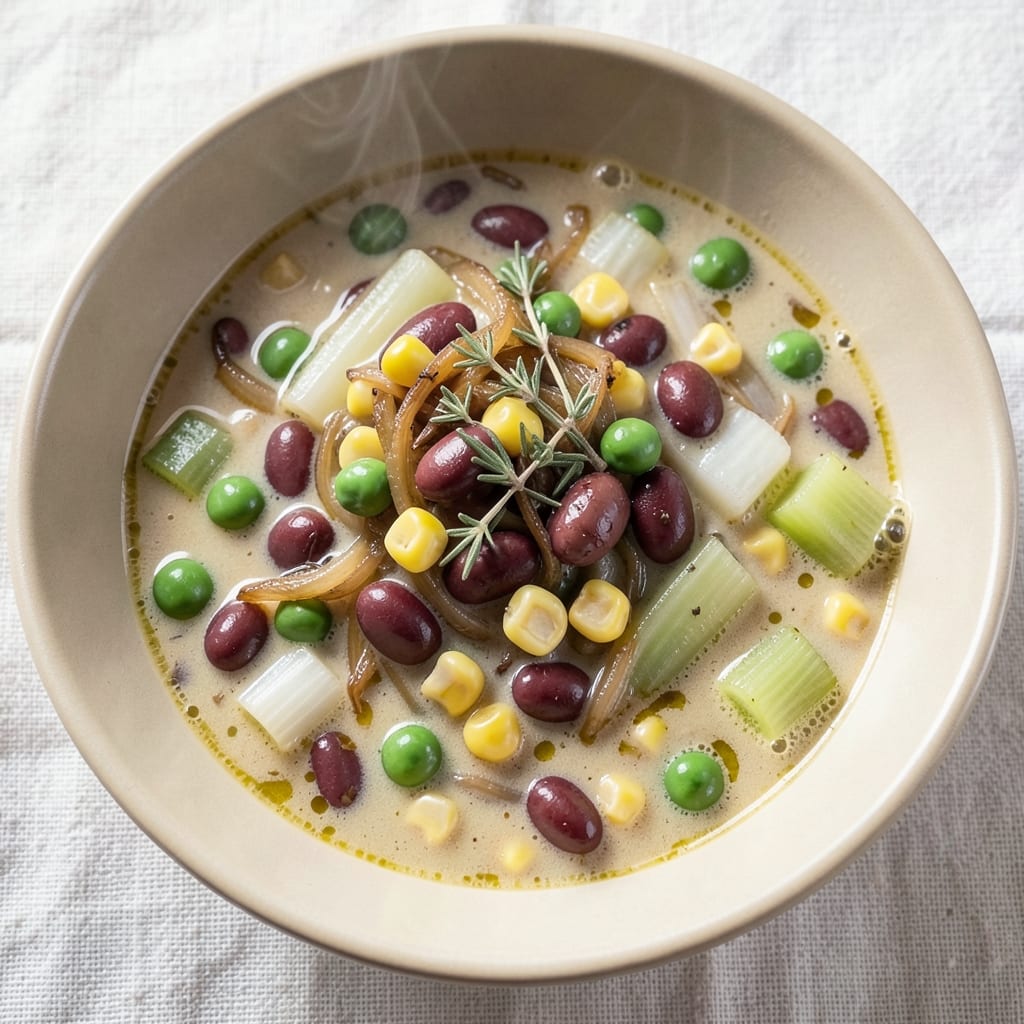
This 5-can vegetable soup recipe transforms pantry staples into a deeply satisfying meal that simmers together in just 30 minutes.
The beauty of this approach lies in its simplicity—no fancy ingredients, no complicated techniques, just five cans of vegetables, aromatic herbs, and a few pantry essentials that come together to create a rich, flavorful broth.
It’s the kind of soup that warms you from the inside out, perfect for chilly evenings or when you need a comforting meal without the fuss.
The foundation of this soup starts with sautéing onions, garlic, and celery to build a fragrant base, then adding your choice of canned vegetables—think corn, carrots, green beans, or diced tomatoes—along with vegetable or chicken broth.
Seasoning with salt, pepper, and a pinch of dried thyme ensures every spoonful is packed with flavor. The result is a hearty, well-balanced soup that’s as nourishing as it is delicious.
What makes this recipe truly special is its versatility. You can customize it based on what you have on hand, whether you’re aiming for a lighter vegetable broth or a heartier chicken-based version.
The soup thickens naturally as it simmers, creating a velvety texture that coats every bite. Serve it with crusty bread or a sprinkle of fresh parsley for a touch of brightness.
This foolproof method ensures you’ll always have a warm, satisfying bowl of soup ready in no time—ideal for busy weeknights or meal prep. The best part?
Every ingredient plays a role in creating a dish that’s both comforting and full of flavor, proving that simple pantry staples can deliver restaurant-quality results.
Ingredients for 5 can vegetable soup
Five cans, one pot, endless comfort. Pantry staples only—no fancy shopping needed.
| Ingredient | Amount | Notes |
|---|---|---|
| Yellow Onion 🧅 | 1 whole | Diced small for even cooking |
| Garlic Cloves 🧄 | 3 cloves | Minced for aromatic base |
| Celery Stalks 🥬 | 2 whole | Diced small, about 1 cup |
| Vegetable Broth 💧 | 4 cups | Low-sodium preferred |
| Canned Vegetables (Mix) 🥕🌽🍅 | 5 cans | Corn, carrots, green beans, tomatoes (15 oz each) |
| Dried Thyme 🌿 | 1 tsp | Or 1 tbsp fresh thyme |
| Salt 🧂 | 1 ½ tsp | Adjust to taste |
| Black Pepper 🌶️ | ½ tsp | Freshly ground preferred |
| Olive Oil 🫒 | 2 tbsp | For sautéing vegetables |
| Fresh Parsley 🌿 | ¼ cup | Chopped for garnish (optional) |
| Crusty Bread 🍞 | 4 slices | For serving, optional |
The canned veggies are the star here—pick whatever you like. Libby’s or Del Monte are reliable for consistency, but any brand works. Fresh parsley at Trader Joe’s or Whole Foods has the best flavor, but dried works in a pinch. The vegetable broth should be low-sodium—Pacific Foods or Imagine are great options. For the celery, look for stalks that are crisp and bright green; yellowing means they’ve been sitting too long. The onion and garlic? Sweet onions caramelize better, but yellow will work too—just don’t skip them. They’re what builds that deep, savory base.
No vegetable broth? Chicken broth works too—just swap it out. Fresh thyme is ideal, but dried at one-third the amount gets you close. If you’re missing a can of veggies, frozen peas or lima beans work perfectly. The olive oil matters here—use something you’d drizzle on bread. Extra-virgin adds a nice fruity note. For the bread, any crusty loaf does the trick—sourdough or baguette slices are my go-to. If you’re short on time, skip the fresh parsley—it’s just for garnish, not flavor.
This soup tastes even better the next day—5-6 days in the fridge, no problem. For longer storage, freeze portions for up to 3 months. I always double the batch and freeze half. The crusty bread? Toast it fresh before serving—2 minutes in a 375°F oven makes it crispy again. Leftovers reheat beautifully—just stir and warm through. The veggies hold up well, so you won’t get a watery soup.
Why You’ll Love This Recipe
- No Chopping Struggle: I swear by this recipe because the onion, celery, and garlic? Just rough-chopped. No crying over onions here—it’s the kind of soup that lets you actually enjoy the process instead of dreading it.
- Garlic Bomb Flavor: That one extra minute of sautéing the garlic until it’s almost golden? Total game. The canned veggies soak up the aroma like sponges, turning this into a savory, umami-packed bowl that tastes like you slaved over it.
- Leftovers That Don’t Suck: Honestly, I make this on Sundays because it’s the only soup that stays just as good on day three. The broth thickens slightly, the flavors meld, and it’s still hearty enough to make me forget I’m eating something from a can.
- Pantry Magic for Any Day: Between us, this is my go-to when I’m broke or lazy—or both. Five cans mean five different veggies, so I can swap in whatever’s on sale, and the broth stretches to feed me for days. It’s the kind of meal that doesn’t judge your grocery budget.
Step-by-step instructions for 5-Can vegetable soup
Here’s how to transform pantry staples into a comforting bowl of soup in just 30 minutes.
Sauté the Aromatic Base
Heat the 2 tablespoons olive oil in a large pot over medium-high heat until shimmering. Add the 1 whole yellow onion (diced small), 2 whole celery stalks (diced small), and 3 cloves garlic cloves (minced). Cook for 5-6 minutes until the vegetables soften and the garlic becomes fragrant.
I stir frequently during this time to ensure everything cooks evenly and doesn’t stick. You’ll know it’s ready when the onions turn translucent and the celery begins to soften at the edges. This aromatic base forms the flavor foundation for your soup.
Add Seasonings and Broth
Reduce heat to medium-low and stir in the 1 teaspoon dried thyme, 1.5 teaspoons salt, and 0.5 teaspoon black pepper. Cook for 1 minute to toast the spices slightly and release their aromas.
Pour in the 4 cups vegetable broth and bring to a gentle boil. Here’s where it gets good—this is when all those flavors meld together. Let it simmer for 5 minutes to let the seasonings fully infuse into the broth before adding the canned vegetables.
Incorporate the Canned Vegetables
Add the 5 cans canned vegetables (mix) (corn, carrots, green beans, tomatoes) and their juices to the pot. Stir gently to combine everything. The soup should bubble gently now—this is when you want to maintain a steady simmer rather than a rolling boil to prevent the vegetables from breaking apart.
Simmer for 15-20 minutes until all the vegetables are heated through and the flavors have melded together. You’ll know it’s ready when the soup has a rich, vegetable-forward aroma and the vegetables are tender but still hold their shape. Taste and adjust seasoning if needed—this is your chance to make it perfectly to your liking.
Finish and Serve
Once the soup reaches your desired consistency and flavor, remove it from heat. Stir in the 0.25 cup fresh parsley (if using) for a pop of freshness and color. The parsley adds a bright contrast to the hearty vegetables and broth.
Ladle the soup into bowls and serve immediately with the 4 slices crusty bread on the side. The crusty bread is perfect for soaking up all that delicious broth. This soup tastes even better the next day, so don’t hesitate to make extra for leftovers!
Pro Tips For Making 5 Can Vegetable Soup
- SWEAT THE SOFT STUFF: Onion, celery, and garlic don’t just need to be chopped—they need to melt. After dicing them, cook them in a dry pot over medium heat for 5 minutes before adding oil. This draws out moisture and makes them caramelize faster when the broth comes in, giving your soup depth without burning.
- DRAIN, RINSE, REPEAT: Canned veggies taste better when you rinse them first—especially corn and green beans. The broth in the cans is salty and starchy, and skipping this step makes your soup taste flat. Pop them in a colander, give them a quick cold-water rinse, and drain well. Your soup will thank you.
- DON’T BOIL IT TO DEATH: Vegetable soup simmers, it doesn’t roar. Once everything’s in the pot, keep the heat at a gentle simmer (small bubbles, occasional swirls) for 15-20 minutes. Boiling too hard turns tough veggies mushy and makes the broth cloudy. Patience here keeps the texture balanced.
- ACID CUTS THE MUDDINESS: Your soup might taste a little one-note with just broth and canned veggies. Add a splash of vinegar (1 tablespoon apple cider or white) or a squeeze of lemon at the end. It brightens flavors, cuts through any metallic taste from the cans, and makes the whole thing feel fresher. Trust me, it works—even if it sounds weird.
Essential equipment for perfect results
Large Pot Essentials
Start with a 6-8 quart pot—this gives you room to work without overcrowding. I swear by my All-Clad Stainless Steel Dutch Oven (6-quart size) because it distributes heat evenly and handles simmering like a dream.
If you’re on a budget, a Calphalon Nonstick Stock Pot works just as well for this recipe. The key is finding a pot with a heavy bottom to prevent hot spots that can burn your onions or broth. 🔥
Wooden Spoon Must-Have
Never use metal utensils when sautéing your onions and garlic—they can scratch nonstick pots or react with stainless steel. My OXO Good Grips Wooden Spoon is my go-to for stirring soups because it’s heat-resistant and won’t melt or warp.
The slightly curved design helps scrape up any stuck bits from the bottom of the pot. If you prefer ergonomic handles, Ladles Unlimited makes a great wooden spoon with a comfortable grip.
Fine-Mesh Strainer
For straining broth or rinsing canned vegetables, a fine-mesh strainer is a game-changer. I use a OXO Good Grips Collapsible Strainer because it’s easy to store and handles liquids effortlessly. If you’re blending your soup, a strainer helps remove any unwanted bits before serving.
For canned vegetables, give them a quick rinse under cold water to remove excess sodium—this makes a noticeable difference in flavor.
Immersion Blender
If you prefer a creamy texture, an immersion blender is the easiest tool for the job. My Magic Bullet Immersion Blender blends right in the pot, so no transferring to a separate blender is needed.
For a smoother finish, blend about half the soup first, then stir it back in. This keeps some texture while still achieving that velvety consistency. If you don’t have one, a standard blender works—just let the soup cool slightly before blending.
Timer and Thermometer
Set a timer for 15-20 minutes once the vegetables are added to avoid overcooking. A kitchen timer (like the OXO Good Grips Digital Timer) keeps you on track.
For broth-based soups, a meat thermometer isn’t necessary, but if you’re using chicken broth, it’s handy to check that it reaches 165°F for safety. I keep a Thermoworks ThermoPop on hand for all my soups—it’s affordable and reliable.
Optional: Ladle and Garnish Tools
A stainless steel ladle (like the Cuisinart Multi-Clad) makes serving soup effortless, and a small pair of kitchen shears helps chop fresh parsley quickly. For extra flair, invest in a microplane to zest lemon or garlic for garnishes.
The key is to keep your tools clean and organized—this soup deserves a polished presentation. ✨
Nutrition facts
Frequently asked questions
Can I use frozen vegetables instead of canned?
Swap frozen veggies for the canned ones—just thaw them first by microwaving or soaking in warm water. Use about 2 cups frozen veggies per can (e.g., 10 cups total for 5 cans). Frozen veggies work best in this soup because they retain their texture better than canned when simmered. The flavor will be slightly fresher too!
How do I make this soup thicker?
For a thicker consistency, simmer the soup uncovered for 10-15 extra minutes to let the liquid reduce naturally. If you need it thicker faster, stir in 1-2 tablespoons cornstarch mixed with 2 tablespoons cold water and simmer for 2-3 minutes until it thickens. Avoid over-thickening—this soup should still be ladle-friendly!
Is this soup gluten-free?
Yes, but check your ingredients! The recipe itself is naturally gluten-free, but always verify your vegetable broth (some contain wheat) and canned vegetables (rare, but some brands add gluten). Use certified gluten-free broth and check labels. The crusty bread on the side should also be gluten-free if needed—opt for a baguette-style loaf made with rice flour.
Can I make this soup in an Instant Pot?
Absolutely—it’s perfect for pressure cooking! Sauté the onions, garlic, and celery in 1 cup water for 3 minutes on sauté mode. Add broth, veggies, and seasonings, then pressure cook for 5 minutes on high pressure. Quick-release the pressure and stir in parsley. The Instant Pot cuts cooking time to just 15 minutes total!
What if my soup tastes too salty?
Don’t panic! Add 1-2 cups extra broth (or water) and simmer for 5 minutes to dilute the salt. If that’s not enough, stir in 1/2 cup unsalted tomato paste or 1/4 cup milk (dairy or plant-based) to balance the flavor. Taste as you go—this works better than adding more veggies, which won’t change the saltiness.

- 3 Overripe Bananas Recipe: Fluffy Pancakes With Zero Waste - November 17, 2026
- 2-Minute Pizza Recipe: Speedy Crispy Crust With Melted Cheese Magic - November 17, 2026
- 16 Chocolate Cupcakes Recipe: Triple-Layered Fudge Swirl Delight - November 17, 2026