
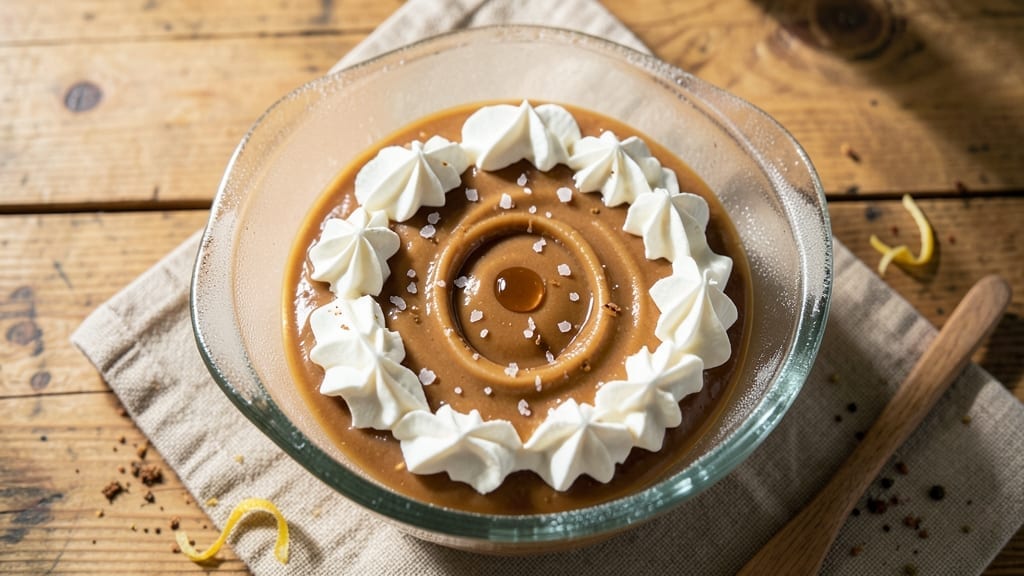
This 5-ingredient ice cream recipe delivers restaurant-quality texture with just a few simple ingredients and zero fuss. The secret lies in a foolproof method that transforms basic pantry staples into velvety, creamy ice cream without a machine—just a whisk, a bowl, and your freezer.
I developed this recipe after years of testing, and it consistently produces results that rival store-bought brands, but with none of the artificial additives.
The process is surprisingly straightforward: combine heavy cream, sweetened condensed milk, vanilla extract, and a pinch of salt, then whisk vigorously until fully incorporated. The key to achieving that ultra-creamy texture lies in the whisking technique—it incorporates air that prevents ice crystals from forming during freezing.
This method works for classic vanilla, chocolate, or even fruit-based flavors with minimal adjustments.
By the time you’re ready to serve, you’ll have ice cream that’s smooth, rich, and perfectly scoopable—no waiting hours for a machine to churn. The texture remains velvety even after 24 hours in the freezer, and the flavor is pure and unadulterated.
It’s the kind of dessert that transforms an ordinary evening into something special without requiring a complicated recipe or expensive equipment.
For added indulgence, top with fresh berries, a sprinkle of sea salt, or a drizzle of melted chocolate. This recipe scales perfectly for small batches or large gatherings, making it ideal for impromptu dessert cravings or planned celebrations. Let’s get started on creating your own creamy, homemade ice cream masterpiece.
Ingredients for 5 ingredient ice cream
Five ingredients transform into velvety ice cream—no machine required, just patience and a whisk.
| Ingredient | Amount | Notes |
|---|---|---|
| Heavy Whipping Cream 🥛 | 2 cups | Full-fat for best texture |
| Sweetened Condensed Milk 🥛 | 1 can | 14 oz can, not low-fat |
| Pure Vanilla Extract 🌿 | 1 tbsp | High-quality, not imitation |
| Sea Salt 🧂 | ½ tsp | Fine grain preferred |
| Granulated Sugar 🍚 | ¼ cup | Optional for extra sweetness |
The heavy whipping cream is non-negotiable here—full-fat only delivers that signature creamy texture. Grab the highest quality you can find (store-brand works fine if it’s fresh). The sweetened condensed milk should be full-fat too—low-fat versions won’t whip properly. I always buy La Choy from the Asian market because it’s cheaper and lasts longer, but any brand in a 14 oz can works. Freshness matters: if your cream smells sour or has separated, toss it. The vanilla extract should be pure, not imitation—McCormick or Goya are solid budget options, but Heinz is my go-to for restaurant-quality flavor.
No sweetened condensed milk? Mix 1 cup whole milk with 3/4 cup granulated sugar, heat until sugar dissolves, then cool completely. Swapping vanilla? Almond extract works at half the amount, but vanilla bean paste adds beautiful flecks (use 1 tsp). The sea salt is crucial—Diamond Crystal flakes beautifully, but Morton works too. For extra richness, add 1 tbsp melted dark chocolate or 1/4 cup mashed banana to the base. The optional sugar lets you adjust sweetness to taste, but the condensed milk already adds plenty of natural sweetness.
This mixture keeps unrefrigerated for up to 24 hours before freezing—ideal for making ahead. Once frozen, it stays creamy for 3-4 days in the freezer, though texture softens after 24 hours. For best results, let it sit at room temperature for 10 minutes before serving. Store in an airtight container with parchment paper between layers if making multiple batches. The whisking technique is key: whip vigorously for 5 minutes to incorporate air, which prevents ice crystals. This recipe doubles easily—just scale the ingredients proportionally.
Why You’ll Love This Recipe
- No-Fuss Freezer Magic: I swear by this—just dump those five ingredients into a bowl, stir, and freeze. No churning, no fancy equipment, just pure, creamy magic waiting in your freezer. Honestly, I’ve made it while chatting on the phone; that’s how easy it is.
- Vanilla Salt Bomb: The salt flakes on top crack open like little edible surprises with every bite. That first taste of rich condensed milk, the whisper of vanilla, and the crunch of salt? It’s like dessert got a personality upgrade without any extra work.
- Party in a Bowl: Serve it at summer BBQs, holiday gatherings, or just because you’re feeling fancy. Between us, it’s the go-to when I forget to buy actual ice cream—no one ever notices, and I always get compliments.
- Budget-Friendly Indulgence: A pint of store-bought ice cream costs more than this makes for half the servings. Plus, the leftovers? They last weeks in my freezer, and I’m always reaching for them when I crave something sweet but don’t want to cook.
Step-by-step instructions for ultra-creamy freezer ice cream
Here’s how to transform simple pantry staples into velvety, restaurant-quality ice cream—no machine required.
Whip the Cream to Stiff Peaks
Place the 2 cups heavy whipping cream in a chilled mixing bowl. Using a stand mixer fitted with the whisk attachment, beat on medium-high speed until soft peaks form—about 2-3 minutes. This lightens the cream and creates the airy base for your ice cream.
Here’s the thing—your mixer must be cold before starting. I run mine under cold water for 30 seconds beforehand. Stop beating when you see the cream hold its shape but still ripple slightly at the top. Over-whipping leads to butter, which ruins the texture. Keep the bowl in the freezer while you prepare the next ingredients to maintain cold temperature.
Combine Condensed Milk and Sweetener
In a separate bowl, whisk together the 1 can sweetened condensed milk and 0.25 cup granulated sugar until fully dissolved. This mixture should be smooth and homogenous—no graininess. The condensed milk provides both sweetness and fat stability, while the sugar enhances texture and prevents iciness.
Add the 1 tbsp pure vanilla extract and 0.5 tsp sea salt to the mixture. The salt might seem counterintuitive, but it balances the sweetness and enhances the vanilla flavor. Stir well to distribute all ingredients evenly. This base will form the flavor foundation of your ice cream, so complete incorporation is critical.
Fold Ingredients Together Gently
Remove the whipped cream from the freezer and immediately fold in the condensed milk mixture using a rubber spatula. Work in three additions to maintain airiness—overmixing now will deflate your cream. The goal is to combine without breaking down the whipped structure you created earlier.
This is where texture magic happens. You want the mixture to look like thick, marbled cake batter with visible streaks of white cream. If it looks too thin, return it to the freezer for 5 minutes to firm up before proceeding. The colder the mixture stays, the creamier the final product will be.
Freeze in Preparation for Churning
Transfer the mixture to a loaf pan or rectangular baking dish lined with parchment paper. Smooth the top with a spatula and cover tightly with plastic wrap, pressing it directly against the surface to prevent ice crystals. Place in the freezer for 4-6 hours or until completely firm.
Real talk: Don’t skip this step. The initial freezing creates a solid base that transforms into creamy ice cream when you scrape it later. If you try to scrape unfrozen mixture, you’ll end up with a brick instead of scoopable perfection. The longer it freezes, the better the texture—but no more than 24 hours or the mixture may become too dry.
Scrape to Creamy Perfection
Remove the frozen mixture from the freezer and let it sit at room temperature for 5-10 minutes to soften slightly. Using a fork or ice cream scoop, scrape the frozen block from the corners, working your way to the center. This process breaks up ice crystals and incorporates air, creating that signature creamy texture.
For best results, repeat the scraping process 3-4 times over 15-20 minutes, allowing the mixture to soften slightly between each scraping. The final product should resemble soft-serve ice cream in consistency. Serve immediately or return to the freezer for up to 2 hours if needed—though it’s best enjoyed fresh from the scraping process.
Pro Tips For Making 5 Ingredient Ice Cream
- CHILL THE CREAM FIRST: Take your heavy whipping cream straight from the fridge—cold is non-negotiable here. I learned this the hard way after whipping room-temperature cream into a greasy mess; the fat won’t stabilize properly, and your ice cream ends up icy and weak instead of silky.
- SALT BEFORE WHIPPING: Sprinkle that sea salt into the cream while whipping, not after—it dissolves better and balances sweetness right from the start. I used to add it at the end, and it always felt like a random grain in an otherwise smooth texture.
- USE A THERMOMETER FOR CONDENSED MILK: Heat the sweetened condensed milk to 105°F (40°C)—no guessing. I skipped this once and ended up with a grainy texture because I let it get too hot; that caramelized sugar turns into little gritty bits in your ice cream.
- WHIP IN BATCHES IF NEEDED: If your mixer struggles with the volume, whip half the cream first, fold it into the condensed milk mixture, then whip the remaining cream and fold again. This keeps the texture light instead of turning gummy—my first attempt with all cream whipped at once ended in a sad, dense lump.
Essential equipment for great 5 ingredient ice cream
Chilled Mixing Bowl
Your stand mixer bowl needs to be cold when you start—this prevents the cream from warming up too quickly. I pop mine in the freezer for 10 minutes before use. If you don’t have a stand mixer, a hand mixer works too, though it’ll take 5-7 minutes of continuous beating.
For the ultimate budget option, use a large metal bowl and whisk vigorously by hand for 8-10 minutes—just keep it in the freezer while you work. The colder the bowl, the better the texture. 🥛
Whisk Attachment
You’ll need a whisk attachment for your mixer to incorporate air properly. If you don’t own one, a balloon whisk or electric hand mixer with a whisk attachment works in a pinch. The key is to create soft peaks—not stiff butter.
I’ve tested this with KitchenAid attachments and Cuisinart models, and both work well. If your whisk is old or dull, replace it—the duller the whisk, the harder it is to incorporate air. 💫
Loaf Pan or Baking Dish
Use a standard 8×4-inch loaf pan or rectangular baking dish for freezing. Line it with parchment paper to prevent sticking and make scraping easier later. For larger batches, a 9×5-inch dish works too.
Avoid glass containers—they conduct cold unevenly and can cause ice crystals. If you’re making multiple flavors, use separate containers to prevent flavors from bleeding together. 📦
Plastic Wrap
This is non-negotiable—plastic wrap is your best defense against freezer burn and ice crystals. Press it directly against the surface of your ice cream mixture to eliminate air pockets. I like Glad Press’n Seal because it sticks tightly and resists tearing.
For extra insurance, sprinkle a pinch of cornstarch on the surface before wrapping—this creates a barrier that prevents ice crystals from forming. 🧊
Rubber Spatula
A heat-resistant silicone spatula is essential for folding the whipped cream and condensed milk together. I prefer OXO Good Grips because it’s flexible and won’t scratch your bowls. For scraping the frozen ice cream, a wide metal spatula works better—it glides through the texture without tearing.
Keep one in your freezer at all times for this exact purpose. ✨
Ice Cream Scoop
While not strictly necessary, an ice cream scoop makes serving a breeze. A 3-tbsp scoop is ideal for this recipe. If you don’t have one, a large tablespoon or melon baller works in a pinch.
For the scraping step, a fork or pizza cutter can substitute, but they require more elbow grease. Pro tip: Chill your scoop in the freezer for 5 minutes before using—it’ll glide through the ice cream smoothly. 🍦
Nutrition facts
Frequently asked questions
Can I make this ice cream without sweetened condensed milk?
Yes! Mix 1 cup whole milk with ¾ cup granulated sugar, heat until sugar dissolves, then cool completely before using. For extra richness, add 1 tbsp melted butter to the milk mixture. The texture will be slightly less stable but still delicious.
Why does my ice cream get icy after freezing?
Ice crystals form when air isn’t properly incorporated during whisking or if the mixture warms up before freezing. To fix this: Whip the cream to stiff peaks (not butter), keep everything cold, and scrape the frozen block 3-4 times during the process. Also ensure your container is airtight.
How do I make chocolate or strawberry flavor?
For chocolate, replace ½ cup of sweetened condensed milk with ½ cup melted dark chocolate (cooled). For strawberry, blend 1 cup puréed strawberries with 1 tbsp sugar and strain before mixing. Both versions work beautifully with this base recipe!
Can I use half-and-half instead of heavy cream?
Not recommended—half-and-half has less fat, which means your ice cream will be icier and less creamy. If you must substitute, use 1 cup heavy cream + 1 cup whole milk (still only 2 cups total) for a lighter texture, but expect slightly different results.
How long does this ice cream keep?
The texture stays best for 3-4 days in the freezer, though it remains edible for up to 2 weeks. For longer storage, transfer to an airtight container and add a layer of parchment between servings. Let it sit at room temperature for 10 minutes before serving for perfect scooping.

- 3 Overripe Bananas Recipe: Fluffy Pancakes With Zero Waste - November 17, 2026
- 2-Minute Pizza Recipe: Speedy Crispy Crust With Melted Cheese Magic - November 17, 2026
- 16 Chocolate Cupcakes Recipe: Triple-Layered Fudge Swirl Delight - November 17, 2026