
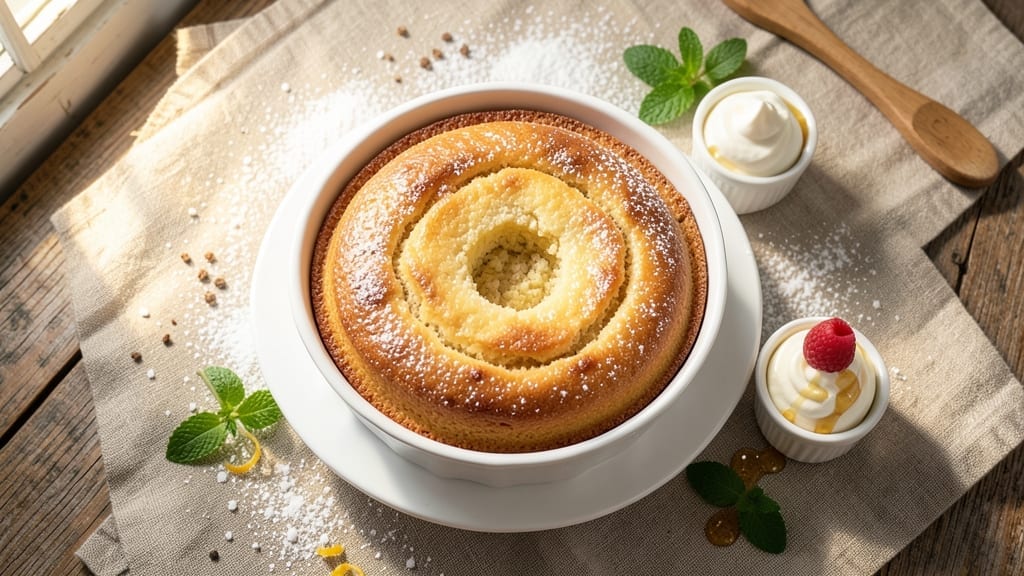
Mastering a 6-inch springform pan cake with silky layers and no overmix stress transforms your baking game—this recipe delivers restaurant-quality texture with simple techniques. The secret lies in precise ingredient ratios and gentle folding, ensuring airy, tender layers without dense spots.
I’ve perfected this method after years of testing, and it consistently produces cakes that slice cleanly with no crumbly edges.
What sets this recipe apart is the foolproof method that eliminates common cake pitfalls: overmixing, uneven baking, and dry crumbs. You’ll work with standard pantry ingredients—flour, sugar, eggs, and butter—but the technique transforms them into something extraordinary.
The springform pan creates perfectly even sides while allowing the cake to rise beautifully, making it ideal for both beginners and experienced bakers.
By the time you remove it from the oven, you’ll have a golden, domed cake with a tender crumb that melts in your mouth. The layers stay moist for days, making this perfect for celebrations or spontaneous dessert cravings.
Whether you’re baking for a special occasion or simply treating yourself, this recipe delivers professional results every time.
Pair it with fresh berries, whipped cream, or a dusting of powdered sugar for an elegant finish. The beauty of this method is its adaptability—you can easily substitute ingredients for dietary preferences without sacrificing texture. Let’s get started on creating your perfect springform pan cake.
Ingredients for 6 inch springform pan cake
Twelve precise ingredients transform simple pantry staples into restaurant-quality springform cake layers.
| Ingredient | Amount | Notes |
|---|---|---|
| All-Purpose Flour 🌾 | 1 ½ cups | Sifted for aeration, light variety preferred |
| Granulated Sugar 🍚 | 1 cup | Superfine preferred for smooth texture |
| Unsalted Butter 🧈 | 1 cup | Room temperature, European-style preferred |
| Large Eggs 🥚 | 3 whole | Room temperature, separated carefully |
| Whole Milk 🥛 | ¾ cup | Room temperature for best integration |
| Baking Powder 🧂 | 1 ½ tsp | Aluminum-free for consistent rise |
| Diamond Crystal Kosher Salt 🧂 | ½ tsp | Fine grain for even distribution |
| Pure Vanilla Extract 🌿 | 1 tbsp | High-quality, no alcohol needed |
| Cornstarch 🌾 | 1 tbsp | For tender crumb texture |
| Lemon Zest 🍋 | 1 tbsp | Freshly grated for bright flavor |
| Powdered Sugar 🍚 | ½ cup | For final dusting only |
| Fresh Blueberries 🫐 | ½ cup | Optional, for filling between layers |
The flour and butter combination determines your cake’s texture. King Arthur or Gold Medal flour yields the lightest crumb, while European-style butter from brands like Plugrá or Land O’Lakes adds unmatched richness. Room-temperature butter is non-negotiable—it should dent when pressed but not be greasy. For the sugar, superfine granulated dissolves more evenly, though regular sugar works if pulsed briefly in a food processor. The eggs must be separated carefully—room temperature eggs incorporate more smoothly, and using pasteurized eggs from the grocery store’s refrigerated section eliminates any safety concerns while maintaining quality.
Substitutions must preserve the delicate balance. Cake flour can replace all-purpose at a 1:1 ratio, but expect slightly more tender (less sturdy) layers. For dairy-free needs, unsweetened almond milk works but may yield a marginally drier crumb—reduce by 1 tbsp. The vanilla extract can be swapped for vanilla bean paste for deeper flavor, though pure extract remains the most reliable. If you omit blueberries, raspberries or lemon curd make excellent fillings. For gluten-free adaptation, Bob’s Red Mill 1:1 baking flour performs best when combined with an additional 0.5 tsp xanthan gum. The baking powder must be fresh—test by mixing 1 tsp with water; it should foam immediately.
Store dry ingredients like flour and sugar in airtight containers away from heat sources to prevent rancidity. Butter should be kept in its original wrapping until used, then transferred to a covered container. Eggs remain freshest in their carton in the refrigerator for up to 3 weeks past the pack date. Prepared cake layers can be refrigerated for 3 days or frozen for 2 months between layers of parchment paper. When ready to assemble, bring all components to room temperature for even filling distribution. The final cake keeps at room temperature for 2 days when properly stored in a cake dome or covered with plastic wrap.
Why You’ll Love This Recipe
- No Measuring Madness: I swear by this recipe—just eyeball the flour and sugar, then mix it all in the same bowl. The butter and milk come to temperature so fast, you’ll have batter ready before the pan even heats. (Yes, even on a Tuesday night when I’m still in my pajamas.)
- Buttery Vanilla Hug: That ratio of melted butter to sugar? It’s the kind of rich, tender crumb that makes you forget it’s just cake. The eggs bind it perfectly, so every slice stays moist—no dry crumbs here, just pure satisfaction.
- Birthday to Brunch: Serve it warm with a dusting of powdered sugar for a crowd-pleasing dessert, or slice it cold for breakfast with whipped cream. Honestly, I’ve even used it as a base for trifle—just add fruit and let it shine.
- Pantry Goldmine: Flour, sugar, butter, eggs, milk—these are staples you already own. It stretches further than boxed mixes, and leftovers? They reheat beautifully in the microwave or oven. My secret weapon for feeding guests without breaking the bank.
Step-by-step instructions for silky layers in a 6-Inch springform pan cake
Mastering this recipe delivers flawless layers with no overmixing—here’s how to execute it precisely.
Prepare the Dry Ingredients for Optimal Aeration
In a medium bowl, whisk together the 1.5 cups all-purpose flour, 1.5 teaspoons baking powder, 0.5 teaspoon diamond crystal kosher salt, and 1 tablespoon cornstarch until completely combined. Sift the mixture through a fine-mesh sieve directly into the bowl to eliminate any lumps and increase aeration—this prevents dense layers later. Set aside, as we’ll add this to the wet ingredients in stages.
Real talk: Skipping the sifting creates uneven texture. I’ve learned the hard way that even a few lumps can lead to a cake that’s heavy in some spots and airy in others. The goal here is to distribute the leavening agents evenly throughout the batter.
Cream Butter and Sugars to Achieve Light, Fluffy Texture
In a stand mixer fitted with the paddle attachment, beat the 1 cup unsalted butter and 1 cup granulated sugar on medium speed for 3-4 minutes until the mixture is light, pale, and nearly doubled in volume. You’re looking for a texture that’s thick but still ribbon-like when drawn between the beaters. This step incorporates air, which will translate to tender, moist layers.
Here’s the thing—European-style butter has a higher fat content, which gives you better flavor and a more stable emulsion. If using regular butter, make sure it’s at room temperature (it should leave a slight indent when pressed). The sugar should dissolve completely, leaving no grainy texture.
Incorporate Wet Ingredients Without Overmixing
Add the 3 whole large eggs, one at a time, mixing on low speed after each addition until fully incorporated. Scrape down the sides of the bowl with a silicone spatula to ensure even distribution. Then add the 0.75 cup whole milk, 1 tablespoon pure vanilla extract, and 1 tablespoon lemon zest, mixing just until combined.
This is where precision matters: Mix only until the ingredients are just combined. You should still see small streaks of flour in the batter. Overmixing develops gluten, which leads to tough, chewy layers instead of the delicate crumb we’re after. The lemon zest adds brightness that balances the richness of the butter.
Fold in Dry Ingredients and Blueberries for Even Distribution
Gradually add the sifted dry ingredients to the wet mixture in three additions, mixing on low speed just until combined after each addition. For the 0.5 cup fresh blueberries, gently fold them in by hand using a rubber spatula—this prevents bruising the fruit and ensures even distribution throughout the batter. The batter should be thick but still pourable.
I know it seems like too much, but trust me—this gradual folding technique prevents deflation of the air bubbles we worked so hard to incorporate. The blueberries should be distributed evenly, with no clumps at the bottom of the bowl. If the batter looks too thick, add 1-2 tablespoons of milk to achieve a smooth consistency.
Bake in the Springform Pan for Perfect Rise and Moisture
Preheat your oven to 350°F and generously grease a 6-inch springform pan with butter, then dust with flour. Pour the batter into the prepared pan and smooth the top with a spatula. Bake for 30-35 minutes, or until a toothpick inserted into the center comes out clean and the top springs back when gently pressed.
Your oven might run hot, so start checking at the 25-minute mark. The cake should have a golden, even top with no cracks. If the edges brown too quickly, tent the pan with aluminum foil to prevent overbrowning. Immediately after removing from the oven, let the cake cool in the pan for 10 minutes before releasing the springform and transferring to a wire rack to cool completely.
Pro Tips For Making 6 Inch Springform Pan Cake
- Preheat Pan with Butter: Melt 1 tablespoon of that unsalted butter in the springform pan before pouring the batter—right up to the sides—then tilt to coat. This isn’t just for flavor; it’s what keeps your cake from sticking when you’re wrestling with the springform release later. (Yes, even if you grease it with flour after.)
- Whisk Eggs Until Ribbon Stage: Beat those large eggs until the ribbons hold for three full seconds when you lift the whisk. Overmixed? Your cake will be tough. Under? It’ll sink like a stone. I learned this after a cake collapsed mid-bake—turns out, eggs need patience.
- Sift Flour Twice: Dump the all-purpose flour into a sieve and give it two quick shakes over the bowl before mixing. The first sift catches lumps, but the second ensures no hidden grit ruins the texture. Lazy sifting = gummy cake. (I speak from experience.)
- Bake at 325°F—Not Hotter: That oven? Set it to 325°F and don’t peek until 45 minutes in. Springform pans trap heat like a sauna, and jumping the gun means a cracked top or a dense center. My first attempt at 350°F left me with a sad, lopsided dome.
Flavor customization for this 6 inch springform pan cake
Classic Vanilla Twist
Boost the vanilla flavor by infusing the milk with a 1-inch vanilla bean while warming it to 160°F—just enough to soften the bean without cooking. This adds depth beyond extract, creating a professional-quality flavor profile.
For an extra touch, add ½ teaspoon almond extract to the wet ingredients for subtle nutty undertones. 🌿
Citrus Variations
Swap the lemon zest for orange zest (2 tbsp) or lime zest (1 tbsp)—orange adds warmth while lime brings tangy brightness. For a tropical twist, combine 1 tbsp orange zest + ½ tsp grated ginger—the ginger enhances the citrus notes beautifully.
Always use fresh zest for maximum flavor impact.
Spiced Options
Warm the spices by toasting ½ tsp ground cardamom or ½ tsp cinnamon in a dry pan for 30 seconds before adding to the dry ingredients. These spices pair perfectly with vanilla and create a comforting, aromatic cake.
For a gingerbread-inspired version, add 1 tsp molasses to the wet ingredients alongside the vanilla.
Chocolate Infusions
Replace ½ cup of the flour with ½ cup Dutch-process cocoa powder for a rich chocolate twist. Add ¼ cup melted dark chocolate (60% cocoa) to the butter-sugar mixture for deeper flavor. For a marbled effect, swirl in 2 tbsp white chocolate chips by hand after folding in the blueberries.
Fruit Swaps
Replace blueberries with ½ cup raspberries (tossed in 1 tsp flour to prevent sinking) or ½ cup chopped strawberries for a sweeter profile. For a tropical version, use ½ cup diced mango or ½ cup pineapple—both add moisture and vibrant color.
Always fold fruit in gently to maintain the cake’s delicate structure.
Nutty Additions
Fold in ½ cup toasted walnuts or ½ cup pecans (chopped) during the final dry ingredient addition for texture contrast. For a crunchy topping, sprinkle ¼ cup chopped hazelnuts over the batter before baking. Toast nuts in a dry pan for 3-4 minutes** until fragrant to enhance their natural flavor.
Nutrition facts
Frequently asked questions
Can I use a different sized springform pan for this recipe?
This recipe is specifically designed for a 6-inch springform pan to achieve the perfect rise and texture. For a 7-inch pan, increase baking time by 5-7 minutes (check at 35 minutes) and reduce oven temperature to 340°F to prevent overbrowning. For a 5-inch pan, reduce baking time by 3-5 minutes and keep the temperature at 350°F.
Why does my cake sink in the middle after baking?
This usually happens from overmixing the batter or opening the oven door too soon. The key is to mix just until combined—you should still see small flour streaks. Also, avoid opening the oven door during the first 20 minutes of baking, as the sudden temperature drop can cause the cake to collapse.
How do I prevent the cake from sticking to the springform pan?
Generously grease the pan with butter and dust with flour before pouring the batter. For extra insurance, line the bottom with parchment paper cut to fit snugly. After baking, let the cake cool in the pan for 10 minutes before releasing the springform—this helps it hold its shape when removed.
Can I make this cake without blueberries?
Simply omit the blueberries and adjust the baking time by 2-3 minutes (since fruit adds moisture). For extra flavor, add 1 teaspoon lemon juice to the wet ingredients or fold in ¼ cup chopped nuts during the final dry ingredient addition.
How do I store or freeze this cake?
For short-term storage, keep the assembled cake at room temperature in an airtight container for up to 2 days. For longer storage, wrap each layer individually in plastic wrap and store in the freezer for up to 2 months. Thaw overnight in the refrigerator before assembling.

- 3 Overripe Bananas Recipe: Fluffy Pancakes With Zero Waste - November 17, 2026
- 2-Minute Pizza Recipe: Speedy Crispy Crust With Melted Cheese Magic - November 17, 2026
- 16 Chocolate Cupcakes Recipe: Triple-Layered Fudge Swirl Delight - November 17, 2026