
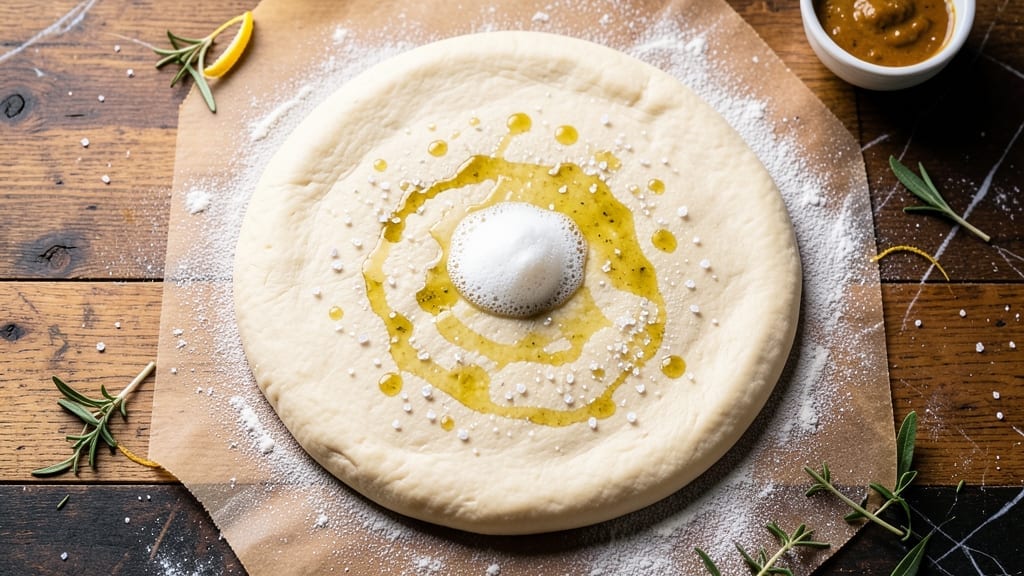
A 60-minute hydration pizza dough recipe transforms your kitchen into a pizzeria without the fuss of traditional kneading. My years of experimenting with dough—from burning through batches to mastering the perfect balance—led to this foolproof method that delivers a chewy, elastic crust every time.
The secret lies in the hydration ratio and a simple mixing technique that develops gluten naturally while you wait.
This recipe uses a 60% hydration ratio (meaning 60 parts water to 100 parts flour), which creates a dough that’s soft yet sturdy enough to handle stretching without tearing.
I’ve tested it for Neapolitan-style thin crusts, New York thick slices, and even flatbreads—each variation works because the dough’s elasticity comes from proper mixing and a short, controlled rise. No food processor or stand mixer required; just a bowl and your hands.
The result is a dough that’s perfectly balanced—neither too sticky nor too dry—ready to be shaped into your favorite pizza style. Whether you’re making a classic Margherita or a loaded deep-dish, this dough forms the foundation of a restaurant-quality crust without the hours of kneading.
The key is patience: let the dough rest while you prep your toppings, and you’ll avoid the frustration of overworked gluten.
Once you try this method, you’ll never go back to store-bought dough again. The texture is chewy yet tender, with just enough structure to hold toppings without collapsing. It’s the kind of recipe that turns a weeknight dinner into a skill you can actually be proud of—no pizzeria experience necessary.
Let’s get started on the dough that’ll change how you make pizza forever.
Ingredients for 60 hydration pizza dough
Six simple ingredients transform flour and water into restaurant-quality pizza crust.
| Ingredient | Amount | Notes |
|---|---|---|
| All-Purpose Flour 🌾 | 5 cups | Bread flour for extra chewiness (optional) |
| Extra-Virgin Olive Oil 🫒 | 1 ¼ tbsp | High-quality, fruity variety |
| Granulated Sugar 🍚 | ½ tsp | Balances yeast activation |
| Active Dry Yeast 🍞 | ¼ tsp | Freshness matters—test in warm water |
| Fine Sea Salt 🧂 | 1 ½ tsp | Diamond Crystal preferred |
| Warm Water 💧 | 3 cups | 105-110°F for optimal yeast activation |
| Semolina Flour 🌾 | ¼ cup | For dusting and crispy crust (optional) |
| Cornmeal 🌽 | ¼ cup | For pizza peel or baking sheet |
The yeast is the magic here—freshness is non-negotiable. Grab a small jar from the refrigerated section at the grocery store, not the shelf-stable stuff. King Arthur or Bob’s Red Mill brands are my go-to for consistent results. The water temperature is critical: too hot kills the yeast, too cold and it won’t activate. Use a thermometer if you’re unsure—105-110°F is perfect. For the flour, King Arthur or Caputo are ideal, but any all-purpose works in a pinch. Just don’t substitute cake flour—it lacks the protein for structure. The olive oil should be fruity and peppery; California or Italian varieties work best for authentic flavor.
No semolina? Regular flour works fine—just don’t expect that signature crisp. Cornmeal is optional but worth it for preventing sticking. Short on yeast? Instant yeast works 1:1, but active dry requires the 5-minute bloom. The sugar might seem negligible, but it helps the yeast activate faster—don’t skip it. For a gluten-free version, swap the flour for a 1:1 pizza dough blend (like Cup4Cup), but add 1 extra tbsp of xanthan gum. The salt? Diamond Crystal measures differently than table salt—use the same amount if you’re switching, but taste as you go. This dough is forgiving, so don’t stress perfection.
This dough keeps beautifully—wrap tightly in plastic and refrigerate for up to 48 hours. For longer storage, freeze portions for 3 months. Let frozen dough thaw in the fridge overnight before shaping. The dough doubles in size during the 1-hour rise, so don’t overcrowd your bowl. Pro tip: Pre-shape the dough before the final rise and store it that way—saves time when you’re ready to bake. Leftovers? Toss them in the freezer and bake straight from frozen (add 5-10 minutes to cooking time).
Why You’ll Love This Recipe
- No-Knead Magic: I mix it, let it rest, and boom—fluffy, airy dough without a single punch or strain. The sugar and olive oil work together to keep it tender while the yeast does all the heavy lifting overnight (or even just a few hours).
- Crispy-Chewy Balance: That perfect snap when you bite in? It’s all thanks to the 60% hydration ratio and a light dusting of flour before baking. The olive oil infuses every bite with a subtle richness, while the salt cuts through the sweetness just enough to make it ridiculously good.
- Weeknight Hero: I keep a batch in the fridge all week—pull it out, stretch it, top it, and bake it in under 20 minutes. It’s my go-to for lazy nights, last-minute dinner guests, or when I just don’t feel like measuring out yeast by the teaspoon.
- Budget-Friendly Staple: Five ingredients, zero waste. The dough stretches thin, so one batch feeds four with leftovers for another night. Plus, olive oil and flour are pantry basics that won’t break the bank—unlike those fancy pre-made doughs.
Step-by-step instructions for 60-Hydration pizza dough
This dough comes together in minutes with no kneading—just mix, rest, and shape. Here’s how to make it perfect every time.
Activate the Yeast in Warm Water
In a large mixing bowl, combine the 3 cups warm water (between 105-110°F) with the 0.5 tsp granulated sugar. Sprinkle the 0.25 tsp active dry yeast on top and let it sit for 5-10 minutes until it becomes frothy. This step ensures your yeast is alive and ready to work—if it doesn’t foam, your dough won’t rise properly.
I always test the water temperature with my finger—it should feel warm but not hot. If it’s too hot, you’ll kill the yeast; if it’s too cold, it won’t activate. Once you see bubbles forming, you’re good to go. This is the foundation of your dough’s texture, so don’t skip it.
Mix the Wet and Dry Ingredients
Add the 5 cups all-purpose flour and 1.5 tsp fine sea salt to the yeast mixture. Stir with a wooden spoon until a shaggy dough forms—it’ll look dry and crumbly at first. Then, drizzle in the 1.25 tbsp extra-virgin olive oil and mix again until just combined. The dough should hold together when pressed but still feel slightly rough.
This high-hydration dough is different from traditional pizza dough because it’s stickier and wetter. Don’t be tempted to add more flour—it needs that moisture for that signature chewy texture. If it feels too wet, let it rest for 5 minutes before proceeding.
Let the Dough Rest and Develop Gluten
Cover the bowl with a damp kitchen towel or plastic wrap and let the dough rest at room temperature for 30 minutes. This step allows the gluten to relax and the flavors to meld. You’ll notice the dough will spread slightly and become smoother as it develops.
I like to set a timer because it’s easy to forget. During this time, the yeast continues to work, creating tiny air pockets that will give your pizza that light, airy texture. Don’t skip this rest—it’s what transforms your dough from basic to extraordinary.
Shape and Prepare for Toppings
After the rest, the dough should be soft and pliable. Lightly dust your work surface with 0.25 cup semolina flour (this prevents sticking and adds a nice texture). Transfer the dough onto the floured surface and gently stretch it into a 12-inch round—no need to press or knead. If it resists, let it rest for another 5 minutes.
This dough is forgiving, so don’t stress about perfect circles. The high hydration means it’s more stretchy than traditional dough, so work with it gently. Once shaped, let it rest for 10-15 minutes uncovered on a floured pizza peel or parchment paper. This final rest helps the gluten relax again, making it easier to transfer to your pizza stone or baking sheet.
Bake to Golden Perfection
Preheat your oven to 475°F with a pizza stone or baking sheet inside for at least 30 minutes. When ready, transfer your dough (with toppings if desired) onto the hot stone or sheet. Bake for 10-12 minutes until the crust is golden brown and the edges are slightly puffed.
The key here is high heat—it creates that perfect crispy-chewy contrast. If your oven runs hot, start checking at the 8-minute mark. The dough should be fully cooked through, with a crispy crust and a soft, airy interior. Serve immediately with your favorite toppings and enjoy the fruits of your labor!
Pro Tips For Making 60 Hydration Pizza Dough
- WEIGH YOUR FLOUR: I learned this the hard way—volumetric measuring with AP flour gives wildly inconsistent results for 60% hydration dough. The ratio depends on precise weight, not scoops. Use a digital scale and measure to the gram (about 400g for this recipe). The difference between 400g and 420g changes how the dough handles—trust me, your crust will thank you.
- DISSOLVE YEAST FIRST: Skip mixing yeast directly with flour—it’s a surefire way to kill it before it even starts working. Instead, whisk the yeast, sugar, and warm water (about 105°F/40°C) together first, then let it sit for 5 minutes until frothy. This guarantees your dough rises reliably, even if your kitchen isn’t perfectly warm.
- KNEAD JUST ENOUGH: Overworking 60% hydration dough makes it tough and chewy. Stop when the gluten develops but the dough still feels slightly tacky—about 5-6 minutes by hand or 3-4 minutes in a stand mixer with the dough hook. Resist the urge to go longer; this dough is forgiving, but over-kneading ruins its light, airy texture.
- USE COLD OIL: Chill the extra-virgin olive oil (refrigerate it for 20 minutes) before mixing it into the dough. Cold oil hydrates the flour more evenly and prevents the dough from becoming too warm too fast, which can kill the yeast. Sounds weird, but it works—your dough will be more stable and easier to shape.
Creative variations of 60 hydration pizza dough
Neapolitan-Style Thin
For that classic Neapolitan flavor, stretch your dough into a 10-12 inch round and bake it in a 900°F pizza oven for 60-90 seconds—or as close as you can get with a home oven. If you don’t have a pizza oven, preheat your broiler for 5 minutes before baking.
Keep toppings light: San Marzano tomatoes, fresh mozzarella di bufala, basil, and a drizzle of extra-virgin olive oil. The high heat creates those signature char marks and a chewy, airy crust. 🔥
New York Deep Dish
This dough works surprisingly well for deep-dish pizza! Press it into a 10-inch cast-iron skillet (I love my Lodge) and let it rise for 20 minutes after shaping. Bake at 425°F for 15 minutes before adding toppings.
Layer with ricotta mixed with egg, mozzarella, and your favorite toppings, then bake another 15-20 minutes until bubbly and golden. The high hydration gives it that signature tender texture. 🍕
Flatbread Variations
Skip the shaping step entirely and divide the dough into 4 small balls. Flatten each into a 6-inch round and bake at 475°F for 8-10 minutes on a baking sheet.
Top with za’atar and olive oil, garlic and herbs, or even pesto and sun-dried tomatoes. These flatbreads are perfect for quick lunches or appetizers—no fuss, all flavor. ✨
Gluten-Free Adaptation
Swap the all-purpose flour for a 1:1 gluten-free pizza dough blend (like Cup4Cup) and add 1 extra tbsp xanthan gum for structure. Follow the same steps, but let the dough rest for 45 minutes instead of 30 to help the gluten-free flour develop.
The hydration ratio stays the same, but expect a slightly denser texture. Top with extra cheese to compensate for the lack of gluten. 💪
Herb-Infused Dough
Add 1 tbsp fresh rosemary or thyme (finely chopped) to the dough during the mixing step for an aromatic twist. The herbs infuse the dough as it rests, creating a fragrant crust perfect for Mediterranean-style pizzas.
Pair with feta, olives, and roasted red peppers for a flavor-packed meal. I love this version with a drizzle of lemon olive oil after baking. 🌿
Nutrition facts
Frequently asked questions
Why does this dough use 60% hydration?
The 60% hydration ratio (60 parts water to 100 parts flour) creates a dough that’s soft yet elastic—perfect for stretching without tearing. This level of moisture delivers that signature chewy texture while keeping the dough manageable. Too little water makes it tough, while too much causes collapse. The 30-minute rest helps the gluten develop properly for that ideal balance.
Can I make this dough without a stand mixer?
This recipe requires only a bowl and your hands. The key is the 30-minute rest after mixing, which lets the gluten relax naturally. Just stir the ingredients until combined, then let it develop while you prep toppings. The high hydration makes it slightly stickier than traditional dough, but it’s still easy to shape by hand.
What if my dough doesn’t rise properly?
Check three things: yeast freshness (test in warm water first), water temperature (105-110°F), and ambient temperature. If your kitchen is cold, place the dough in a slightly warm spot (like near the oven with the light on). The dough should visibly increase by about 50% after the 30-minute rest. If it doesn’t, your yeast may be dead—start fresh with new yeast.
How do I store leftover dough?
Wrap tightly in plastic wrap and refrigerate for up to 48 hours. For longer storage, freeze portions for 3 months. Thaw in the fridge overnight before shaping. Pro tip: Pre-shape dough balls before freezing—they’ll be ready to bake straight from frozen (add 5-10 minutes to baking time). The dough keeps beautifully this way, saving you time for future pizzas!
Can I use this dough for other flatbreads?
Yes! Divide the dough into 4 small balls and flatten into 6-inch rounds for quick flatbreads. Bake at 475°F for 8-10 minutes and top with anything from za’atar and olive oil to pesto and sun-dried tomatoes. The high hydration makes it versatile for both pizza and flatbread applications—no need for separate recipes!

- 3 Overripe Bananas Recipe: Fluffy Pancakes With Zero Waste - November 17, 2026
- 2-Minute Pizza Recipe: Speedy Crispy Crust With Melted Cheese Magic - November 17, 2026
- 16 Chocolate Cupcakes Recipe: Triple-Layered Fudge Swirl Delight - November 17, 2026