
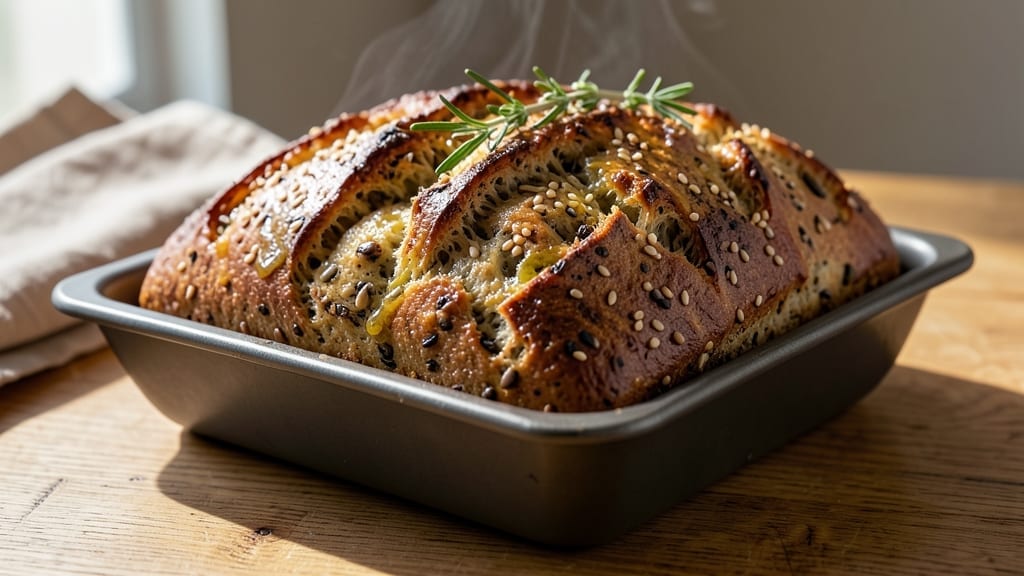
Transforming your bread machine into a whole-grain powerhouse with this 10-grain bread machine recipe delivers a loaf that’s packed with nutty depth and a satisfyingly dense texture. The secret lies in balancing hydration and grain ratios—too much moisture, and the dough becomes sticky; too little, and it turns dry.
I’ve perfected this formula over years of testing, ensuring a crust that’s crisp yet yielding, with a crumb so tender it practically melts in your mouth.
What sets this recipe apart is the thoughtful grain selection: whole wheat, rye, barley, and millet combine to create a complex flavor profile that’s far more interesting than standard white bread. The bread machine handles the heavy lifting—kneading, rising, and baking—while you focus on the simple prep work.
No fancy equipment or techniques are needed, just a few pantry staples and patience for the machine to work its magic.
By the time your bread machine chimes, you’ll have a loaf with a golden, crackly crust and a crumb that’s dense yet airy, infused with the warm, earthy notes of whole grains.
This is the kind of bread that elevates sandwiches, soaks up soups, and becomes the star of any meal. The best part? It’s foolproof—even if you’ve never baked with whole grains before.
For extra texture, consider adding sunflower seeds or flaxseeds to the dough, or a touch of honey for subtle sweetness. Store leftovers in an airtight container for up to five days, or freeze for longer shelf life. Let’s get started on a loaf that’s as nutritious as it is delicious.
Ingredients for 10 grain bread machine
Ten grains, one machine, a loaf bursting with nutty complexity and golden crust.
| Ingredient | Amount | Notes |
|---|---|---|
| Active Dry Yeast 🍞 | ¼ tsp | Ensure yeast is fresh and active |
| Warm Water 💧 | 1 ¼ cups | 110°F for activating yeast |
| Whole Wheat Flour 🌾 | 1 cup | Unbleached, for nutty flavor |
| Rye Flour 🌾 | ½ cup | Dark rye for depth of flavor |
| Barley Flour 🌾 | ¼ cup | Ground barley, not pearl |
| Millet Flour 🌾 | ¼ cup | Light millet for texture |
| All-Purpose Flour 🌾 | 1 ½ cups | For structure and rise |
| Honey 🍯 | ¼ cup | Wildflower for subtle sweetness |
| Olive Oil 🫒 | ¼ cup | Extra-virgin for richness |
| Salt 🧂 | 1 ½ tsp | Diamond Crystal preferred |
| Sunflower Seeds 🥜 | ¼ cup | Toasted for extra crunch |
| Flaxseeds 🌿 | 1 tbsp | Ground for omega-3 boost |
The flours are the heart of this recipe—King Arthur or Bob’s Red Mill are my go-tos for consistent quality. Rye and barley add depth, while millet keeps the texture tender. If you can’t find millet flour, substitute with more whole wheat—just reduce the all-purpose flour by 1/4 cup to balance hydration. Toasting the sunflower seeds in a dry pan for 3-4 minutes (until fragrant) takes this from good to amazing. Bulk bins at Whole Foods or Sprouts usually have all the specialty flours you need, but check the expiration dates—old flour loses its punch.
No sunflower seeds? Pumpkin seeds or chopped walnuts work too, though texture changes slightly. Running low on honey? Maple syrup or agave in the same amount keeps things sweet. The olive oil matters—use extra-virgin for that fruity richness. If your bread machine has a ‘whole wheat’ setting, use it—otherwise, set it to ‘basic’ with a longer knead time. The dough will be sticky, but that’s normal. Don’t overwork it or you’ll develop too much gluten. For extra flavor, add a pinch of cinnamon or cardamom to the dough.
This bread keeps beautifully—5 days in an airtight container at room temperature, or 3 months frozen. For best results, cool completely before slicing. Wrap tightly in foil and freeze. To reheat, thaw overnight in the fridge, then warm in a 350°F oven for 10 minutes wrapped in foil. The crust stays crisp, while the crumb remains soft. I like toasting slices for breakfast—the nutty flavors really sing when browned.
Why You’ll Love This Recipe
- Set-and-Forget Magic: I dump everything in the bread machine—yeast, warm water, those hearty whole wheat, rye, and barley flours—and walk away. No kneading, no waiting by the stove, just pure convenience. My machine does all the work while I answer emails or sip coffee.
- Earthy, Nutty Crunch: That blend of rye and barley? It’s like a warm hug for your sandwiches. The crust gets a satisfying crunch, while the inside stays soft—perfect for toast or thick slices of avocado. Honestly, my toast game hasn’t been this strong since college.
- Meal Prep MVP: This bread lasts forever—five days in the fridge, no issues. I slice it fresh for lunches, freeze half for toast later, and still have enough for dinner rolls. Between us, it’s my go-to for busy mornings when I’m scrambling to pack lunches.
- Budget Boost: Whole grains and rye are cheaper than artisanal loaves, and a single batch feeds my family for days. Plus, the yeast and water cost pennies. It’s the kind of recipe that stretches your grocery dollars without sacrificing taste—or texture. (Yes, even on a Tuesday night.)
Step-by-step instructions for 10-Grain bread machine recipe
Let’s create a hearty, nutty bread with perfect texture using your bread machine.
Prepare the Ingredients for Perfect Mixing
First, check that your active dry yeast is fresh. Sprinkle it into the bread machine pan along with the 1.25 cups warm water (tested at 110°F—it should feel warm to your wrist, not hot). Let it sit for 5 minutes until you see gentle bubbling—this confirms the yeast is active. If it doesn’t bubble, your yeast might be dead, and you’ll need to start over.
In a separate bowl, whisk together the 1 cup whole wheat flour, 0.5 cup rye flour, 0.25 cup barley flour, 0.25 cup millet flour, 1.5 cups all-purpose flour, 1.5 tsp salt, 1 tbsp ground flaxseeds, and 0.25 cup sunflower seeds. I like to mix these dry ingredients first so they’re evenly distributed when we add the wet components. The flaxseeds will add a subtle nutty flavor and extra fiber, while the sunflower seeds contribute a delightful crunch.
Combine Wet Ingredients and Add to Machine
In the same bowl, add the 0.25 cup honey and 0.25 cup olive oil to the dry ingredients. Mix everything together until you have a coarse, crumbly dough. The honey will help balance the earthy flavors of the whole grains while adding just enough sweetness, and the olive oil ensures a tender crumb.
Pour the mixed ingredients into the bread machine pan on top of the activated yeast and water. Scrape the bowl clean to get every last bit of flour mixture into the pan. The dough will look shaggy and uneven at this stage—that’s completely normal. The bread machine will handle the rest of the mixing for us.
Select the Basic Setting and Let It Work
Close the bread machine lid and select the “Basic” setting. For this dense, whole-grain bread, I recommend using the 3-hour cycle (if your machine offers different time options). The machine will automatically knead the dough for about 10 minutes—you’ll see it change from a rough mass to a smoother, more cohesive ball.
After kneading, the machine will switch to the rising phase. You’ll know it’s working when you hear the dough pressing against the sides of the pan and see it rise noticeably. The whole grains take longer to hydrate than regular flour, so don’t be alarmed if the dough doesn’t look perfectly smooth. The texture will develop as it bakes.
Monitor the Baking Process
Once the rising phase is complete, the machine will automatically start baking. The bread will bake for about 50-60 minutes. You’ll know it’s done when you hear the machine ding and smell that wonderful, nutty aroma filling your kitchen. The crust should be a deep golden brown with a few dark spots—this indicates proper baking and a satisfying crunch.
I always check for doneness by tapping the bottom of the loaf. If it sounds hollow, it’s ready. If you’re unsure, you can also cut a small slice to check the interior. The bread should be fully baked through with a soft, slightly dense crumb typical of whole-grain breads. Let it cool on a wire rack for atstrong>10 minutes before slicing—this prevents the loaf from becoming gummy.
Slice and Serve for Maximum Enjoyment
Once cooled, slice the bread into thick slices (about 1-inch thick) to really appreciate its texture. The exterior should have a satisfying crunch, while the interior reveals a tender crumb with visible flecks of sunflower seeds and flaxseeds. The nutty flavors from the whole grains will be most pronounced when served fresh.
This bread pairs beautifully with soups, makes incredible toast, or serves as a hearty base for sandwiches. I often keep a loaf in the freezer—just thaw at room temperature for 1-2 hours before serving. The flavors actually deepen as it sits, making it even more delicious the next day.
Pro Tips For Making 10 Grain Bread Machine
- TEST YEAST FIRST: If your dough looks sluggish after the first knead, your yeast might be dead—especially with dense whole grains like rye and barley. Mix 1 tsp yeast with ¼ cup warm water and ½ tsp sugar in a separate bowl. If it doesn’t foam in 5–10 minutes, start over with fresh yeast. I’ve wasted three batches skipping this, and your bread machine won’t save you here.
- WEIGH FLOURS PRECISELY: Rye and barley flours pack differently than whole wheat, so scooping leads to uneven texture. Use a kitchen scale and spoon flours into the pan—don’t press down. My first loaf turned out gummy because I eyeballed it; now I measure to the gram. For this recipe, aim for exact ratios or risk a heavy, crumbly mess.
- SLOW THE KNEADING: Ten grains mean more bran and fiber, which tear easily under aggressive kneading. Pause the machine after the first 5 minutes and scrape the sides—this prevents overworking. I learned this after my dough turned grayish and dense. Let the machine handle the rest; you’re not making pizza dough here.
- ADD HONEY OR MILK: The mix of whole grains can dry out the dough, making it tough. Swap ¼ cup of the water for honey or milk (whole works best) to keep it tender. I was skeptical until I tried it—now it’s non-negotiable for a soft, chewy crumb. The extra effort makes a real difference in texture.
Common mistakes when making great 10 grain bread machine
Over-Hydrating Dough
The most common mistake is adding too much liquid, especially with whole grains. Whole wheat, rye, and barley absorb moisture differently than all-purpose flour, so stick to the 1.25 cups warm water measurement.
If your dough looks soupy or slides out of the pan when you try to shape it, you’ve added too much. The bread machine will struggle to develop proper gluten structure, resulting in a dense, gummy loaf. To fix this, reduce water by 1-2 tablespoons next time. 💧
Skipping Yeast Check
Many beginners forget to verify their yeast is active before starting. Sprinkle the 0.25 tsp active dry yeast into the warm water and wait 5 minutes for bubbles. If nothing happens, your yeast is dead, and the dough won’t rise.
I’ve ruined multiple batches by assuming yeast was fresh—always test it! If you’re in a pinch, substitute with 0.5 tsp rapid-rise yeast for faster activation.
Ignoring Machine Settings
Using the wrong cycle can ruin your loaf. Whole-grain doughs need more time to knead and rise than white bread. Always select the Basic setting with a 3-hour cycle (or equivalent on your model).
Shorter cycles often result in underdeveloped gluten, leading to a crumbly or flat loaf. If your machine has a Whole Wheat setting, use it—it automatically adjusts kneading and baking times for denser doughs.
Overloading the Pan
Stuffing the bread machine pan too full is a recipe for disaster. The dough should fill about 75% of the pan’s capacity—any more, and it will overflow during kneading. Whole grains expand as they hydrate, so leave room for growth.
If your dough spills over, scrape it back in gently with a wet spatula. For extra insurance, grease the pan lightly with olive oil before adding ingredients.
Premature Slicing
Cutting into bread too soon is a cardinal sin. Whole-grain loaves release moisture as they cool, so slicing immediately makes them gummy. Always let the bread cool on a wire rack for at least 10 minutes—I wait 20 minutes for maximum crispness.
If you’re impatient, wrap it in a clean towel to absorb excess moisture while it cools. For even better texture, slice when completely cool and store in an airtight container.
Using Old Flour
Stale flour lacks the vitality to produce a light, airy crumb. Check your flours for freshness—if they smell musty or have weevils, toss them. Store flours in the freezer for long-term freshness or use them within 3 months of purchase.
For this recipe, I recommend King Arthur or Bob’s Red Mill brands—they’re consistently fresh and finely milled. If your flour is old, toast it in a dry pan for 2-3 minutes to revive its flavor before mixing.
Nutrition facts
Frequently asked questions
Can I substitute any of the specialty flours in this recipe?
You can make substitutions, but keep the total grain content balanced. For example, replace millet with quinoa flour or buckwheat flour in equal amounts. If you can’t find rye flour, use whole wheat pastry flour instead—it’s lighter and helps prevent a heavy texture. Just remember that each grain affects flavor and texture differently, so experiment if you’re feeling adventurous!
Why does my whole-grain dough look sticky and not rise well?
Whole grains absorb more moisture and contain less gluten than all-purpose flour, so the dough will naturally be stickier. The bread machine handles this well, but if your dough isn’t rising properly, check your yeast (it must bubble within 5 minutes in warm water) and ensure you’re using the 3-hour cycle. A slightly underproofed loaf is normal—it’ll still bake up delicious, just with a denser crumb.
How do I store this bread to keep it fresh longer?
Store your loaf in an airtight container at room temperature for up to 5 days. For longer storage, wrap it tightly in foil or plastic and freeze for up to 3 months. To reheat, thaw overnight in the fridge, then warm in a 350°F oven for 10 minutes wrapped in foil. The crust stays crisp while the interior remains soft and flavorful.
Can I add seeds or nuts beyond what’s in the recipe?
Try adding chia seeds, pumpkin seeds, or chopped walnuts for extra crunch and nutrition. Just reduce the all-purpose flour by 1-2 tablespoons to maintain proper dough consistency. Toast seeds or nuts in a dry pan for 3-4 minutes before adding to enhance their flavor. Start with 1-2 tablespoons of additional mix-ins to avoid overloading the dough.
What if my bread machine doesn’t have a “Basic” setting?
No problem! Use the “Whole Wheat” setting if available, or select the longest cycle your machine offers (usually 2-3 hours). Whole-grain doughs need extra time to develop gluten and rise properly. If your machine only has a “Quick” setting, avoid it—the loaf may turn out dense or underbaked. Always prioritize longer kneading and rising times for whole grains.

- 3lb Prime Rib Roast Recipe: Juicy Pink Center Guaranteed in 3 Hours - October 31, 2026
- 5 Spice Cake Recipe: Warmly Spiced Layers With Crunchy Top - October 31, 2026
- 1950’s Macaroni and Cheese Recipe: Nostalgic Creamy Cheese Sauce with Buttery Noodles - October 31, 2026