
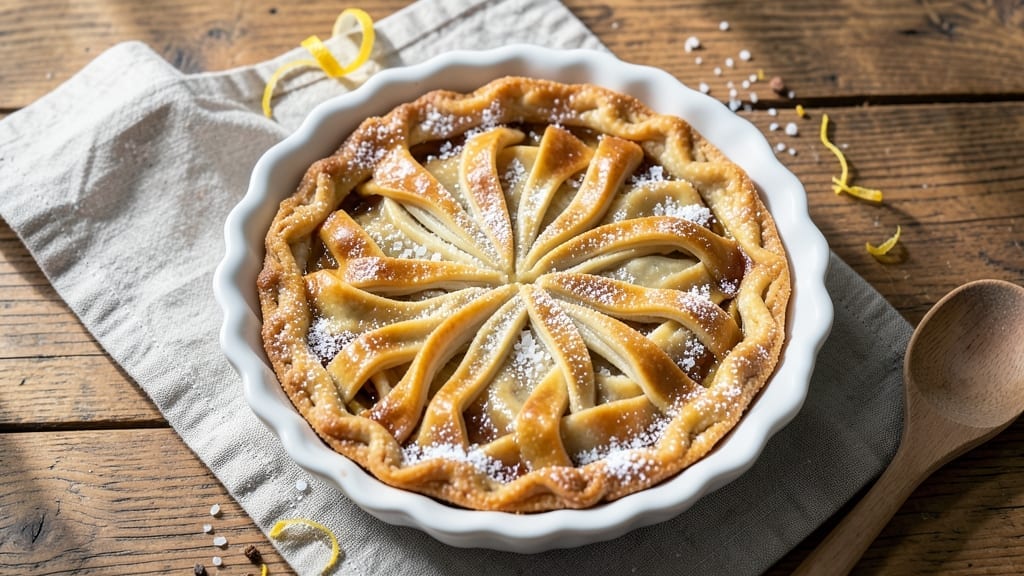
The 10-inch pie crust recipe with shortening delivers the kind of flaky, golden perfection that makes every slice worth the wait. This isn’t just any crust—it’s the foundation for pies that hold their shape, resist sogginess, and shatter into delicate layers with every bite.
The secret lies in the cold butter and shortening combination, which creates those signature air pockets while maintaining structure even under heavy fillings.
What sets this recipe apart is its precision: 2 ¼ cups of all-purpose flour, 1 teaspoon salt, and ¾ cup of shortening work together to form a dough that’s sturdy yet tender. The key technique?
Keeping everything cold—from the butter to the water—ensures the fat stays intact during baking, delivering that iconic flakiness. This isn’t a recipe for guesswork; it’s a method that’s been tested and perfected for foolproof results every time.
Once baked, this crust transforms into a golden, crisp shell that’s sturdy enough for fruit pies, savory quiches, or even deep-dish classics. The shortening creates a tender yet sturdy base, while the cold water prevents shrinking.
Whether you’re a beginner or a seasoned baker, this recipe builds confidence—no more brittle edges or greasy messes. The payoff? A crust so good, it makes even the simplest filling taste extraordinary.
For those who love to experiment, variations like a lattice top or deep-dish adjustments are simple to adapt, but the core technique remains the same. Ready to master the art of pie crust? Let’s get started with a method that’s as reliable as it is delicious.
Ingredients for 10-inch pie crust recipe with shortening
Precision ingredients for a pie crust that delivers legendary flakiness and golden perfection every time.
| Ingredient | Amount | Notes |
|---|---|---|
| All-Purpose Flour 🌾 | 2 ¼ cups | Sifted for light texture |
| Unsalted Butter 🧈 | ½ cup | Cold, cubed, not softened |
| Shortening 🍯 | ¾ cup | All-vegetable, like Crisco |
| Ice Water 💧 | ½ cup | Chilled, not tap water |
| Kosher Salt 🧂 | 1 tsp | Diamond Crystal preferred |
| Granulated Sugar 🍚 | 1 tbsp | For dough stability |
| Large Egg Yolks 🥚 | 1 whole | Cold, for binding |
| White Vinegar 🍶 | 1 tsp | For tenderizing flour |
| Cornstarch 🌽 | 1 tbsp | For extra crispness |
| Coarse Sugar 🍚 | 1 tbsp | For egg wash |
The shortening is non-negotiable here—Crisco or all-vegetable shortening creates the signature flakiness while preventing greasiness. Kroger or Walmart brands work perfectly, but avoid partially hydrogenated oils. The unsalted butter must be cold (freeze it 15 minutes first if needed)—soft butter ruins the flaky layers. King Arthur or Gold Medal flour are ideal for their protein balance, but any all-purpose works. Diamond Crystal kosher salt dissolves more easily than table salt, so use it if you have it. The ice water is critical: tap water at room temperature will make the dough tough.
No shortening? Lard or coconut oil can substitute, but texture differs—lard gives a more tender crust, while coconut oil adds subtle sweetness. Butter-only crusts (like French-style) require more cold work to compensate. The egg yolk acts as a binder, but if you’re avoiding eggs, 1 tbsp cold water works in a pinch. White vinegar tenderizes the flour proteins, but lemon juice is a fine substitute. For the coarse sugar egg wash, turbinado sugar gives the best caramelization—brown sugar works if you’re in a hurry. Always chill the dough between rolls to maintain structure.
Store dough between parchment sheets in the fridge for up to 48 hours—it relaxes and becomes easier to roll. For longer storage, wrap tightly in plastic and freeze for up to 3 months. Thaw overnight in the fridge before using. Pre-baked crusts freeze beautifully: cool completely, wrap in foil, and freeze. Bake straight from frozen (add 5-10 minutes) for deep-dish pies. The cornstarch in the dough prevents shrinking, but if you skip it, 1 extra tbsp flour helps. Always preheat your oven to 375°F—cold pans cause soggy bottoms.
Why You’ll Love This Recipe
- Fewer Messy Ingredients: I swear by this combo—just five things, no weird substitutions. The shortening keeps it flaky, the butter adds richness, and ice water? That’s the secret to not overworking the dough. No food processor, no stress.
- Buttery-Crispy Magic: That perfect balance of butter and shortening? It’s the flakiest crust I’ve ever made—golden edges, tender layers. Honestly, it’s the kind of crust that makes you pause mid-slice just to admire it.
- Endless Pie Possibilities: From classic apple to deep-dish chocolate, this crust handles it all. I’ve used it for savory galettes too—just fold in herbs or cheese. No need for a separate recipe; one dough does it all.
- Budget-Friendly Staples: Flour, butter, shortening—these are things I already have. No specialty ingredients, no last-minute grocery runs. And leftovers? I freeze rolled-out crusts for months. Zero waste, all flavor.
Step-by-step instructions for a 10-Inch pie crust with shortening
Mastering this technique delivers the signature shatter-and-flake texture that separates great pie crusts from good ones.
Combine Dry Ingredients and Cold Fats
In a large mixing bowl, whisk together the 2.25 cups all-purpose flour, 1 tsp kosher salt, 1 tbsp granulated sugar, and 1 tbsp cornstarch. This dry blend creates the structural foundation for our flaky layers. In a separate bowl, cut together the 0.5 cup unsalted butter and 0.75 cup shortening using a pastry cutter or your fingers until the mixture resembles coarse crumbs with pea-sized fat pieces. The butter provides flavor while the shortening ensures stability and flakiness at high temperatures.
Key here is keeping everything cold – if the fats begin to soften, chill the mixture for 10 minutes before proceeding. The fat-to-flour ratio creates pockets that will vaporize during baking, creating those signature air pockets that make the crust flaky. Work quickly to maintain cold temperatures throughout this process.
Incorporate Wet Ingredients for Dough Formation
Make a well in the center of your dry ingredients and add the 1 whole large egg yolk, 1 tsp white vinegar, and 0.5 cup ice water. The vinegar acts as a tenderizer, preventing gluten development while the ice water keeps the dough cold. Using a fork, gently stir until the mixture just begins to come together – you’re looking for a shaggy, crumbly texture that holds when pressed.
At this stage, resist the urge to overmix. The dough should form when pressed together but still feel slightly dry. If it’s too crumbly, add 1 tablespoon of ice water at a time until it begins to cohere. Once formed, turn the dough out onto a lightly floured surface and gently shape into a 1-inch thick disc. Wrap tightly in plastic wrap and refrigerate for at least 1 hour or up to 2 days. This resting period allows the gluten to relax and the fats to firm up, preventing shrinking during rolling.
Roll and Transfer the Dough
On a lightly floured surface, roll the chilled dough starting from the center outward to your 10-inch pie dish, rotating the dish as you work to maintain even thickness. Keep the dough about 1/8-inch thick at the edges and slightly thicker in the center where it will shrink during baking. The edges should extend about 1 inch up the sides of your pie dish.
Carefully transfer the dough to your 10-inch pie dish, using a rolling pin to help guide it without stretching. Trim the excess dough, leaving about 1/2-inch overhang. Fold the overhang under itself to create a double thickness at the rim. This technique creates a sturdy edge that won’t shrink during baking. Use your fingers to press gently along the seam to seal. Prick the bottom with a fork every 1/2 inch to prevent air pockets.
Prepare for Blind Baking
Preheat your oven to 375°F. Line the crust with parchment paper, then fill it completely with pie weights or dried beans. This creates an even surface for baking and prevents the crust from puffing up. Bake for 15 minutes, then remove the weights and continue baking for an additional 10-12 minutes until the edges are golden brown and the crust is firm to the touch.
For a finished look, brush the hot crust with a mixture of the 1 whole large egg yolk and 1 tbsp coarse sugar diluted with 1 tablespoon ice water. This creates the signature caramelized top while adding a subtle sweetness. Return to the oven for 2-3 minutes until the sugar begins to bubble. Let the crust cool completely before adding fillings – this prevents soggy bottoms and maintains structural integrity.
Pro Tips For Making 10-Inch Pie Crust Recipe With Shortening
- Chill the Shortening First: I learned this the hard way—using shortening straight from the fridge makes it too stiff, and mixing it with cold butter creates uneven pockets in the dough. Let that shortening sit at room temp for 10-15 minutes before cutting it into the flour. Your crust will be smoother and easier to roll out.
- Use a Food Scale: Measuring flour by volume is where pie crusts go wrong. Weigh your all-purpose flour (about 250g for a 10-inch crust) instead of scooping it—packing or lightening the flour changes the texture. A cheap digital scale is a game-changer here.
- Skip the Overworking: Once the dough comes together, handle it as little as possible. Every extra fold or stretch warms the fat and makes the crust tough. Gently shape it into a disk, wrap it, and let it rest—no need to knead it like bread dough.
- Freeze the Dough Disk: If you’re not baking the pie right away, freeze the shaped dough disk (wrapped in plastic) for up to 2 weeks. Thaw it in the fridge overnight before rolling—it’s less likely to shrink, and the cold butter/shortening stays firm longer. No last-minute stress.
Make-ahead tips for 10-inch pie crust recipe with shortening
Dough Prep Ahead
Shape your dough into a 1-inch thick disc and wrap tightly in plastic wrap. Store in the fridge for up to 48 hours—this chilling time relaxes the gluten and firms up the fats.
For longer storage, freeze the wrapped dough for up to 3 months. When ready to use, thaw overnight in the fridge to prevent condensation from making the dough sticky. 💧
Blind-Baked Crust
Pre-bake your crust completely for make-ahead convenience. After blind-baking at 375°F for 25 minutes, let it cool completely. Wrap in aluminum foil and store at room temperature for up to 3 days or freeze for 3 months.
When reheating, place the frozen crust on a baking sheet and warm at 350°F for 10-15 minutes until pliable. This method keeps the crust crisp and ready for fillings. ⏰
Filling Prep
Assemble your pie filling one day ahead and refrigerate. For fruit fillings, pre-cook and thicken with 1 tbsp cornstarch to prevent sogginess. Store in an airtight container with parchment paper pressed against the surface to prevent a skin from forming.
When ready to bake, simply pour the chilled filling into your pre-baked crust and bake as directed. 🍎
Deep-Dish Adaptation
For deep-dish pies, divide the dough in half and roll each half into a 12-inch circle. Line your deep-dish pan with one crust, then fill and top with the second crust. Crimp the edges and cut 4-5 slits for steam to escape.
Blind-bake the bottom crust for 20 minutes before adding filling, then cover with the top crust and bake as usual. This technique prevents a soggy bottom in taller pies. 🏆
Freezer-Friendly Tips
Freeze your filled but unbaked pie for up to 2 months. Wrap tightly in plastic wrap, then aluminum foil, and label with the date. When ready to bake, thaw overnight in the fridge, then bake at 375°F for 50-60 minutes (add 10-15 minutes if frozen).
This method locks in freshness and saves time on busy days. ❄️
Nutrition facts
Frequently asked questions
Why does this recipe use both butter and shortening?
The combination creates the perfect balance—butter adds rich flavor while shortening delivers that signature flakiness without greasiness. Shortening’s higher melting point prevents the crust from becoming too tender when hot fillings are added.
Can I make this crust without a food processor?
Use your fingers or a pastry cutter to cut the cold fats into the flour until pea-sized pieces remain. Work quickly to keep everything cold—this prevents the fats from melting and losing their flaky magic.
How do I fix a cracked crust after rolling?
Gently press the cracked edges together with your fingers or use a small piece of dough to patch the cracks. Chill the dough for 15-20 minutes before rolling again to strengthen the gluten. This prevents further tearing during transfer.
What’s the best way to prevent a soggy bottom?
Always pre-bake your crust (blind bake) until golden brown, then let it cool completely before adding fillings. For extra insurance, sprinkle 1 tbsp cornstarch on the crust’s bottom before filling. This creates a barrier against moisture.
Can I use this crust for savory pies too?
Yes! This sturdy crust works perfectly for quiches, pot pies, or savory tarts. Simply brush the baked crust with olive oil instead of egg wash for a neutral flavor. The high fat content makes it ideal for holding rich fillings.

- 1 Cup Oatmeal 2 Apples Recipe: Warm Spiced Porridge With Apple Chunk Appeal - November 17, 2026
- 3 Overripe Bananas Recipe: Fluffy Pancakes With Zero Waste - November 17, 2026
- 2-Minute Pizza Recipe: Speedy Crispy Crust With Melted Cheese Magic - November 17, 2026