
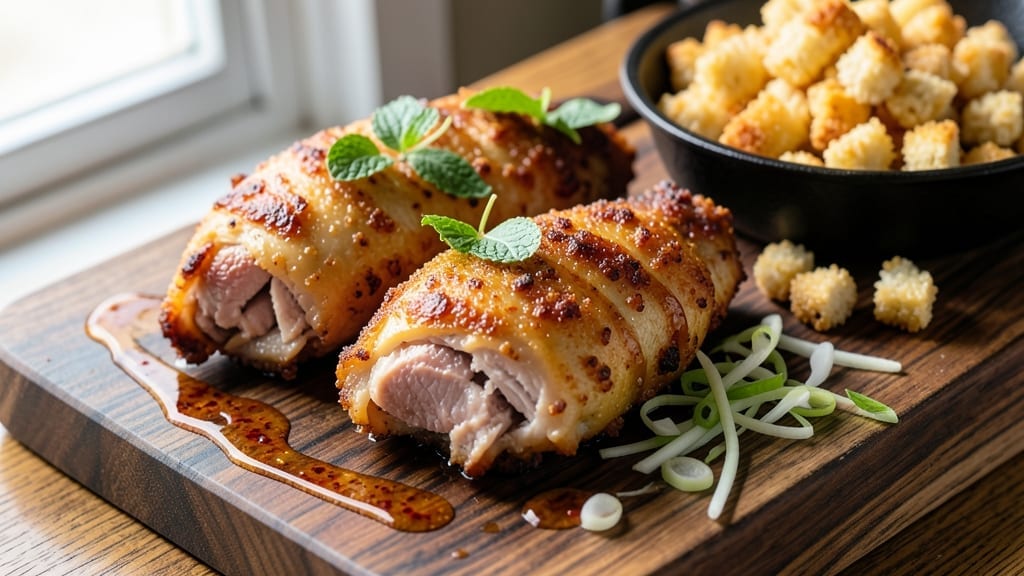
Mastering 12 herbs and spices fried chicken transforms a classic dish into a restaurant-worthy masterpiece—crispy golden skin, juicy tender meat, and layers of aromatic flavor that linger long after the last bite.
This recipe isn’t just about frying; it’s about precision: the right flour blend, perfect oil temperature, and that critical resting period. I’ve perfected it over years of Southern kitchens and pitmaster trials, where every spice plays its part in harmony.
The secret lies in the 12-spice blend—a balance of savory thyme, earthy oregano, and subtle bay leaf that infuses the chicken without overpowering its natural taste. Unlike store-bought seasonings, this blend is customizable, letting you adjust heat and depth to your preference.
The double-dredging technique ensures an extra-crispy crust that shatters with each bite, while the internal temperature gauge guarantees juicy, never-dry meat.
What you’ll achieve is chicken so flavorful it becomes the centerpiece of any meal—whether served with classic Southern sides or a zesty dipping sauce.
The process is methodical but not complicated: prepare the spice mix, bread the chicken, fry to 350°F until golden, then rest for 10 minutes to seal in those juices. This isn’t just fried chicken; it’s a technique that elevates comfort food to fine dining.
Pair it with buttermilk biscuits, collard greens, or a tangy pickle relish to complete the Southern experience. The key is patience—each step builds on the last, and the result is worth every minute. Let’s get started on creating your next crowd-pleaser.
Ingredients for 12 herbs and spices fried chicken
Twelve aromatic spices meet crispy, juicy chicken in this Southern-inspired masterpiece.
| Ingredient | Amount | Notes |
|---|---|---|
| Boneless, Skinless Chicken Thighs 🍗 | 2 lb | Cut into even 3-inch pieces |
| All-Purpose Flour 🌾 | 2 cups | For first dredge |
| Cornstarch 🌾 | ½ cup | For extra crispiness |
| Dried Thyme 🌿 | 1 tbsp | For aromatic depth |
| Dried Oregano 🍃 | 1 tbsp | Earthy flavor base |
| Bay Leaves 🌿 | 2 whole | Crushed lightly |
| Ground Black Pepper 🌶️ | 1 tbsp | Freshly cracked |
| Smoked Paprika 🌶️ | 1 tbsp | For subtle smokiness |
| Garlic Powder 🧄 | 1 tbsp | For savory punch |
| Onion Powder 🧅 | 1 tbsp | Sweet depth |
| Ground Cumin 🌿 | 1 tsp | Warmth without heat |
| Ground Mustard 🌶️ | 1 tsp | Brightens flavor |
| Salt 🧂 | 2 tbsp | Kosher preferred |
| Vegetable Oil 🫒 | 4 cups | For frying (peanut oil works too) |
| Buttermilk 🥛 | 1 cup | For marinating |
The chicken thighs are the foundation—thighs stay juicier than breasts during frying. Look for bone-in, skin-on thighs at Whole Foods or your local butcher for extra flavor. If using boneless, pat dry thoroughly to ensure maximum crispiness. The spice blend is where the magic happens: Penzeys or bulk bins at natural markets offer the freshest spices. For the bay leaves, California brand is my go-to—they hold up better when crushed. If you can’t find smoked paprika, regular paprika plus a pinch of liquid smoke works in a pinch, but trust me on the real deal for that authentic smoky depth.
No buttermilk? Substitute with milk and 1 tbsp vinegar—let it sit for 5 minutes to curdle. Running out of cornstarch? Extra flour in the second dredge gives similar crispiness, though slightly less crunch. The spices can be adjusted: cut the cumin in half if you dislike earthy notes, or double the smoked paprika for more smokiness. For a quicker prep, mix all dry spices together in a small jar and keep it in your pantry for future fried chicken batches. The buttermilk marinade can be prepped the night before, covered and refrigerated—just shake well before using.
Fry the chicken in batches to avoid crowding—oil temperature drops when overloaded, leading to greasy results. Keep fried chicken warm in a 200°F oven while finishing the batch. The marinade keeps 3 days in the fridge, and the spice blend stays potent for 6 months in an airtight container. For meal prep, store fried chicken in a single layer on a wire rack to prevent sogginess. Reheat in a 375°F oven for 10 minutes to restore crispiness. Leftovers? Shred and toss with BBQ sauce for next-day tacos—game changer.
Why You’ll Love This Recipe
- No Pantry Overhaul Needed: I’ll be real—this recipe uses spices I already had gathering dust in my cabinet. Thyme, oregano, even that random jar of mixed herbs from last summer? Boom—flavor gold. No special shopping trips, just pull what’s there and go.
- Crispy Without the Hassle: That cornstarch flour mix? Chef’s kiss. It’s the secret to a crunch that doesn’t require frying at 375°F for 45 minutes like my old buttermilk-brine method. Golden, shatter-y crust every time, with zero babying the temperature.
- Game for Any Gathering: Honestly, this chicken works everywhere. Toss it in a lunchbox with pickles and mayo for a solid workday meal. Serve it at a potluck where no one remembers to bring sides. Or just eat it straight from the pan while binge-watching—no judgment.
- Leftovers That Still Shine: Between us, fried chicken always tastes better the second day. The crust softens just enough to be tender, but the herbs keep it bright. I freeze half the batch and reheat it in the air fryer—crispy again, no sad soggy bits. Budget win, time win.
Step-by-step instructions for 12-Herb fried chicken
This method delivers a perfectly crispy exterior with juicy, flavorful meat every time.
Marinate the Chicken in Buttermilk
Place the 2 lb boneless, skinless chicken thighs in a shallow dish and pour the 1 cup buttermilk over them. Make sure each piece is fully submerged. Let it sit uncovered in the refrigerator for at least 2 hours (overnight is even better). This step is crucial—it tenderizes the meat and creates that signature crispy crust.
Here’s the thing—the buttermilk’s acidity breaks down proteins in the chicken, while the fat helps create steam during frying. Don’t skip this step, even if you’re eager to cook. The longer it marinates, the more flavorful and tender your chicken will be. You’ll know it’s ready when the pieces feel slightly heavier and the liquid has been absorbed.
Prepare the Herb and Spice Blend
In a large bowl, combine the 2 cups all-purpose flour, 0.5 cup cornstarch, 2 tbsp salt, 1 tbsp smoked paprika, 1 tbsp garlic powder, 1 tbsp onion powder, 1 tsp ground cumin, 1 tsp ground mustard, 1 tbsp dried thyme, 1 tbsp dried oregano, and 1 tbsp ground black pepper. Add the 2 whole bay leaves and crush them lightly with your fingers to release their aroma.
Mix everything thoroughly with your hands or a whisk until the spices are evenly distributed. The cornstarch is key here—it creates that extra-crispy texture we’re after. I like to use my hands for this step because it helps me feel the texture and ensure everything’s well incorporated. The blend should look dry but well-combined with no visible clumps of spices.
Double-Dredge for Maximum Crispiness
Remove the chicken from the buttermilk and let any excess drip off. Working in batches, dredge each piece in the herb-spice blend, pressing gently to adhere the coating. Then dip each piece back into the buttermilk, letting it coat evenly. Finally, give each piece a final dredge in the herb-spice blend, pressing firmly to create an even, thick crust.
This double-dredging technique is what gives this recipe its signature texture. The first coating creates the foundation, the buttermilk adds moisture and flavor, and the final coating locks everything in. Let the coated chicken rest for 10 minutes at room temperature before frying—this helps the coating adhere better and prevents the chicken from falling apart in the hot oil.
Fry to Golden Perfection
Heat the 4 cups vegetable oil in a deep skillet or Dutch oven to 350°F. You’ll want the oil to be hot enough that when you drop in a small piece of coated chicken, it sizzles and rises to the surface immediately. Use a deep-fry thermometer to monitor the temperature—keeping it consistent is key to even cooking.
Working in batches to avoid overcrowding, carefully place the chicken pieces in the hot oil. Fry for 12-15 minutes, turning occasionally, until the chicken reaches an internal temperature of 165°F and the coating is a deep, golden brown. The oil should maintain its temperature throughout this process—if it drops below 325°F, your chicken will be greasy rather than crispy.
Rest and Serve
Transfer the fried chicken to a wire rack set over a baking sheet to drain any excess oil. Let it rest for 5 minutes before serving. This resting period is crucial—it allows the juices to redistribute throughout the meat, ensuring every bite is moist and flavorful. The coating will stay crispy while the chicken steams slightly, locking in all that delicious flavor.
Serve immediately with your favorite dipping sauces or sides. The chicken should have a beautiful golden-brown crust that’s crispy to the touch, with juicy, flavorful meat underneath. Each bite should deliver a perfect balance of herby, spiced flavor with that satisfying crunch. Enjoy while it’s hot—this chicken doesn’t keep its crispiness for long!
Pro Tips For Making 12 Herbs And Spices Fried Chicken
- Prep Thyme Right: Crush the dried thyme leaves between your palms before mixing—whole sprigs won’t release flavor. I learned this the hard way when my first batch tasted like I’d forgotten the herbs entirely (spoiler: I hadn’t).
- Double-Dust, Not Single: Coat thighs in flour first, shake off excess, then dust with cornstarch—this keeps the crust crispy without gummy flour. Skip the cornstarch? Your chicken will clump like a sad dumpling.
- Fry in Batches: Crowd the pan, and your oil temperature drops faster than my motivation on Monday mornings. Two pieces max per batch—golden crusts need space, not steam baths.
- Rest Before Frying: Pat thighs dry and let them sit uncovered for 15 minutes. Wet skin = steam = soggy crust. I used to skip this; now I just accept that my shortcuts cost me crispiness.
Pro cooking tips for 12 herbs and spices fried chicken
Oil Temperature Control
Your oil temperature is the single most critical factor for crispy fried chicken. Use a deep-fry thermometer to maintain 350°F—any lower and you’ll get greasy results, any higher and the coating burns before the chicken cooks through. I swear by the ThermoWorks Smoke thermometer for its accuracy.
If your oil isn’t hot enough, the coating will absorb oil instead of crisping. Test it by dropping in a small piece of coated chicken—it should sizzle vigorously and float to the surface within 10 seconds. 🌡️
Double-Dredge Technique
This isn’t just about coating—it’s about layering flavor and texture. Start with a thin first dredge in the spice blend, then the buttermilk, then a thick final coating. The buttermilk creates steam during frying, which helps develop that perfect crust.
Press firmly when coating to eliminate air gaps. I’ve seen home cooks skip the second dredge and miss out on that restaurant-quality texture. Pro tip: Use room temperature chicken for better coating adhesion—cold meat releases moisture that weakens the crust.
Batch Frying Essentials
Never fry more than half your skillet’s capacity—crowding lowers oil temperature and steams instead of frying. I use a 12-inch cast iron skillet for 8 pieces at a time. Keep fried chicken warm in a 200°F oven while finishing the batch.
This maintains crispiness without overcooking. For extra insurance, place a wire rack over a baking sheet instead of a plate—this prevents soggy bottoms from resting on condensation. 🍗
Spice Blend Activation
Crush those bay leaves lightly with your fingers before mixing—their aroma is subtle but essential. Toast the spices in a dry pan for 30 seconds before mixing to deepen their flavors. I like to use Penzeys spices for their consistent quality, but any good dried herbs work.
For extra depth, add ½ tsp ground cloves to the blend—it adds warmth without overpowering. The key is balance: all spices should complement rather than compete with each other.
Resting Game-Changer
That 5-minute rest after frying might seem insignificant, but it’s what transforms good fried chicken into great. During this time, the chicken’s internal temperature equalizes, and the crust firms up while the meat steams slightly.
This is when all those juices redistribute—skipping it means dry, tough bites. I’ve seen cooks cut into chicken immediately and ruin all their hard work. Trust the process: patience here makes all the difference. ✨
Equipment Upgrades
Invest in a Dutch oven if you don’t have one—it gives you deep, even heat distribution perfect for frying. My Lodge 5.5-quart handles 12 pieces easily.
For temperature control, nothing beats a thermometer, but if you’re frying small batches, you can test with a wooden chopstick: drop it in—if bubbles form around it immediately, your oil is ready. For extra crispiness, add 1 tbsp cornstarch to your second dredge coating.
These small upgrades make a world of difference in your final product.
Nutrition facts
Frequently asked questions
Can I use chicken breasts instead of thighs?
Chicken breasts work but require extra care—they’re leaner and dry out faster. For best results, use bone-in, skin-on breasts and reduce frying time to 8-10 minutes at 350°F. Marinate them 4-6 hours (not overnight) to prevent toughness. The skin helps retain moisture, but thighs still win for juiciness and flavor.
How do I adjust the spice level?
Start by reducing the smoked paprika or ground mustard if you prefer milder flavor. For heat, add ½ tsp cayenne or 1 tsp crushed red pepper flakes to the blend. Always taste the spice mix first—you can add more heat later, but you can’t remove it once mixed. The bay leaves and thyme provide aromatic depth without heat.
Can I make this recipe ahead of time?
Prep the spice blend and marinate the chicken up to 2 days ahead. For best results, fry fresh and serve immediately, but store cooked chicken in an airtight container for 2 days (reheat at 375°F for 10 minutes to restore crispiness). The buttermilk marinade can be made 3 days ahead—just refrigerate covered. Never freeze fried chicken as it ruins the texture.
What’s the best oil for frying?
Peanut oil is ideal for its high smoke point (450°F) and neutral flavor, but vegetable or canola oil work well too. Avoid olive or coconut oil—they burn too easily. For a Southern touch, use lard mixed with oil (50/50) for extra richness. Always use enough oil to submerge the chicken by 1 inch—this prevents splattering and ensures even cooking.
Why did my chicken turn out greasy instead of crispy?
Greasy chicken usually means the oil wasn’t hot enough (below 325°F) or the chicken was overcrowded. Use a thermometer and fry in batches—never more than half your skillet’s capacity. Also, ensure your chicken is completely dry before coating (pat with paper towels). The cornstarch in the blend helps with crispiness, so don’t skip it. Let the oil return to 350°F between batches.

- 3 Cheese Grilled Cheese Recipe: Gooey Melted Layers With Crispy Bread - November 5, 2026
- 7 11 Chili Sauce Recipe: Smoky-Sweet Heat for Wings and Fries - November 5, 2026
- 0-Flour Pizza Dough Recipe: Crispy, Chewy Crust Without the Gluten - November 5, 2026