
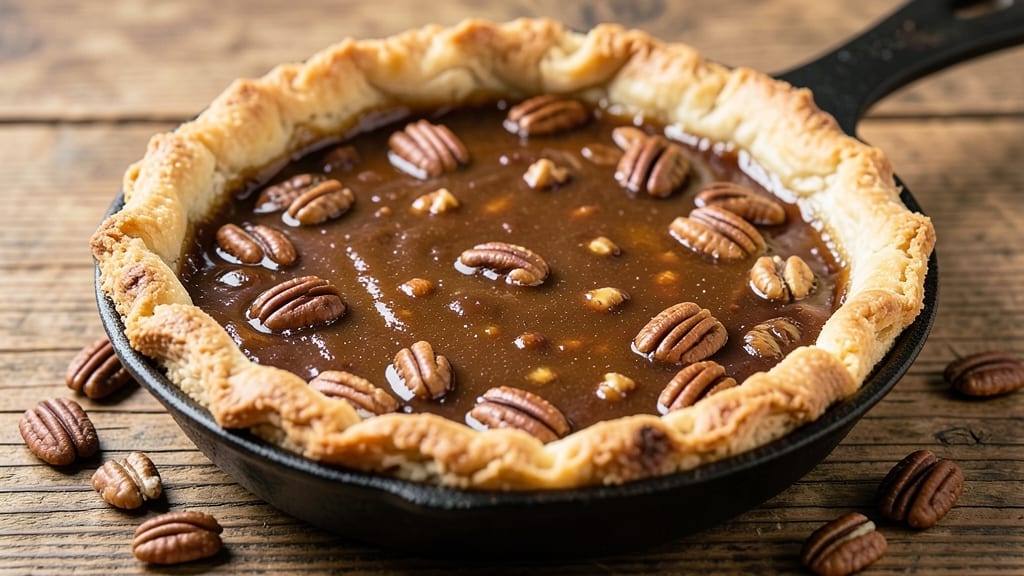
This 1920 pecan pie recipe brings a taste of Prohibition-era America to your kitchen, where buttery bourbon-kissed crust meets a rich, caramelized filling that balances sweetness with just the right hint of smoky depth.
The secret lies in slow-cooked corn syrup and toasted pecans, a technique perfected in 1920s home kitchens when pecan trees flourished across the South. Every slice delivers that signature crunch from candied nuts and a silky, golden center that melts at the first bite.
The crust starts with a classic shortcrust base, elevated by a splash of bourbon that infuses warmth without overpowering. While the filling simmers, the pecans toast until fragrant, their oils releasing into the syrup for maximum flavor.
This isn’t your grandmother’s pecan pie—it’s a nod to early 20th-century baking traditions with modern precision, where every ingredient earns its place in the recipe.
What you’ll achieve is a pie with perfectly golden crust edges, a filling that’s neither too runny nor too thick, and pecans that stay crisp rather than soggy. The bourbon in the crust adds a subtle complexity that pairs beautifully with the caramelized sweetness of the filling.
It’s the kind of dessert that feels both nostalgic and refined, perfect for holiday gatherings or when you want to impress without fuss.
Serve warm with vanilla ice cream or whipped cream to highlight the pie’s rich flavors, or enjoy it at room temperature for a more balanced taste experience. The recipe scales well, so you can make one for a small gathering or double it for a crowd.
Let’s recreate this classic with confidence—your taste buds will thank you.
Ingredients for 1920 pecan pie
Pantry staples plus a few specialty touches—this pie brings 1920s charm to your kitchen.
| Ingredient | Amount | Notes |
|---|---|---|
| All-Purpose Flour 🌾 | 2 cups | Sifted for light texture |
| Unsalted Butter 🧈 | 1 cup | Cold, cubed for crust |
| Granulated Sugar 🍚 | 1 ½ cups | For crust and filling |
| Light Brown Sugar 🍚 | ½ cup | Packed for filling depth |
| Corn Syrup 🍯 | 1 cup | Karo brand preferred |
| Large Eggs 🥚 | 1 whole | Room temperature |
| Vanilla Extract 🌿 | 1 tbsp | Pure, not imitation |
| Bourbon Whiskey 🍷 | ¼ cup | 80-proof preferred |
| Pecans 🥜 | 2 cups | Raw, shelled, toasted |
| Salt 🧂 | ½ tsp | Fine sea salt |
| Ground Cinnamon 🌿 | 1 tsp | Freshly ground preferred |
| Baking Powder 🍞 | 1 tsp | Aluminum-free |
| Heavy Cream 🥛 | ¼ cup | For crust richness |
The bourbon makes all the difference in that crust—Makers Mark or Buffalo Trace if you’re splurging, but any good 80-proof will do. Pecans? Local Southern grocers or bulk bins have the best quality, but store-bought works too—just toast them yourself for maximum flavor. The corn syrup is non-negotiable; Karo brand has that classic caramelized taste. For the flour, King Arthur or Gold Medal are my go-tos—they bake up lighter. Keep everything chilled until ready to mix.
No bourbon? Apple cider or extra vanilla extract adds depth without the alcohol. Store-bought pecans? Toast them in a dry pan until fragrant (about 5 minutes)—this releases their natural oils for that signature crunch. The crust gets its lift from baking powder, but if you’ve got self-rising flour, you can skip it entirely. For the filling, if you’re worried about the pie being too runny, add an extra egg yolk to thicken it up. And trust me, the extra vanilla in the filling is worth it.
This pie tastes even better the next day, so make it ahead if you can. Store the crust separately at room temperature for up to 2 days, and the filling (unbaked) in the fridge for 3 days. Once baked, keep whole at room temperature for up to 5 days, or slice and freeze portions for 3 months. Reheat slices in the oven at 350°F for 10 minutes to restore that perfect crunch.
Why You’ll Love This Recipe
- No-Fuss Crust: I swear by this recipe’s shortcut crust—just flour and butter, rolled and baked in 10 minutes. No fancy pie dough, no stress. Honestly, the buttery layers melt in your mouth, and the filling steals the show anyway.
- Sweet Caramel Magic: That corn syrup and brown sugar combo? It’s what turns this into something special. The pecans soak up the syrupy richness, while the granulated sugar keeps it from being too heavy. One bite and you’ll understand why this was a 1920s classic—it’s ridiculously good.
- Holiday or Weeknight: Between us, this pie works for Thanksgiving or a lazy Sunday dessert. The crust holds up for days, and the filling stays gooey even when sliced thin. I’ve served it at potlucks, family dinners, and even as a midnight snack—no judgment.
- Budget-Friendly Luxury: You’re using pantry staples here: butter, sugar, flour. No specialty ingredients, no markup. That said, it tastes like a bakery showstopper without the price tag. Leftovers? They disappear just as fast as the first slice.
Step-by-step instructions for bourbon-kissed pecan pie
Here’s how to create that signature 1920s-style pecan pie with a flaky crust and rich, caramelized filling.
Prepare the Buttery Bourbon Crust
In a food processor, pulse the 2 cups all-purpose flour, 0.5 teaspoon salt, and 1 teaspoon baking powder until combined. Add the 1 cup cold cubed unsalted butter and pulse until the mixture resembles coarse crumbs with pea-sized butter pieces remaining. This texture is crucial for a flaky crust.
Pour in the 0.25 cup heavy cream and pulse just until the dough comes together. Avoid overmixing—you want to preserve the butter’s coldness. Transfer the dough to a lightly floured surface, shape into a disk, wrap in plastic, and chill for 30 minutes. This resting period relaxes the gluten and makes rolling easier.
Assemble the Crust and Create the Filling
Preheat your oven to 375°F. On a floured surface, roll out the chilled dough to a 12-inch circle, about ⅛-inch thick. Transfer carefully to a 9-inch pie dish, trim the edges, and crimp decoratively. Prick the bottom all over with a fork to prevent bubbling.
In a large bowl, whisk together the 1.5 cups granulated sugar, 0.5 cup packed light brown sugar, 1 cup corn syrup, 0.25 cup bourbon whiskey, 1 tablespoon vanilla extract, 1 whole large egg, and 2 cups toasted pecans. The filling should be thick but pourable—if it’s too stiff, whisk in 1 tablespoon warm water. Pour the filling into the prepared crust, spreading it evenly.
Bake to Golden Perfection
Place the pie on a baking sheet lined with parchment paper (to catch any drips) and bake for 50-55 minutes. The filling should be bubbling vigorously in the first 20 minutes, then gradually set as it bakes. You’re looking for a filling that’s firm to the touch but still slightly jiggly in the center when done.
Here’s the thing—don’t overbake. The pie will continue thickening as it cools. When the edges are deep golden brown and the filling has set but still has a slight wobble in the center, remove from the oven. Let it cool completely on a wire rack for at least 4 hours—this is non-negotiable for the perfect texture.
Finish and Serve
Once cooled, run a sharp knife around the edge to loosen the pie. If you prefer a glossy finish, brush the top with a mixture of 1 tablespoon corn syrup and 1 tablespoon bourbon whiskey, then broil for 1-2 minutes until caramelized. Let it cool completely before slicing.
Slice through the center to reveal that signature caramelized filling with pecans peeking through. Serve warm with vanilla ice cream or whipped cream for the ultimate 1920s-style dessert experience. The contrast of the warm pie with cold ice cream is what makes this classic so special.
Pro Tips For Making 1920 Pecan Pie
- Whisk the Syrup: Don’t just dump the corn syrup into the hot sugar mix—whisk it in slowly while stirring constantly. I learned this the hard way when I got lazy and ended up with grainy, clumpy filling that ruined the texture. A smooth pour means a silky pie.
- Toast Pecans Low: Skip the high-heat skillet if you want flavor without burning. Spread pecans on a baking sheet at 325°F for 8–10 minutes, stirring once. This gives them that nutty aroma without turning them bitter—like the difference between a good pie and a great one.
- Chill the Crust: If your crust is too soft or greasy, pop it in the fridge for 30 minutes before filling. Cold butter behaves better, and you’ll avoid a soggy bottom. (Yes, even if you’re impatient like me—this isn’t the step to rush.)
- Skip the Extra Egg: The 1920 recipe likely calls for just one egg—don’t double it for “extra richness.” Too much egg makes the filling gummy. Trust the original ratio; it’s balanced for a perfect set without turning into pecan pie flan.
Essential equipment for perfect results
Pie Dish Essentials
A 9-inch glass or metal pie dish is non-negotiable for even heat distribution—CorningWare or Pyrex are my top picks. Glass handles temperature shifts better than metal, preventing soggy bottoms.
Avoid dark ceramic dishes; they absorb heat unevenly. For a rustic touch, a cast-iron skillet works too, but preheat it longer to prevent cracking. 🔥
Crust Tools
Your crust needs three tools: a food processor (like KitchenAid FP1151) for perfect butter distribution, a rolling pin (I love OXO Good Grips), and parchment paper for easy transfer. For the crimp, use a pie crust fork or your fingers—just press firmly to seal.
A bench scraper helps trim edges cleanly. Pro tip: Chill your tools in the freezer for 10 minutes before rolling to prevent sticking.
Mixing & Measuring
Precision matters most with the filling. Use a whisk (like OXO Good Grips) to combine sugars and syrup smoothly, and a digital kitchen scale for accurate measurements—especially with corn syrup.
A fine-mesh sieve sifts flour for the crust, and a rubber spatula ensures no filling clings to the bowl. For the bourbon, a measuring cup with spout prevents spills. 🍯
Baking Gear
Line your baking sheet with heavy-duty parchment paper (like Reynolds) to catch drips, and use an oven thermometer (I recommend Thermoworks Oven Thermometer)—home ovens often run 25°F hotter than set.
A wire cooling rack prevents soggy bottoms while cooling. For the broil step, place a heat-resistant mat under the pie to avoid drips on your oven rack.
Cooling & Serving
After baking, let the pie cool on a wire rack for at least 4 hours—this is where patience pays off. A sharp chef’s knife (like Victorinox Fibrox) slices cleanly through the filling.
For serving, a pie server with a built-in fork prevents messy fingers. Store leftovers in an airtight container with parchment between layers to keep pecans crisp. ⏰
Nutrition facts
Frequently asked questions
Why does this 1920 pecan pie recipe use bourbon in the crust?
The bourbon adds a subtle depth and warmth that was popular in 1920s baking. It enhances the buttery flavor without overpowering, creating a more complex crust that pairs beautifully with the caramelized filling. Just ¼ cup makes all the difference!
Can I make this pecan pie without bourbon?
Substitute with ¼ cup apple cider or add 1 extra teaspoon vanilla extract for depth. The bourbon adds a unique character, but the pie will still be delicious. For a non-alcoholic version, use ¼ cup water and boost the vanilla to 2 teaspoons.
How do I prevent the pecans from getting soggy?
The key is proper cooling and storage. Let the pie cool completely on a wire rack for at least 4 hours before slicing. Store leftovers in an airtight container with parchment paper between slices. For extra crunch, broil slices for 1-2 minutes before serving.
What’s the best way to toast the pecans?
Toast them in a dry 350°F oven for 8-10 minutes, stirring halfway, until fragrant and lightly browned. For a quicker method, use a dry skillet over medium heat for 5-7 minutes, stirring constantly. Never let them burn—they should smell amazing but not darken too much!
Can I make this pie ahead of time?
This pie actually tastes better the next day! Assemble the crust and filling, then refrigerate unbaked for up to 3 days. Bake as directed. For a fully made-ahead option, bake the pie, cool completely, then store at room temperature for 5 days or freeze slices for 3 months**.

- 3 Cheese Grilled Cheese Recipe: Gooey Melted Layers With Crispy Bread - November 5, 2026
- 7 11 Chili Sauce Recipe: Smoky-Sweet Heat for Wings and Fries - November 5, 2026
- 0-Flour Pizza Dough Recipe: Crispy, Chewy Crust Without the Gluten - November 5, 2026