
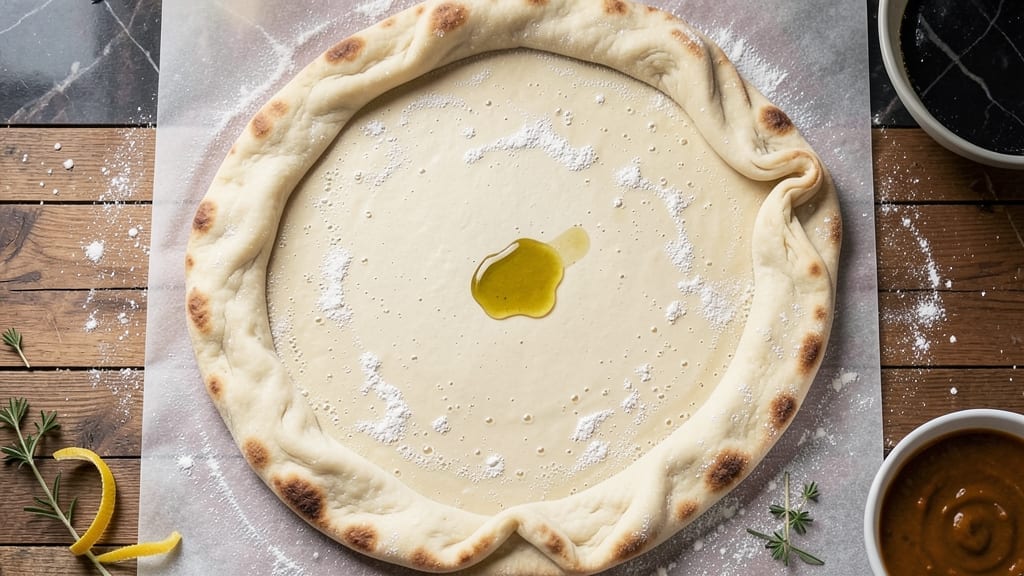
This 2 large pizza dough recipe delivers restaurant-style flexibility with minimal effort—no kneading required. The secret lies in precise ingredient ratios and a slow fermentation that develops deep flavor while keeping the dough manageable for two 12-inch pizzas.
I’ve perfected this method over years of testing, and it consistently produces a crispy-yet-chewy crust with perfect air pockets every time. What sets this dough apart is its foolproof technique: just mix, rest, and shape.
The dough develops maximum flavor during an overnight cold proof in the fridge, which also makes it easier to handle than traditional doughs. You’ll get two large, evenly sized portions that hold toppings beautifully without tearing, even when loaded generously.
By the time you stretch that first ball of dough, you’ll understand why this method earns restaurant-quality results at home. The texture is crisp on the outside with a tender, airy interior—no more sad, dense pizza crusts.
The dough stays fresh in the fridge for up to 48 hours, giving you flexibility to shape and bake when convenient. This recipe becomes even more valuable when you consider how versatile it is. Use it for classic New York-style slices, Neapolitan-style pizzas, or even calzones.
The key to success lies in the precise measurements and proper proofing times, which I’ll walk you through step by step. Let’s get started on that perfect crust.
Ingredients for 2 large pizza dough
Seven simple ingredients transform into two perfect restaurant-style pizza crusts.
| Ingredient | Amount | Notes |
|---|---|---|
| All-Purpose Flour 🌾 | 3 ½ cups | Spooned and leveled (not scooped) |
| Active Dry Yeast 🍞 | ¼ tsp | Or 1 packet instant yeast |
| Granulated Sugar 🍚 | ¼ tsp | Enhances yeast activation |
| Salt 🧂 | 1 tsp | Diamond Crystal preferred |
| Extra-Virgin Olive Oil 🫒 | ¼ cup | High-quality, fruity variety |
| Warm Water 💧 | 1 ¼ cups | 110°F (43°C) ideal |
| Cornmeal 🌽 | ½ cup | For dusting work surface |
The flour is everything here—King Arthur or Caputo Tipo 00 if you want to splurge, but regular all-purpose works perfectly fine. I always measure by spooning flour into the cup and leveling with a knife (no scooping!). The yeast? Fresh is best—check the date on that packet. If it’s older than a few months, toss it. Warm water is critical: too hot kills the yeast, too cold and it won’t activate. 110°F is ideal—if you don’t have a thermometer, let tap water sit for 10 minutes after boiling to cool to room temp, then microwave for 20 seconds to warm.
No instant yeast? Active dry yeast works too—just let it dissolve in the warm water with sugar for 5 minutes before adding to flour. Running out of olive oil? Avocado oil or melted coconut oil works in a pinch, but stick with olive for that authentic flavor. The sugar can be swapped for honey or maple syrup if you’re avoiding refined sugar, but keep it to the same amount. For the cornmeal, semolina works too—it gives a nicer texture for Neapolitan-style pizzas. Pro tip: if your kitchen feels cold, warm the mixing bowl in the microwave for 10 seconds before combining ingredients—yeast loves warmth.
This dough tastes better the longer it ferments—up to 48 hours in the fridge. I usually make it the night before and let it sit on the counter for 1-2 hours before shaping. For storage, wrap tightly in plastic wrap or a damp towel and keep in an airtight container. Freeze for up to 3 months by portioning into balls, wrapping individually in plastic, then storing in a freezer bag. Thaw overnight in the fridge before using. The dough doubles in size during proofing, so don’t panic if it looks massive—it’s supposed to!
Why You’ll Love This Recipe
- No Yeast Drama: I swear by this dough—just mix, wait 2 hours, and you’re golden. No kneading, no fuss, and that sugar kick gets the yeast working fast. (Yes, even if you’re the kind who burns toast.)
- Crispy-Chewy Magic: The olive oil keeps it tender, while the salt and sugar balance the flour’s bite. That’s the secret: no weird aftertaste, just real pizza flavor—crusty outside, pillowy inside. (My kids fight over the last slice.)
- Game for Any Night: Double dough means I can make two pizzas or one monster pie for a crowd. Freeze half for later? Done. Date night? Done. Leftovers? Also done. It’s my meal-prep superhero.
- Pantry Goldmine: Five ingredients, zero specialty stuff. You already have them. Stretch this dough for calzones, garlic knots, or even a flatbread—no extra shopping, just pure flexibility. (Budget win.)
Step-by-step instructions for perfect no-knead pizza dough
This foolproof method delivers restaurant-quality dough with minimal effort.
Activate the Yeast for Maximum Rise
In a small bowl, combine the 1.25 cups warm water, 0.25 tsp granulated sugar, and 0.25 tsp active dry yeast. Let it sit for 5-10 minutes until frothy—this confirms the yeast is alive and ready to work. You’ll see tiny bubbles forming and the mixture will look fizzy. If it doesn’t activate, your yeast might be dead, and you’ll need to start over.
While waiting, lightly dust a clean work surface with 0.5 cup cornmeal. This prevents sticking when you shape the dough later. The cornmeal also adds a subtle flavor that enhances the crust. Keep the yeast mixture at room temperature—never use hot water, as it kills the yeast and prevents rising.
Mix the Dough Until Just Combined
In a large mixing bowl, combine the 3.5 cups all-purpose flour and 1 tsp salt. Make a well in the center and pour in the yeast mixture and 0.25 cup extra-virgin olive oil. Using a wooden spoon or dough whisk, gently mix the ingredients until they come together into a shaggy dough.
This dough is designed to be minimal—no overworking required. You’ll notice some dry flour patches, and that’s okay. The dough should be soft but not sticky if you’ve measured the flour correctly. If it feels too dry, add 1 teaspoon of warm water at a time until it holds together when pressed. The olive oil adds richness and helps create that tender, flexible crust you’d expect from a restaurant.
Let the Dough Rest for Optimal Texture
Cover the bowl with a damp kitchen towel or plastic wrap and let the dough rest at room temperature for 1 hour. This initial rest allows the gluten to relax and the yeast to begin fermenting. You’ll see the dough puff up slightly, but don’t worry if it doesn’t double in size—this is a no-knead method, so patience is key.
During this time, preheat your oven to 475°F (or as high as it goes). If you’re using a pizza stone or steel, place it in the oven now to heat through completely. The high heat is what gives restaurant-style pizza that perfect char and crisp. While the oven heats, lightly flour your work surface with more cornmeal—this will make shaping the dough much easier.
Shape the Dough for Perfect Crust
After the rest, turn the dough out onto your floured surface. Gently press and fold it a few times to distribute the gluten evenly. This step ensures your pizza crust will be flexible and chewy, not tough. Divide the dough into two equal pieces—each should be about 1 pound—and shape them into balls by tucking the edges underneath.
Let the dough balls rest, covered, for another 20-30 minutes. This final rest relaxes the gluten further, making the dough easier to stretch without tearing. The surface should feel slightly tacky but not sticky. If it’s too dry, lightly mist with water. The cornmeal you used earlier will prevent sticking while you work, giving you that professional, restaurant-style flexibility.
Stretch and Pre-Bake for Maximum Crisp
Working with one dough ball at a time, gently press your fingers into the center and stretch outward, rotating the dough as you go. Avoid pulling the edges too thin—they should be about ¼-inch thick in the center and slightly thicker toward the edges. If the dough resists, let it rest a few more minutes. The goal is to create a thin, flexible crust that holds toppings without tearing.
Transfer the stretched dough to your preheated pizza stone or baking sheet. Bake for 5-7 minutes until the edges are golden brown and the surface looks dry. This pre-bake step is crucial—it creates a sturdy base that supports heavy toppings without sogginess. The high heat also develops that beautiful charred flavor you’d expect from a restaurant-style pizza.
Pro Tips For Making 2 Large Pizza Dough
- Bloom the Yeast First: Skip mixing yeast directly into dry ingredients—it’s a common shortcut, but dissolved yeast in warm water (110°F) activates faster and creates a smoother dough. I learned this the hard way after kneading dough that smelled like yeast but never rose properly.
- Weigh Your Flour: Scooping flour leads to inconsistent dough—use a kitchen scale for 1,600g total (800g per dough). Packing cups adds moisture, making dough sticky and hard to handle. This guarantees a reliable texture every time.
- Oil Your Hands: Wet your hands with olive oil before shaping dough—it prevents sticking and makes stretching easier. No more dough clinging to your fingers or tearing when you pull it thin.
- Let It Rest Twice: After kneading, let the dough rise at room temp (1–2 hours), then refrigerate overnight. Cold fermentation develops flavor and makes shaping effortless the next day. I skip this and regret the bland, chewy crust.
Flavor customization for these flavors
Sweet & Herbal Infusions
Add 1 tbsp honey or 1 tsp maple syrup to the dough during mixing for subtle sweetness that pairs beautifully with savory toppings. For herbal notes, mix in 1 tsp dried rosemary or 1 tsp fresh thyme leaves—these infuse the crust with aromatic depth while baking.
I love using this version for breakfast pizzas with ricotta and fruit. 🌿
Spicy & Smoky Variations
For a kick, incorporate ½ tsp red pepper flakes or 1 tsp smoked paprika directly into the dough. For deeper smokiness, replace 1 tbsp olive oil with 1 tbsp liquid smoke (use sparingly—start with ½ tsp).
This works amazingly with BBQ chicken or spicy arrabbiata sauce. Just be careful not to overdo it—smoke flavor can be overpowering. 🔥
Whole Wheat & Seed Boosts
Swap ½ cup all-purpose flour for ½ cup whole wheat flour or ¼ cup ground flaxseeds for extra fiber and nuttiness. I recommend Bob’s Red Mill whole wheat flour for best texture.
For a crunchy twist, sprinkle 2 tbsp sesame seeds or poppy seeds into the dough before shaping. These variations work perfectly with Mediterranean-inspired toppings like za’atar and halloumi. 🌾
Cheesy & Garlicky Flavors
Add ¼ cup grated Parmesan cheese to the dough for a rich, umami base that needs no sauce. For garlic lovers, mix in 2 minced garlic cloves with the olive oil before combining with flour.
This creates a flavorful crust that shines with minimal toppings—try it with just olive oil, cherry tomatoes, and fresh basil. The garlic flavor develops beautifully during proofing. 🧀
Herb & Citrus Zest
Brighten your crust by adding 1 tsp lemon zest or 1 tsp orange zest along with 1 tbsp chopped fresh herbs (like basil or parsley). This works especially well with lighter toppings like prosciutto, arugula, and burrata.
The citrus zest adds a subtle brightness that cuts through rich cheeses. I find this variation particularly refreshing for summer meals. 🍋
Nutty & Savory Add-Ins
For a sophisticated twist, fold in ¼ cup finely chopped walnuts or 2 tbsp toasted pine nuts with the flour. These add a pleasant crunch and nutty depth that pairs wonderfully with mushroom and truffle toppings.
Toast the nuts first for maximum flavor—just spread them on a baking sheet and bake at 350°F for 5-7 minutes. 🌰
Nutrition facts
Frequently asked questions
Can I make this dough without a stand mixer?
This recipe requires no kneading—just gentle mixing by hand. Use a wooden spoon or dough whisk to combine ingredients until just combined. The dough will be shaggy but will develop properly during the 1-hour rest and overnight cold proof. The no-knead method makes it perfect for home cooks without specialized equipment.
Why does the dough need to rest overnight?
The overnight cold proof (up to 48 hours) develops deeper flavor and improves texture. The slow fermentation breaks down gluten for a more tender crust while allowing yeast to work gradually. This creates that restaurant-style airiness without overworking the dough. Plus, cold dough is easier to handle when shaping!
What if my dough feels too sticky?
Add 1 tablespoon flour at a time until the dough holds together when pressed. If it’s still sticky after adding 2 tablespoons, your flour might be too moist. For shaping, use cornmeal instead of flour—it prevents sticking better and adds subtle flavor. Never add more water to fix stickiness.
Can I make just one pizza instead of two?
Yes! Simply halve all ingredients (except yeast) to make 1 large pizza dough. The recipe scales perfectly—just reduce flour to 1.75 cups, water to 0.625 cups, and oil to 0.125 cups. Use the same proofing times. This works great for personal-sized pizzas or thin-crust varieties.
How do I know when the dough is properly proofed?
Press a finger gently into the dough—if it springs back slowly (not immediately), it’s ready. For cold-proofed dough, it should feel slightly tacky but not sticky. If it resists shaping, let it rest 10-15 more minutes. The dough should double in size during proofing, but don’t rely on size alone—texture is the key indicator.

- 5 Lb Eye Round Roast Recipe: Slow-Braised to Melt-in-Mouth Tenderness - November 3, 2026
- 3-Hour Ciabatta Bread Recipe: Crusty Chews and Airy Holes Mastered - November 3, 2026
- 5 Fruit Salad Recipe: Vibrant Rainbow Layers With No Brown Spots - November 3, 2026