
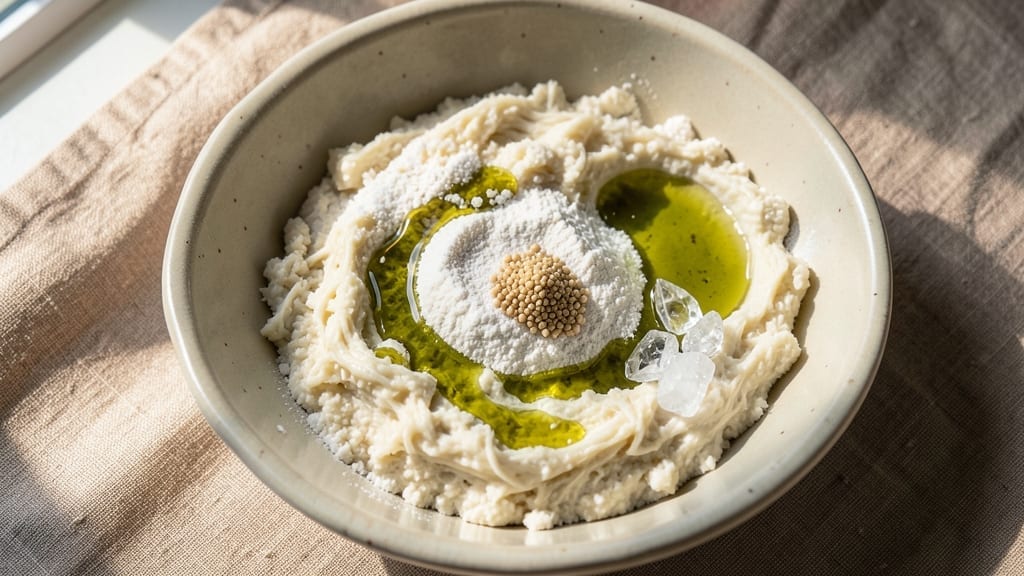
This 3-day bread recipe transforms basic flour and water into an artisan loaf with a crisp crust and complex, tangy flavor—no fancy equipment required. The secret lies in slow fermentation, where time develops depth and texture that store-bought loaves can’t match.
I’ve perfected this method over years of baking, and it’s the only way to achieve that perfect crumb and golden crust at home.
The process begins with a sourdough starter (or commercial yeast for beginners), followed by a hydration-focused dough that rests overnight. This autolyse step ensures gluten development without overworking the dough.
Bulk fermentation spans two days, allowing flavors to mature and the dough to rise naturally, while cold proofing overnight tightens the crumb for an airy, open texture.
By the time you slide that loaf into a 450°F oven, you’ll smell the caramelizing crust and hear the satisfying thwack of a properly baked bread. The result? A crust that shatters with each bite and a crumb so tender it melts in your mouth.
This isn’t just bread—it’s a restaurant-quality loaf you can make in your own kitchen.
Whether you’re a seasoned baker or trying this for the first time, the 3-day timeline ensures consistent results. The effort pays off in every slice—worth the wait for bread that tastes like it came from a Parisian boulangerie. Let’s get started on your first loaf.
Ingredients for 3 day bread
Fourteen ingredients. Three days. A loaf that rivals Parisian bakeries.
| Ingredient | Amount | Notes |
|---|---|---|
| Unbleached Bread Flour 🌾 | 3 ½ cups | High-protein for structure, 12-14% protein |
| Active Dry Yeast 🍞 | ¼ tsp | Instant yeast works too, no proofing needed |
| Sourdough Starter 🍞 | 1 cup | 100% hydration, bubbly and active |
| Granulated Sugar 🍚 | ½ tsp | Feeds yeast for initial rise |
| Diamond Crystal Kosher Salt 🧂 | 1 ½ tsp | Adjusts flavor, don't substitute table salt |
| Extra-Virgin Olive Oil 🫒 | ¼ cup | Adds richness to dough |
| Warm Water 💧 | 2 ¼ cups | 105°F for yeast activation |
| Cornmeal 🌽 | ½ cup | Prevents sticking during shaping |
| Ice Water ❄️ | ¼ cup | For final shaping and cold proof |
| Semolina Flour 🌾 | ⅛ cup | For dusting and crisp crust |
| Honey 🍯 | 1 tbsp | Enhances crust browning |
| Coarse Sea Salt 🧂 | 1 tsp | For final crust scoring |
The flour is non-negotiable here—King Arthur or Caputo bread flour gives that perfect open crumb. I always grab mine from Whole Foods or King Arthur’s website for consistent quality. The sourdough starter? If you’re new, grab a small jar of Bobs Redmill starter from the refrigerated section—it’s ready to use. For yeast, Saf-Instant is my go-to because it dissolves directly into the dough, no proofing needed. The olive oil should be extra-virgin—the good stuff with fruity notes. Regular olive oil lacks the depth for this recipe.
No sourdough starter? Commercial yeast plus 1 cup warm water works for beginners, but the flavor won’t be as complex. Short on honey? Maple syrup at half the amount gives similar browning. The coarse sea salt for scoring? Maldon flakes are perfect, but any flaky salt will do. If you’re gluten-sensitive, substitute half the bread flour with white rice flour—the texture will be denser but still delicious. The cornmeal can be swapped for semolina if you prefer a nuttier flavor. And yes, you can use cold water instead of warm, but the dough will take longer to rise.
Flour keeps indefinitely in a cool, dark place. The yeast? 3 months in the fridge, 6 months frozen. Store your starter in the fridge between feedings—it’ll last 2 weeks if maintained properly. Once baked, this loaf reheats beautifully. Wrap it in a clean kitchen towel and warm in a 200°F oven for 10 minutes. For leftovers, slice and toast—3 days in an airtight container. The crust gets stale after that, but the crumb stays fresh for 5 days if wrapped tightly.
Why You’ll Love This Recipe
- No-Knead Magic: I swear by this—just toss the dough in a bowl, let it rise while I make dinner, then bake. The sourdough starter does all the heavy lifting, so I don’t even need to punch it down or fuss with shaping.
- Crusty-Creamy Payoff: That first bite? The outside crackles like a campfire while the inside stays soft and pillowy. The yeast and sugar team up for a flavor that’s almost artisanal, but 100% homemade—no bakery markup here.
- Three-Day Meal Boss: Make a batch on Sunday, and you’ve got lunch or dinner covered for days. Toast it, tear it into sandwiches, or freeze slices for quick PB&J mornings. It’s my secret weapon for lazy afternoons.
- Budget-Friendly Staple: A few dollars of flour and yeast stretch into a loaf that feeds my family for ages. Plus, the sourdough starter? Free after the first batch. This is bread that actually saves money—no sad grocery store loaves here.
Step-by-step instructions for slow-fermented artisan bread
This three-day process builds unmatched flavor and texture through controlled fermentation.
Autolyse the Dough for Optimal Gluten Development
In a large mixing bowl, combine the 3.5 cups unbleached bread flour and 2.25 cups warm water (105°F). Mix with your hands or a dough whisk until no dry flour remains—this creates a shaggy dough called an autolyse. The warm water activates gluten formation while allowing time for proper hydration.
Cover the bowl with a damp towel and let rest for 30 minutes. You’ll notice the dough transform from loose and sticky to more cohesive and elastic. This resting period develops gluten strands without yeast activity, creating a lighter, more extensible dough. Don’t skip this—it’s the foundation for your bread’s structure.
Incorporate Yeast, Starter, and Remaining Ingredients
After the autolyse, add the 1 cup sourdough starter, 0.25 tsp active dry yeast, 0.5 tsp granulated sugar, 1.5 tsp diamond crystal kosher salt, and 0.25 cup extra-virgin olive oil to the dough. Mix thoroughly with your hands until all ingredients are evenly distributed and the dough becomes smooth and elastic.
Knead the dough for 8-10 minutes by hand or 5-6 minutes with a stand mixer with a dough hook. You’re looking for a windowpane test—when you stretch a small piece of dough thinly, it should be translucent with no tears. This indicates proper gluten development. The dough should be slightly tacky but not sticky to the touch.
Bulk Fermentation at Room Temperature
Shape the dough into a loose ball and place it in a lightly oiled bowl. Cover with plastic wrap and let ferment at room temperature (70-75°F) for 6-8 hours. During this time, the dough will rise significantly, then collapse as the yeast consumes sugars and produces gas.
After 4 hours, perform the first set of stretch-and-folds: wet your hands, grab one side of the dough, stretch it upward, and fold it over itself. Rotate the bowl and repeat this process 4-5 times. This builds strength and creates surface tension for better oven spring later. Repeat this process every 60 minutes for a total of 3 sets. The dough should be smooth, elastic, and nearly doubled in size by the end of fermentation.
Cold Proof for Enhanced Flavor
After the bulk fermentation, transfer the dough to the refrigerator and cold proof for 12-16 hours. This slow fermentation develops complex flavors and improves texture. The cold temperature also allows for better control over the final proofing stage.
During this time, the dough will continue to develop slowly. When ready to bake, remove the dough from the refrigerator and let it sit at room temperature for 1-2 hours until it’s slightly puffy and springs back slowly when poked. This indicates it’s ready for shaping and final proofing.
Shape, Final Proof, and Score
Lightly dust your work surface with 0.125 cup semolina flour and shape the dough into your desired loaf shape—boule for round loaves or batard for oval loaves. Place the shaped dough seam-side down in a proofing basket or bowl lined with a floured towel.
Cover loosely and let proof at room temperature for 1-2 hours until the dough has risen to about 50-75% of its final volume. Preheat your oven to 450°F with a Dutch oven inside for 45 minutes. Remove the Dutch oven and place the scored loaf inside (score with a razor blade or sharp knife, sprinkling with 1 tsp coarse sea salt and brushing with 1 tbsp honey for color and flavor). Bake covered for 20 minutes, then uncover and bake for an additional 20-25 minutes until the crust is deep golden brown.
Pro Tips For Making 3 Day Bread
- Hydrate the Yeast Properly: DESCRIPTION: Mix the active dry yeast with warm water (105–110°F) and a pinch of sugar first—let it foam for 5–10 minutes before adding anything else. I learned this the hard way when my dough failed to rise because the yeast was sluggish from dry flour exposure.
- Measure Salt by Weight: DESCRIPTION: Diamond Crystal kosher salt clumps when scooped—use a scale for accuracy (1 tsp = ~5.3g). I was skeptical until I tried it; the texture and flavor consistency improved noticeably.
- Skip the Over-Kneading: DESCRIPTION: Let the dough rest after each fold instead of forcing extra kneading. Overworking the gluten tightens the crumb, and this bread relies on a tender, open structure. Trust the schedule—your arms will thank you later.
- Proof at Room Temp: DESCRIPTION: Place the dough in a warm spot (75–80°F) for the final proof—no oven needed. I used to rely on the oven light, but a simple bowl of warm water under a towel keeps it steady and predictable.
Creative variations of this dish
Sweet & Sticky Variations
Swap the 1 tbsp honey for 2 tbsp maple syrup and add ¼ cup dried fruit (raisins, cranberries, or chopped dates) to the dough during bulk fermentation.
The syrup enhances browning while the fruit adds natural sweetness. For extra decadence, fold in 2 oz chopped walnuts or pecans during the final shaping. 🍯
Herb & Cheese Twist
Mix 1 tbsp fresh rosemary or thyme into the dough during the autolyse stage, then fold in ½ cup shredded Gruyère or Parmesan cheese after bulk fermentation. The herbs add aromatic depth while the cheese melts into the crumb for a savory, nutty flavor.
Brush the baked loaf with garlic-infused olive oil for extra richness.
Whole Grain Boost
Replace ½ cup of the bread flour with whole wheat flour or spelt flour for a nuttier, heartier loaf. For extra texture, add ¼ cup toasted pumpkin seeds or sunflower seeds during the final shaping.
These variations increase fiber content while maintaining the bread’s open crumb structure. Store-bought whole grain flours work fine, but freshly milled grains yield superior flavor.
No-Knead Adaptation
For a simplified version, skip the kneading step by mixing all ingredients in a bowl, covering, and letting the dough rest for 12 hours at room temperature. After the initial rise, perform 2 sets of stretch-and-folds (instead of 3) before cold proofing.
This method still delivers excellent flavor with less effort—ideal for busy bakers. The texture will be slightly denser but equally delicious.
Seasonal Add-Ins
Incorporate seasonal ingredients like roasted garlic in summer or cinnamon and apple chunks in fall. For winter, fold in dried apricots and orange zest during bulk fermentation.
These additions transform your bread into a flavorful centerpiece for any meal. Always adjust hydration slightly (add 1 tbsp water) if using moist ingredients like fruit.
Gluten-Free Option
Replace 1.75 cups of the bread flour with a 1:1 gluten-free flour blend (like Bob’s Red Mill or King Arthur). Add ½ tsp xanthan gum to improve elasticity. Expect a denser crumb but still achieve a crisp crust.
Proofing times may extend by 30-60 minutes, so monitor closely. This version works well for those with gluten sensitivities while keeping the 3-day process intact.
Nutrition facts
Frequently asked questions
Why does this bread need 3 days to make?
The extended fermentation time develops complex flavors and a superior crumb structure. The first 24 hours build gluten, while the cold proof overnight enhances tanginess and tightens the crumb. This slow process creates bread with depth that store-bought loaves can’t match—worth every minute!
Can I use regular yeast instead of sourdough starter?
Yes! For beginners, replace the 1 cup sourdough starter with 2¼ tsp active dry yeast plus 1 cup warm water. The flavor won’t be as complex, but you’ll still get a delicious loaf. The 3-day process remains the same—just skip the starter maintenance.
What if my dough doesn’t rise during bulk fermentation?
Check your yeast first—it may be expired. Ensure your kitchen is 70-75°F (warm environments help yeast activate). If using sourdough, verify it’s bubbly and active. Add ½ tsp extra sugar to feed the yeast, then cover and wait another 2 hours. If still flat, start fresh with fresh yeast.
How do I know when the bread is fully baked?
Listen for a hollow sound when tapping the bottom—it should echo like a drum. The internal temperature should reach 205-210°F. A deep golden crust with steam escaping when sliced confirms doneness. Never rely on time alone; every oven varies!
Can I make this in a toaster oven?
Not ideal—this recipe requires a 450°F oven for proper steam and crust development. If you lack a full-sized oven, try baking in a Dutch oven on the stovetop> with a gas burner set to high for 20 minutes> before transferring to a 350°F oven> for the remainder. The results won’t be perfect, but still edible!

- 6 Egg Cake Recipe with Oil: Light as Air With Buttery Moisture - October 4, 2026
- 4 Bean Casserole Recipe: One-Pan Heartiness With Smoky Paprika Depth - October 4, 2026
- 3-Ingredient Keto Mug Cake Recipe: Microwave Magic in 2 Minutes - October 4, 2026